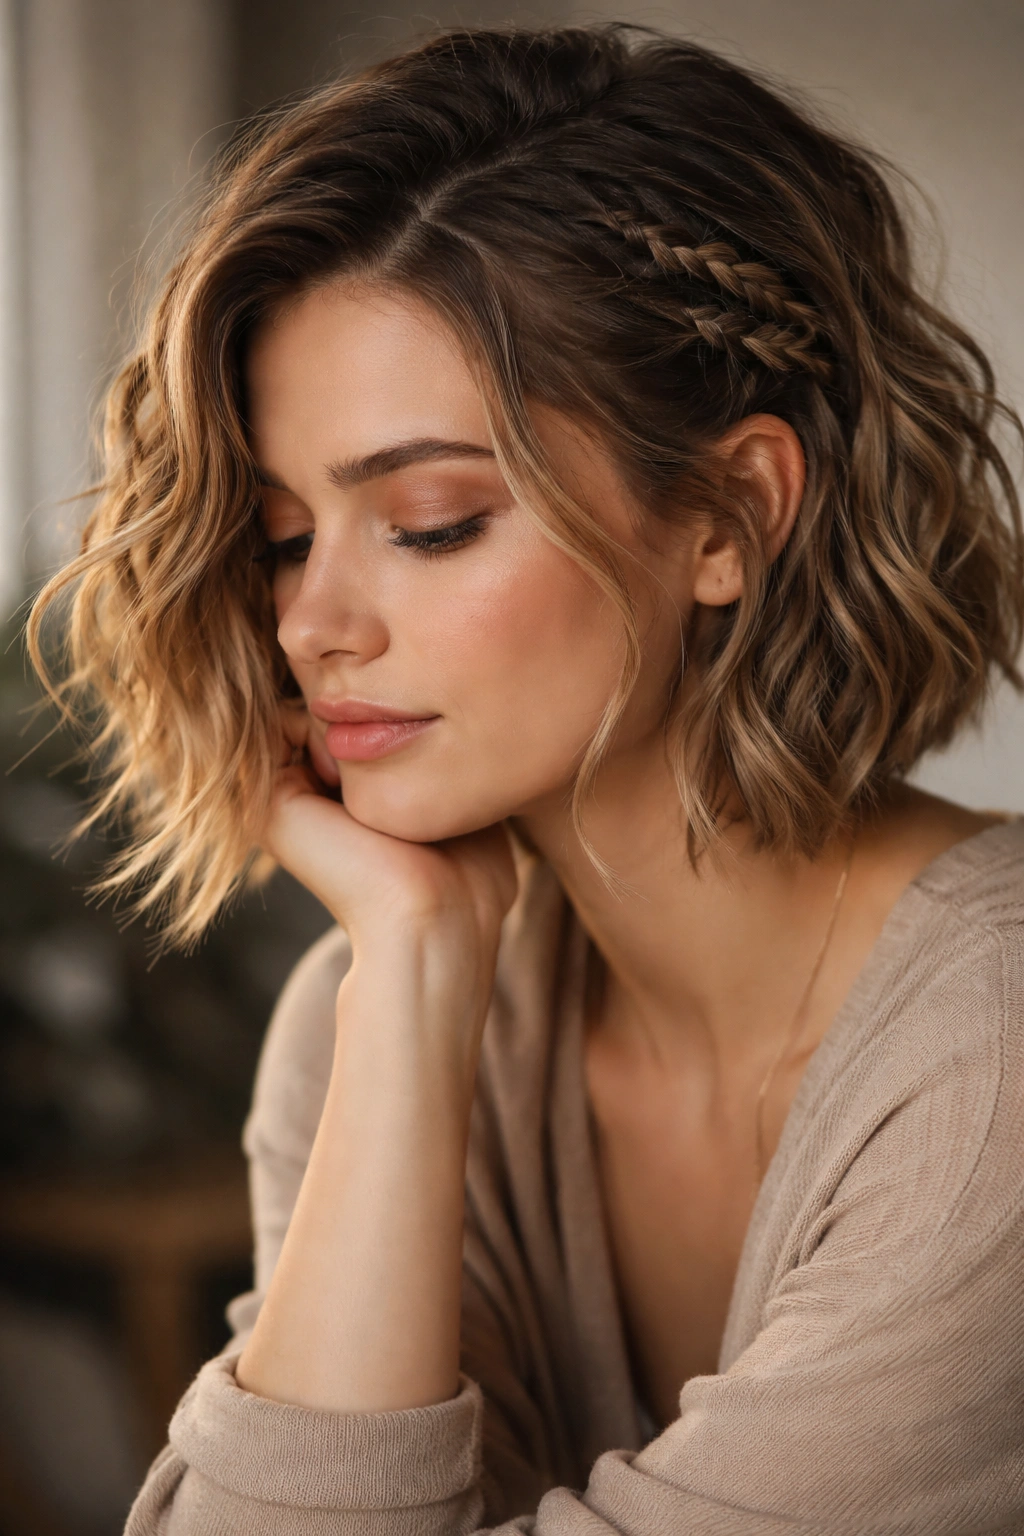
Wavy hair has a natural advantage when it comes to braiding — the texture holds styles longer, adds dimension, and creates that effortless, intentional look that takes others hours to achieve. But short braids? That’s where wavy hair really shines. The waves fill in gaps that straight hair leaves empty, they grip the strands tighter for longer-lasting hold, and they transform a simple three-strand braid into something with actual visual depth and movement.
The trick isn’t fighting your waves or trying to smooth them into submission before braiding. Instead, it’s choosing styles that work with your natural texture and understanding exactly how to weave them so they stay put throughout the day. Some braids suit the springy, voluminous nature of wavy hair better than others, and knowing which ones to reach for — whether you’re braiding right after a shower, on day-two texture, or styled waves — is the difference between a style that falls apart by noon and one that looks intentional all day long.
The styles below are all proven winners for wavy hair. They range from ultra-simple finishes that take three minutes to more textured designs that give you something truly special. Most work beautifully on second-day or textured waves without any styling products, though a light texture spray or sea salt spray can help if you’re starting with freshly washed hair. None of them require you to blow-dry straight first — in fact, you probably shouldn’t.
1. The Twisted Side Knot
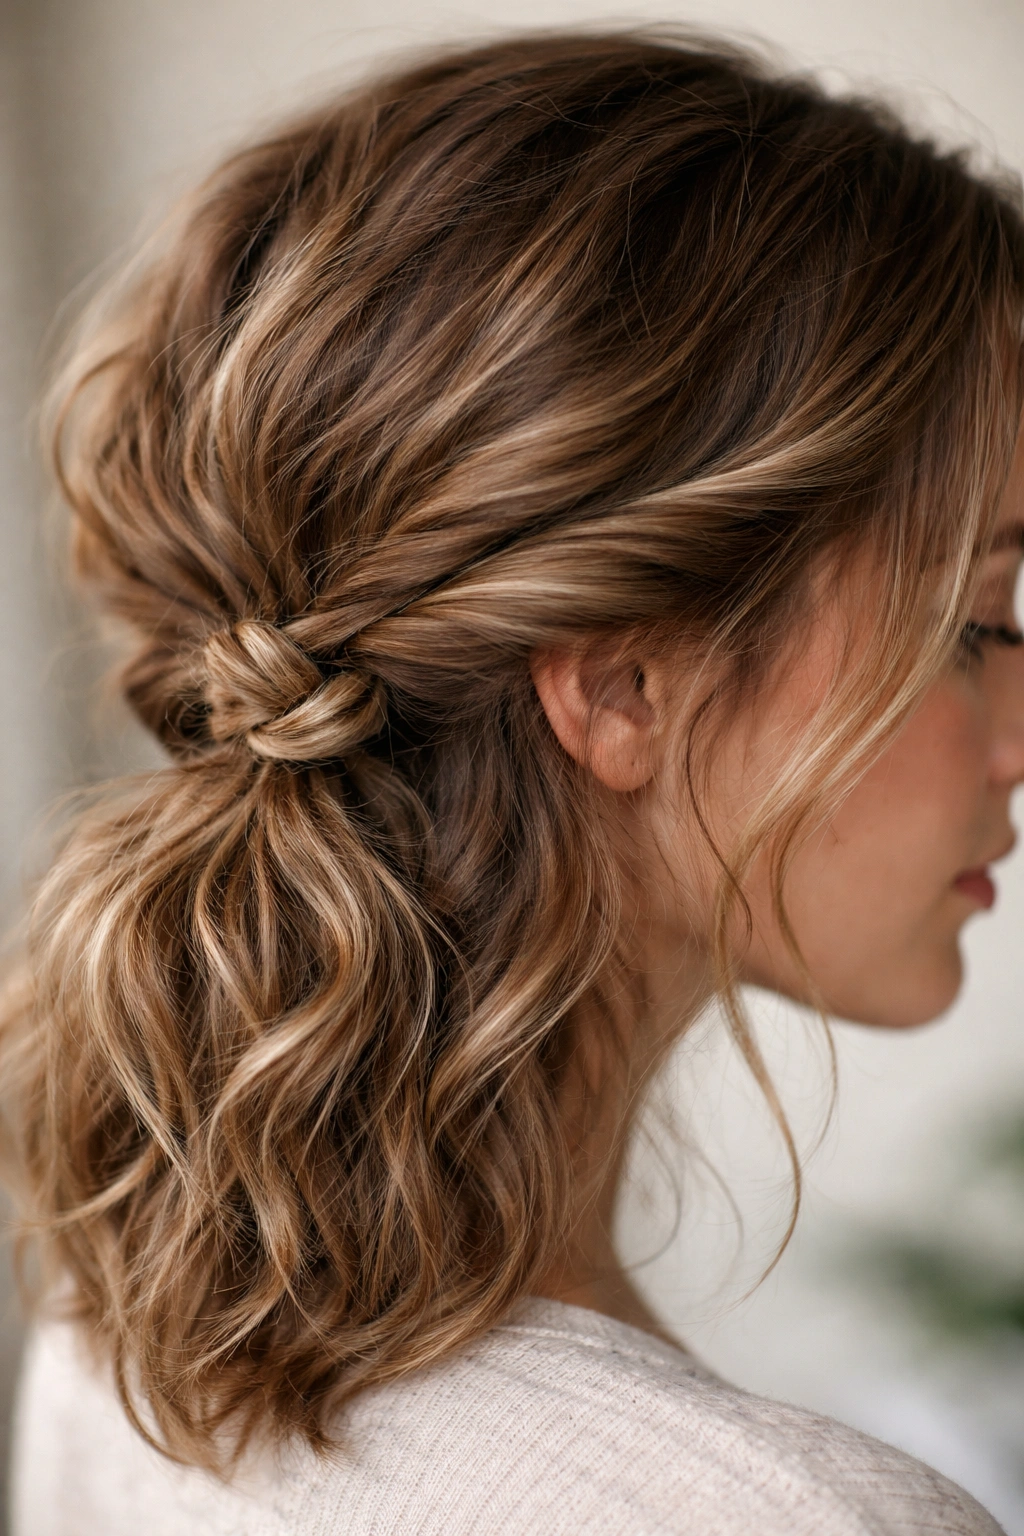
This isn’t technically a braid, but it’s braid-adjacent and absolutely perfect for wavy hair because it leans into the texture rather than fighting it. Start with a piece of hair from one side of your head near your temple, twist it loosely as you move toward the back, then twist in another small section as you go. Once both twisted sections meet at the back-middle area of your head, tie them together in a knot and secure with a small clip or bobby pin.
Why It Works With Wavy Hair
The loose twists naturally accommodate the wave pattern without compressing your curls into submission. Unlike braids that can look flat against wavy hair, twists create visual separation between the strands while still holding the waves in place. Wavy hair’s inherent grip means the twist stays tighter and cleaner throughout the day.
How to Make It Last
- Start with day-two hair or lightly misted waves for the best grip
- Don’t twist too tightly — wavy hair holds on its own, so a relaxed twist is all you need
- Pull the finished knot apart just slightly with your fingers to create a softer, fuller look
- A light sea salt spray helps locks grip without adding crunch or stiffness
Pro tip: This works brilliantly as a half-up style if you have longer layers — twist just the front sections and leave the rest loose for movement.
2. The Dutch Braid Undercut
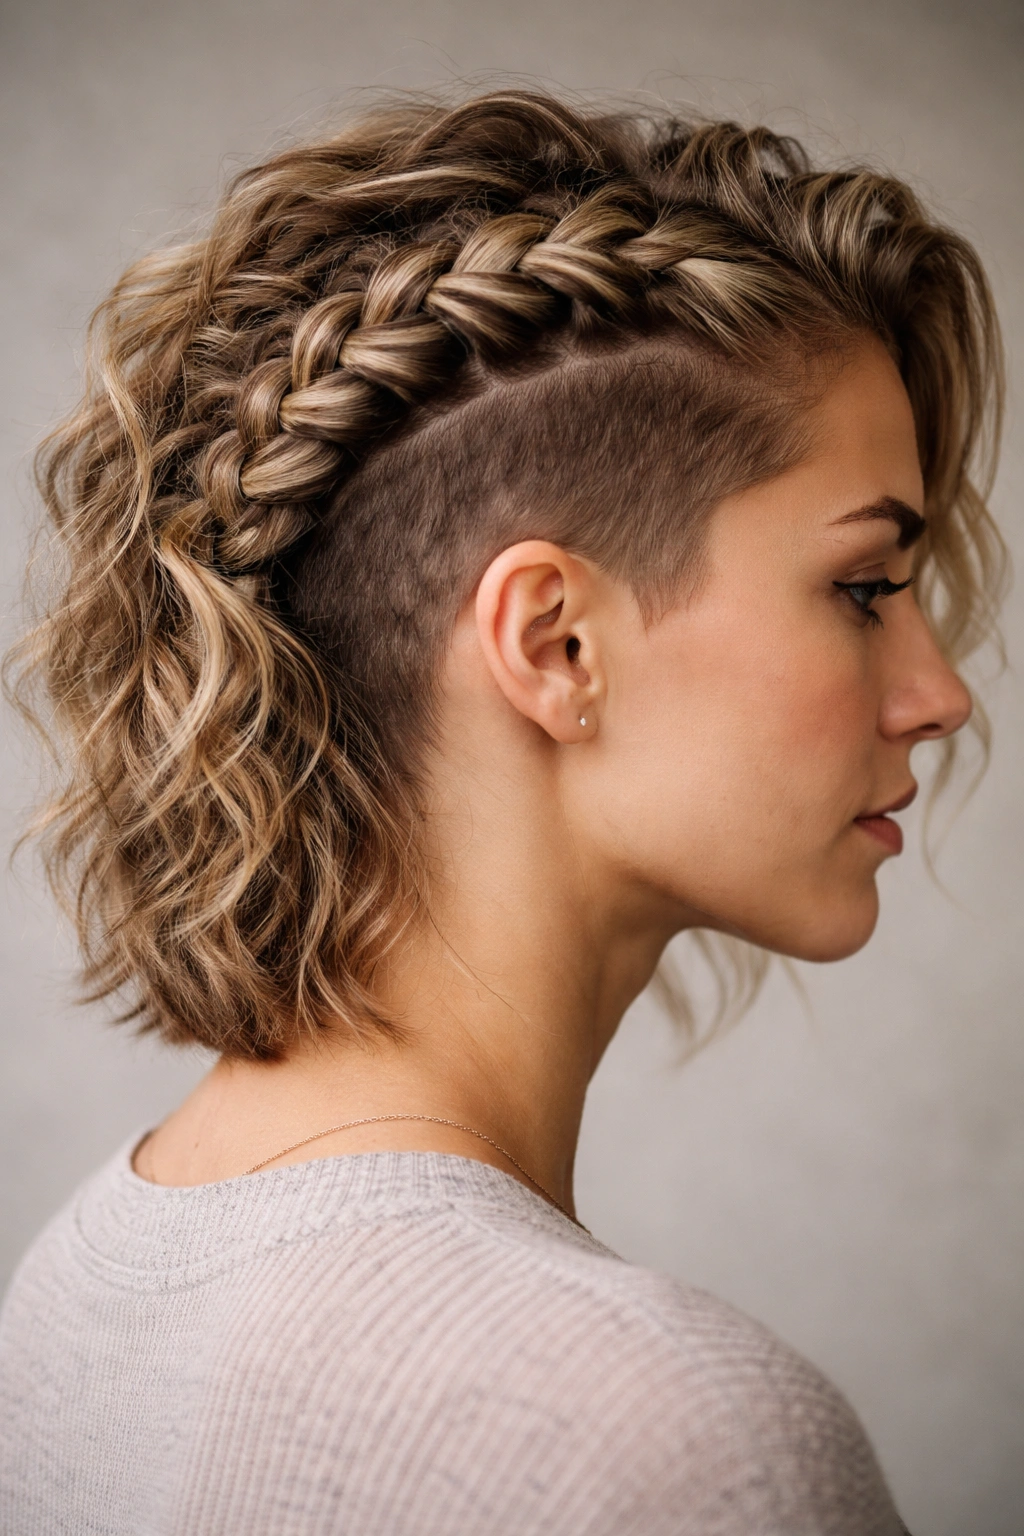
This braid reverses the traditional braiding pattern — instead of pulling strands over the center, you push them under. It creates a raised, textured look that’s particularly flattering on wavy hair because the braid sits slightly elevated above the scalp rather than laying flat against it. The visual effect is fuller, more interesting, and shows off the wave texture beautifully.
Why It Works With Wavy Hair
Dutch braids naturally create dimension because the undercut technique makes each strand stand out slightly rather than blending smoothly. Wavy hair’s texture amplifies this effect — the waves read as intentional and styled rather than as frizz or disconnect. The braid appears thicker and more defined on wavy hair than it does on straight hair.
How to Master It
- Start from the top of your head or slightly to one side depending on the look you want
- Keep tension moderate — too tight and you’ll flatten the waves, too loose and the braid loses shape
- Don’t expect it to sit flat — that’s not the goal; embrace the slightly raised, sculptural quality
- Finish by gently tugging each loop of the braid outward to create texture and definition
Pro tip: Braid to about ear level and stop — short Dutch braids are easier to execute and photograph better than longer ones on waves.
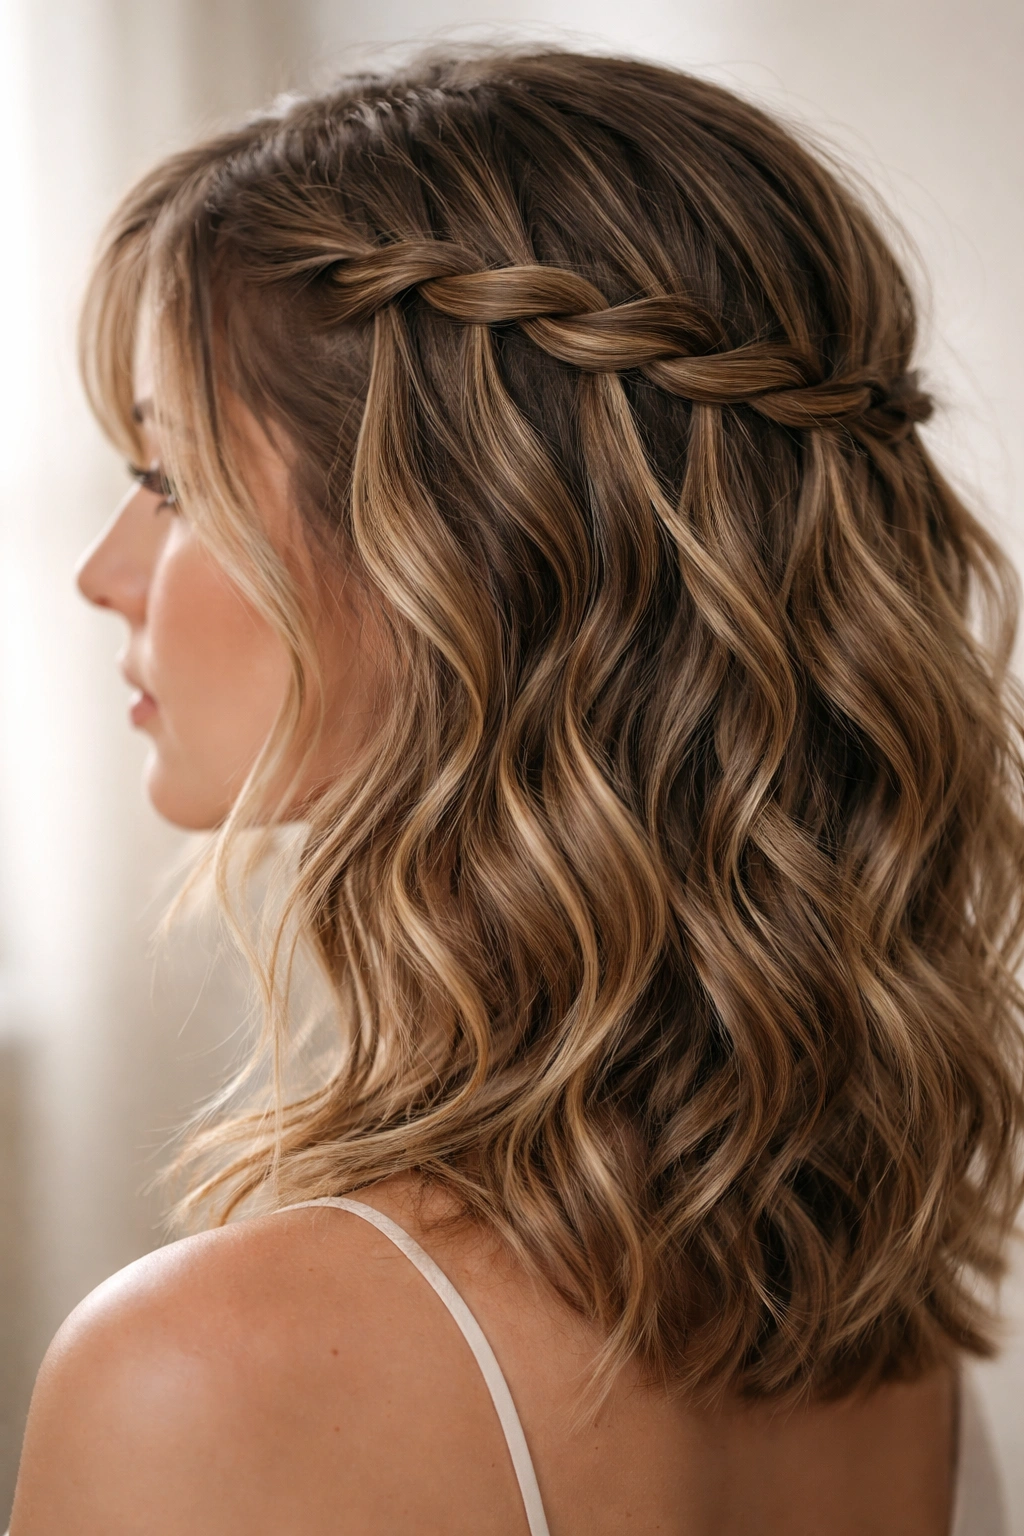
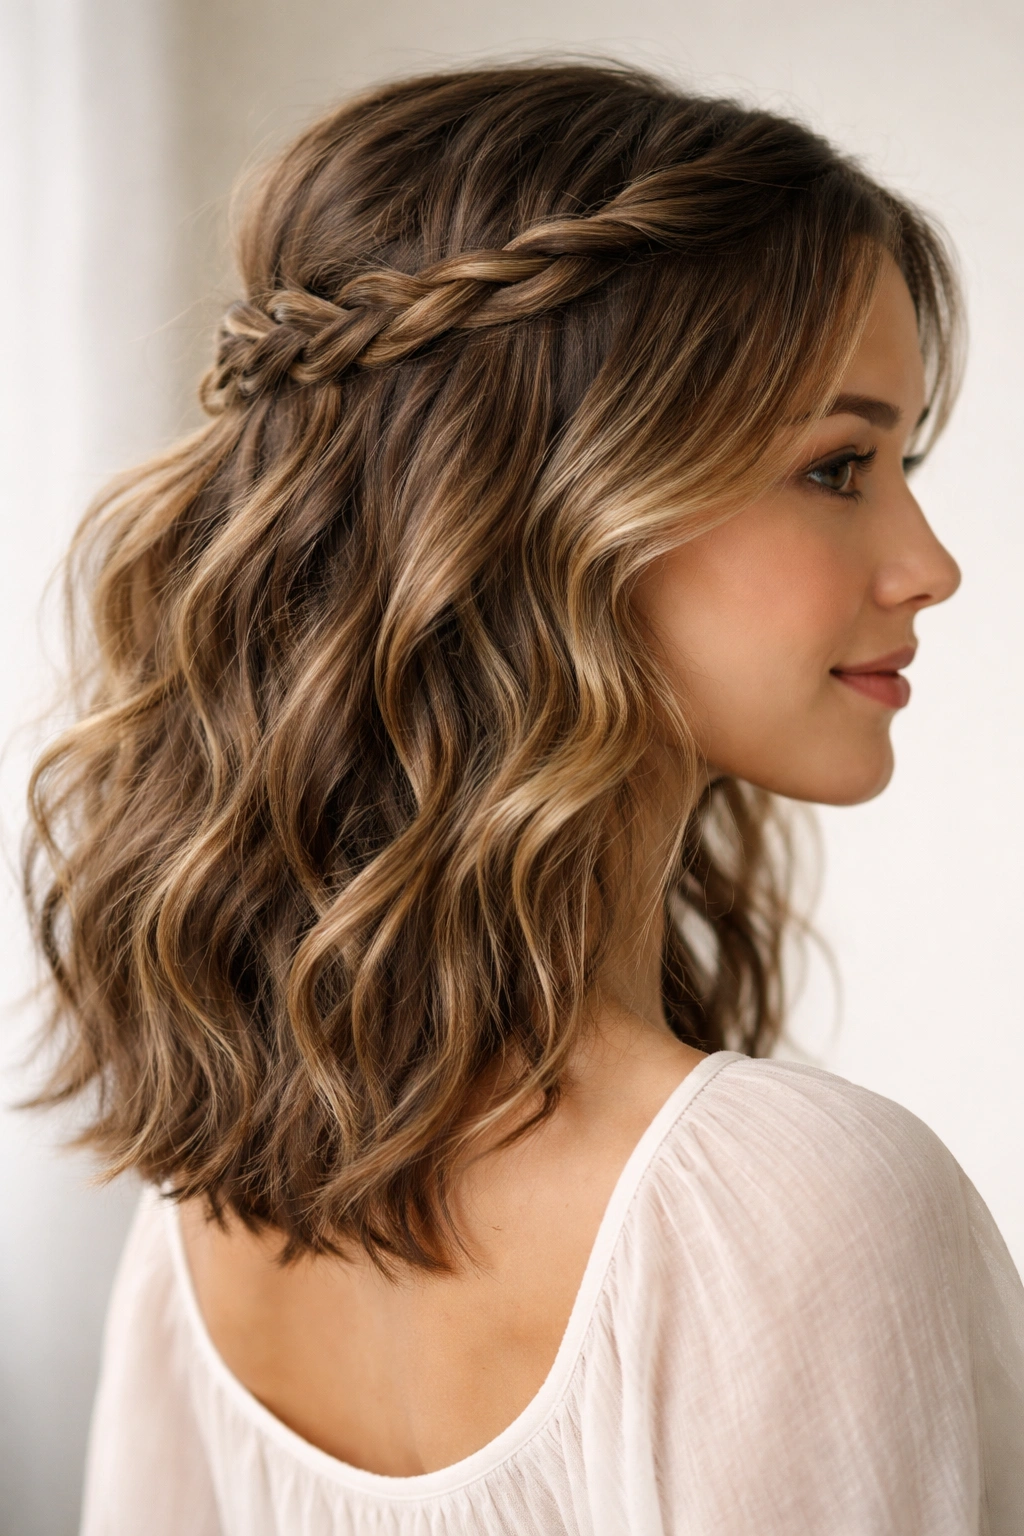
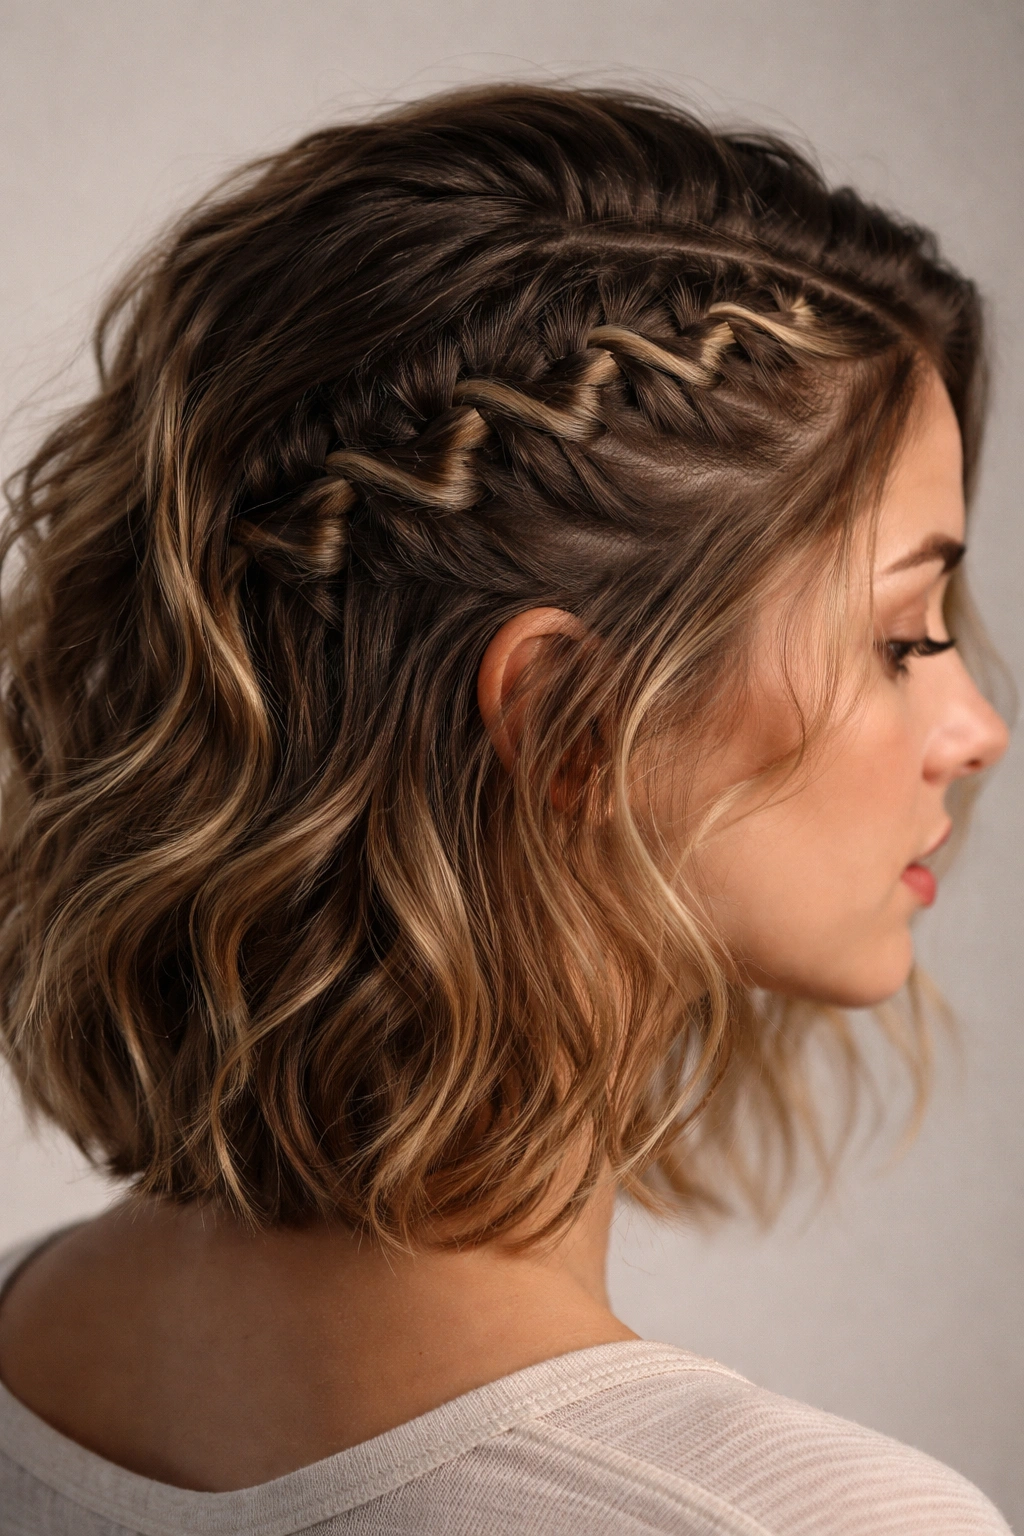
3. The Side Crown Braid
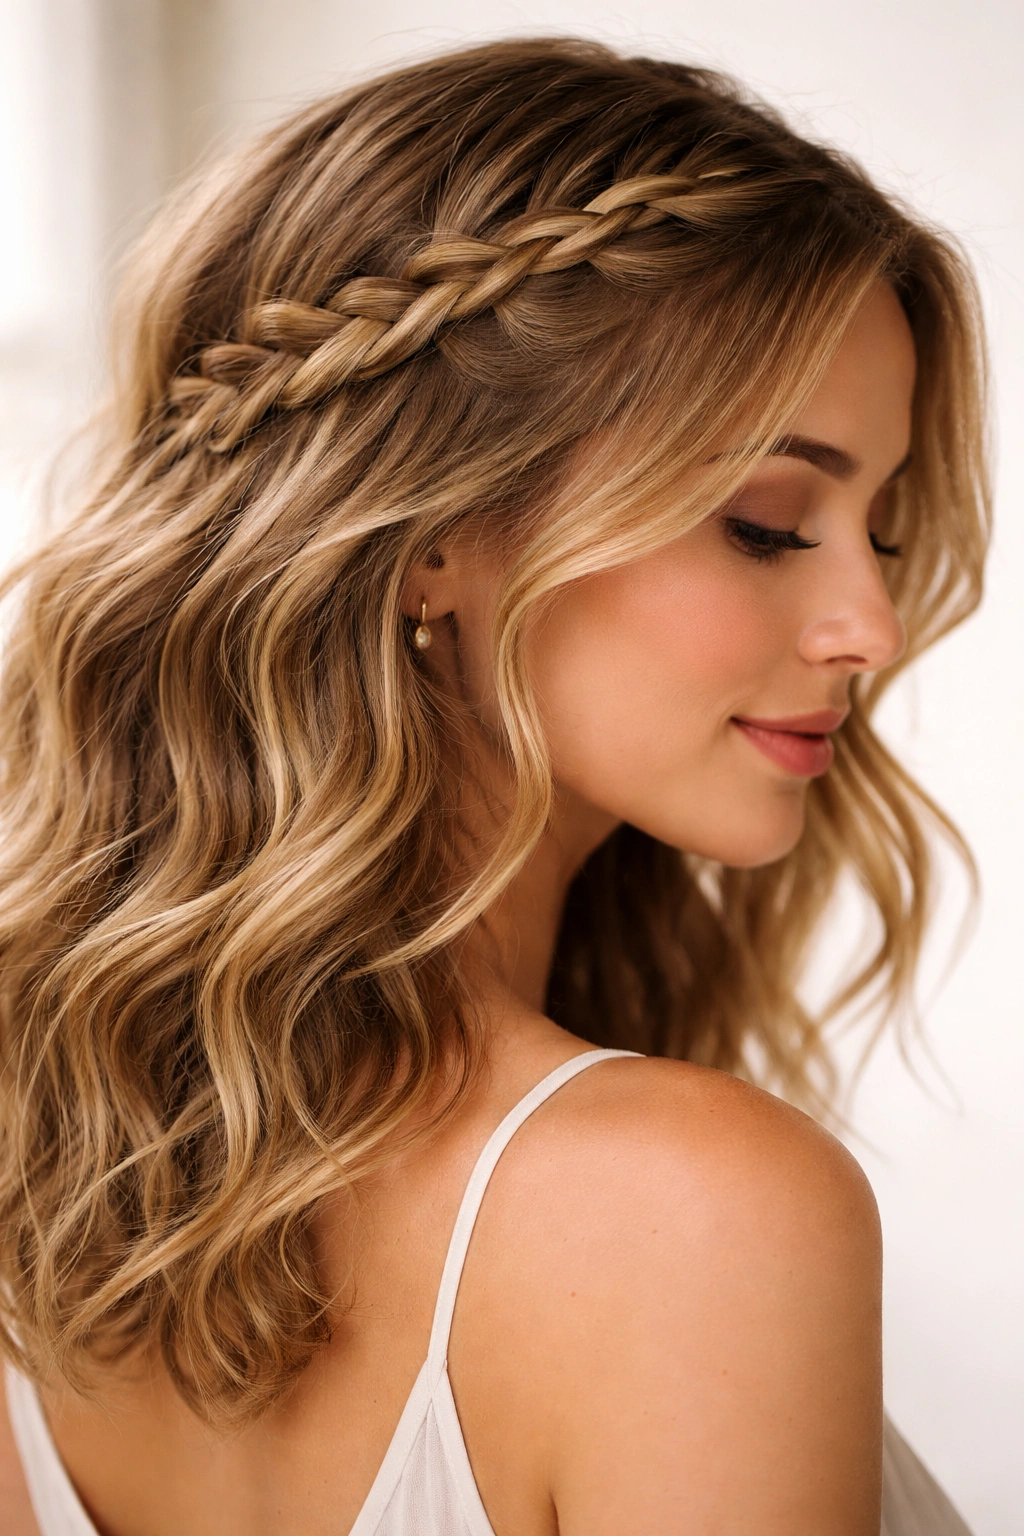
Crown braids look high-maintenance but take maybe five minutes, especially on wavy hair. This version sits along one side of your head like a halo, starting behind one ear, moving toward the crown, and ending behind the opposite ear. The result is half-up without looking like a half-up style — it just looks like gorgeously styled waves with intentional movement.
Why It Works With Wavy Hair
Wavy hair naturally fills in the space created by a side braid, so it looks lush and full even if your braid isn’t technically thick. The braided section adds interest to the top, while the loose waves below create movement and softness. Wavy texture makes this look polished without requiring you to blow-dry straight first.
How to Execute It
- Start at one temple and braid loosely across toward the opposite side of your head
- Keep the braid positioned about an inch away from your natural hair part
- Braid all the way to the opposite ear, then secure with a bobby pin hidden in your waves
- Pull the braid apart gently to loosen it and create texture — this step is non-negotiable for a soft, lived-in look
Worth knowing: If you braid with slightly damp waves, the braid will set into an even more defined pattern as your hair dries, making the style more durable throughout the day.
4. The Two-Strand Twist Braid
This hybrid technique combines the simplicity of a two-strand twist with the structure of a braid. Instead of creating a traditional three-strand pattern, you’re twisting two sections of hair around each other while simultaneously adding small pieces from the sides as you move down — creating a braid-like effect with the softer, more textured look of a twist.
Why It Works With Wavy Hair
Two-strand twists are the gold standard for wavy and curly hair because they work with the natural curl pattern instead of against it. Adding small side sections converts this into a braid that holds its shape but retains all the softness and texture that makes waves beautiful. The result feels effortless rather than formal.
How to Build It
- Separate two main sections of hair and begin twisting them around each other
- As you twist, pick up small additional strands from the side, similar to how you’d add to a traditional braid
- The twisting motion should feel gentle and natural, not tight
- Secure at the end and loosen the entire braid by tugging each section outward
Real talk: This takes slightly more practice than a traditional braid, but once you have the rhythm, it becomes incredibly quick and looks noticeably softer than a tighter braid.
5. The Braided Topknot
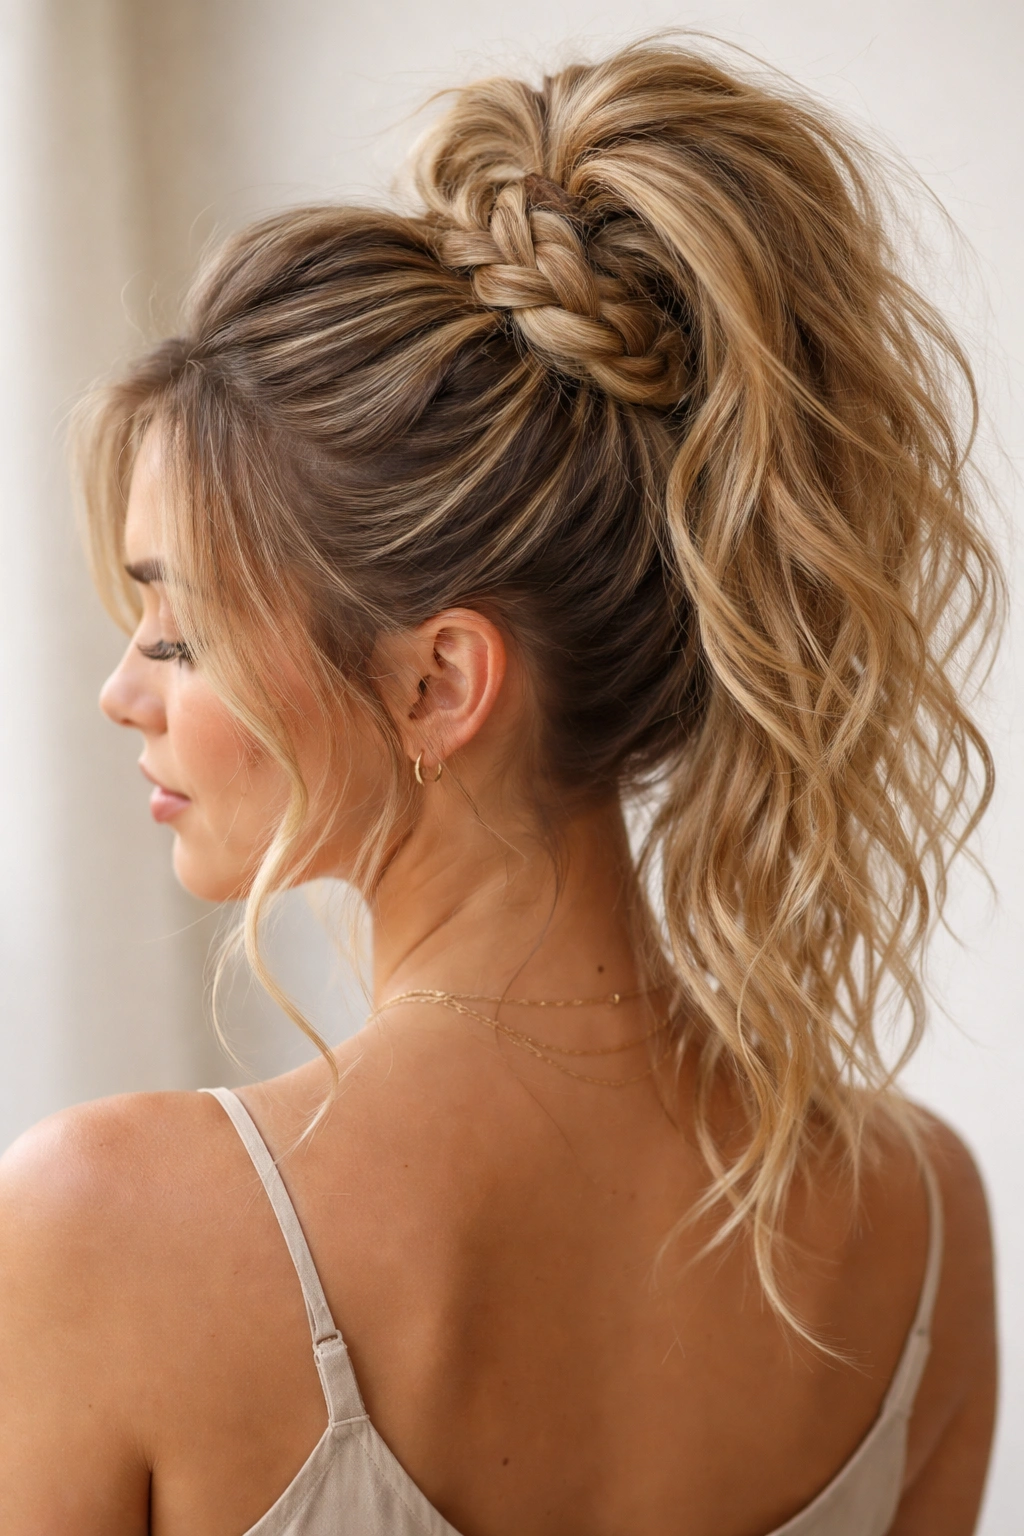
A topknot is already casual and forgiving — add a braid to it and you’ve got a style that works on wavy hair at any stage: fresh waves, second-day texture, even a little bit of frizz. Create a high ponytail at the crown, then braid it loosely and wrap the braid around the base of the ponytail in a spiral, securing with bobby pins.
Why It Works With Wavy Hair
Topknots naturally look fuller on wavy hair because the texture adds volume. Braiding the ponytail before wrapping it creates a denser, more interesting-looking knot than twisting would. Loose braids work particularly well here because the braid is partially hidden, so imperfections read as texture rather than mistakes.
How to Create It
- Gather hair into a high, slightly off-center ponytail for a softer effect
- Divide the ponytail into two sections and braid loosely — you want this braid to be visibly textured
- Wrap the braid around the base of the ponytail and pin it in place with at least two bobby pins for security
- Pull the knot apart with your fingers to make it look fuller and looser
Insider note: Using a matte finish elastic instead of a shiny one makes even a simple topknot look more intentional and styled.
6. The Waterfall Braid
A waterfall braid drops strands as it moves, creating a cascade effect that’s incredibly flattering. On wavy hair, this braid is stunning because the dropped strands naturally wave and move rather than hanging straight. The visual effect is romantic and intentional without feeling overly formal.
Why It Works With Wavy Hair
The dropped strands don’t lay flat the way they might on straight hair — they flow and curve with your natural wave pattern. This makes the waterfall effect much more pronounced and beautiful on wavy hair. You get visual impact without needing to style extensively.
How to Execute It
- Start at one temple with three strands, creating the first loop of a basic braid
- As you braid, “drop” one strand down and replace it with a new strand picked up from above
- Continue along the side of your head toward the back
- The dropped strands should fall freely and move with your waves
- Secure the braid end with a small clip or bobby pin
Pro tip: This works best on waves that already have some texture or definition. If you’re starting with very soft, loose waves, apply a light texture spray first to give the strands something to grip.
7. The Chunky French Braid
Take everything you know about regular French braids and make it chunkier — take larger sections, braid them more loosely, and lean into pulling the braid apart after you’ve finished. On wavy hair, a chunky French braid looks bold and intentional rather than tight and controlled.
Why It Works With Wavy Hair
Large sections mean the braid itself becomes part of the style’s visual interest rather than a detail. Wavy hair fills in these large sections beautifully, creating a braid that looks fuller and more dimensional than it would on straight hair. The looseness works with rather than against the natural texture.
How to Build It
- Start at the crown with three large sections of hair — bigger than you’d use for a regular French braid
- Braid loosely, taking larger chunks of hair as you incorporate new strands
- Braid all the way down or to mid-length, depending on your hair length
- Once finished, pull each loop of the braid outward to create texture and softness
- Don’t expect it to look tight or controlled — that’s the whole point
Worth knowing: Chunky braids are more forgiving on day-two or textured hair because the pre-existing wave pattern helps create the visual separation you’re going for.
8. The Rope Braid

This braid mimics the look of twisted rope and is simpler than it sounds. Divide a section of hair into two pieces and twist each one individually, then wrap them around each other. The result is a textured braid that works beautifully on wavy hair because it emphasizes the natural texture rather than trying to smooth it.
Why It Works With Wavy Hair
Rope braids are inherently textured — they’re made of twists rather than the smooth pattern of a traditional braid. This texture complements wavy hair perfectly because it adds detail without requiring you to fight against the natural wave pattern. The braid reads as intentionally textured rather than as frizz.
How to Create It
- Separate a section of hair into two equal pieces
- Twist the first section tightly away from your head (or toward it — consistency matters more than direction)
- Twist the second section in the same direction
- Wrap the two twisted sections around each other — they’ll naturally spiral together
- Secure at the end and loosen slightly with your fingers
Pro tip: For a rope braid that holds all day on wavy hair, twist each section fairly tightly before wrapping them together. The tighter initial twists compensate for the grip-friendly nature of wavy hair.
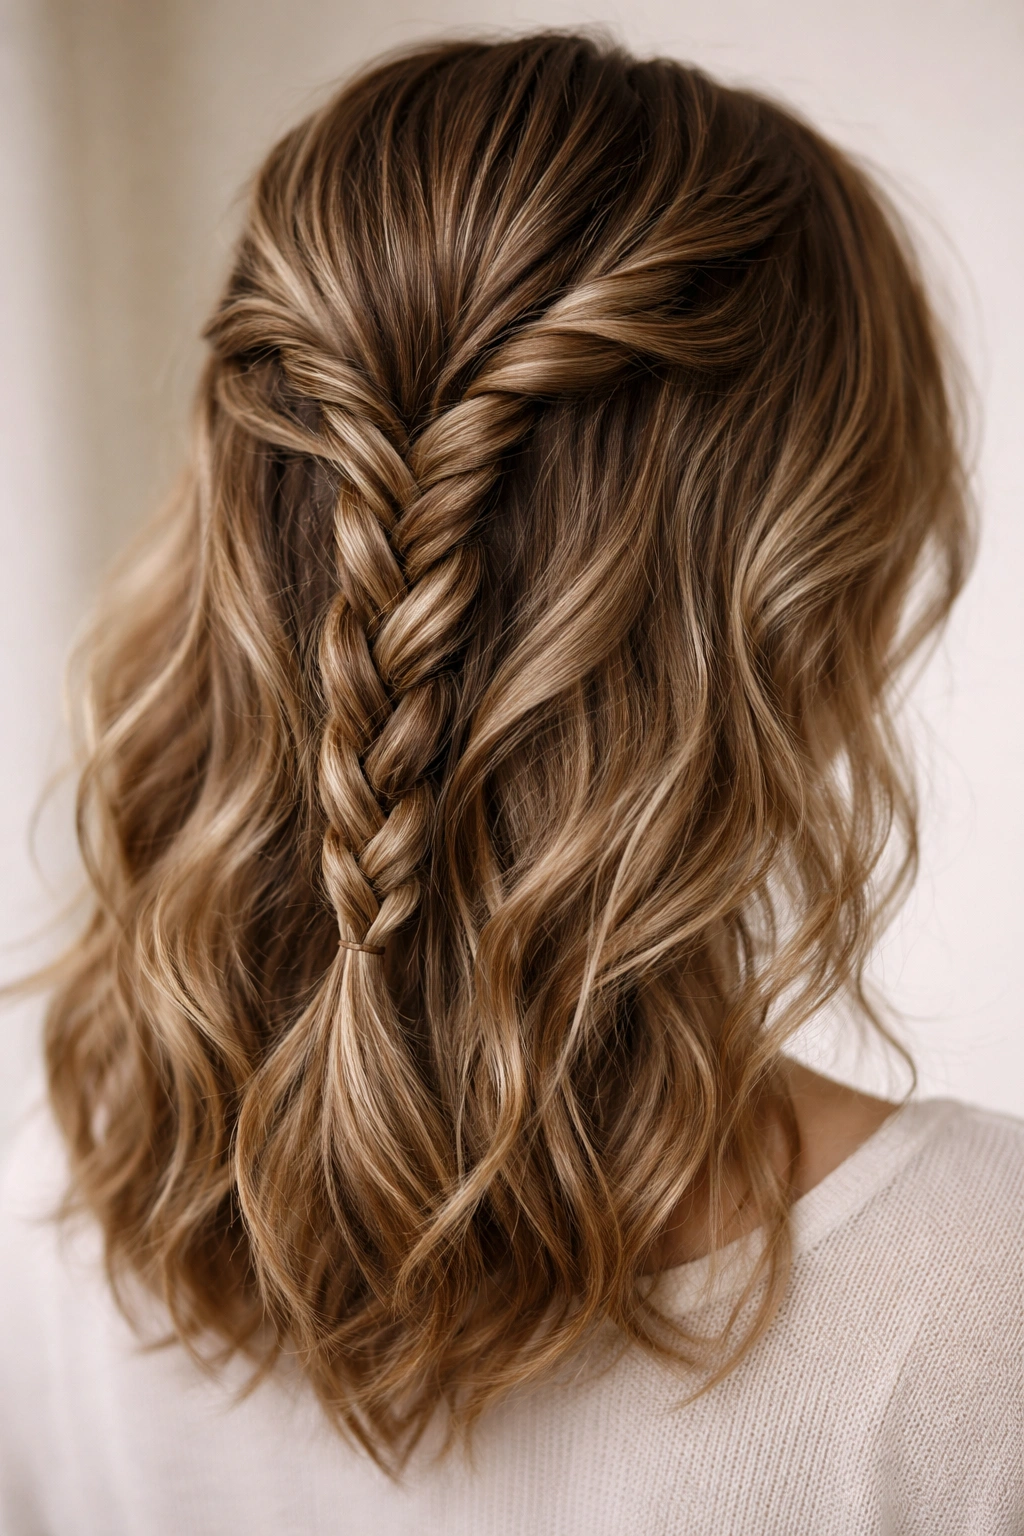
9. The Half-Up Braided Twist
This combines the practicality of a half-up style with the visual interest of a braid and the softness of a twist. Gather the top half of your hair and create a loose braid or twist, securing it at the back. The beauty here is that it’s not quite a braid and not quite a twist — it’s something in between that looks effortlessly styled on wavy hair.
Why It Works With Wavy Hair
Half-up styles benefit enormously from wavy texture because the loose waves below add movement and dimension. A braided or twisted anchor on top creates visual interest without requiring your entire head to be styled. Wavy hair makes this look polished without any extra effort.
How to Execute It
- Gather the top half of your hair (from ear to ear across the crown)
- Create either a loose three-strand braid or a two-strand twist with this section
- Secure at the back with a bobby pin or elastic, positioned at the nape of your neck
- Leave the bottom half of your hair completely loose and wavy
- Tug the braid or twist apart to soften it
Real talk: This is genuinely one of the quickest styled looks you can create, and it works whether you’ve just showered or it’s day three of your waves.
10. The Zigzag Braid
Instead of braiding straight down the back or side of your head, create a braid that moves across your head in a zigzag pattern. Start at one temple, braid diagonally toward the back, then change direction and braid back toward the opposite side. On wavy hair, this geometric pattern is stunning because the wave texture fills in the space and creates dimension.
Why It Works With Wavy Hair
Straight hair can look sparse and disconnected when braided in geometric patterns; wavy hair fills those patterns with texture. The zigzag creates visual movement that complements the natural movement of waves. This style proves that waves aren’t a limitation — they’re an advantage.
How to Create It
- Start with a small section at one temple
- Braid diagonally back and inward toward the center of your head
- At approximately the back-middle of your head, change direction and braid toward the opposite ear
- Continue the zigzag pattern along the back and sides of your head
- Secure at the end and loosen the braid for texture
Worth knowing: This braid is easier to execute if you section your hair with your fingers as you go, creating a visual path before you actually braid.
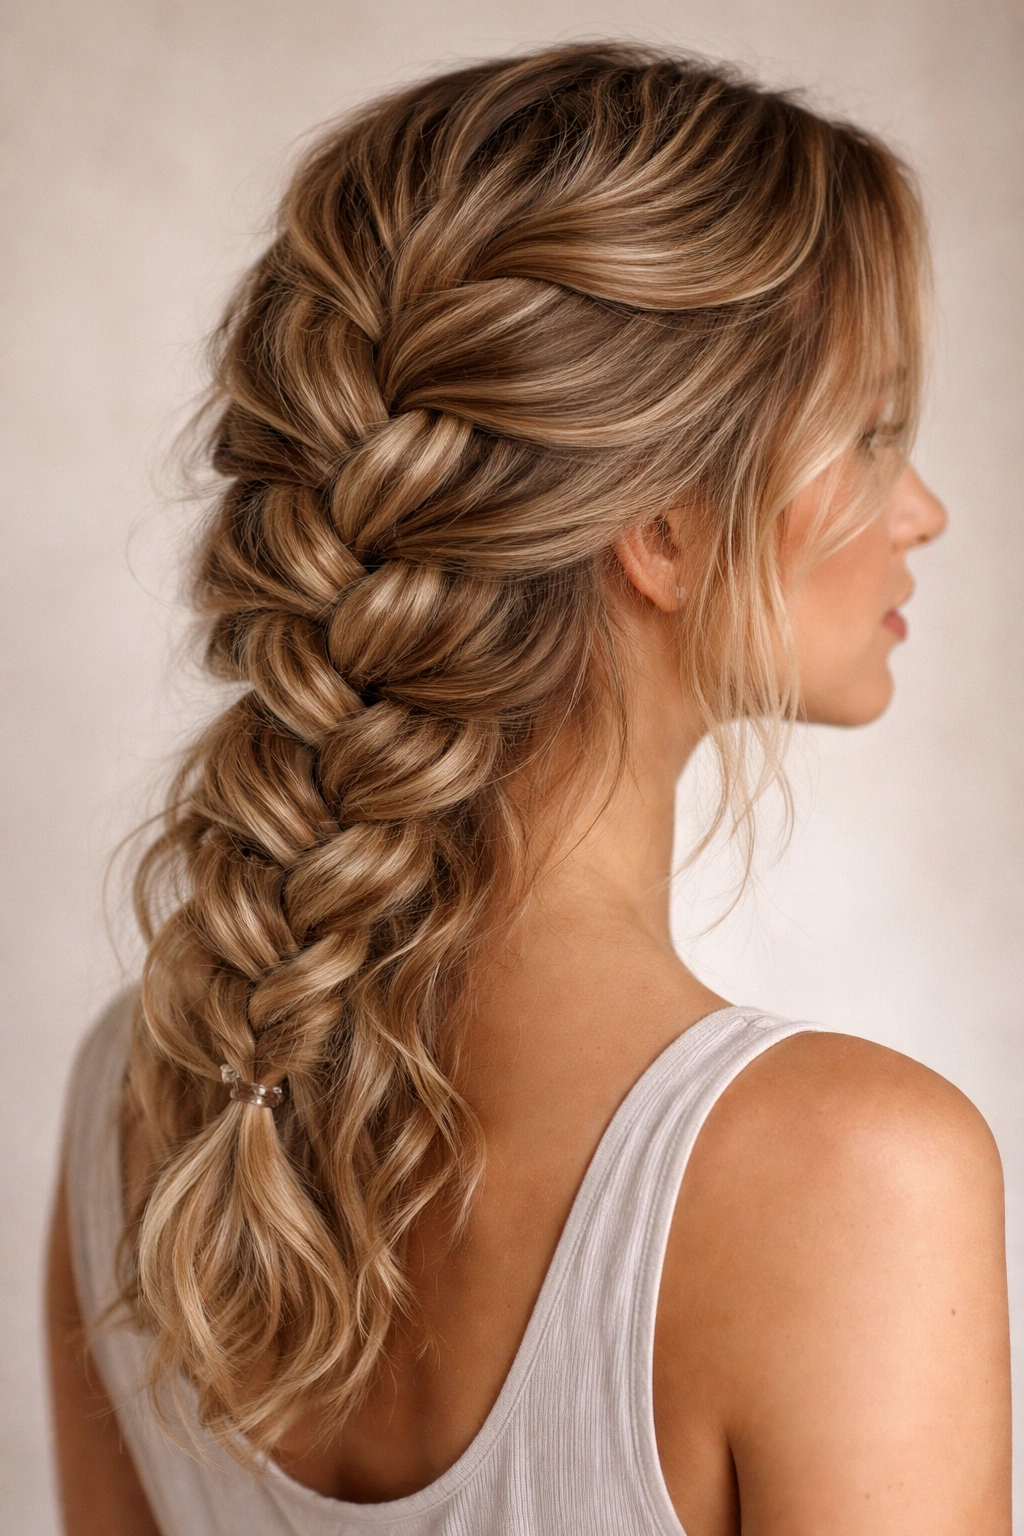
11. The Braided Bun
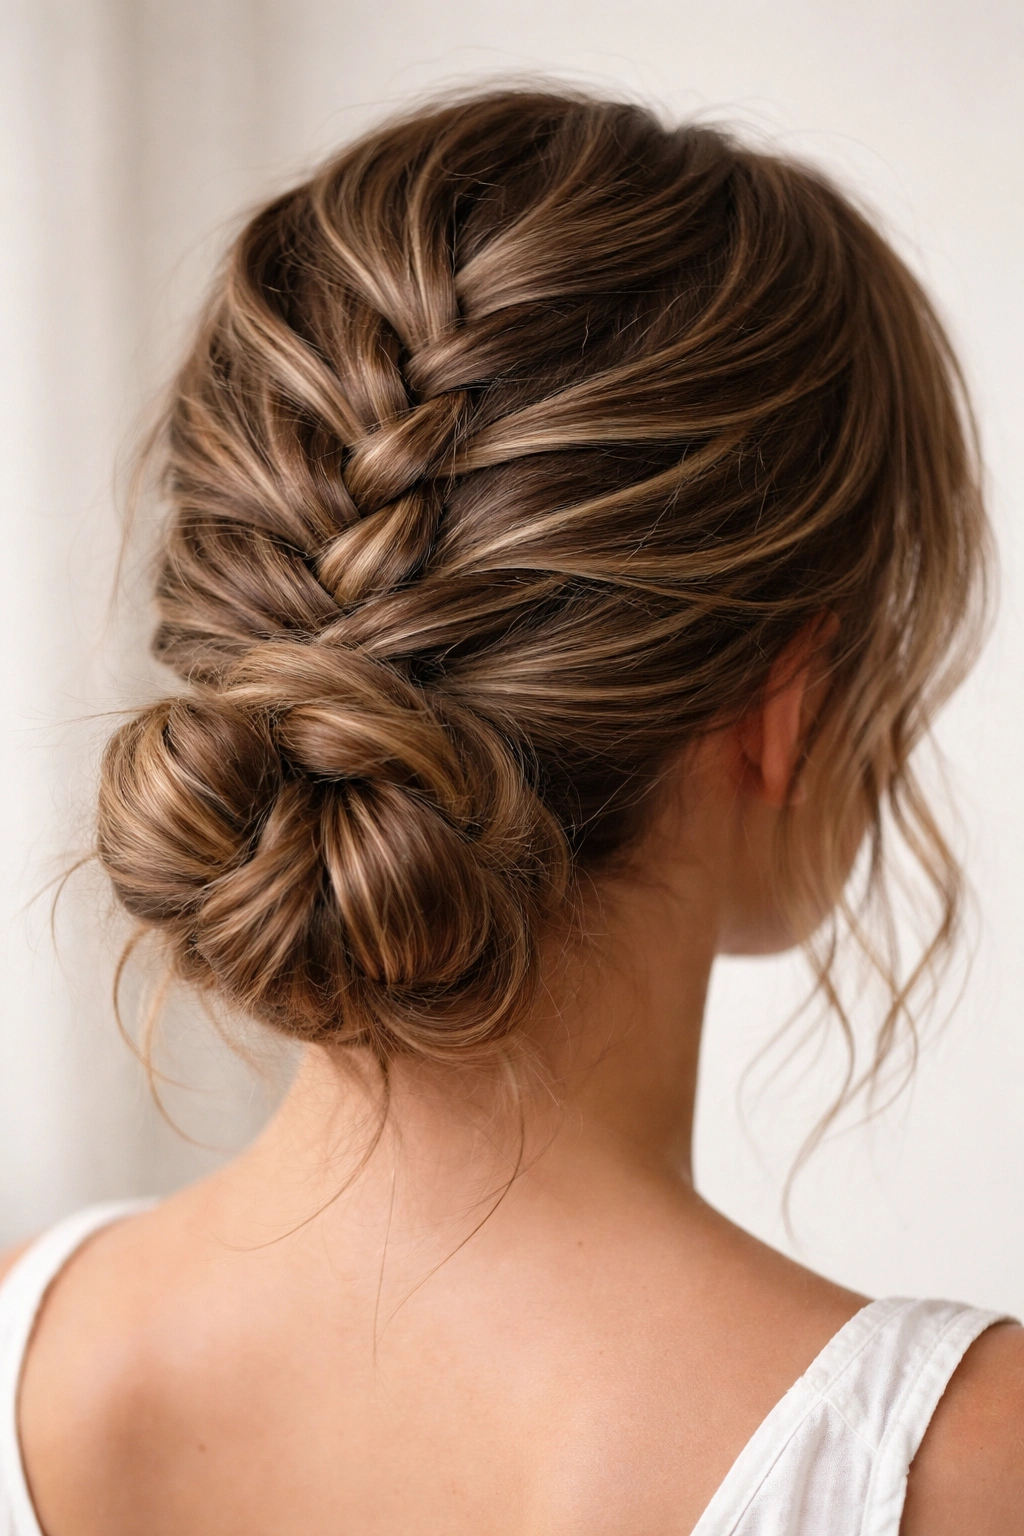
Create a French braid down the back of your head, and instead of securing it at the bottom, wrap the braid around itself in a spiral to form a bun at the nape of your neck. This is more polished than a simple topknot but still casual enough for everyday wear on wavy hair.
Why It Works With Wavy Hair
Braided buns on wavy hair look textured and intentional rather than sleek and controlled. The wave pattern means the bun isn’t perfectly smooth or symmetrical — and that’s exactly why it looks beautiful. There’s an inherent polish to this style on wavy hair that you’d have to work harder to achieve on straight hair.
How to Execute It
- Start with a French braid at the crown, braiding down the center-back of your head
- Continue all the way to the nape of your neck (or wherever your hair ends)
- Wrap the braid around itself in a tight spiral to form a bun
- Secure with bobby pins tucked into the bun so they’re hidden
- Loosen the bun slightly by pulling the braid sections outward
Pro tip: This works best with hair that’s at least shoulder-length. If you have shorter waves, modify by creating a smaller bun higher on your head or braiding only halfway down before wrapping.
Final Thoughts
Short braids on wavy hair are genuinely easier than they look — your natural texture does a lot of the work for you. The key is choosing styles that embrace the waves instead of fighting them and understanding that looser, textured braids read as intentional rather than imperfect.
None of these styles requires perfectly styled waves to work. In fact, braids often look better when your waves have a little texture already, because the grip helps everything stay put. Start with whichever braid speaks to you — the side crown, the Dutch braid, or the rope braid — and practice it a few times until the technique feels natural.
The real magic of braiding wavy hair is that you’re adding visual interest and style without erasing the texture that makes your hair beautiful in the first place. You’re working with what you have, not against it. That’s always when the results look best.