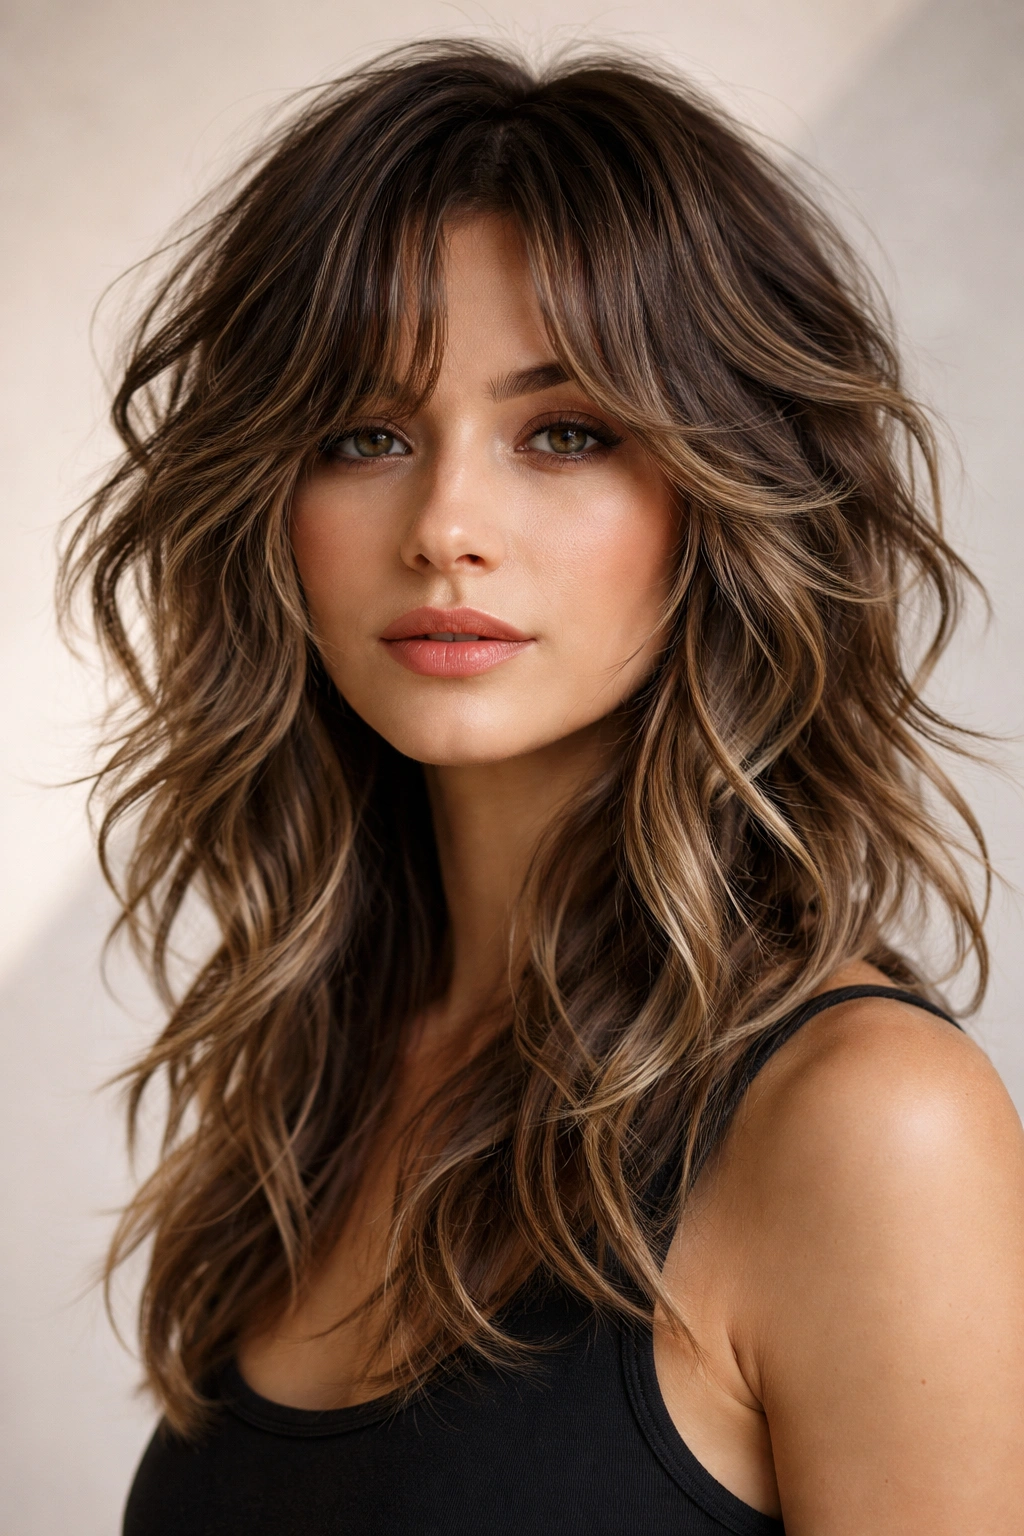
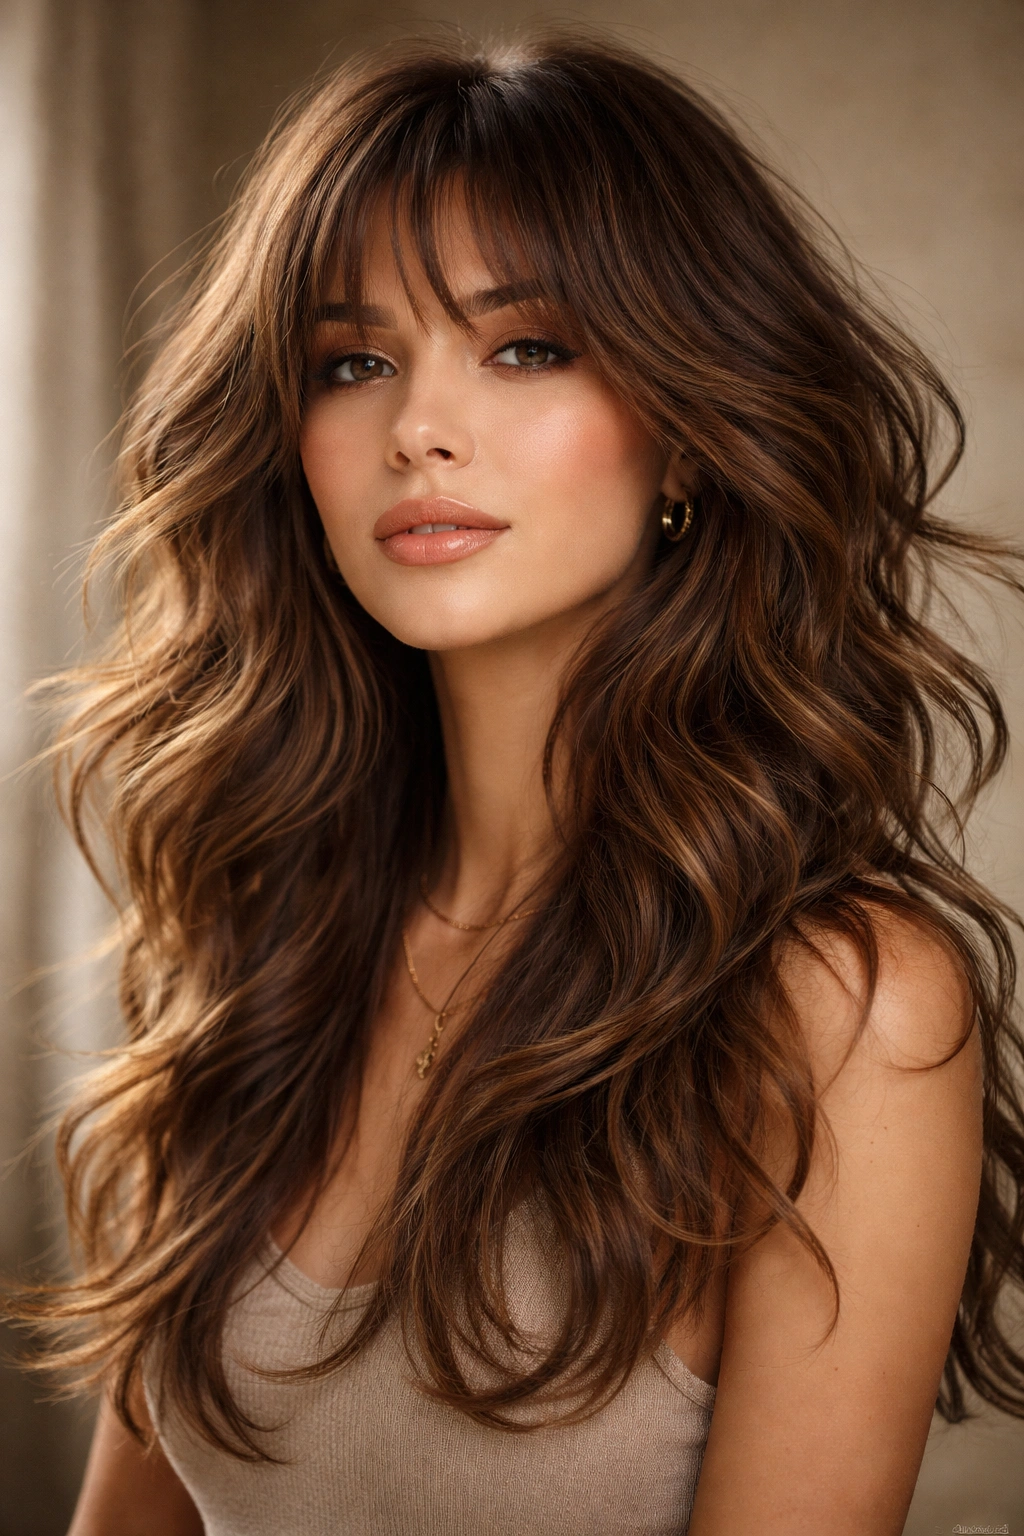
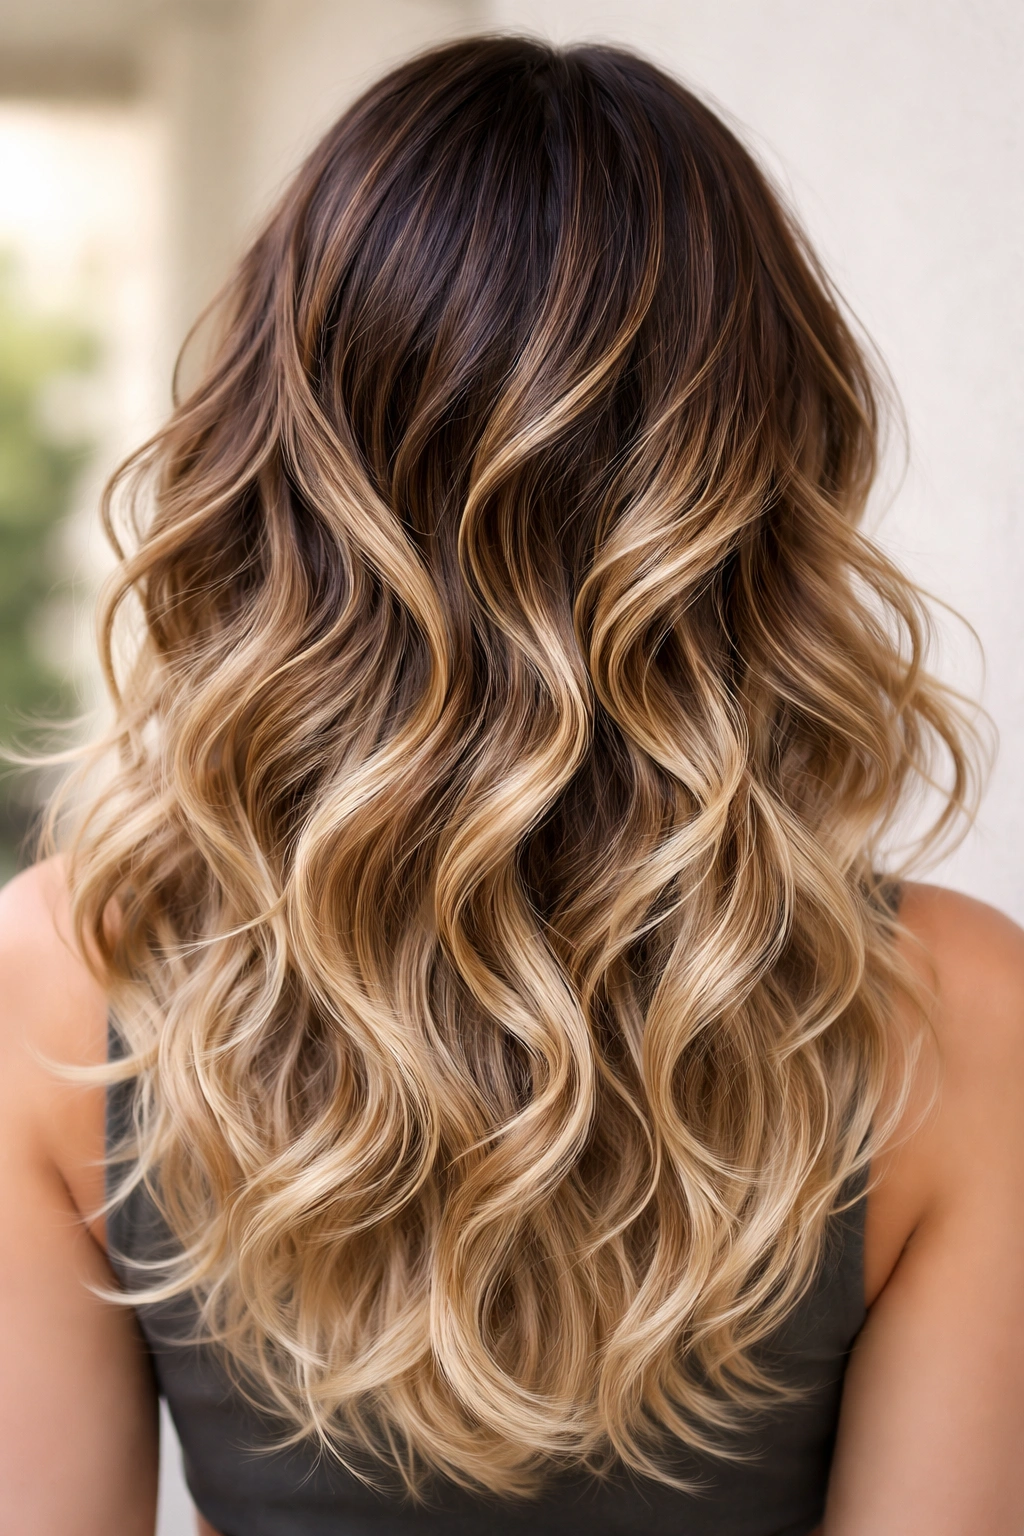
The octopus haircut—those playful, choppy layers that explode outward like tentacles—has become one of the most versatile and flattering cuts in modern styling. But here’s what most people don’t realize: the magic happens when you pair it with waves. The right wave pattern can transform an octopus cut from playful to sophisticated, from trendy to timeless, from one-dimensional to genuinely multidimensional.
Whether you’re drawn to loose, romantic waves or textured, piecy movements, the wavy octopus cut adapts to your hair type, face shape, and personal style in ways that straight blunt cuts simply can’t match. The movement softens the choppiness, adds volume where you need it, and creates a natural flow that actually makes styling easier once you understand what you’re working with. This isn’t a complicated cut—it’s just one that demands the right approach to waves.
What makes wavy octopus cuts so compelling is how they work with the natural texture of your hair rather than fighting against it. The shorter, choppy layers create the foundation for movement to take hold, while waves bring dimension and remove any harshness from the cut’s inherent edge. You’re not locked into one look; depending on how you style your waves, you can go from beachy and undone to polished and intentional.
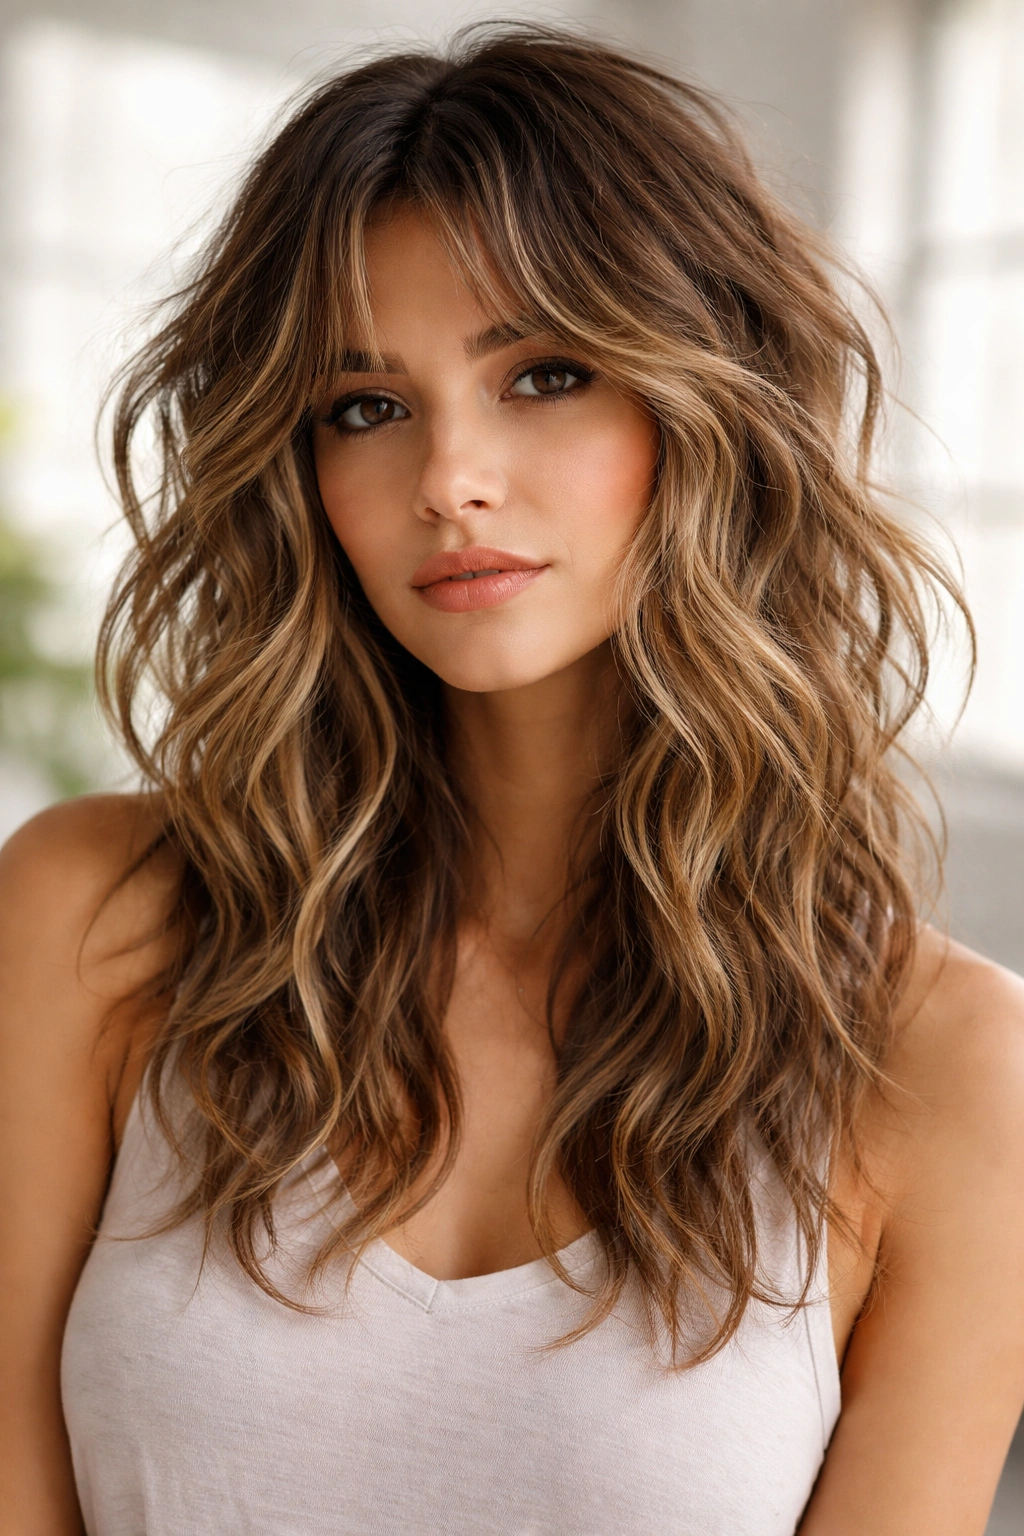
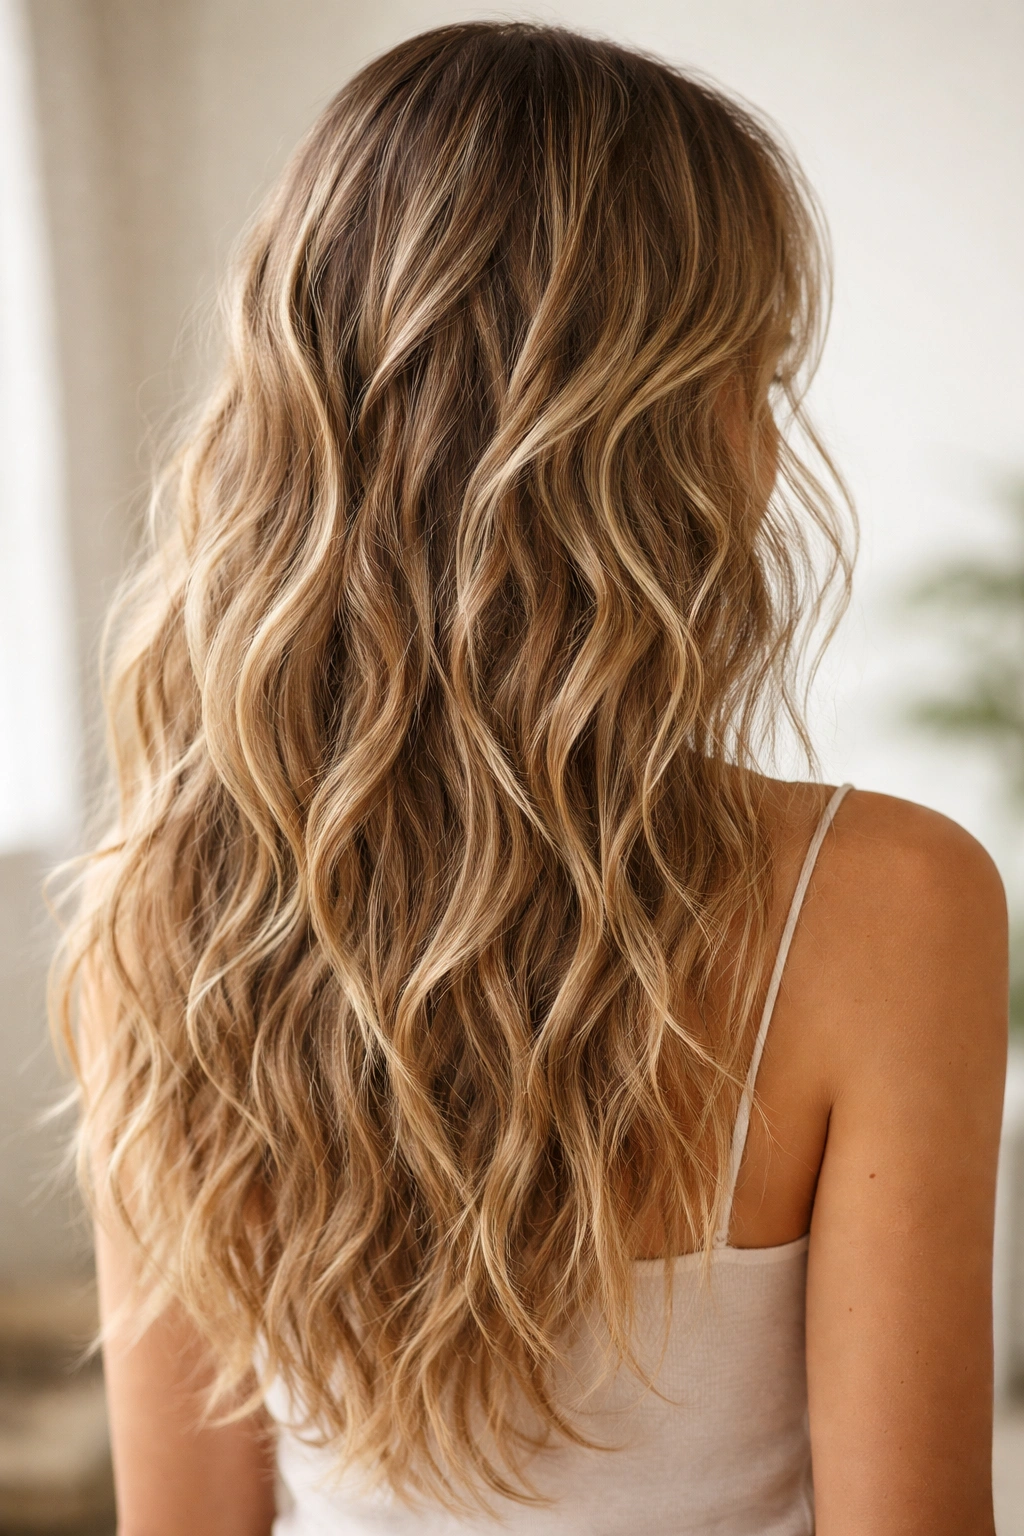
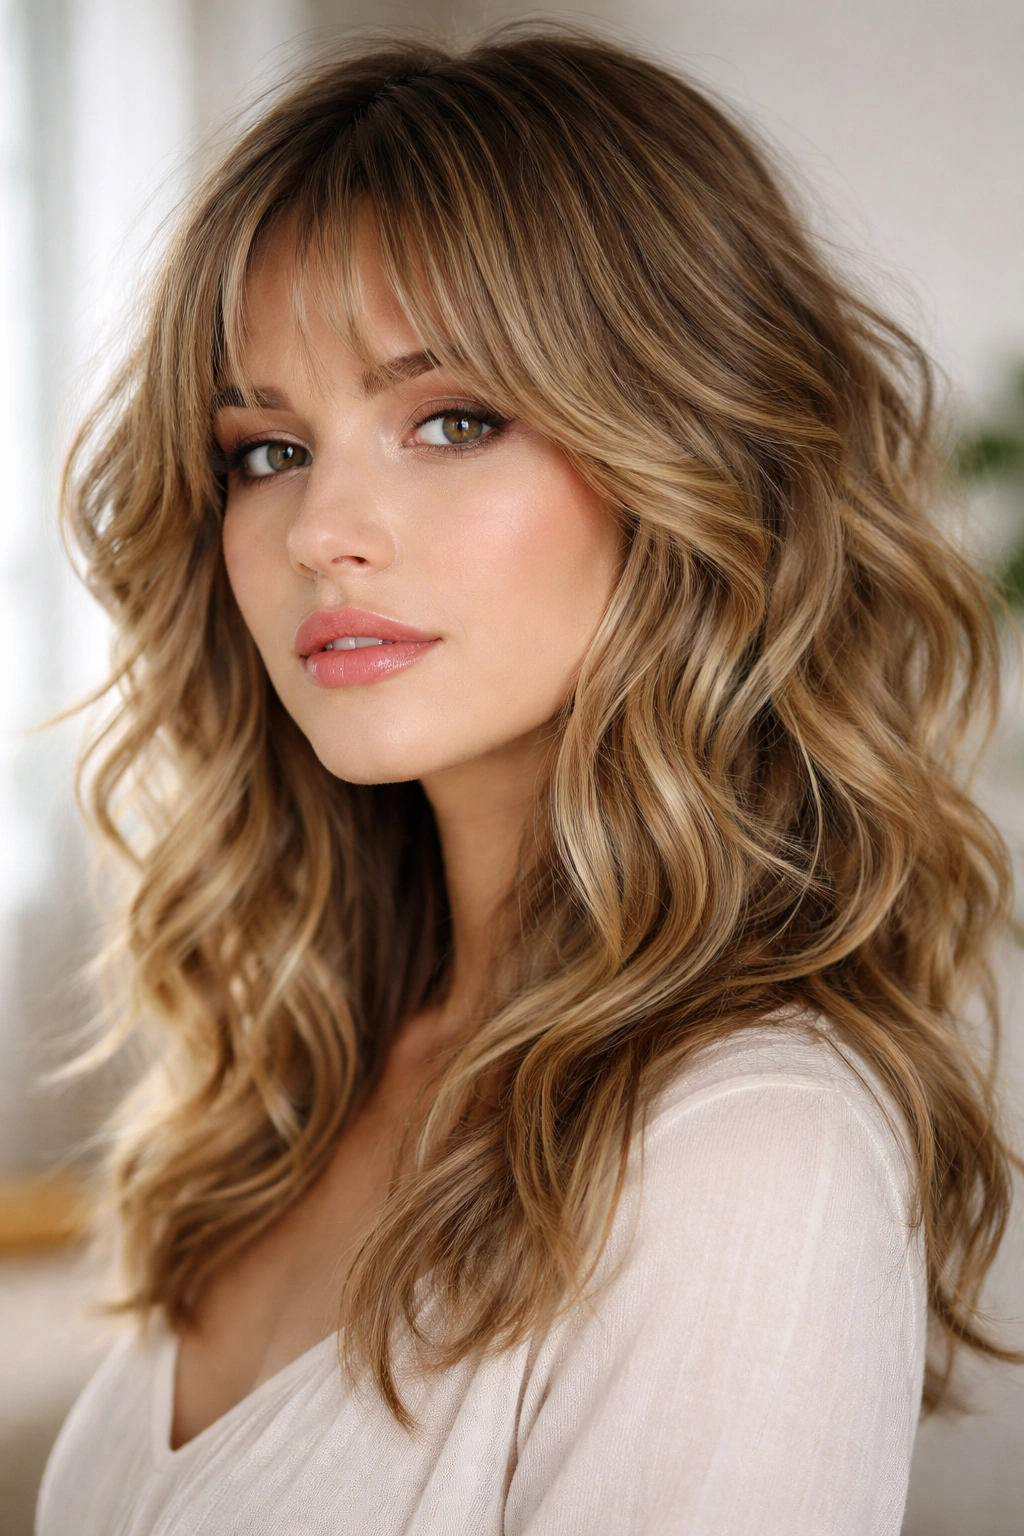
1. Buttery Soft Beach Waves
This version leans into loose, romantic waves that look like you spent the afternoon by the ocean. The layers of the octopus cut create natural pockets for waves to nestle into, creating a soft, almost effortless appearance that still requires intention when you’re styling.
Why This Version Works Best
Beach waves on an octopus cut are pure softness. The shorter layers frame your face without the weight that longer waves need to hang properly, and the texture catches light in multiple places. This creates an illusion of even more volume than the cut itself provides, which is especially valuable if you’re working with naturally fine or thin hair.
How to Achieve and Style It
- Use a 1.25-inch curling iron on medium heat, wrapping each section away from your face
- Alternate the direction of wraps every other section to create that undone, non-uniform wave pattern
- Apply sea salt spray before curling to give your waves grip and texture
- Finish with a light-hold hairspray so waves move with you, not against you
- Scrunch your roots gently once everything has cooled for volume that lasts all day
The styling time here is surprisingly short—about 15 minutes once you get the technique down. The key is not making your waves too tight or uniform; imperfection is the entire point. You want waves that look accidental, the kind that make people wonder if you were born with them.
2. Piecey Textured Waves with Choppy Emphasis
This cut leans harder into the octopus’s choppy nature, using waves to emphasize each individual layer rather than blend them together. It’s bolder and more deliberately styled—less beachy, more intentionally editorial.
Why This Version Works Best
When you want texture and movement without softness, piecey waves are your answer. This approach actually celebrates the choppiness instead of minimizing it, which means the cut itself becomes part of the visual story. Your stylist will want to ensure each layer is distinct and well-defined, creating natural breaking points where waves can sit.
How to Achieve and Style It
- Apply a texturizing spray or dry shampoo to damp roots for grip
- Use a straightener with rounded edges, twisting it as you move down each section for a piecy wave
- Focus on creating movement that emphasizes separation between layers
- Work with smaller sections (about 1 inch) rather than thick chunks so every layer gets texture
- Use a medium-hold, texturizing mousse applied to damp hair before styling
This style suits people with naturally wavy or curly hair particularly well, since the texture you already have becomes enhanced rather than created from scratch. If you have straight hair, you’ll be refreshing these waves every 2-3 days, but they photograph beautifully and feel genuinely contemporary.
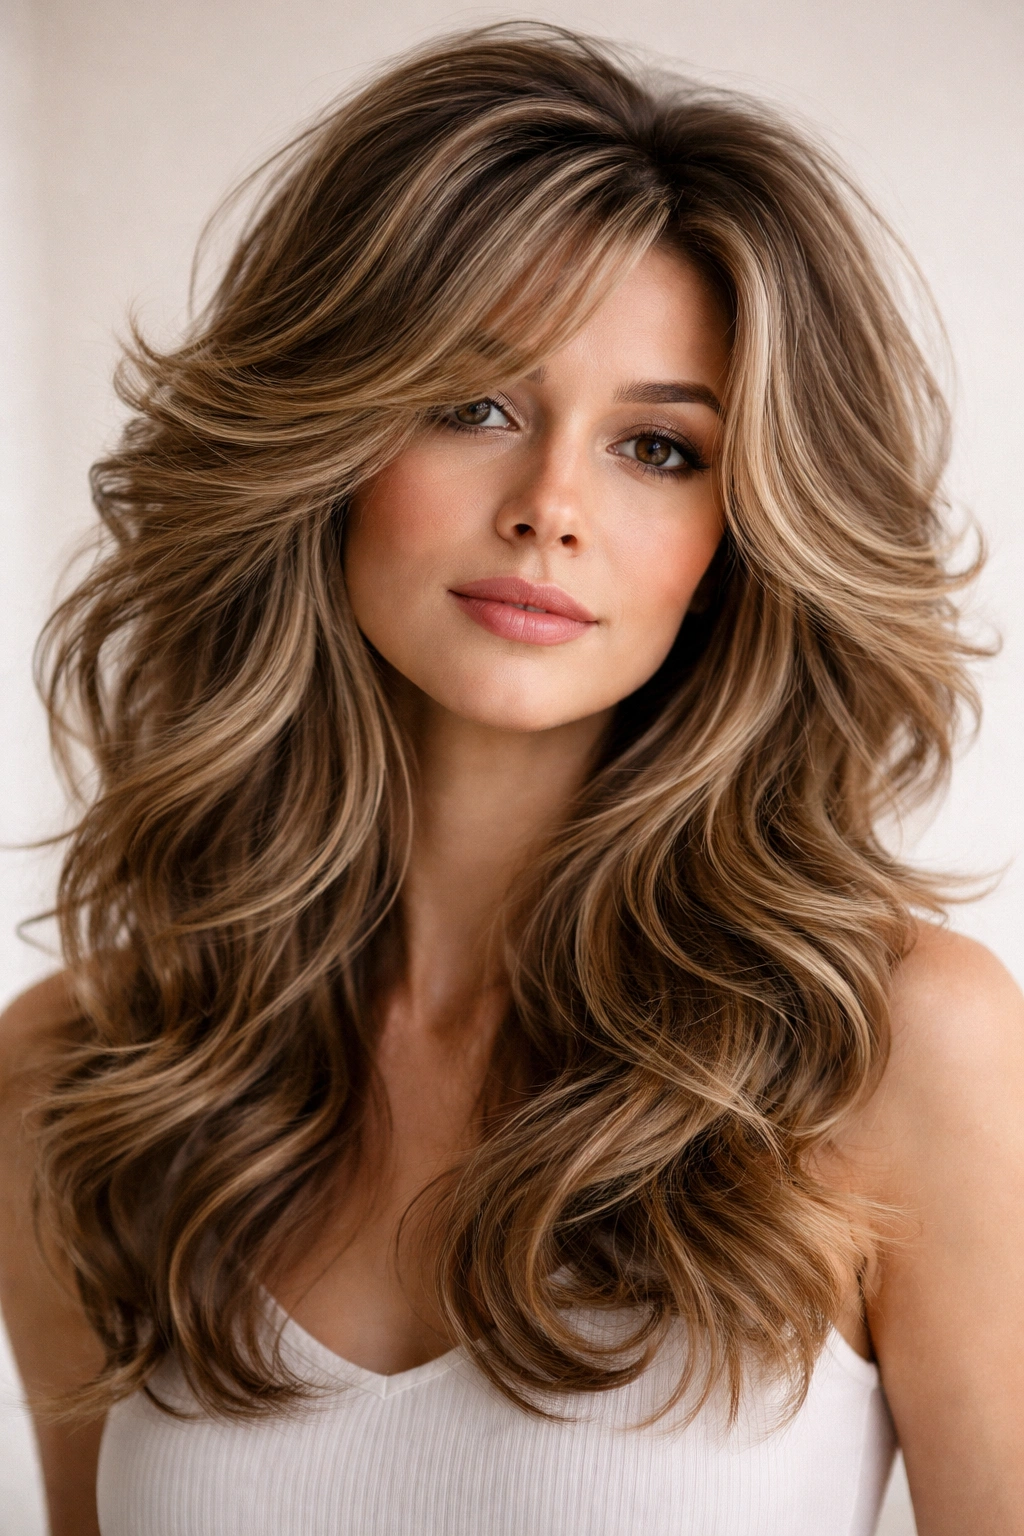
3. Loose Spiral Waves
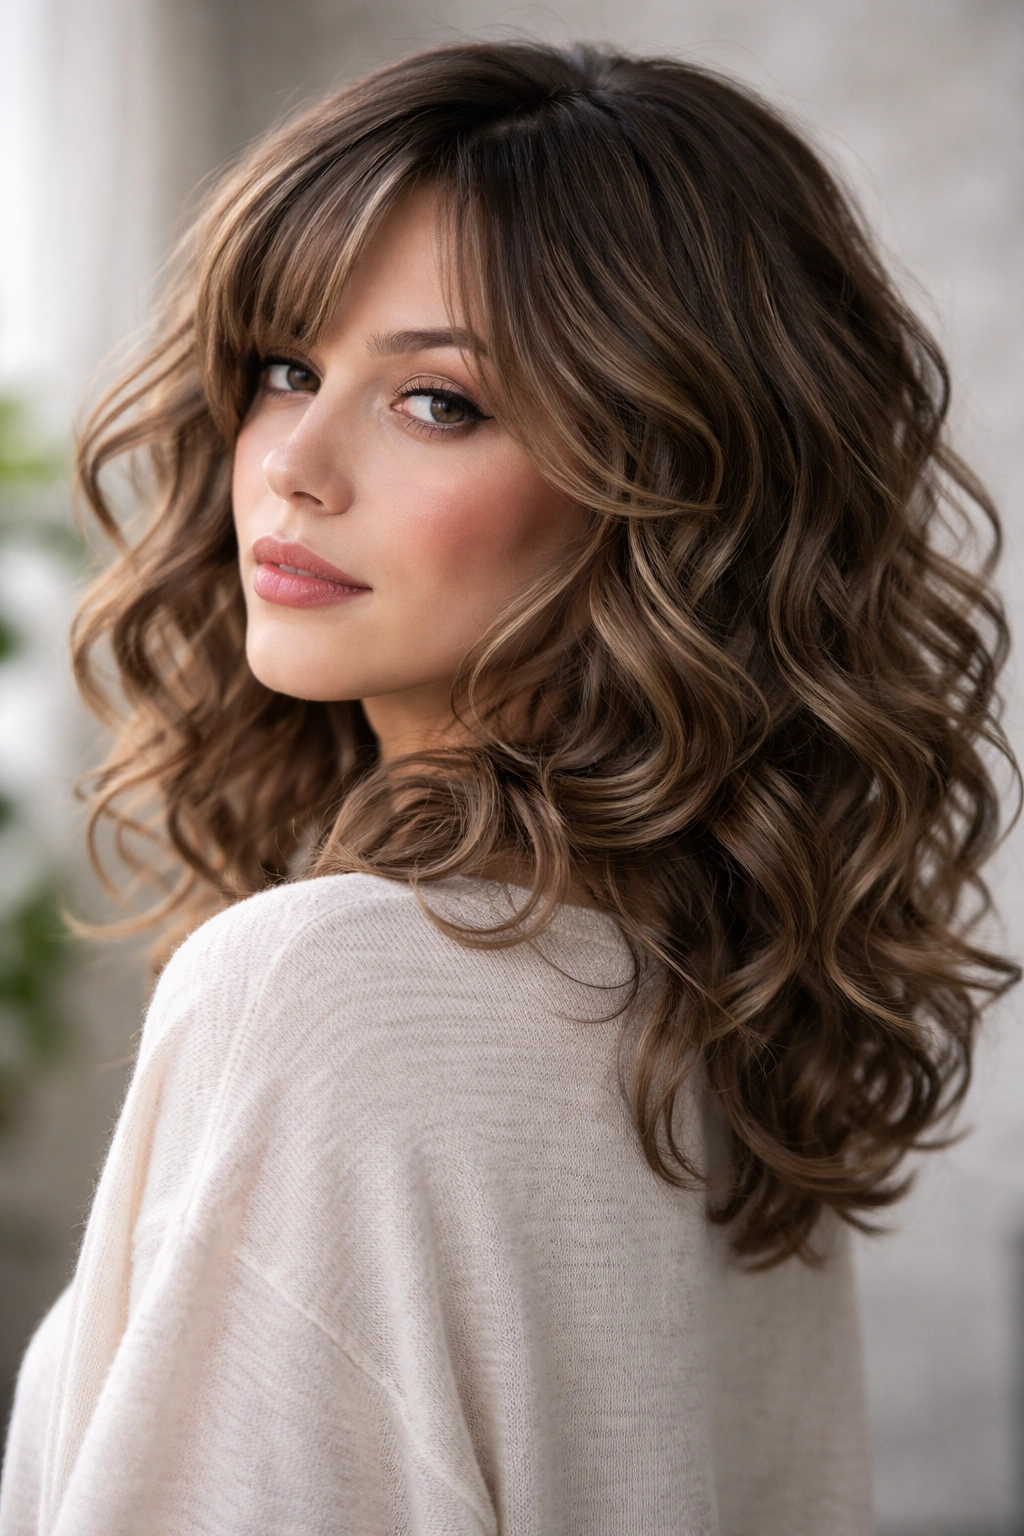
These waves spiral in defined coils rather than the back-and-forth movement of traditional waves. The result is bouncy, youthful, and full of personality—perfect if you want movement that reads as distinct and intentional.
Why This Version Works Best
Spiral waves on an octopus cut create movement that actually adds shape rather than just adding softness. Because the waves wind around rather than flowing side to side, they take up more space, which means even a choppy cut looks fuller and rounder. This works wonderfully on longer faces that need width, and it suits people who want their waves to be a visible feature, not just something subtle underneath.
How to Achieve and Style It
- Divide damp hair into sections about 1 inch wide
- Wrap each section tightly around a 1-inch curling iron, holding for 10-15 seconds before releasing
- Keep the curl tight as it cools to preserve the spiral shape
- Apply a curl-defining cream to damp hair before styling for hold and bounce
- Flip your head upside down and finger-comb waves once they’ve cooled to create separation
These waves work best on hair that’s at least shoulder-length (or the bottom layers of shorter cuts), since shorter hair can read as kinky rather than spiraled. Plan for about 20-25 minutes of styling time, and these waves typically last about 3 days before you’ll want to refresh them.
4. Tousled Undone Waves
This is the “I didn’t really try” look that actually requires the most knowledge of your hair’s texture and behavior. Tousled waves look deliberately careless while still being shaped and intentional.
Why This Version Works Best
An octopus cut is already choppy and a little undone, so pairing it with intentionally messy waves feels harmonious rather than accidental. This is perfect if you have naturally wavy or curly hair, because you’re essentially enhancing what’s already there rather than fighting it. Even people with straight hair can achieve this look, but it requires understanding your texture and knowing which products will amplify it.
How to Achieve and Style It
- Apply a sea salt spray or texturizing mousse to damp hair
- Use a blow dryer on low heat with a diffuser attachment to dry your hair, scrunching as you go
- Use a curling iron or wand loosely—don’t wrap completely, just bend the hair at random intervals
- Don’t worry about consistency; the whole point is that waves appear naturally varied
- Finish with a dry texture spray and a tousle with your fingers
This style is genuinely low-maintenance once you understand your hair. People with naturally wavy hair might just need to refresh this look with product and air-drying. People with straight hair will need to restyle every 1-2 days. Either way, it looks effortlessly cool in a way that photoshoot-perfect waves sometimes don’t.
5. Hollywood Glam Waves
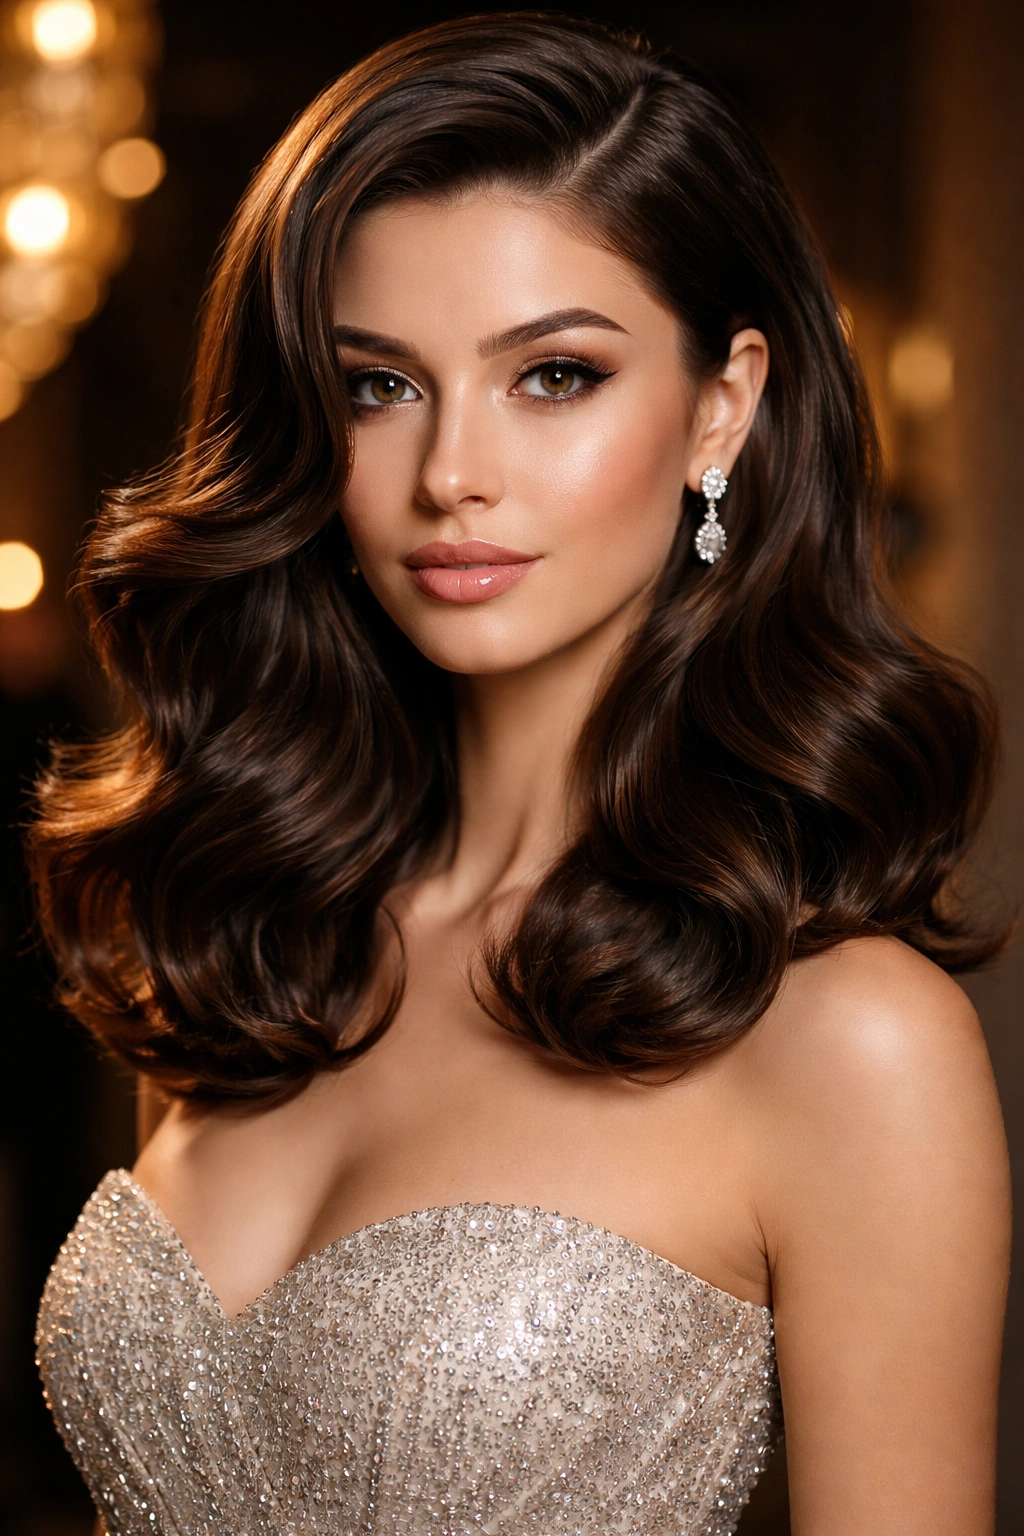
These are the waves you see on red carpets—defined, bouncy, with controlled volume that sits close to the head before cascading outward. The octopus cut provides the foundation; the styling provides the glamour.
Why This Version Works Best
A classic wave pattern with actual control and polish brings sophistication to a cut that can sometimes read as youthful or casual. This works beautifully on people who want their octopus cut but need it to feel appropriate for professional settings or formal events. The choppiness is still there, but it’s styled in a way that says you care about how you look.
How to Achieve and Style It
- Blow-dry hair with a round brush for volume at the roots
- Use a 1.5-inch curling iron on medium-high heat, wrapping sections away from your face
- Make your waves consistent and deliberate—think waves, not texture
- Pin each curl flat as you work (or while they cool) to set the shape
- Brush waves out gently once they’ve cooled, then use a smoothing serum to polish them
- Finish with a strong-hold hairspray
Plan for 25-30 minutes of styling time, and these waves stay looking intentional for 4-5 days. This is the look for people who want obvious, visible wave definition.
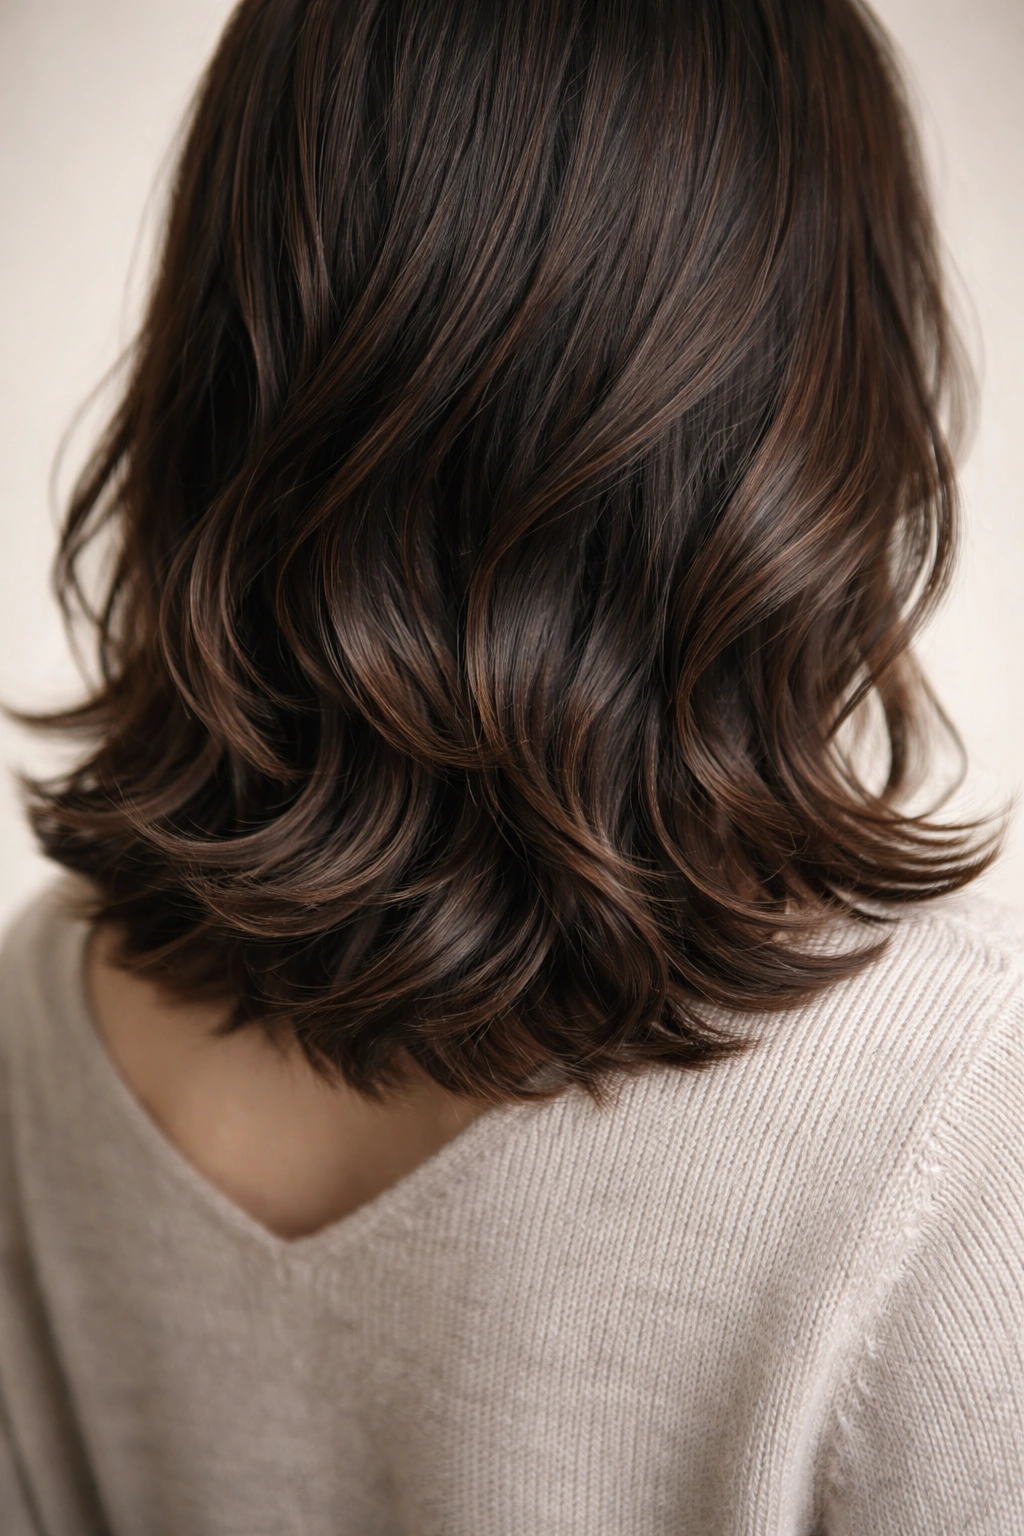
6. Shag Waves with Movement
A shag cut is similar to an octopus cut but often with slightly longer layers and less density at the bottom. Adding waves to a shag-adjacent octopus cut creates a ’70s-inspired look that feels both retro and contemporary.
Why This Version Works Best
If your octopus cut skews longer or has that slightly-shaggier aesthetic, waves amplify the vintage appeal while keeping everything modern. This version reads as intentionally styled rather than casually undone, and it suits people who love bold, recognizable shape in their hair. The movement is obvious and becomes the defining characteristic of your look.
How to Achieve and Style It
- Apply a texturizing spray to damp hair
- Use a 1.5-inch wand loosely, curling away from your face and not wrapping completely
- Focus on creating waves in the mid-lengths and ends; keep the roots smoother for volume
- Flip your head upside down and scrunch once waves are cool to enhance the shag texture
- Use a medium-hold mousse for shape without stiffness
This style works on hair that’s at least chin-length or longer, since shag waves need enough length to actually wave. Refresh styling every 2-3 days, and lean into the movement with your fingers rather than a brush—you want piecy, separated waves, not blended ones.
7. Beachy Braided-Out Waves
This technique uses braiding to create waves instead of heat styling. You can braid damp hair, sleep on the braids, and wake up with waves—or braid freshly styled waves to set them longer. It’s practical, gentle on hair, and creates a very specific texture.
Why This Version Works Best
Braided waves are softer and more organic-looking than heat-styled waves, and they’re gentler on hair overall. The octopus cut’s layers work beautifully with this technique because each layer creates its own pocket of wave. This is particularly good for people with naturally wavy or curly hair who want waves that enhance their texture rather than completely recreate it.
How to Achieve and Style It
- Apply a wave cream or texturizing spray to damp hair
- Create 4-6 loose braids depending on thickness, focusing on the longer layers
- Sleep on the braids or let them sit for at least 4-6 hours
- Unravel braids gently and finger-comb waves apart
- Apply a light mousse or sea salt spray to refresh and enhance the wave
This technique works beautifully for overnight styling—braid your hair in the evening and wake up with waves. It’s particularly valuable if you’re someone whose waves fall out quickly with heat, or if you want to minimize heat styling overall. Refresh with braiding or product every 2-3 days.
8. Sharp Choppy Waves at the Ends
This version keeps the mid-lengths of your hair relatively smooth while creating sharp, defined waves only at the ends. It’s a hybrid approach that balances polish with movement.
Why This Version Works Best
By keeping the bulk of your hair smooth and wavy only at the ends, you create a silhouette that feels intentional and controlled. This suits people who want movement without sacrificing the sophistication of a sleeker look. It also means less styling time—you’re not creating waves throughout all your hair, just at the pieces that frame your face and fall at your shoulders.
How to Achieve and Style It
- Blow-dry hair relatively straight with a paddle brush, focusing on smoothness
- Use a 1.25-inch straightener with slightly rounded edges on just the bottom 2-3 inches of hair
- Twist the straightener slightly as you move down to create a subtle wave rather than a crimp
- Use a smoothing serum on the mid-lengths for polish
- Finish with a light hairspray that won’t weigh down the waves
Styling time is surprisingly quick—about 10-12 minutes—because you’re only working on the ends. These waves last about 4-5 days and look polished without being overdone.
9. Voluminous Bouncy Waves
These waves prioritize volume and bounce above all else. Every technique you use is designed to create lift, making even fine hair look fuller and rounder.
Why This Version Works Best
An octopus cut is naturally voluminous because of the layers, but pairing it with waves that maximize bounce takes that volume to another level. This works for anyone who wants their hair to feel fuller or who needs to add roundness to a longer face. It’s especially effective if you have fine or thin hair, since the wave pattern creates the illusion of density.
How to Achieve and Style It
- Apply a volumizing mousse to damp roots before blow-drying
- Blow-dry upside down with your fingers (not a brush) for maximum lift
- Use a 1.25-inch curling iron on medium-high heat, curling away from your face
- Pin each curl against your scalp while it cools to set maximum bounce
- Lift your roots gently with your fingers once everything is cool
- Use a lightweight volumizing spray rather than heavy hairspray
Plan for 20-25 minutes of styling, and these waves will last about 3-4 days. This is the look for people who want their octopus cut to feel genuinely voluminous and bouncy, not just textured.
10. Ombre Wave Dimension
This isn’t just about the wave pattern itself—it’s about how waves interact with ombre or balayage color. By placing lighter ends underneath and darker roots on top, waves create dimension that reads as intentional color work.
Why This Version Works Best
Waves catch light differently depending on where the light hits them, which means ombre color appears more dimensional when it’s wavy versus straight. This approach turns your waves and color into a cohesive design rather than two separate elements. It’s particularly striking on an octopus cut because the shorter layers show off both texture and color throughout your entire head, not just at the ends.
How to Achieve and Style It
- Start with ombre or balayage color work that places lighter pieces throughout your layers
- Use the wave technique you prefer (heat-styled, braided, or texture-based)
- Focus on creating movement that emphasizes the color by catching light—looser waves rather than tight spirals work best
- Apply a shine serum to enhance color dimension after styling
- Use a color-safe product line to keep your ombre vibrant
This look is genuinely transformative because it uses three elements—the cut, the color, and the waves—to create visual interest that none of them could create alone. Refresh styling every 2-3 days and refresh color every 8-10 weeks depending on your base color and the lightness of your ombre.
Final Thoughts
The magic of a wavy octopus cut isn’t in the cut itself or the waves themselves—it’s in how they work together. The choppiness of the cut creates pockets for waves to sit naturally, while the waves soften the cut’s inherent boldness and add dimension that a straight octopus cut can’t achieve alone. Whether you choose soft beach waves or sharp choppy texture, romantic spirals or undone tousles, you’re working with a foundation that adapts to your styling choice rather than fighting it.
The real skill is understanding your hair’s natural texture and choosing a wave pattern that enhances it rather than competing with it. Someone with naturally wavy hair might find that tousled undone waves or braided waves require minimal effort and look effortlessly good. Someone with straight hair might prefer defined waves that hold longer and read as intentionally styled. Neither is better—they’re just different expressions of the same cut.
Once you’ve found your wave pattern, styling becomes faster and easier each time you do it. Your hair learns the shape, products work more efficiently, and you develop an intuition about what your hair needs. That’s when an octopus cut really starts to feel like your cut—not a trend you’re following, but a personal style that works for the specific hair you have.