Wavy hair has become the go-to choice for wedding guests and bridal parties alike—and for good reason. Waves strike that perfect balance between effortless-looking elegance and polished sophistication that photographs beautifully, holds up through hours of celebration, and flatters virtually every face shape. Whether you’re attending a formal black-tie ceremony, an outdoor garden wedding, or a casual beach celebration, waves adapt to the occasion and work with virtually any dress style or hair length.
The real beauty of wavy hairstyles for weddings isn’t that they look complicated—it’s that most of them feel surprisingly achievable if you know the right techniques and products. You don’t need a professional stylist (though the option is always there) to create waves that look intentional and elegant. With a few core tools—a curling iron, a texturizing spray, and maybe some bobby pins—you can recreate any of these styles at home. The key is understanding that wedding-ready waves aren’t about tight, uniform curls; they’re about creating soft, romantic movement that frames your face and enhances your overall look.
What makes these particular styles perfect for weddings is their versatility and longevity. They work whether you’re wearing your hair down, partially pinned, or fully styled up. They complement both minimalist and ornate makeup. And they photograph beautifully in every kind of lighting, from bright afternoon sun to dim evening receptions. Let’s explore 16 wavy hairstyles that range from super simple to more intricate, so you can find the perfect match for your wedding day look.
1. Soft Side Waves with Natural Texture
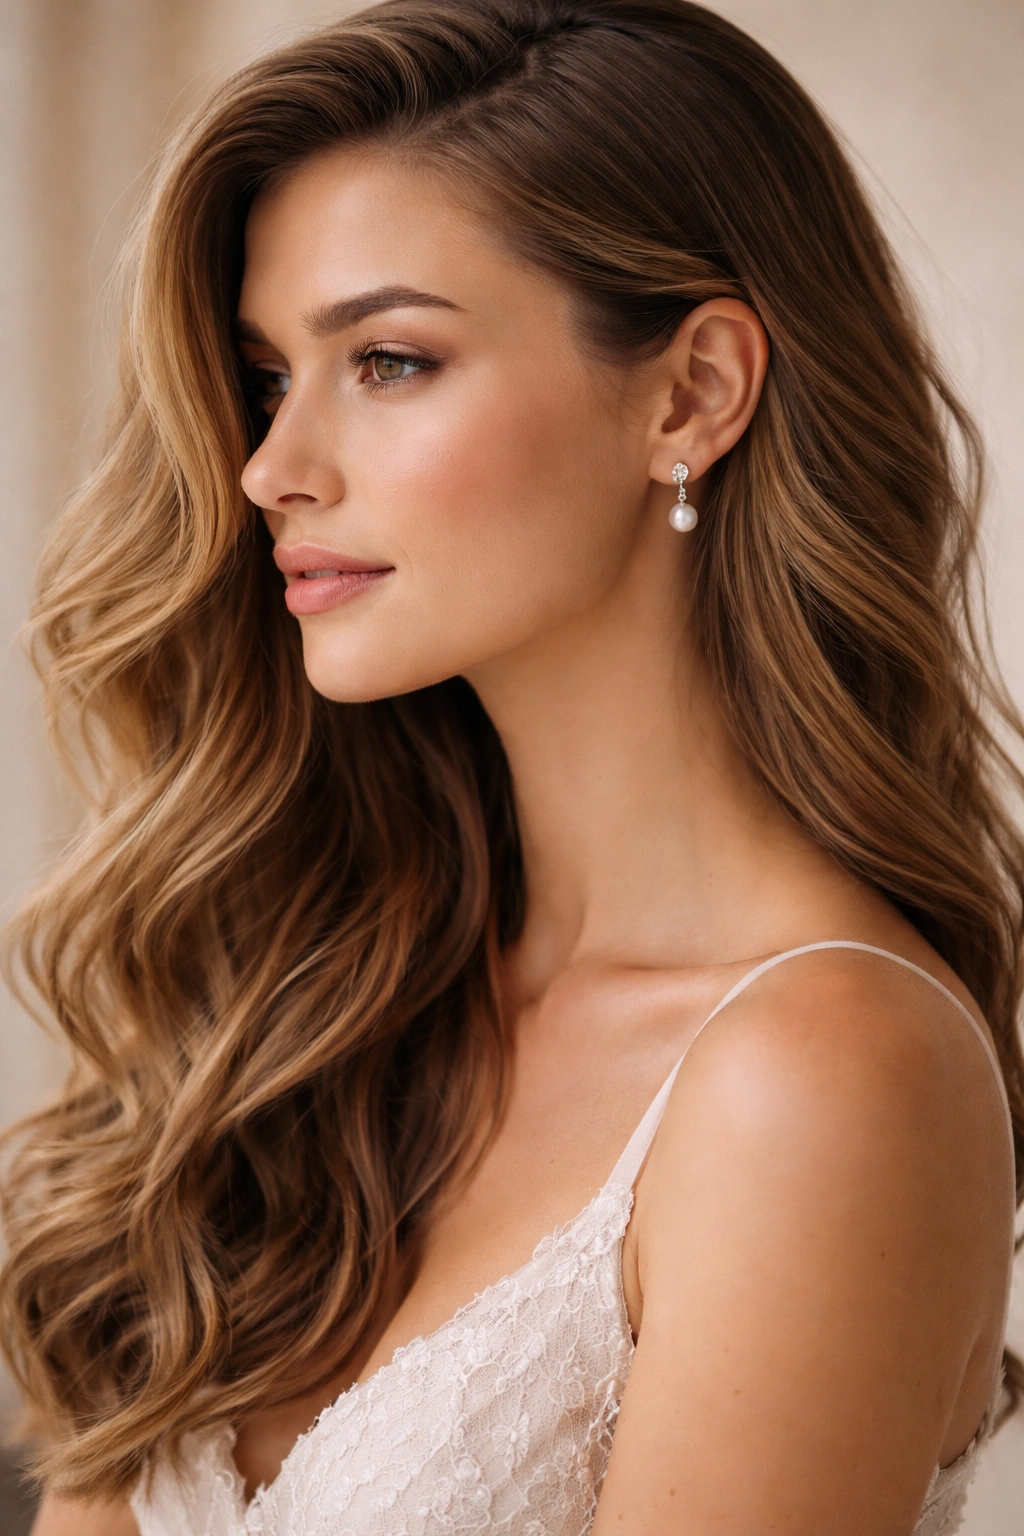
Soft side waves are the epitome of effortless elegance—they look like you spent five minutes getting ready when you’ve actually created something genuinely polished. This style works beautifully when all your hair is swept to one side with gentle, relaxed waves running through it. The waves should feel organic and touchable, not sculpted or overly defined. This is ideal for anyone who wants to look dressy without feeling like they’re wearing a costume.
Why This Works for Weddings
Side waves instantly elongate the face and draw attention to your features without being dramatic. The asymmetry is flattering on most face shapes, and the soft texture photographs beautifully in both candid shots and formal portraits. Because the waves are loose and relaxed, they won’t feel heavy or uncomfortable during a long day of celebration.
How to Create Them
- Use a 1.25-inch curling iron or waving tool to create loose waves throughout your hair, curling sections away from your face
- Brush through the waves gently with your fingers or a paddle brush to soften them into a more natural, undone texture
- Spray with a light texturizing spray (not heavy hairspray—you want movement, not rigidity)
- Sweep all hair to one side and anchor with a few bobby pins hidden underneath for a secure hold
- Finish with a light mist of flexible-hold hairspray to set everything without weighing it down
Pro tip: Create the waves the night before and sleep on them gently in a braid or loose ponytail—they’ll look even softer and more natural the next day.
2. Half-Up Wavy Ponytail with Volume
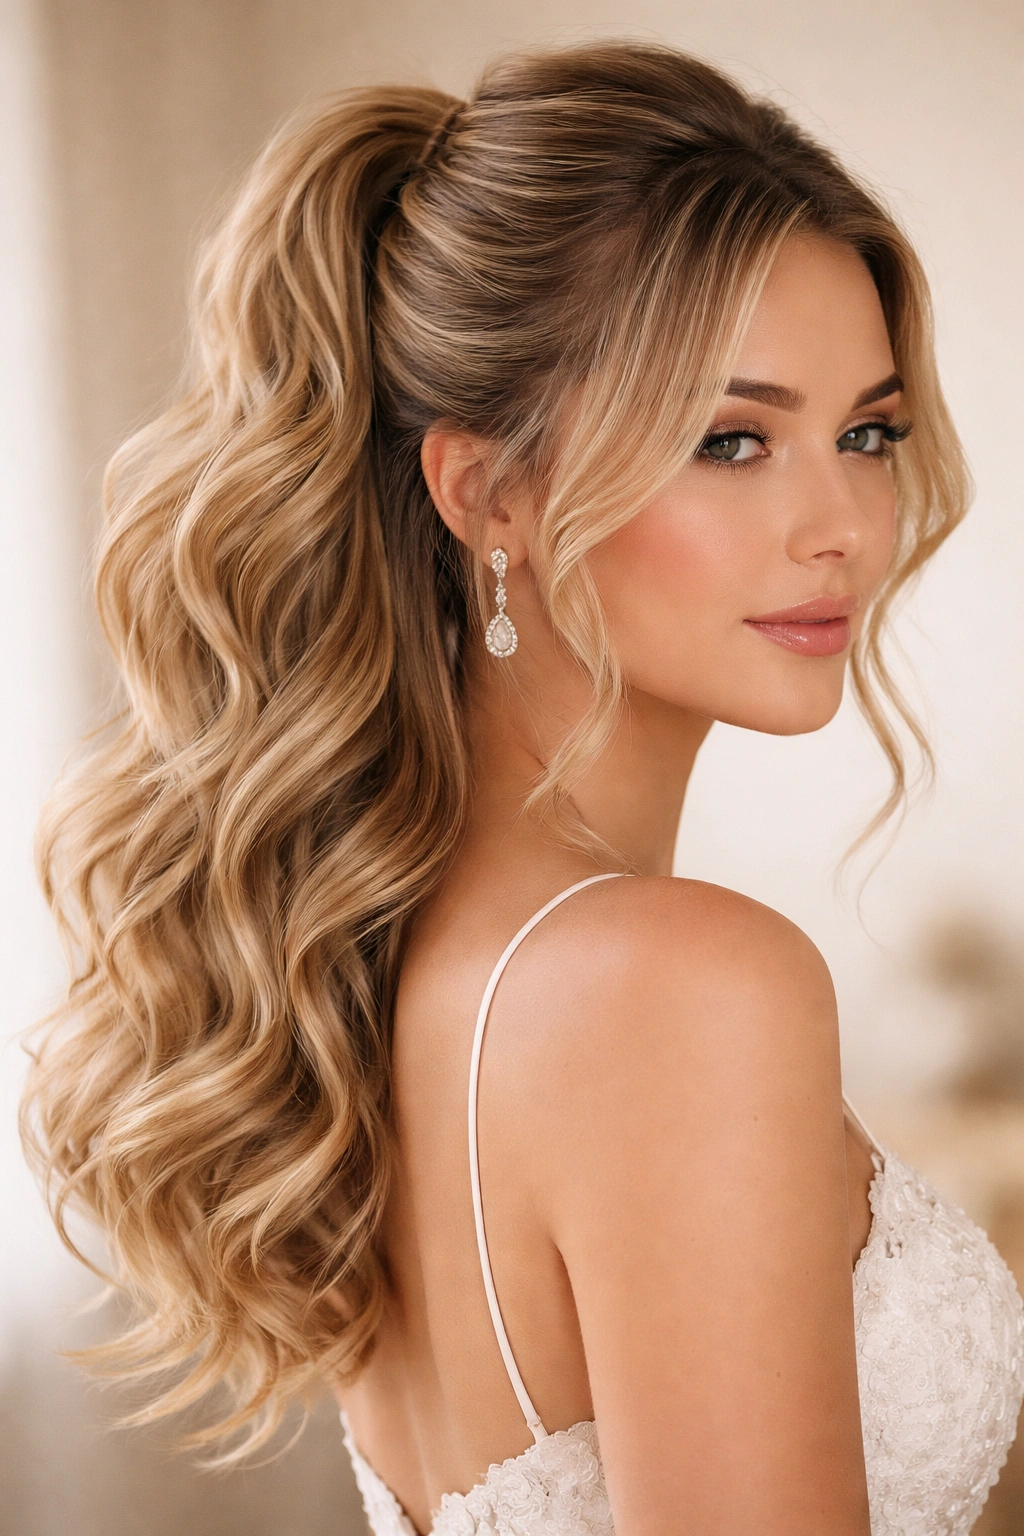
A half-up ponytail with waves combines the best of both worlds: part of your hair stays down to frame your face, while the rest is pulled up to keep things off your shoulders and neck. This style offers practical benefits for a long wedding day (you won’t feel hair constantly on your face) while maintaining a romantic, undone aesthetic. The waves throughout add movement and visual interest that a standard ponytail doesn’t provide.
Why This Style Works for Weddings
Half-up styles are sophisticated enough for formal weddings but feel relaxed enough for casual celebrations. The combination of waves and the pulled-back section creates dimension and visual interest from every angle. It’s also incredibly practical—you can pin flowers, clips, or decorative elements into the pulled-up section for added glamour.
How to Create It
- Create waves throughout your entire head using a 1.25 to 1.5-inch curling iron, paying special attention to the sections you’ll be pulling back
- Once the waves have cooled, gently brush through them to soften the curl definition slightly
- Take the top section of hair (roughly from ear to ear across the back) and gather it into a ponytail at the crown
- Gently tease the ponytail section at the base to add subtle volume
- Secure with a clear elastic or a hair tie that matches your hair color
- Pull out a few face-framing pieces from the front to soften the look
- Wrap a small section of hair around the elastic to hide it, securing the wrapped section with a bobby pin
Worth knowing: Backcombing the base of the ponytail creates a secure anchor that will hold all day without feeling tight or uncomfortable.
3. Loose Beachy Waves for Outdoor Weddings
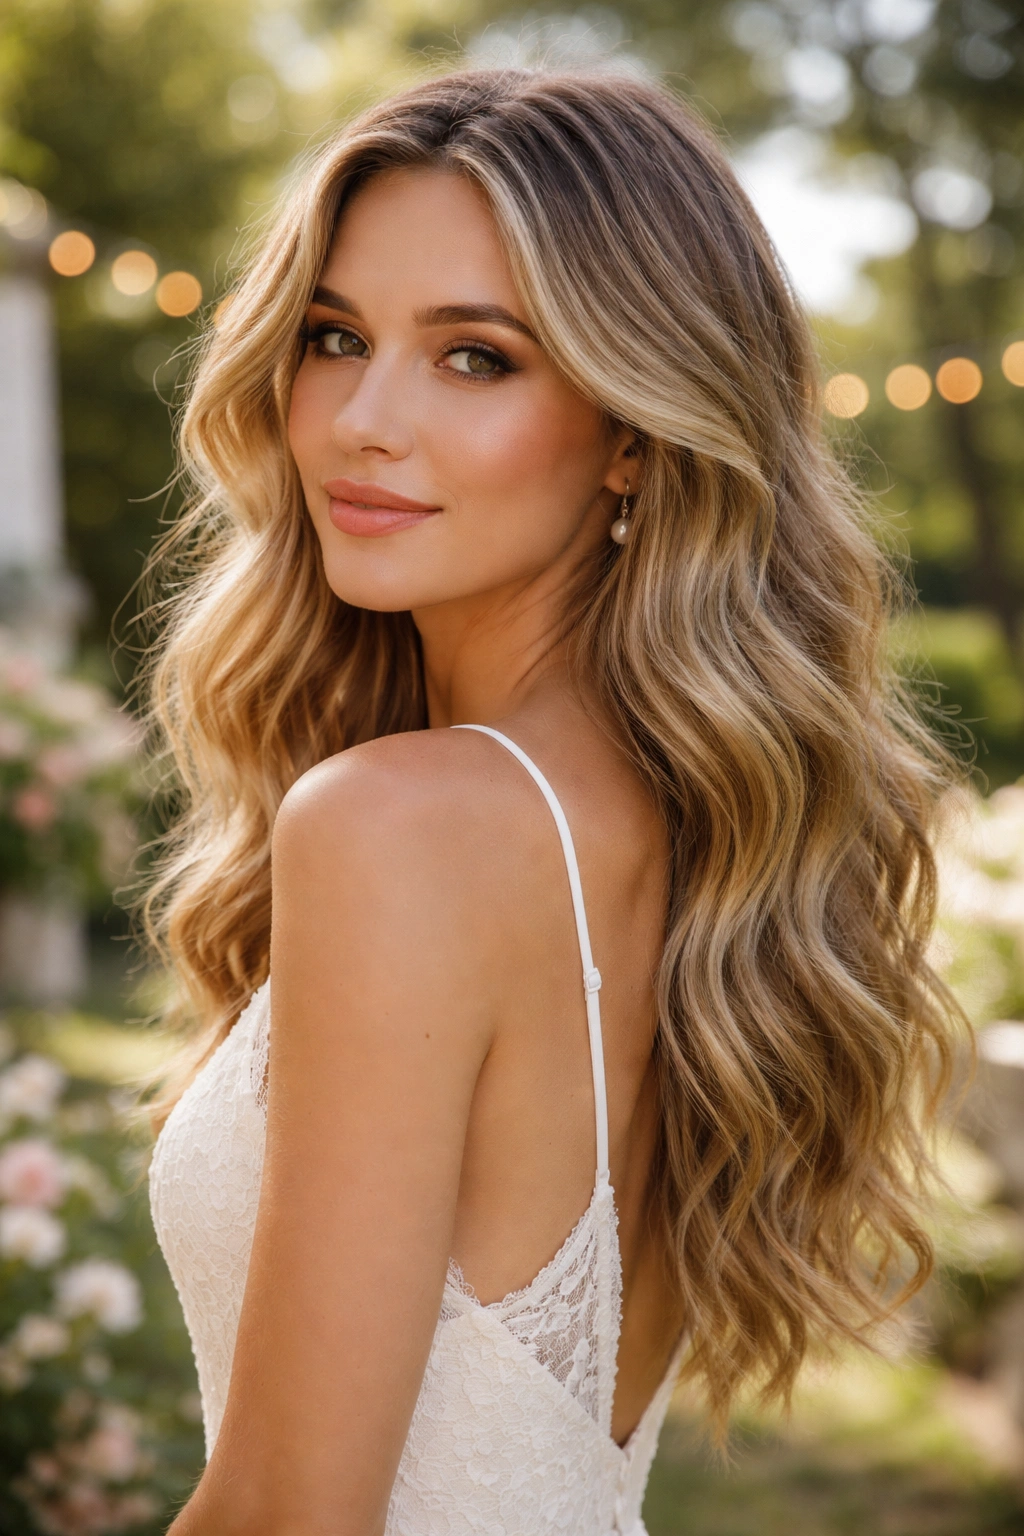
Beachy waves feel inherently romantic and work especially well for outdoor, garden, or destination weddings. These waves should look tousled and undone—like you just came from the beach, not the salon. The texture is softer and more relaxed than traditional waves, with some sections wavier than others to create an organic, lived-in appearance. Loose beachy waves work beautifully on mid-length to long hair and photograph gorgeously in natural sunlight.
Why This Works for Casual and Destination Weddings
Beachy waves complement outdoor settings and natural lighting beautifully. They work with bohemian, vintage, or casual wedding aesthetics and feel appropriate for daytime celebrations. The relaxed nature of the style means it will still look good even if it loosens slightly throughout the day—no rigid styling that falls flat after a few hours.
How to Create Them
- Start with slightly damp hair and apply a sea salt spray or texturizing spray throughout
- Use a 1.5-inch curling iron to create loose waves, curling random sections and leaving other sections straighter for natural variation
- Don’t worry about uniformity—the whole point is organic, inconsistent texture
- Once cooled, flip your head upside down and shake out the waves with your fingers
- Spray lightly with a flexible-hold hairspray to maintain shape without stiffness
- Optional: work a tiny amount of texturizing cream through the mid-lengths and ends for extra texture and movement
Pro tip: If you have naturally wavy hair, skip the curling iron entirely and simply enhance your natural texture with texturizing spray and some finger-combing.
4. Braided Wavy Updo for Formal Elegance
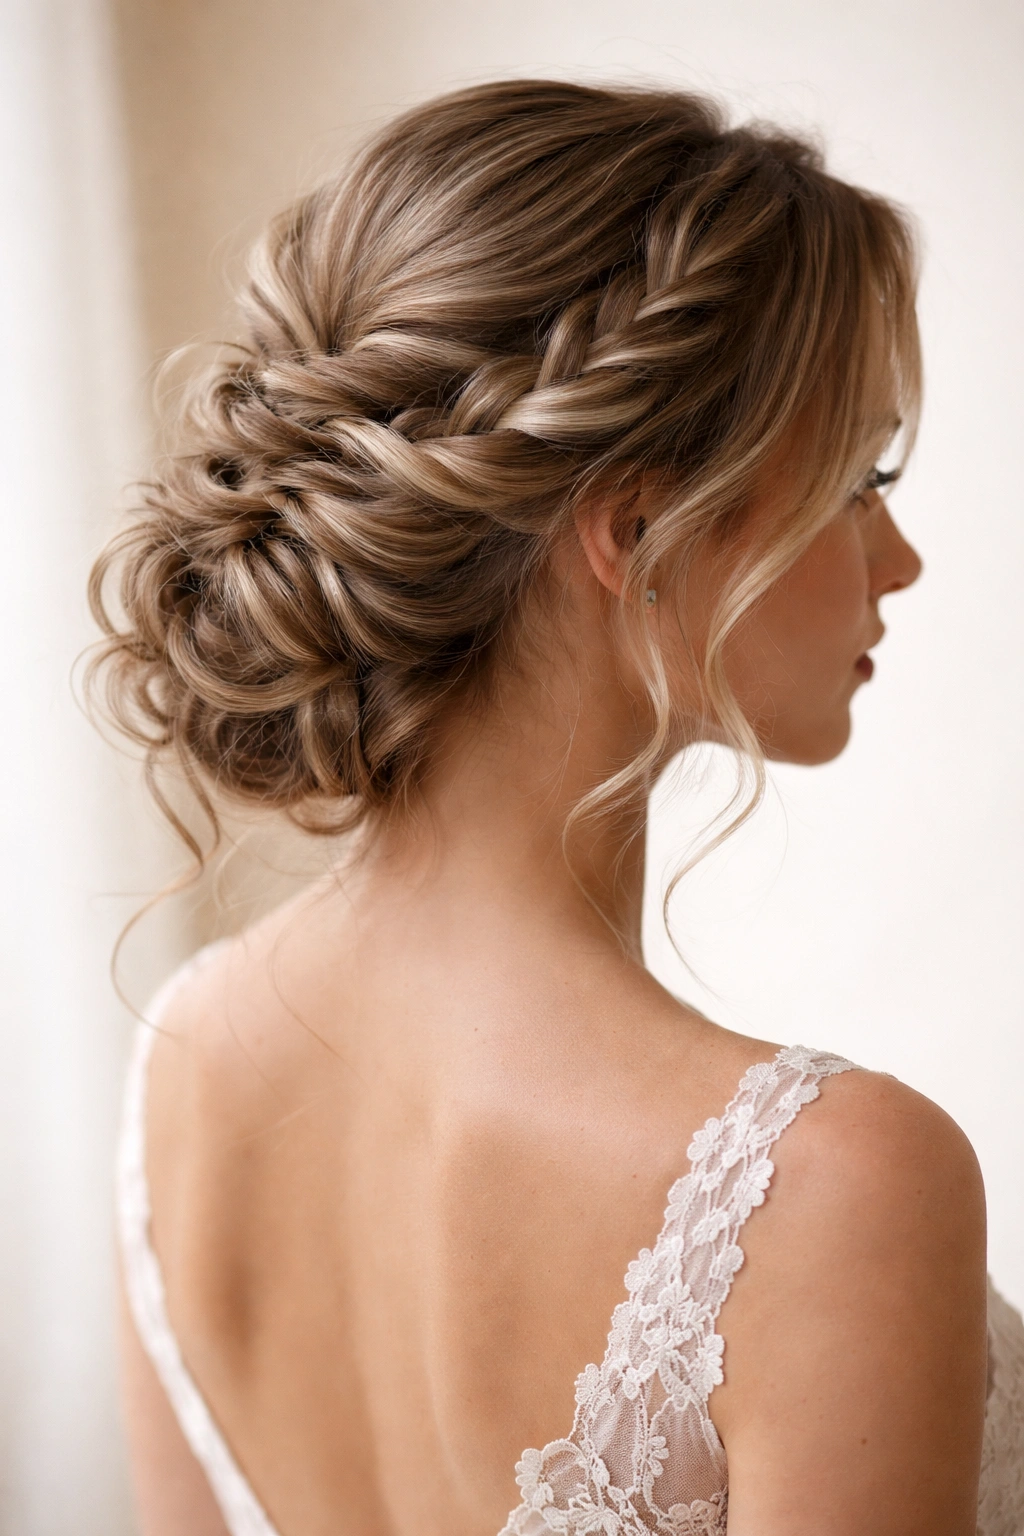
A braided wavy updo combines two romantic elements—braids add intricate detail while waves provide softness and movement. This style works beautifully for formal, black-tie, or traditional weddings where you want something that looks intentional and carefully styled. The braid can wrap around the crown, nestle into a low bun, or wind through an upswept style. The waves soften what could otherwise feel too structured, creating a balanced look that’s both elegant and approachable.
Why This Style Works for Formal Weddings
Braids add visual interest and a sense of craftsmanship that suggests professional styling without looking overly done. The combination with waves creates a romantic, fairytale quality while still being practical for an updo (your hair will stay secured and off your face all day). This style photographs beautifully from every angle and photographs particularly well in profile shots.
How to Create It
- Create soft waves throughout your hair using a curling iron, then brush through slightly to soften them
- Brush hair back into a low ponytail at the nape of your neck
- Divide the ponytail into three sections and loosely braid them, but don’t make the braid tight—keep it relaxed and slightly undone
- Coil the braid into a low bun shape and secure with bobby pins
- Gently pull out small sections from the braid and bun to create texture and soften the look
- Leave a few wavy face-framing pieces loose around your temples
- Finish with flexible-hold hairspray
Real talk: This style takes practice. Do a trial run before your wedding day so you understand exactly how tight or loose to make each section.
5. Textured Low Bun with Wavy Pieces
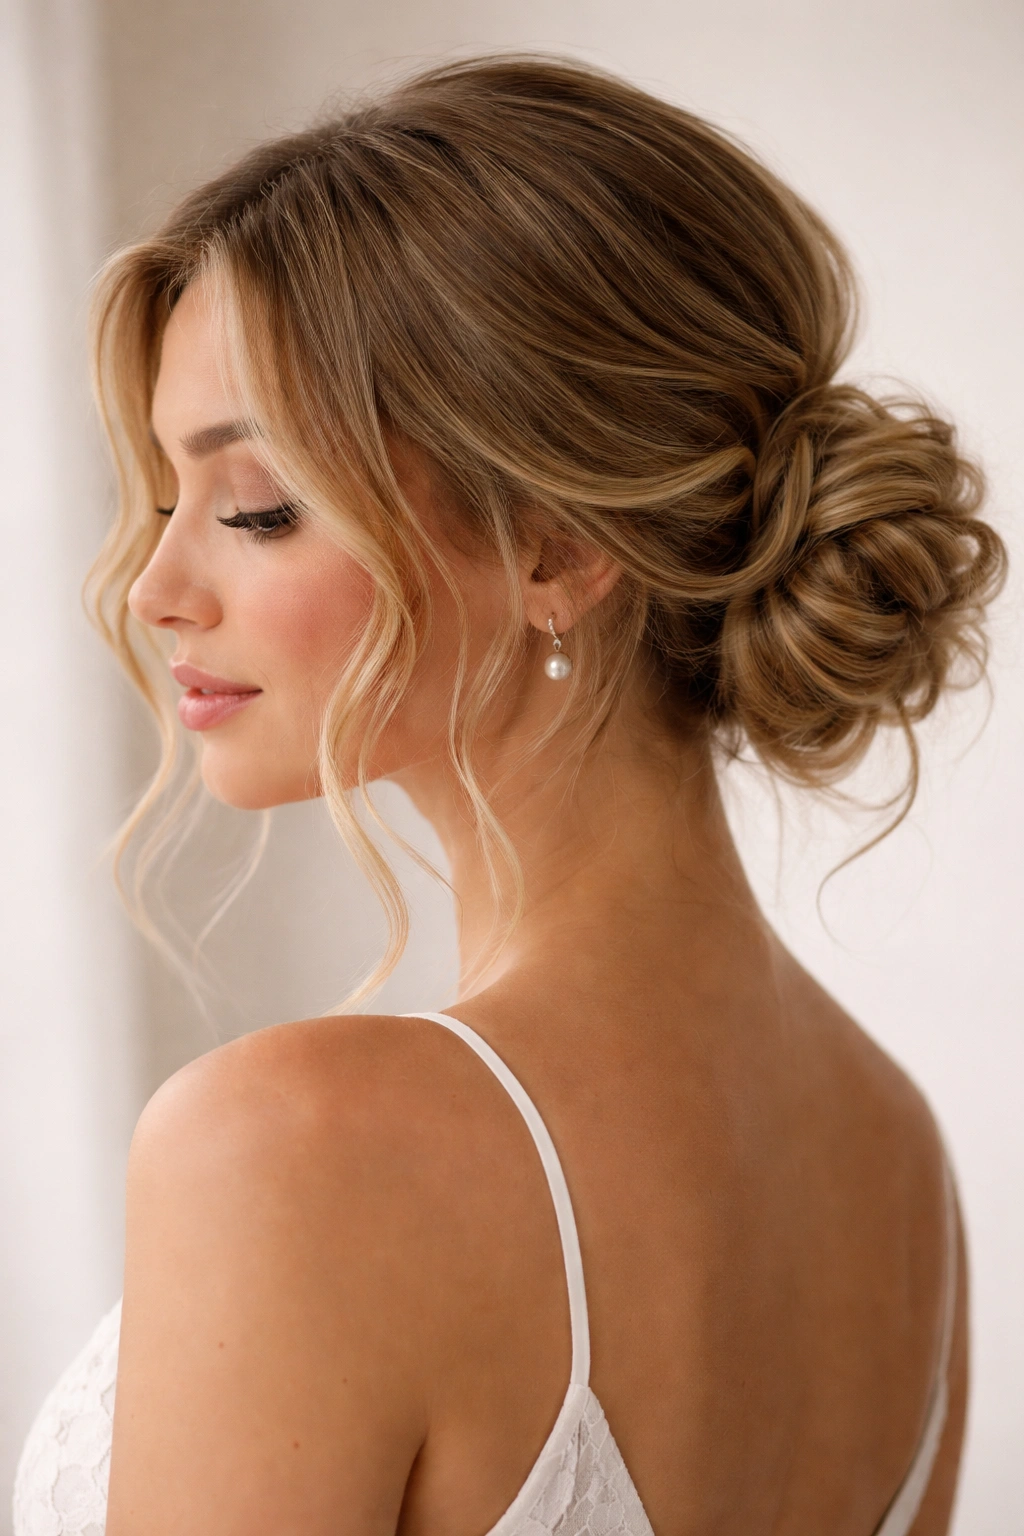
A low bun is inherently elegant and appropriate for any wedding setting, but adding texture and leaving wavy pieces out transforms it from basic to sophisticated. The bun sits at the back of your head with soft, wavy strands left loose around your face and neck, creating a romantic, approachable version of a classic updo. This style is ideal if you want your hair off your face and neck but still want to showcase texture and movement.
Why This Works for Versatile Wedding Settings
Low buns work for formal, casual, garden, and destination weddings equally well. The addition of wavy pieces prevents it from looking severe or overly polished—it feels modern and intentional. It’s also incredibly practical; your hair will stay put all day without feeling heavy or tight, and you won’t have hair falling in your face during the ceremony or dinner.
How to Create It
- Create waves throughout your hair using a curling iron, especially emphasizing the front sections you’ll be leaving down
- Brush your hair into a low ponytail at the base of your neck, just slightly off-center
- Tease the ponytail section lightly to add grip and volume
- Twist or coil the ponytail into a loose bun shape and secure with multiple bobby pins
- Gently pull out a few waves and strands around your face and neck—aim for asymmetrical, undone placement rather than neat positioning
- Leave longer wavy pieces framing both sides of your face
- Finish with flexible-hold hairspray
Insider note: Use bobby pins that match your hair color and angle them in different directions for a more secure hold that won’t be noticeable in photos.
6. Cascading Waves with Strategic Pins

This style creates the illusion of waves flowing and cascading down your back, held in place by decorative or hidden pins. It’s perfect if you love the look of your hair down but want some sections secured away from your face. Decorative pins, vintage clips, or fresh flower pins can anchor sections of waves, creating a structured yet romantic aesthetic. This is an excellent choice for brides or wedding guests who want an updo feel without fully pinning all their hair up.
Why This Works for Fashion-Forward Weddings
Cascading pinned waves offer a modern twist on traditional wavy styles. The pins become part of the design, especially if you choose decorative ones that complement your overall look. This style works beautifully with vintage-inspired, bohemian, or contemporary wedding aesthetics. It photographs incredibly well from the back and side angles.
How to Create It
- Create soft waves throughout your hair using a 1.25-inch curling iron
- Brush through waves gently to soften them slightly
- Take a section of hair from one side (approximately 2-3 inches wide) and twist or braid it loosely
- Pin this section back toward the center of your head using a decorative clip or bobby pins
- Repeat on the other side, creating a balanced look
- Leave the back section of hair in waves, allowing it to cascade naturally
- Add additional pins to secure any sections that feel loose
- Consider adding fresh flowers, greenery, or delicate clips throughout the pinned sections
Pro tip: Anchor pins at different heights and angles to create dimension and prevent the pinned sections from looking flat or one-dimensional.
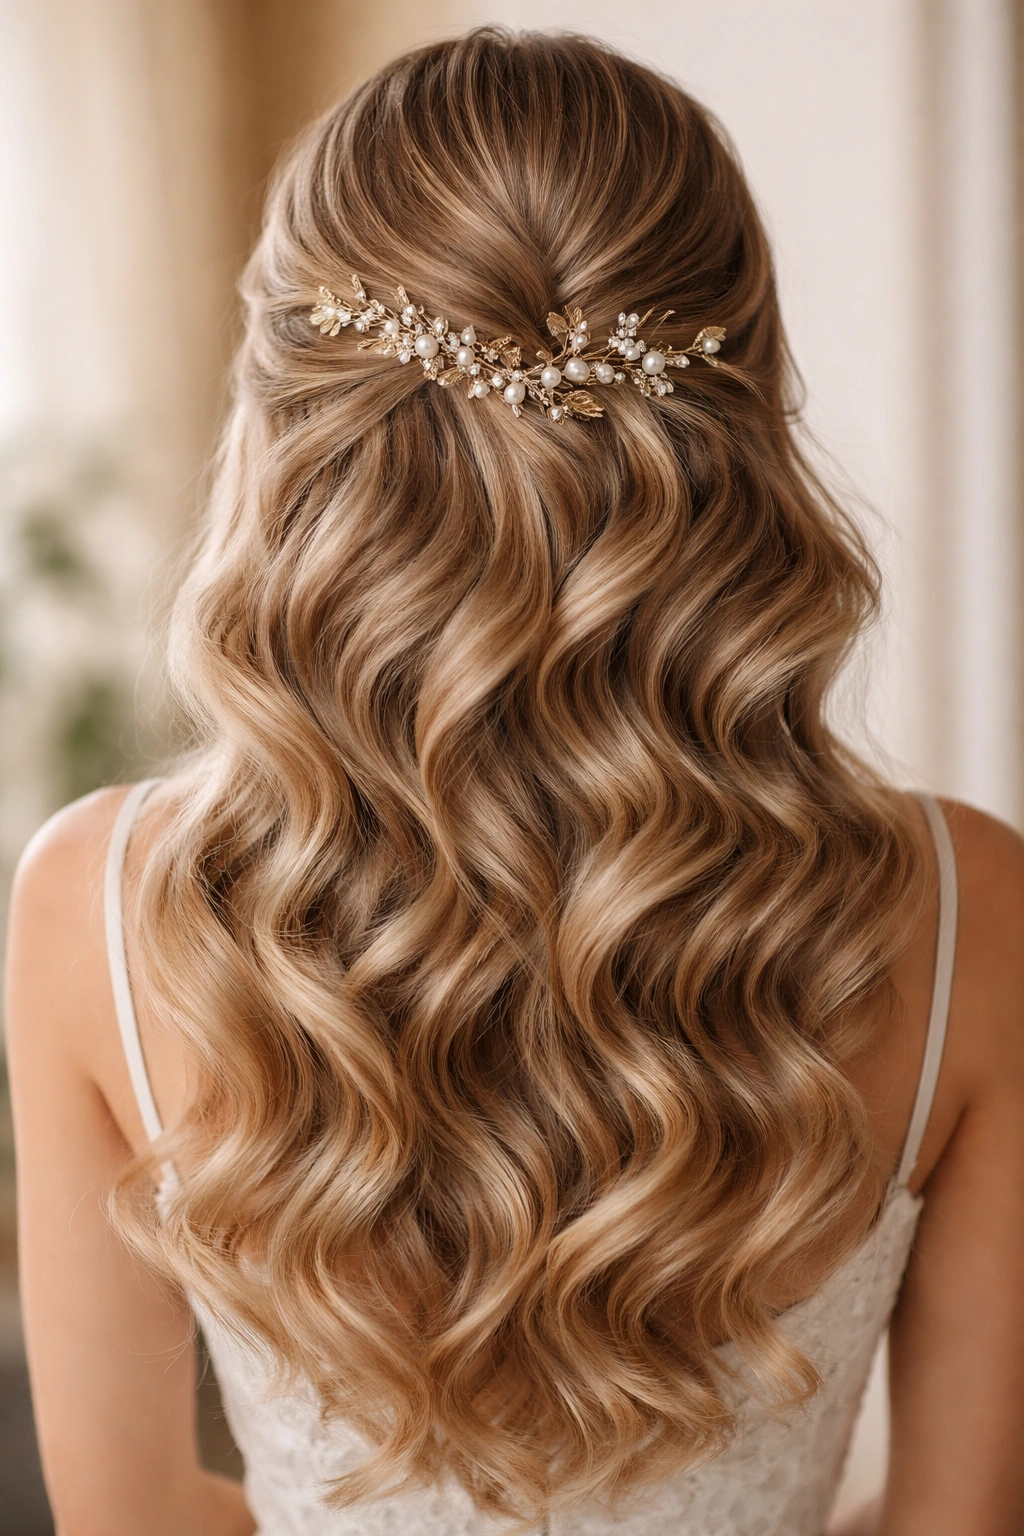
7. Tousled Waves with a Delicate Headpiece
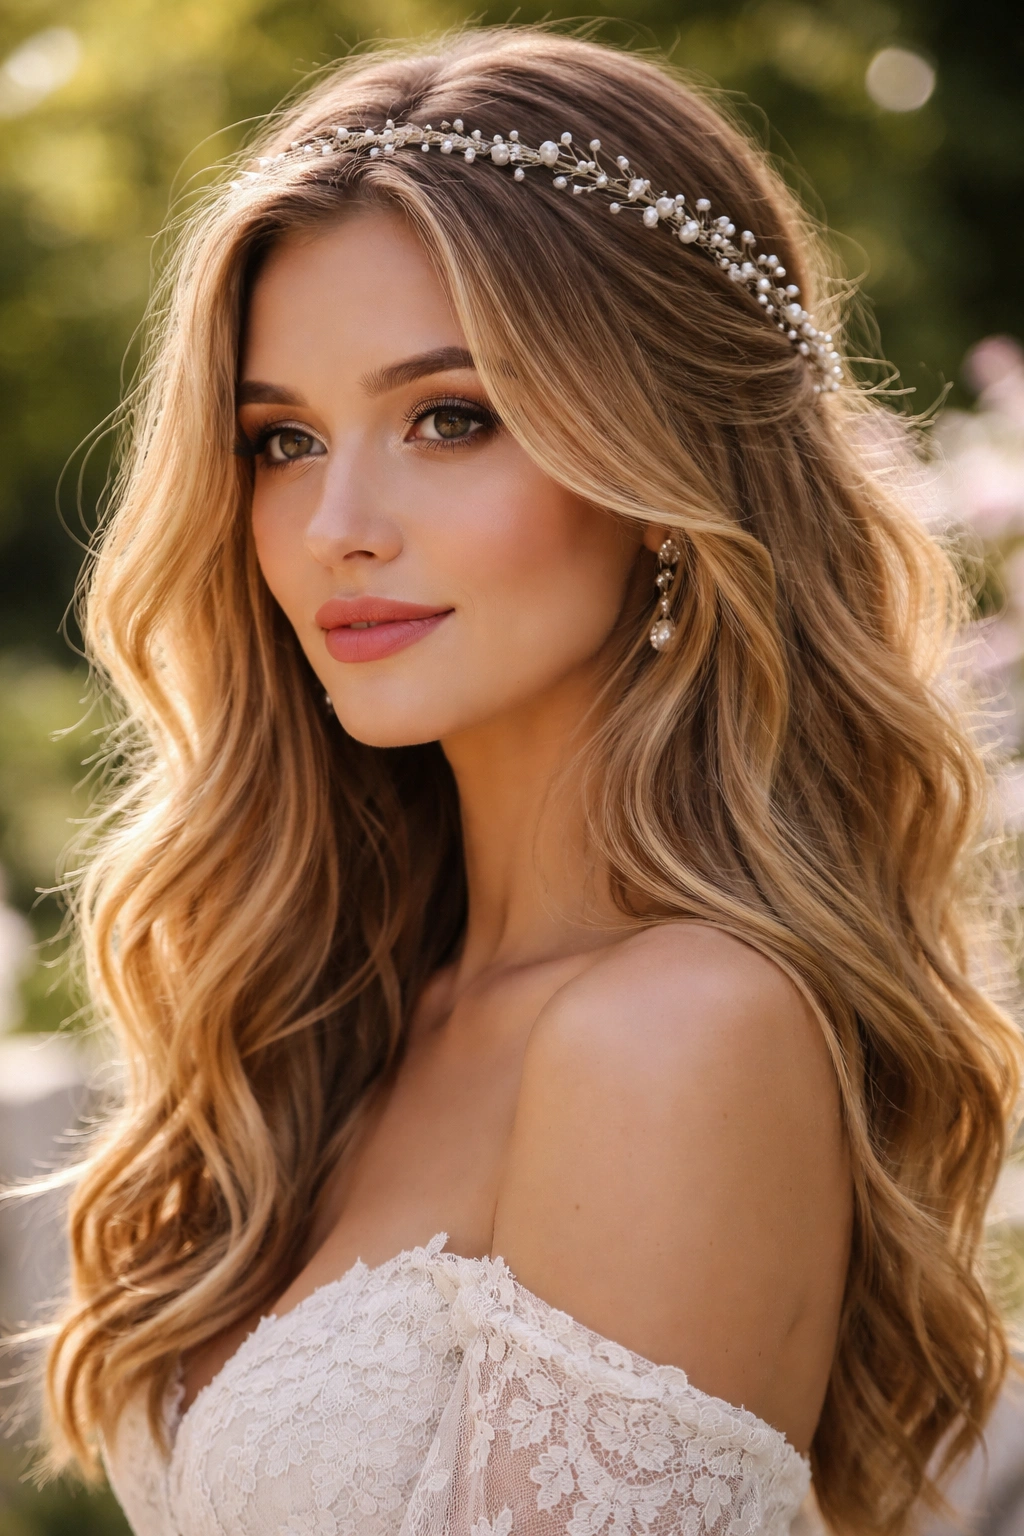
Combining tousled, undone waves with a delicate headpiece—whether it’s a thin metallic band, a pearl-adorned comb, or a vintage-inspired piece—creates an instantly romantic, bohemian aesthetic. The waves should feel messy and lived-in, while the headpiece adds just enough structure and embellishment to feel celebratory. This style is perfect for brides or wedding guests who want maximum romance with minimal fuss.
Why This Works for Romantic Celebrations
The contrast between undone waves and a refined headpiece creates visual interest and elevates the look without it feeling overly formal. A good headpiece draws attention to your face and hair while feeling like a natural accent rather than an afterthought. This combination photographs beautifully and works for outdoor, garden, or bohemian-themed celebrations.
How to Create It
- Create loose waves using a larger curling iron (1.5 to 2 inches) or a waving tool
- Don’t worry about making the waves perfect—asymmetry and variation are the whole point
- Tousle waves with your fingers and a light texturizing spray to enhance the undone quality
- Flip your head upside down and shake out the waves to add volume and movement
- Position your chosen headpiece at a flattering angle—typically just back from the center or slightly off to one side
- Secure the headpiece with bobby pins hidden underneath
- Leave all or most of your hair down, allowing the waves to frame your face and shoulders
- Finish with a light hairspray mist
Worth knowing: Headpiece security is crucial. Use at least three bobby pins and test the stability by gently shaking your head before committing to the look.
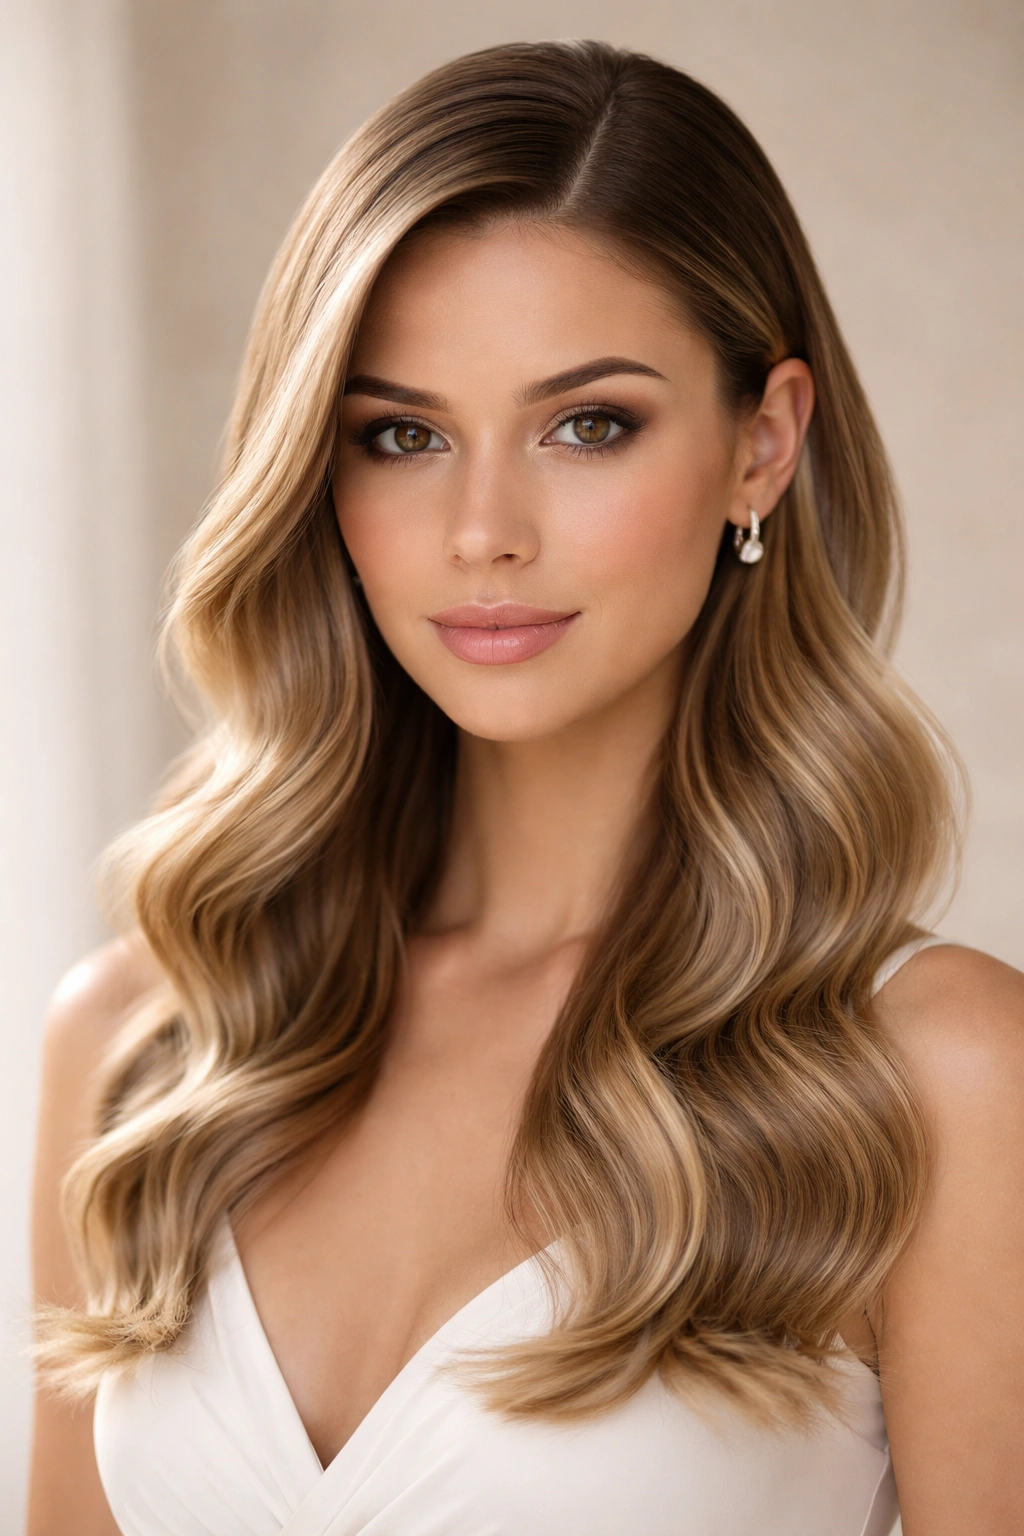
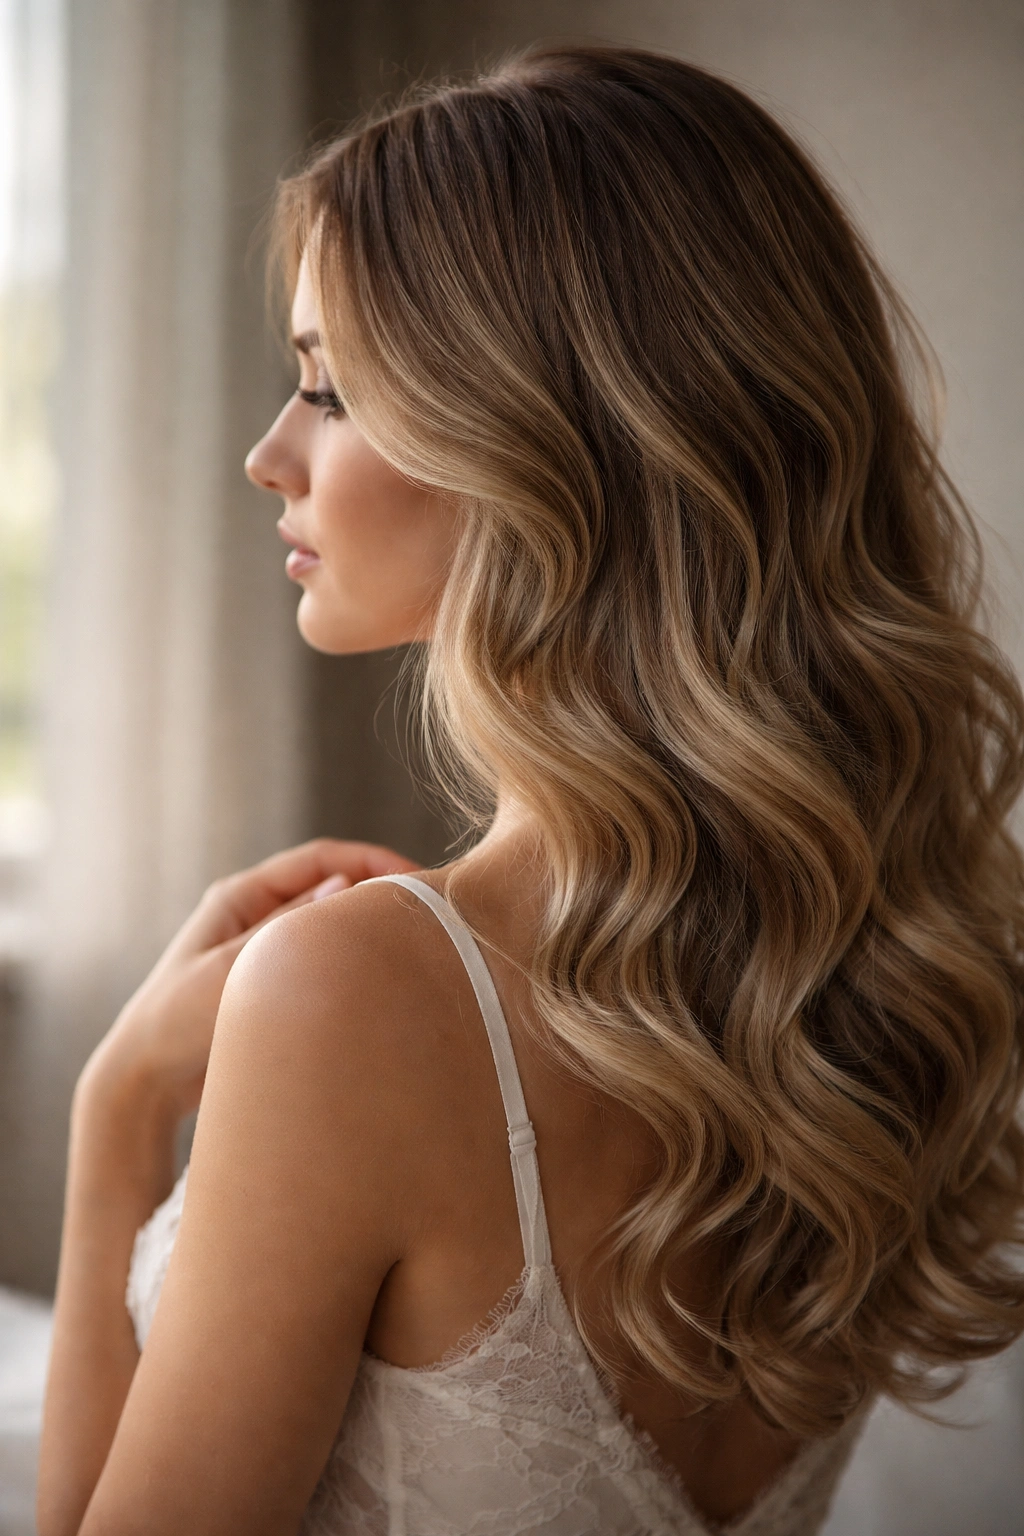
8. Romantic Long Waves with Gentle Volume
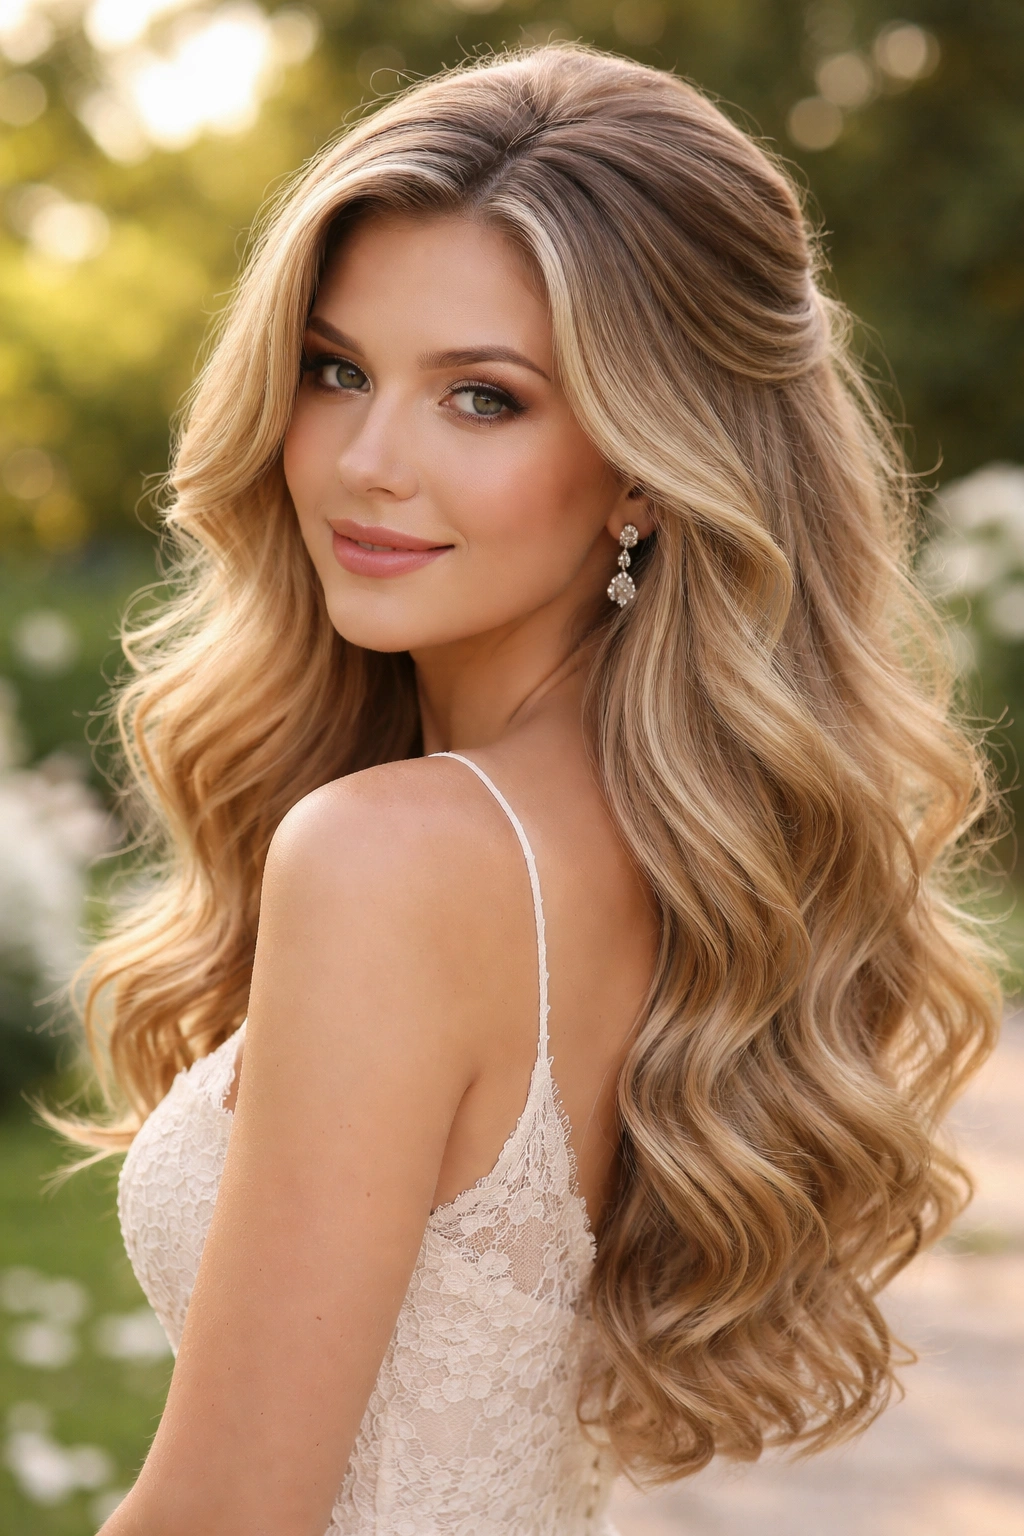
Long, flowing waves are the quintessential romantic hairstyle, and they work beautifully for any wedding setting. The waves should have enough volume at the roots to feel substantial and intentional without looking teased or overdone. This is essentially a “do everything right and let your hair do the work” style—elegant, timeless, and universally flattering. Long waves work on virtually any hair type and length, from mid-back to floor-length hair.
Why This Works for Every Wedding
Long wavy hair is the default romantic aesthetic for a reason. It complements every dress style, every makeup approach, and every wedding aesthetic from casual to formal. It photographs beautifully, feels celebratory without being costume-like, and works equally well for brides, bridesmaids, and guests. Long waves are forgiving—they’ll look beautiful even if they lose some definition throughout the day.
How to Create It
- Apply a volumizing mousse or lightweight spray to damp hair, focusing on the roots
- Blow-dry hair with a round brush, lifting at the roots and smoothing the lengths
- Divide your hair into sections (top, middle, bottom) and curl each section loosely with a 1.25 to 1.5-inch curling iron
- Curl away from your face on the front sections and alternate directions on the back for natural-looking waves
- Allow curls to cool completely before brushing through
- Once cooled, brush through gently with your fingers or a paddle brush to create soft, flowing waves
- Add subtle volume at the crown by gently backcombing and smoothing the top layer
- Finish with a flexible-hold hairspray that won’t feel sticky or stiff
Pro tip: Don’t brush through the waves too much—two to three passes with your fingers is ideal. Overcombing will eliminate the wave definition entirely.
9. Twisted Wavy Crown for Boho-Chic Elegance
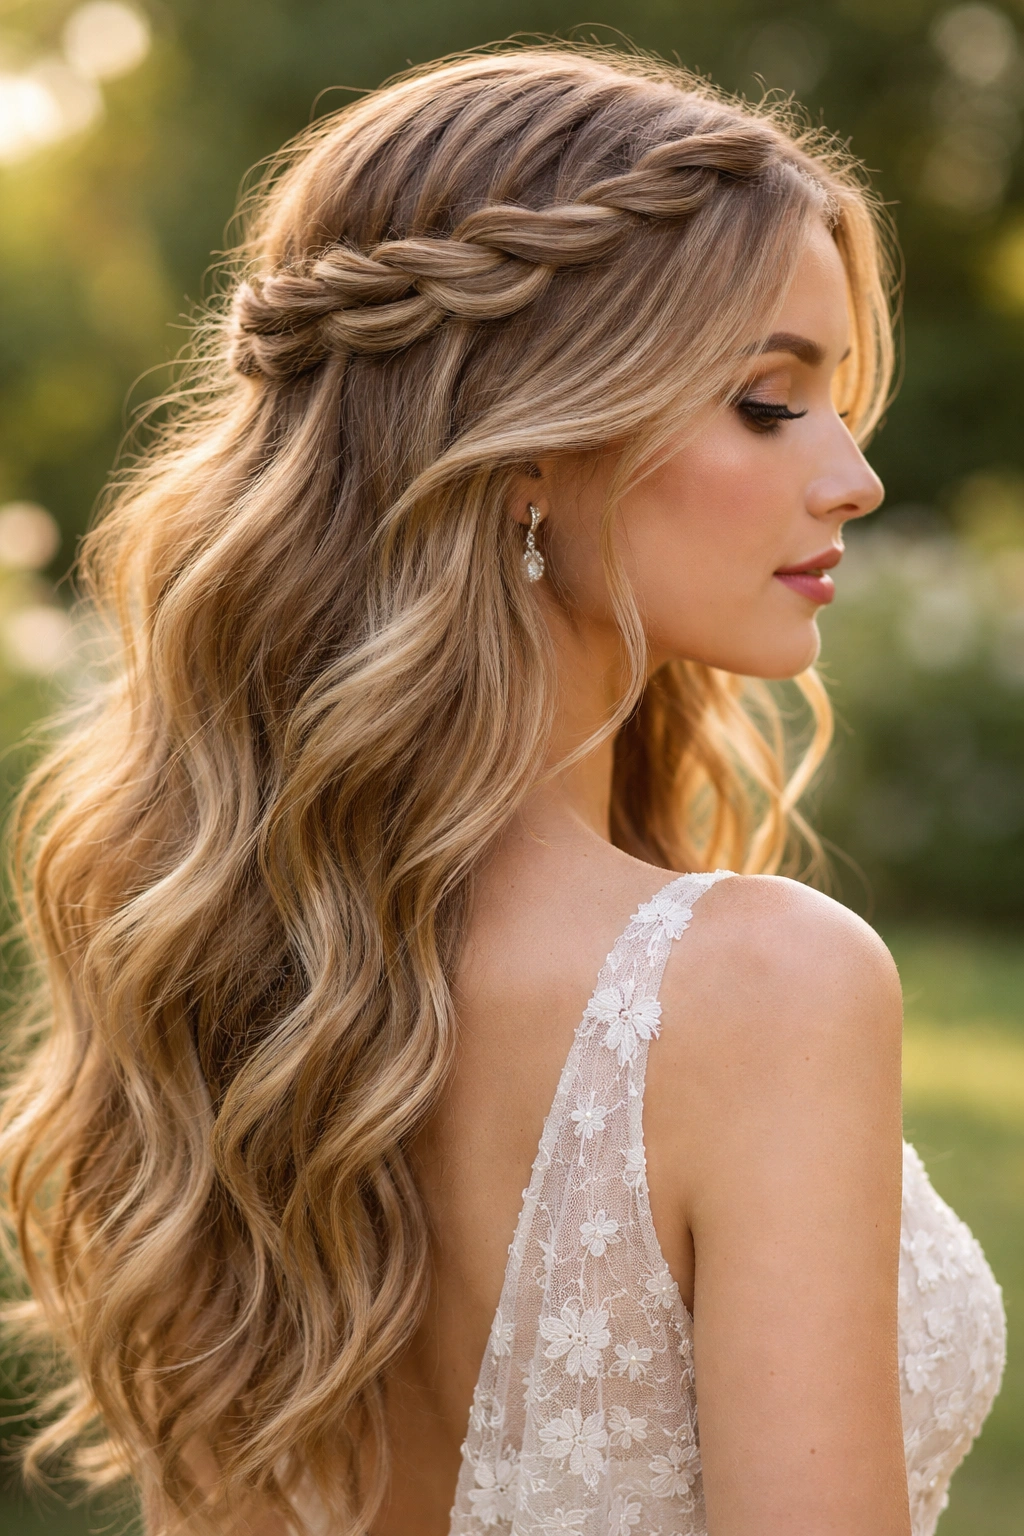
A twisted crown is an elegant way to add detail and structure to wavy hair while maintaining a relaxed, bohemian aesthetic. Two or more twisted sections are wrapped around the crown of your head and secured at the back, creating an intricate frame for your face. The rest of your hair flows down in waves. This style is perfect for outdoor, garden, or casual weddings where you want something special without feeling overly formal or restrictive.
Why This Works for Bohemian Weddings
Twisted crowns add handcrafted elegance and intentionality without feeling stiff or overdone. The style naturally photographs beautifully from the front (showing the crown detail) and from the side and back (showing the flowing waves). It’s also incredibly practical—the twisted sections hold everything in place without needing excessive pins or products.
How to Create It
- Create soft, loose waves throughout your hair using a curling iron
- Brush through the waves gently to soften them
- Take a section of hair from above one ear, approximately 2 inches wide
- Twist this section loosely toward the back of your head, pulling it slightly taut but not tight
- Secure the twist at the back with a bobby pin
- Repeat with another section from above the opposite ear, twisting toward the back
- These two twisted sections should create a crown effect framing your face
- Optional: add a third twisted section down the center or one more on each side for extra detail
- Leave the back section of hair in soft waves, allowing it to flow freely
- Finish with a flexible-hold hairspray
Real talk: This style is easier than it looks, and practice makes it genuinely simple to execute in five minutes.
10. Side-Swept Waves for Timeless Romance
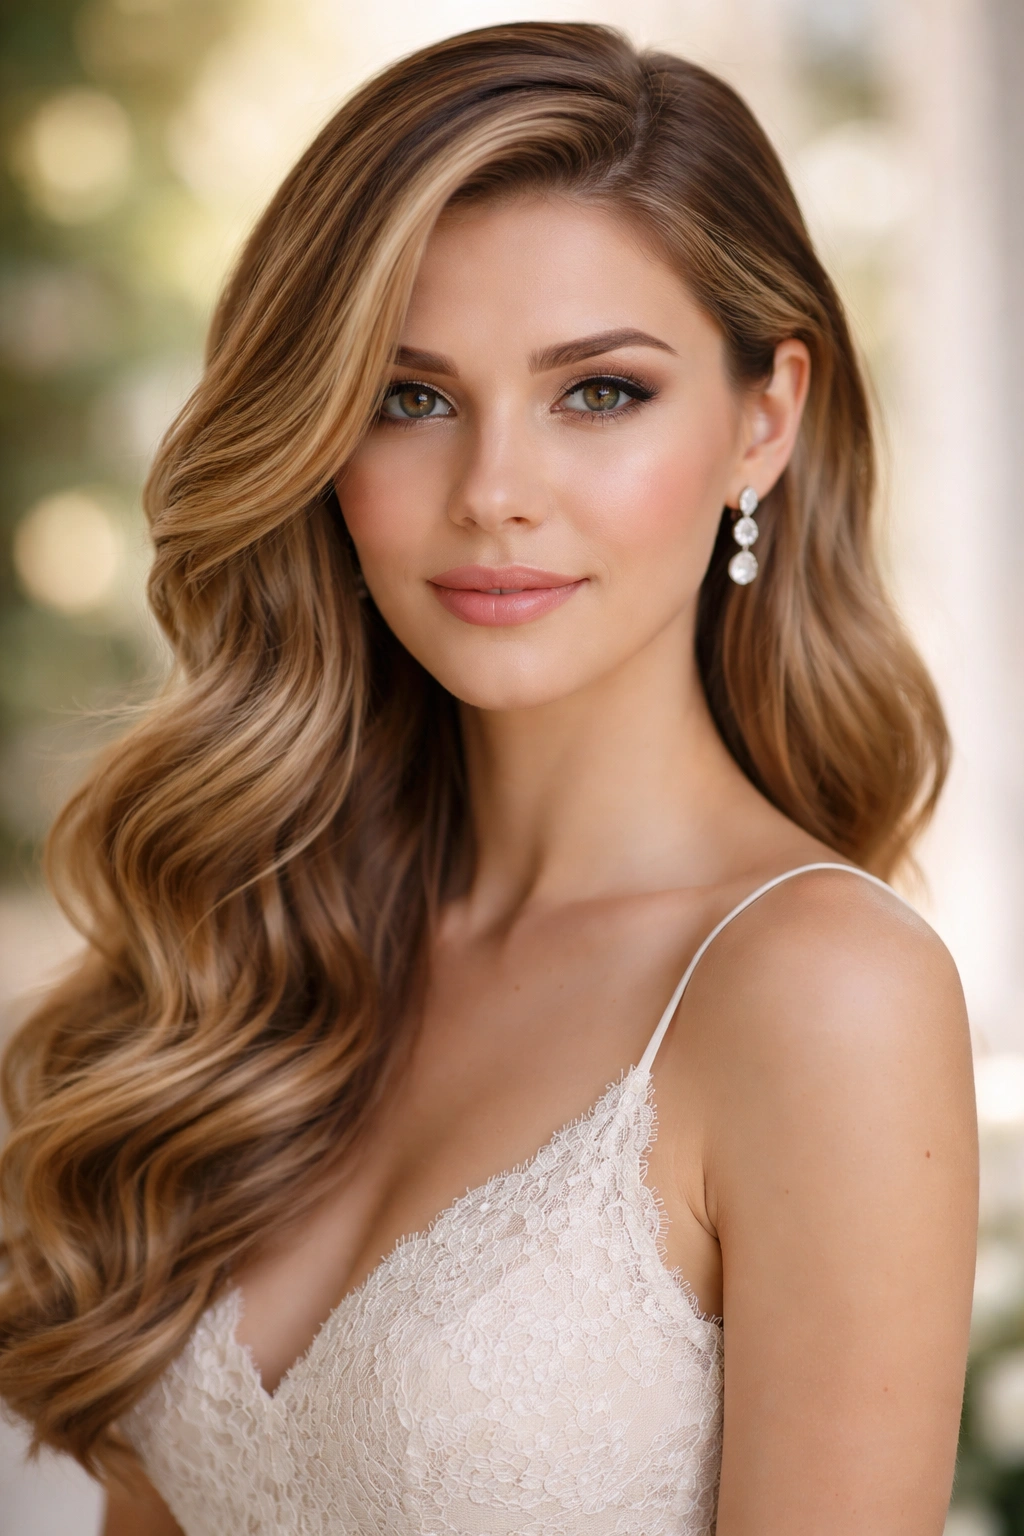
Side-swept waves are a timeless, universally flattering style that works for nearly every face shape and wedding aesthetic. All your hair is swept dramatically to one side and styled in soft, flowing waves. The simplicity of the style is actually its strength—it’s elegant, romantic, and never looks overdone. Side-swept waves work beautifully for any hair length from shoulder-length to very long, and they photograph gorgeously from virtually every angle.
Why This Works for Formal and Casual Weddings
Side-swept waves offer maximum elegance with minimal complexity. The asymmetry flatters most face shapes, and sweeping hair to one side creates a graceful, intentional look without requiring intricate styling. This style works for traditional, bohemian, vintage, and modern wedding aesthetics equally well. It’s also practical—you can see clearly throughout the celebration, and the style will hold beautifully all day.
How to Create It
- Create soft waves throughout your hair using a 1.25-inch curling iron
- Brush through the waves with your fingers to soften them into a more relaxed texture
- Use a volumizing mousse at the roots and blow-dry with a round brush to create subtle volume at the crown
- Brush all your hair toward one side dramatically—sweep it across your head toward that shoulder
- Secure the swept hair at the back of your head with bobby pins hidden underneath the wave layer
- Leave some face-framing pieces loose around your temples and cheeks
- Finish with a light hairspray mist
Pro tip: Create volume at the crown on the opposite side from which you’re sweeping—this creates a balanced, flattering frame for your face rather than flattening everything to one side.
11. Wavy Bubble Ponytail for Modern Fun
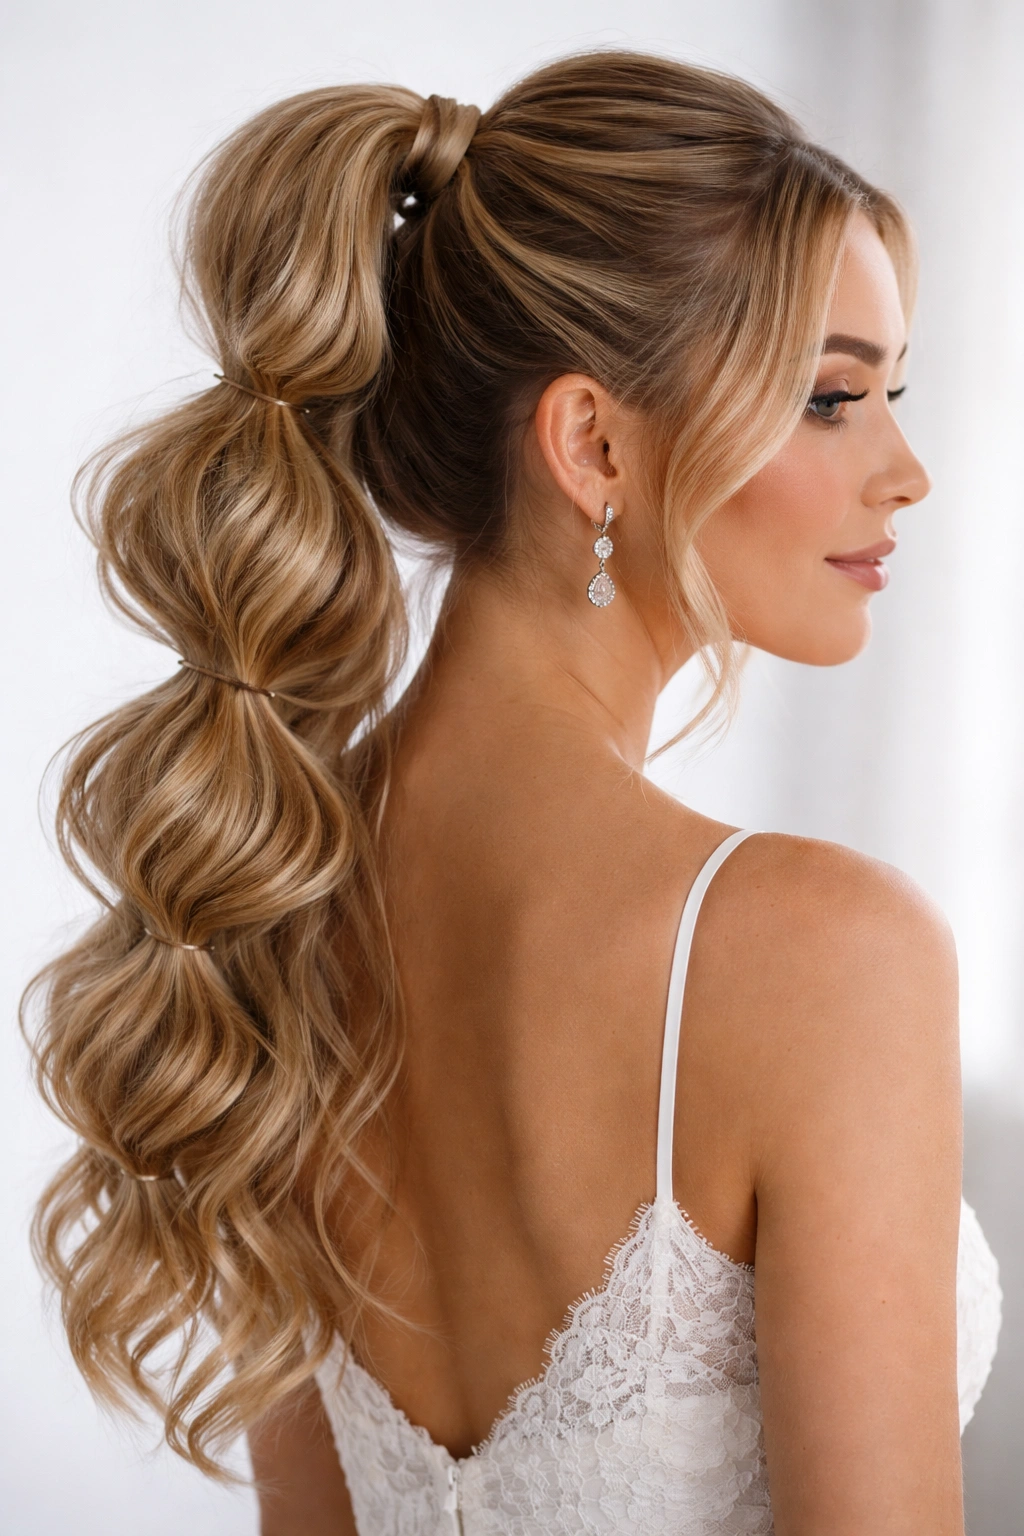
A bubble ponytail takes the classic ponytail and adds visual interest by creating multiple “bubbles” of texture using elastic bands spaced down the length of the ponytail. When the ponytail is made of soft waves rather than straight hair, it becomes a romantic, playful style that photographs beautifully. This is perfect for weddings that lean toward the fun and celebratory side or for bridesmaids who want something special without being too formal.
Why This Works for Casual and Playful Weddings
Bubble ponytails feel modern and intentional while still being romantic and appropriate for celebration. The style adds visual interest and movement without requiring elaborate styling. It’s particularly effective in photographs, where the texture and dimension of the bubbles become a design feature rather than just a hairstyle. This works beautifully on mid-length to long hair.
How to Create It
- Create soft waves throughout your hair using a 1.5-inch curling iron
- Brush through the waves gently to create softer, more relaxed texture
- Gather hair into a high or mid-height ponytail and secure with an elastic
- Starting just below the first elastic, take another elastic and wrap it around the ponytail, pulling the section above it gently outward to create a bubble
- Repeat this process down the length of the ponytail, spacing the elastics about 2-3 inches apart
- After each elastic, gently pull and fluff the bubble to make it fuller and more dimensional
- Leave the very end of the ponytail wavy and flowing below the last bubble
- Finish with hairspray to set everything
Insider note: Use clear elastics that match your hair color, or hide them completely by wrapping a small section of hair around each elastic.
12. Undone Waves with Maximum Volume at the Crown

This style emphasizes volume and movement, creating the impression that your hair has incredible texture and dimension. The waves are relaxed and undone throughout, but there’s intentional volume at the crown and roots, creating a lifted, energetic look. This is ideal for anyone who wants their waves to feel substantial and present without looking overly styled. It works beautifully on hair of any density and length.
Why This Works for Photographs and All-Day Wear
Volume at the crown creates a flattering frame for your face and photographs beautifully in bright light. The undone quality of the waves prevents the style from looking stiff or uncomfortable, while the volume gives it intentionality and presence. This style also holds beautifully throughout a long day of celebration—even as waves relax slightly, the overall volume and movement remain impressive.
How to Create It
- Apply a volumizing mousse to damp hair, focusing heavily on the roots and crown area
- Blow-dry hair with a round brush, lifting sections at the root and creating height at the crown
- Once dry, gently backcomb the crown area to create texture and hold for volume
- Smooth the top layer over the backcombing with a paddle brush so it looks polished, not messy
- Use a 1.25-inch curling iron to create soft waves throughout the rest of your hair
- Tousle the waves with your fingers and a light texturizing spray
- Focus on creating movement and dimension rather than uniform curl definition
- Finish with a lightweight, flexible-hold hairspray that won’t compress the volume
Worth knowing: Volumizing mousse applied to damp hair and blow-dried in creates longer-lasting volume than any backcombing technique alone.
13. Wavy Hair with a Decorative Hair Comb or Clip
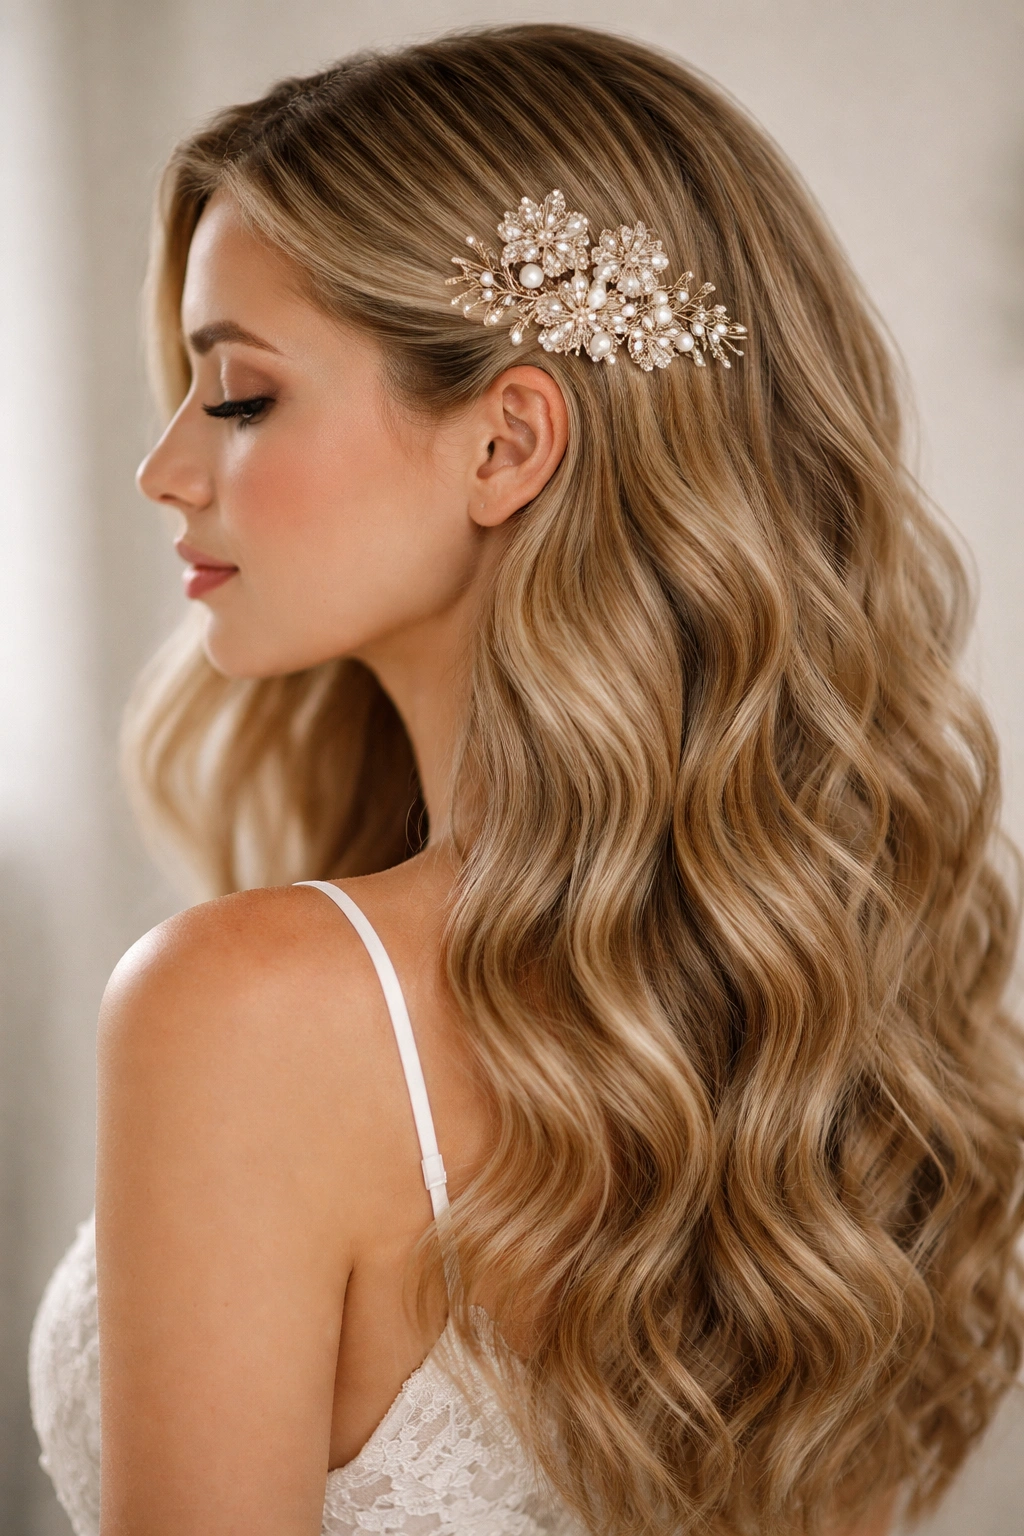
A beautiful decorative comb or clip becomes a style statement when placed thoughtfully in wavy hair. Rather than pulling hair back severely, the comb simply anchors one side or a section of waves while allowing the rest to flow freely. This approach works beautifully on anyone who loves their wavy hair but wants to add a special detail for the occasion. The comb or clip becomes jewelry for your hair rather than a functional necessity.
Why This Works for Special-Occasion Styling
A decorative comb or clip elevates wavy hair from simple to celebratory without requiring major styling changes. It photographs beautifully and becomes a detail guests will notice and admire. This approach works for any wedding aesthetic—a vintage comb for a traditional wedding, a modern geometric clip for a contemporary celebration, or a delicate floral comb for a garden setting. The style allows you to showcase your hair’s natural texture while adding intentional embellishment.
How to Create It
- Create soft waves throughout your hair using a curling iron or your preferred waving method
- Brush through the waves gently to achieve the texture you want
- If desired, create subtle volume at the crown using a round brush and volumizing mousse
- Decide where you want the comb or clip to sit—typically on one side toward the back, or slightly off-center
- Take a small section of hair (about 1-2 inches) from that area and twist or loosely braid it
- Secure the twist or braid with the decorative comb or clip
- Leave the rest of your hair in flowing waves
- Optional: gently pull out a few small pieces around the comb for a softer, more undone look
- Finish with flexible-hold hairspray
Pro tip: Choose a comb or clip that either matches your hair color or complements your wedding outfit and accessories.
14. Sleek and Wavy Hybrid for Modern Edge
This style combines sleek, smooth sections with soft waves to create a modern, artistic look that feels both polished and romantic. Typically, the roots and crown area are smoothed and sleek while the mid-lengths and ends feature soft waves. This creates visual interest and dimension while maintaining a refined, intentional aesthetic. It works beautifully on any hair length and creates a look that photographs impressively from every angle.
Why This Works for Contemporary Weddings
The hybrid sleek-and-wavy approach feels modern and intentional without being costume-like. It offers the sophistication of a sleek style with the romance of waves, creating a balanced, elevated look. This style is particularly striking in photographs because the contrast between sleek and textured sections creates visual interest. It works for sophisticated, modern, or minimalist wedding aesthetics.
How to Create It
- Blow-dry hair smooth and straight, using a paddle brush and focusing on creating a polished, sleek finish at the roots and crown
- Once the roots and crown are sleek, use a 1.25-inch curling iron to create soft waves in the mid-lengths and ends
- The contrast between sleek roots and wavy ends should be clear and intentional
- Brush through the waves with your fingers to soften them slightly—you want waves, not tight curls
- Optional: add subtle volume at the crown by gently backcombing underneath the sleek top layer
- You can leave all hair down or pin back a small section at the sides while keeping waves flowing
- Finish with a flexible-hold hairspray that maintains the sleek sections without stiffness
Real talk: Getting the transition between sleek and wavy to look intentional rather than accidental takes practice, so do a trial run before your wedding day.
15. Romantic Back Waves with Decorative Accessories
This style focuses the visual interest at the back of your head by creating particularly full, dimensional waves in the back section while keeping the front and sides softer and face-framing. Decorative accessories—fresh flowers, greenery, pearl pins, or vintage clips—are woven throughout the back waves, creating an intricate, romantic focal point. This is ideal for brides or anyone who wants their back to look as beautiful as their front (especially important for ceremony photos).
Why This Works for Bride and Formal Styling
Creating a focal point at the back of your head ensures you look beautiful in ceremony photos, which are typically taken from behind or at angles that show your back and hair. Adding flowers or decorative accessories transforms simple waves into an intricate design. This approach works beautifully for formal, bohemian, garden, and romantic weddings. The detail and intention are apparent in every photo.
How to Create It
- Create soft, full waves throughout your hair, with extra attention to the back section
- Brush through the waves gently to create soft, romantic texture
- Add subtle volume at the crown using a volumizing mousse and round brush
- Gather hair slightly at the crown or sides (optional—depends on whether you want an updo feel or all hair down)
- Weave fresh flowers, greenery, or decorative accessories throughout the back waves
- Space accessories throughout rather than clustering them in one spot
- Leave front and side sections softer and less adorned to frame your face
- Make sure the back section feels full and dimensional, with waves that catch light and movement
- Finish with a flexible-hold hairspray
Pro tip: If using fresh flowers, have your stylist or a trusted friend install them just before the ceremony so they stay fresh and vibrant throughout the day.
16. Modern Wavy Lob with Textured Waves
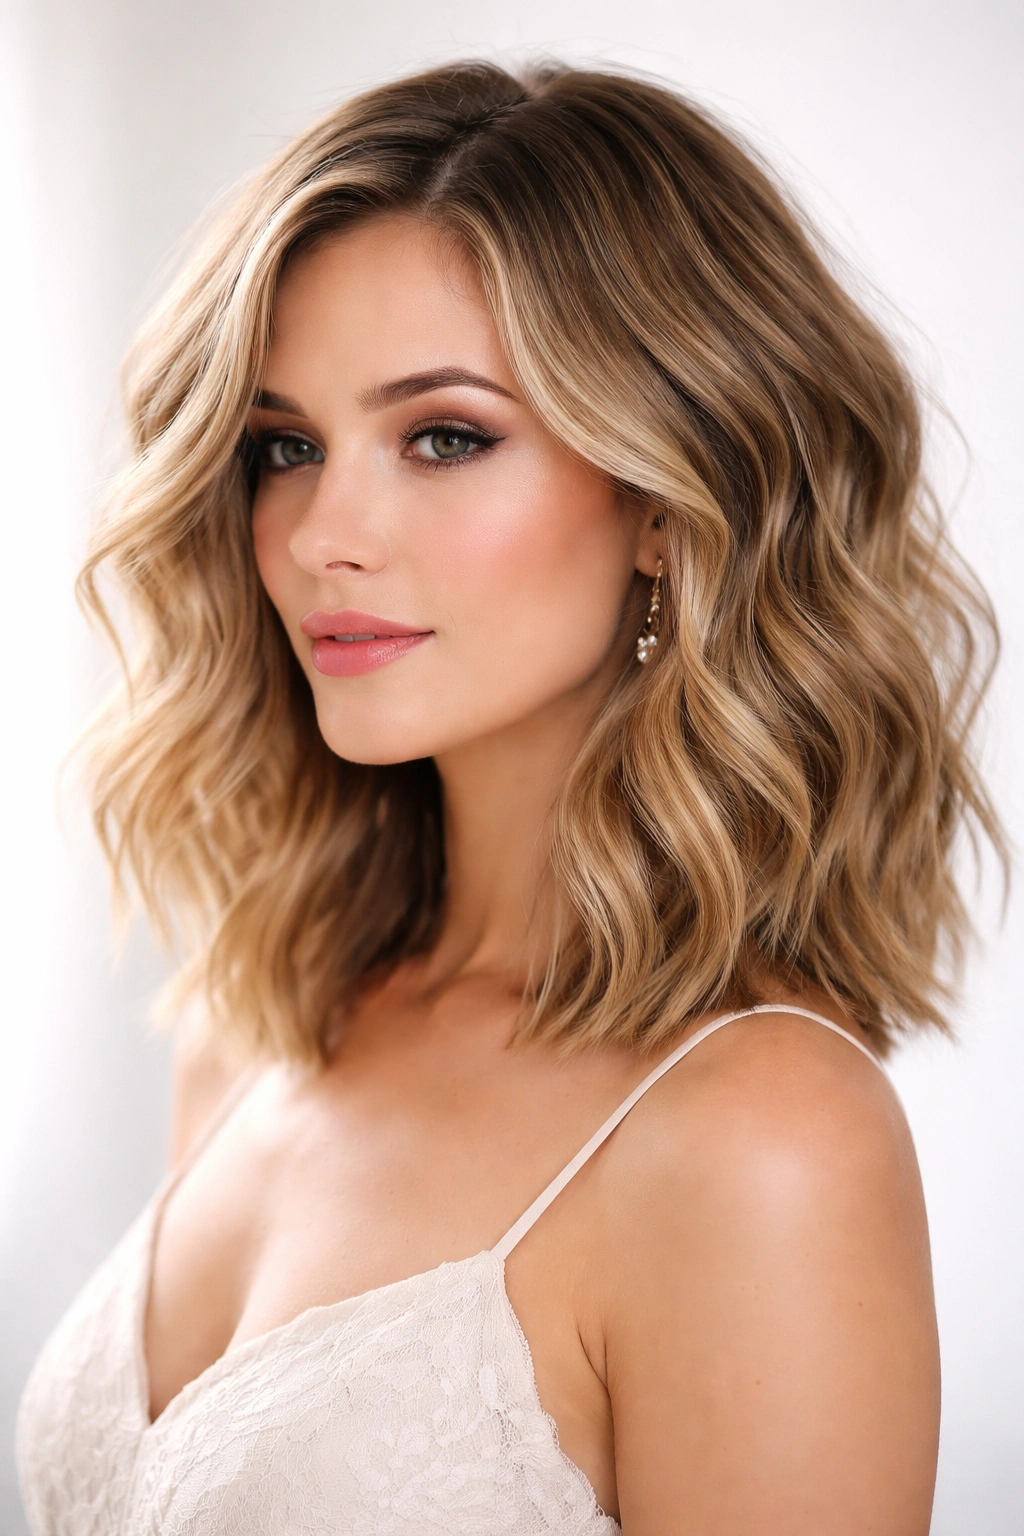
A lob (long bob hitting around shoulder-length) styled with textured waves creates a modern, chic aesthetic that bridges the gap between short and long hair. The waves should have plenty of texture and movement, creating dimension and visual interest throughout. This style feels contemporary and fashion-forward while still being romantic and appropriate for celebration. It’s particularly striking on anyone with naturally thick or wavy hair.
Why This Works for Modern Weddings
A textured lob is the perfect length for maximum movement and dimension—shorter hair allows waves to bounce and move more freely than very long hair. The style feels current and intentional without being trendy or temporary. It photographs beautifully from all angles and works with virtually any wedding aesthetic, from bohemian to minimalist modern. The lob is also incredibly practical—it’s easier to manage throughout the day than longer hair.
How to Create It
- Start with a textured lob cut that’s slightly shorter in the front and longer in the back if possible
- Apply a volumizing mousse to damp hair and blow-dry with a round brush for natural volume
- Use a 1.25-inch curling iron to create waves throughout, curling away from your face on the front sections
- Alternate curl direction on the back sections to create natural-looking, multidirectional waves
- Brush through the waves with your fingers to create soft, textured movement
- Add texture throughout using a texturizing spray or sea salt spray
- Shake out the waves by flipping your head upside down to add volume and movement
- You can leave all hair down or pull back one or both sides with bobby pins
- Finish with a flexible-hold hairspray that maintains movement without stiffness
Worth knowing: Textured waves on a shorter cut will feel fresher and bouncier throughout the day than the same waves on very long hair, which tend to fall flat as the day progresses.
Final Thoughts
The perfect wavy hairstyle for your wedding is the one that makes you feel confident, beautiful, and like yourself—just slightly elevated for the occasion. Whether you choose something simple like soft side waves or more intricate like a braided wavy updo, the principle remains the same: waves add romance and movement while remaining sophisticated and appropriate for celebration. The best part about wavy hairstyles is their flexibility; even if your waves relax or shift throughout the day, they’ll still look intentional and lovely.
Most of these styles can be created at home with basic tools and products, though a professional styling session beforehand gives you confidence and takes the stress out of execution on the actual day. If you’re doing your own hair, do a full practice run at least once beforehand—this eliminates surprises and gives you time to troubleshoot. Pay attention to which products make your waves hold longest and which techniques create the texture you love most.
Remember that wedding photos are typically taken in various lighting conditions and from multiple angles. The waves that look perfect in your bathroom mirror might photograph differently in sunlight or dim indoor lighting. When you do your trial run, take photos in different lighting to see how your chosen style translates to camera. The right hairstyle should make you feel beautiful not just in person but also in every photograph—because those images will bring back memories of your celebration for years to come.