Styling wavy and curly hair doesn’t mean you’re limited to wearing it down—in fact, updos offer a wonderful way to showcase your texture, reduce frizz, and create elegant looks for any occasion. The thing is, updos for wavy and curly hair require a different approach than techniques designed for straight hair. Your texture has natural volume and movement built right in, which means you can create updos with incredible dimension and visual interest that straight-haired updos simply can’t match. The challenge is knowing which techniques actually work with your curl pattern rather than against it, how to secure your waves and curls without flattening them, and which styles let your texture shine rather than tame it into submission.
What makes updos for wavy and curly hair unique is that you’re not trying to create smooth, sleek perfection—you’re embracing the texture you’ve got and building a style that celebrates it. A well-designed updo for your hair type can actually look better when a few pieces escape or frizz slightly, because those flyaways and stray curls add to the romantic, effortless vibe. You’ve got the advantage of natural grip and hold that straight hair doesn’t have, so your updo will stay put without needing industrial amounts of product or bobby pins.
The updos in this guide work with waves ranging from loose, beach-wave texture to tight ringlets, and everything in between. Some are dressy enough for weddings and formal events, while others are perfect for a casual workday or weekend plans. All of them are designed to be achievable at home without professional styling experience, though they look polished enough that you could wear them anywhere with confidence.
1. The Twisted Bun
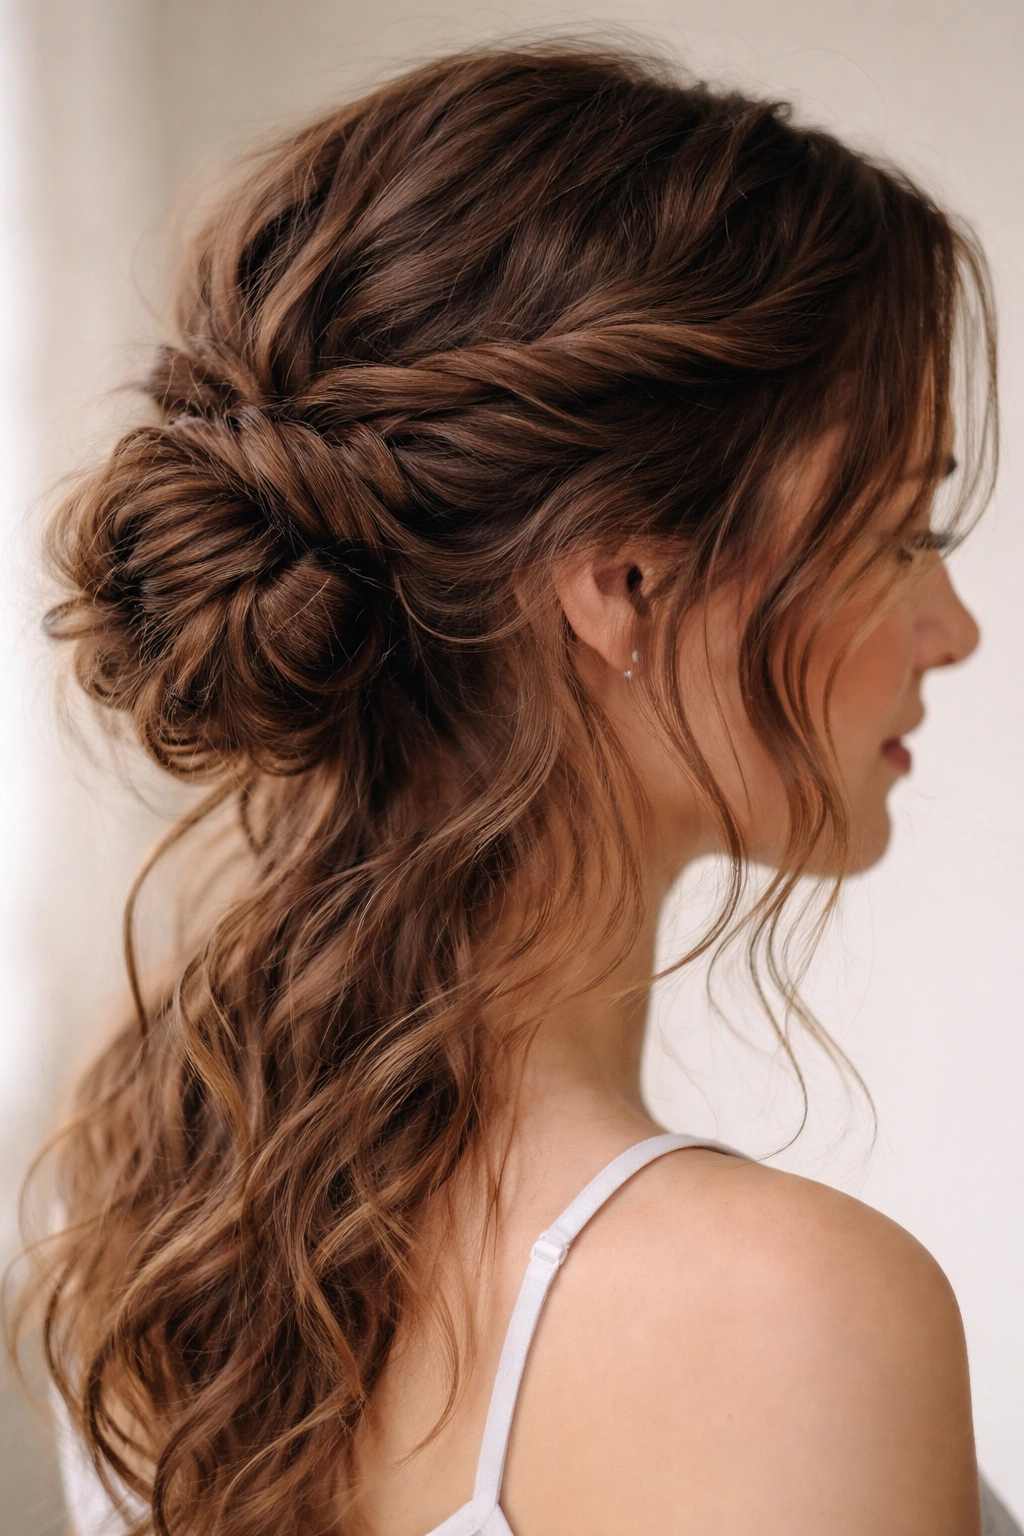
This updo is a go-to for wavy hair because it works with your natural wave pattern instead of fighting it. Instead of gathering hair smoothly into a ponytail, you’re creating gentle twists on either side of your head and wrapping them together, which keeps your waves intact while creating visual interest and texture.
Why This Works for Wavy Hair
The twisted bun plays to wavy hair’s strengths because you’re not trying to smooth everything down flat. Each twist follows the natural path of your waves, so the style actually looks fuller and more dynamic than a traditional bun would on your hair type. The twisting motion gently encourages your waves into a cohesive style without crushing the texture you’ve cultivated. Because you’re working with two separate twists rather than one smooth ponytail, the final bun has natural dimension and dimension that photographs beautifully.
How to Create the Twisted Bun
- Start with wavy hair that’s either air-dried and lightly scrunched or wave-dried with a diffuser (don’t worry if it’s not perfect)
- Take a small section from one temple and gently twist it back toward the crown, following the natural contours of your head
- Pin this twist loosely at the crown with a bobby pin, leaving the end loose
- Repeat on the opposite side, twisting the other temple section back to meet the first twist
- Gather both loose ends plus any remaining hair at the crown into a low ponytail holder
- Twist this ponytail loosely around itself to form a spiral bun shape
- Wrap it gently into a bun and secure with bobby pins, leaving a few wave tendrils loose around the face and nape
Pro tip: Mist lightly with a flexible hold spray—not a heavy-duty formula that’ll crunch your waves—to help the twists stay in place throughout the day without feeling stiff.
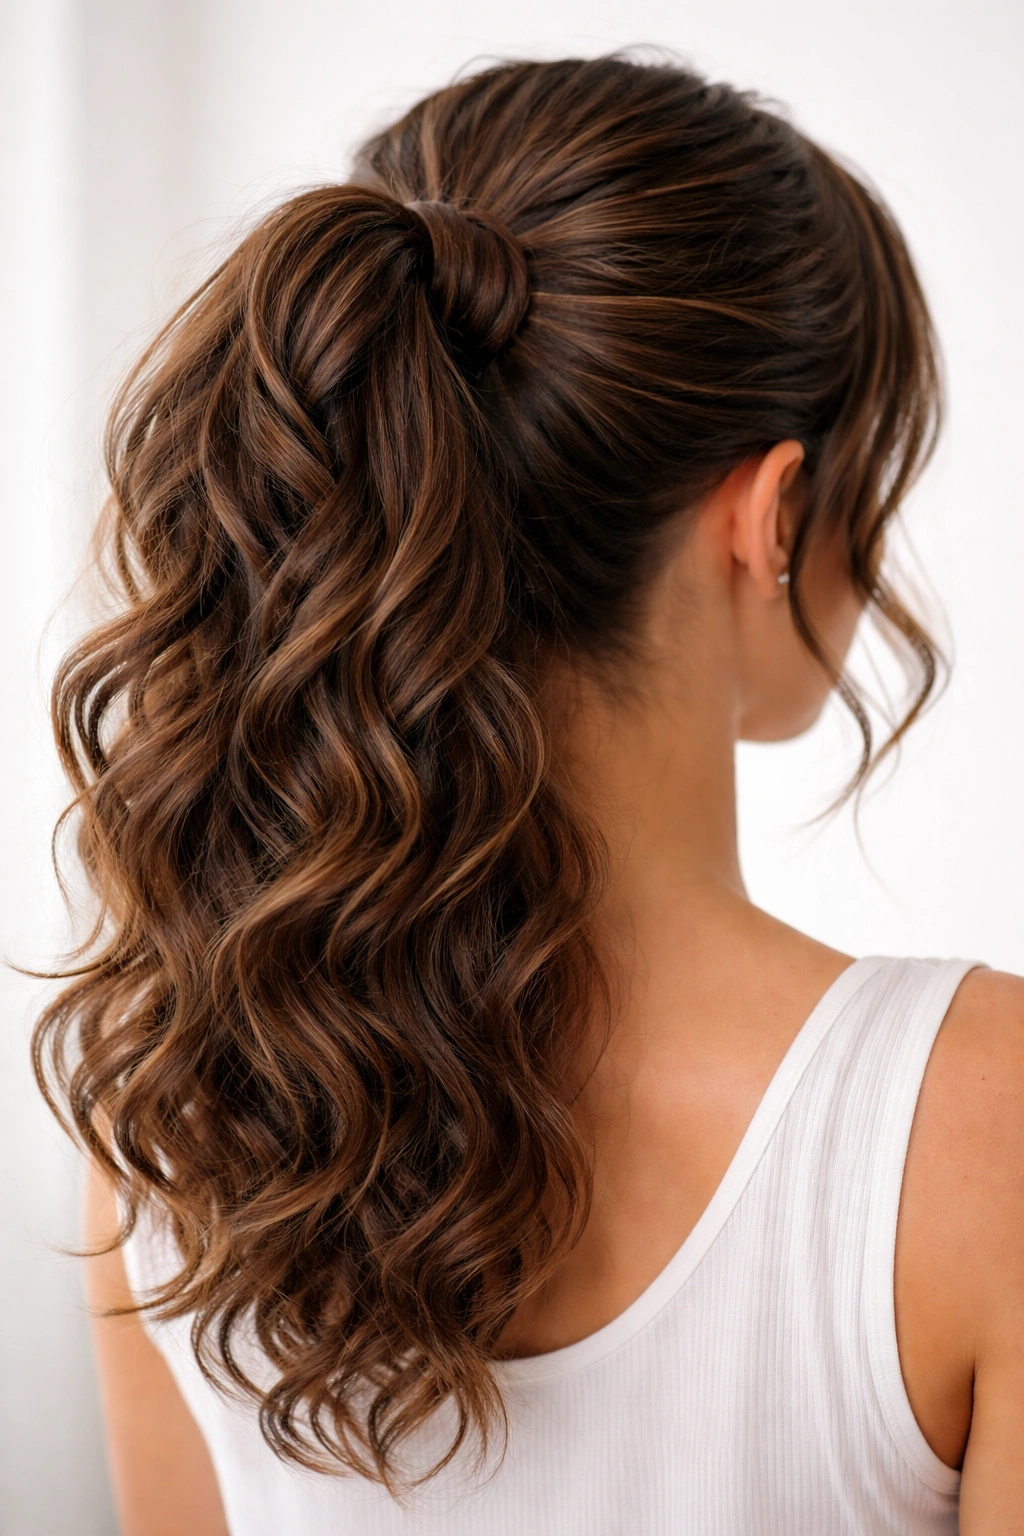
2. The Textured High Ponytail
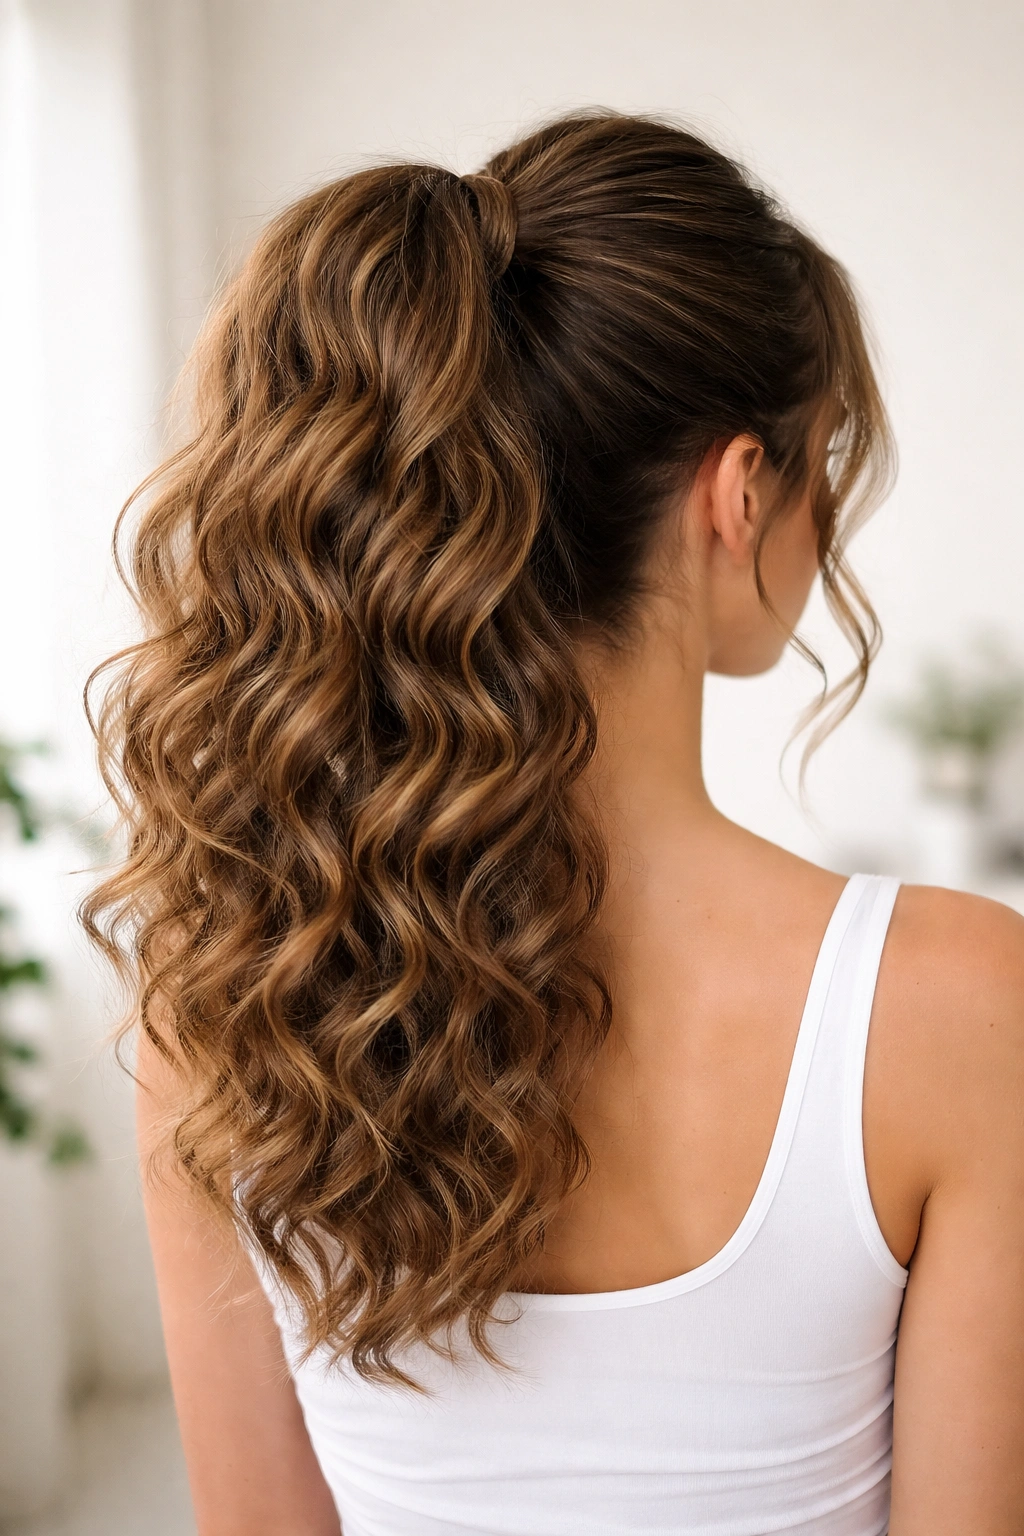
A high ponytail sounds basic, but when you’re working with wavy or curly hair, you can transform it into something that looks intentionally tousled and modern rather than simply pulled back. The key is using the natural height and texture of your curls to create volume at the crown, then letting some curl definition show throughout the ponytail itself.
What Makes This Different Than Regular Ponytails
With straight hair, a sleek high pony requires smoothing and product to look polished. With your hair, you want the opposite approach—you’re aiming for a ponytail that looks deliberately textured and full. The high placement means you’re using your hair’s natural volume to create a lifted, dimensional look, and the curls and waves naturally add interest without any straightening or smoothing required. This style can go from casual to dressy depending on your hair type and how you style the ponytail tail itself.
Steps to Build Your High Ponytail
- Flip your head upside down and apply a light texture spray or sea salt spray to add grip and definition to your waves
- Flip back upright and gather hair at the crown, pulling it into a high pony with a flexible elastic
- Use a fine-tooth comb to gently smooth the crown area (not the actual hair—just the scalp—to create a polished base) while leaving the ponytail section textured
- Wrap a small section of hair from the ponytail around the elastic to cover it and create a finished look
- Optional: take the ponytail tail and twist or braid it gently, or leave it wavy and run your fingers through it to separate and define curls
- Pin the wrapped section with a small bobby pin to secure it
Worth knowing: The height of your ponytail depends on your face shape and preferences, but a high pony tends to look most flattering when positioned at the crown rather than directly on top of your head—it gives a more polished feel.
3. The Half-Up Crown Braid
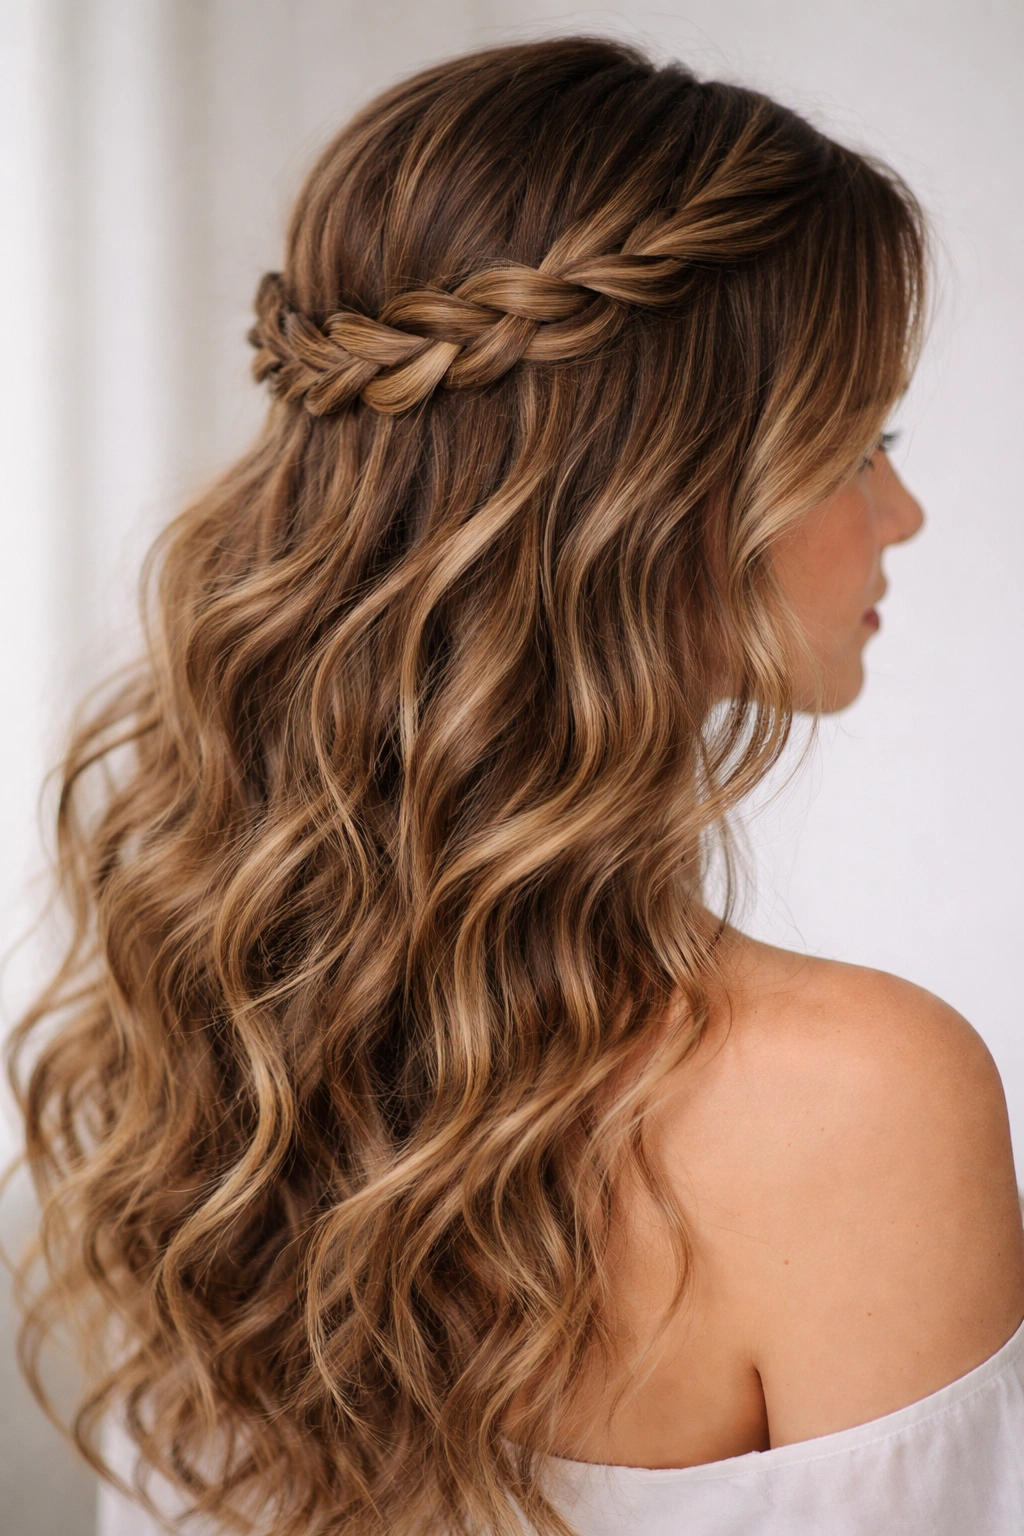
This style is incredibly flattering for wavy hair because it combines the softness of hair down with the polish of an updo. A braid woven through the crown, pulling half your hair up and back, creates a romantic and effortless vibe that works for everything from date night to your cousin’s wedding.
Why Braids Love Curly and Wavy Hair
Braids have incredible grip in textured hair, which means you don’t need products to make them stay—your natural texture does the work for you. A three-strand braid woven through your natural waves creates beautiful dimension and texture that you can actually see and appreciate. The contrast between the defined braid pattern and the loose waves or curls underneath creates a romantic, intentional look that’s hard to achieve with straight hair.
Creating Your Half-Up Crown Braid
- Start with air-dried or freshly scrunched wavy hair that still has some moisture and definition
- Take a small section from one side of your head near the temple, about an inch wide
- Begin a loose three-strand braid, adding small sections of hair as you braid back toward the crown
- Continue braiding toward the opposite ear, weaving the braid across the crown of your head
- Once you’ve reached the opposite side, secure the braid end with a small elastic
- Gently pull the braid slightly to loosen it and create a fuller, more textured appearance
- Take a second small section from the opposite side (mirroring the first) and create a second braid
- Bring both braid ends to the back of your head and tie them together with a small elastic or bobby pin
Quick facts:
- Looser braids look more modern and romantic than tight, structured ones
- You can create the braids the night before and re-mist with water the next morning to refresh them
- Adding a decorative comb or clip where the braids meet at the back creates extra visual interest
- This style works at any hair length, from shoulder-length to waist-length waves
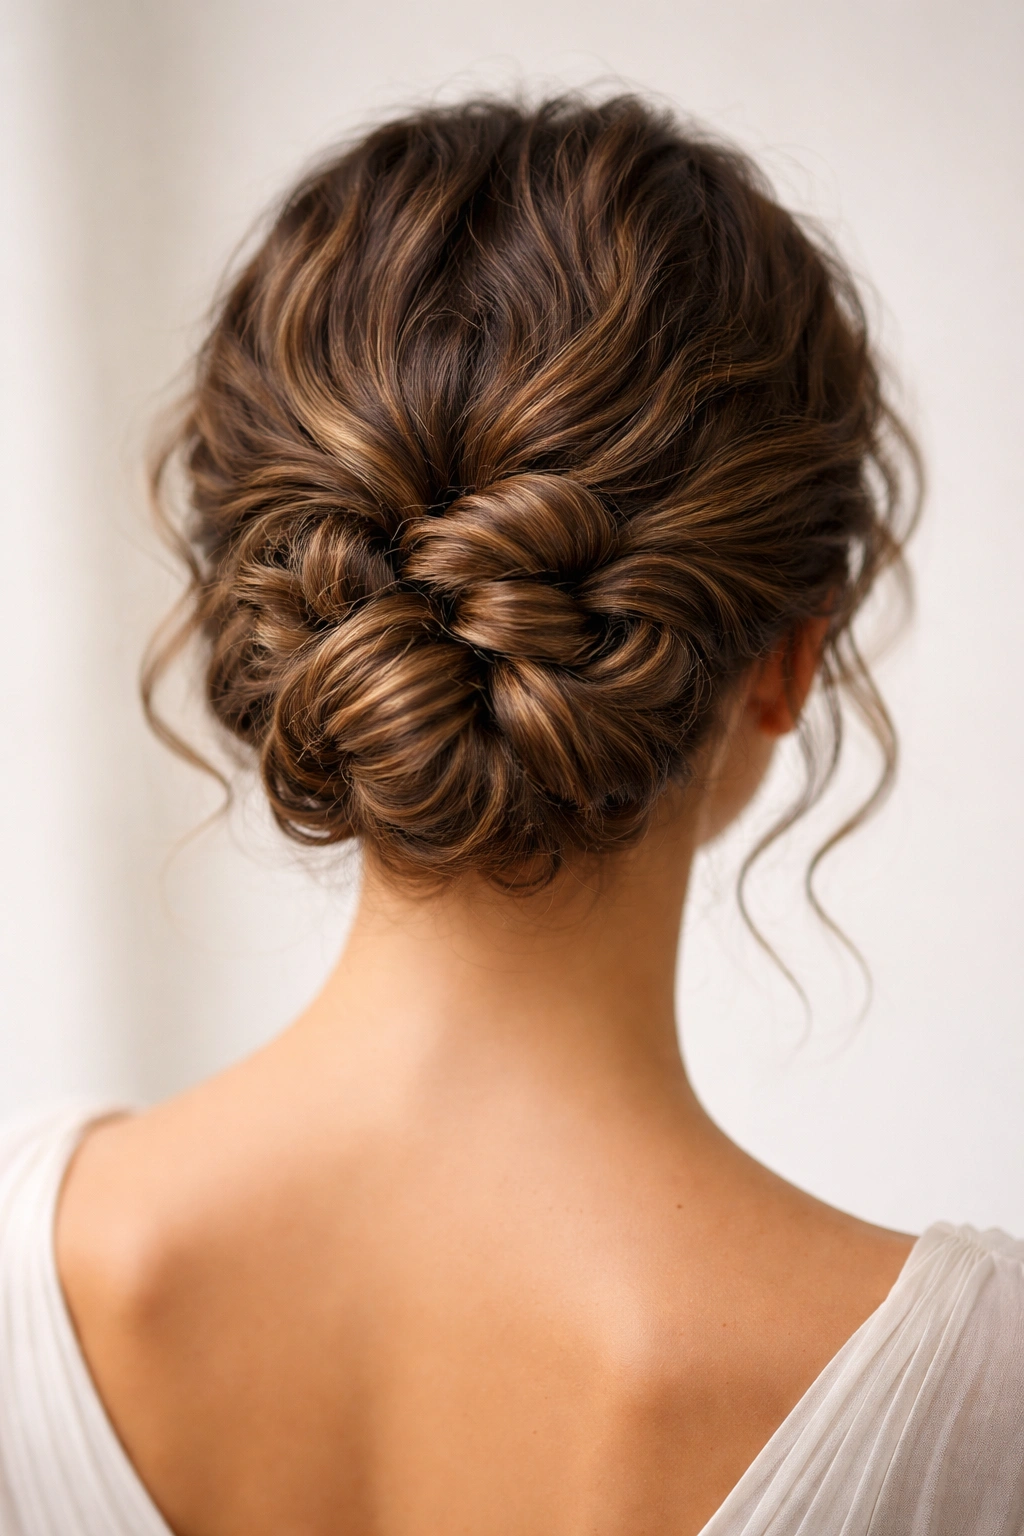
4. The Wrapped Low Bun
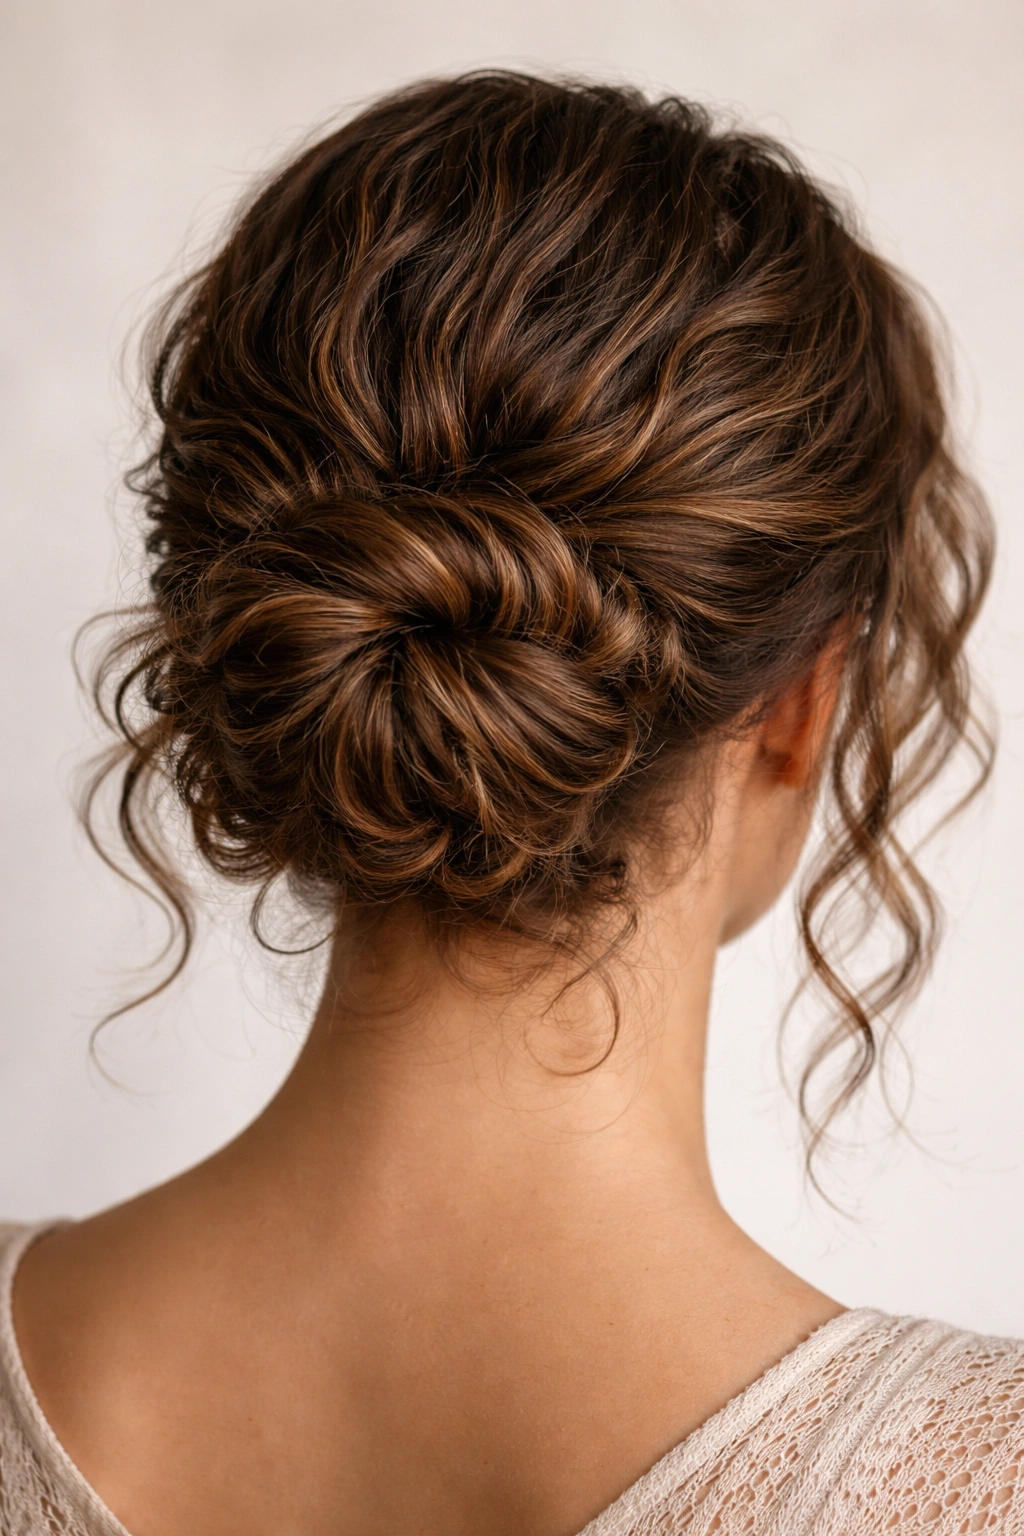
This bun sits low on the back of your neck and works beautifully with curly and wavy hair because you can embrace the spiral texture of your curls in the bun itself rather than trying to smooth them out. It’s sophisticated enough for professional settings or formal events, but casual enough for everyday wear when you want your hair off your neck and face.
The Difference Between Sleek and Textured Low Buns
A traditional low bun on straight hair looks sleek and polished because every strand is smoothed down. On your wavy or curly hair, you’re creating something different—a low bun that shows off the natural pattern of your curls, with a few strategically loose pieces framing your face. This looks intentional and modern rather than like you’re trying (and failing) to tame your hair.
How to Construct a Textured Low Bun
- Gather your hair low at the nape of your neck, roughly where your collar would sit
- Secure with an elastic into a low ponytail
- Take the ponytail end and gently twist it or loosely braid it—don’t worry about making it perfect
- Wrap the twisted section around the base of the ponytail to form a spiral bun
- Pin with bobby pins, letting the curls and waves be visible rather than perfectly sculpted
- Pull out 3-4 small face-framing pieces on either side, curling them gently with your fingers to enhance the wave pattern
- Use a strong-hold hairspray to seal the style without making it look stiff
Pro tip: This bun works best when created on second-day hair, which has more texture and grip than freshly washed waves. If your hair is freshly washed, add texture with a sea salt spray before styling.
5. The Knotted Chignon
A chignon is a French updo that looks infinitely more sophisticated than a regular bun, and it’s surprisingly easy to create with wavy and curly hair. This style uses knots instead of braids or twists, which creates a structured but still-textured look that’s perfect for elegant occasions.
What Makes a Chignon Different From Other Updos
A chignon is specifically an updo that uses multiple small knots or twists woven together, creating a sculptural effect that’s visually interesting from all angles. On wavy or curly hair, you can actually see the individual curl patterns within each knot, which adds incredible dimension. It’s more structured than a casual bun but less formal-looking than a sleek style, making it work for semi-formal events, dates, or even a polished work day.
Building Your Knotted Chignon
- Gather hair into a low ponytail at the nape of your neck and secure with an elastic
- Divide the ponytail into three equal sections
- Take two sections and tie them together in a simple knot (like you’re tying a shoelace, but with hair sections)
- Add the third section and tie another knot, creating a series of knots down the ponytail length
- Coil the knotted section around itself at the nape to create a compact updo
- Secure the entire thing with bobby pins, making sure the curls are visible rather than flattened
- Loosen each knot slightly by gently pulling sections of hair out to create fullness and show off your texture
What to watch for: Make sure each knot is loose enough that you can see your wave or curl pattern—if knots are too tight, your texture will disappear and the style will look awkward rather than elegant.
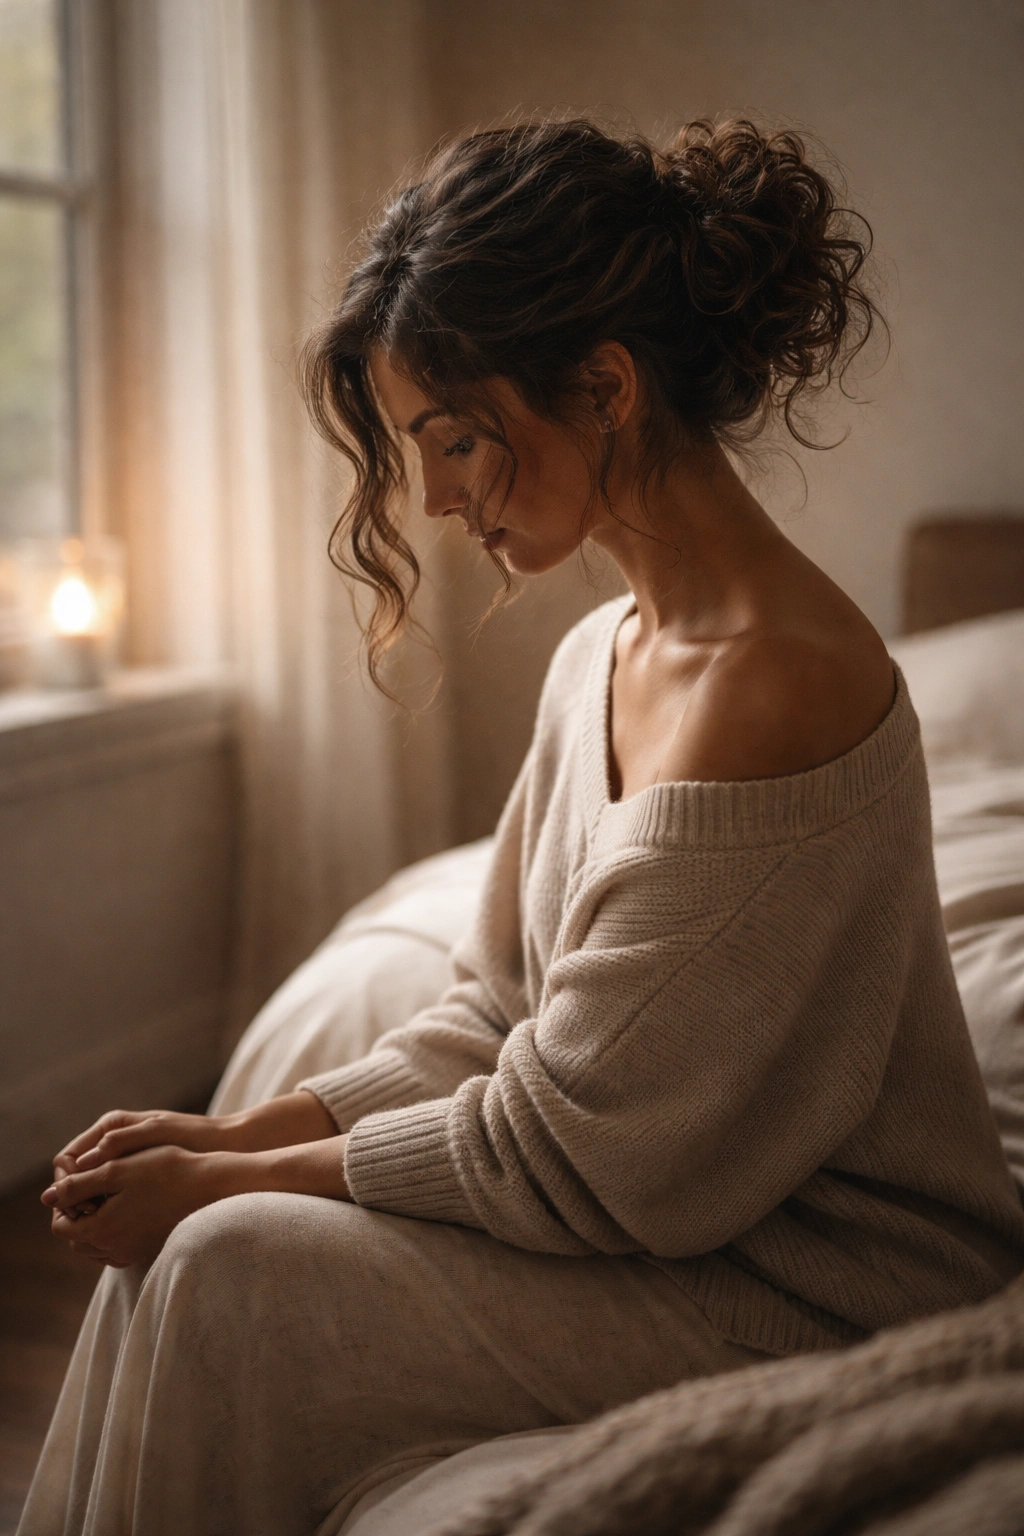
6. The Messy Topknot
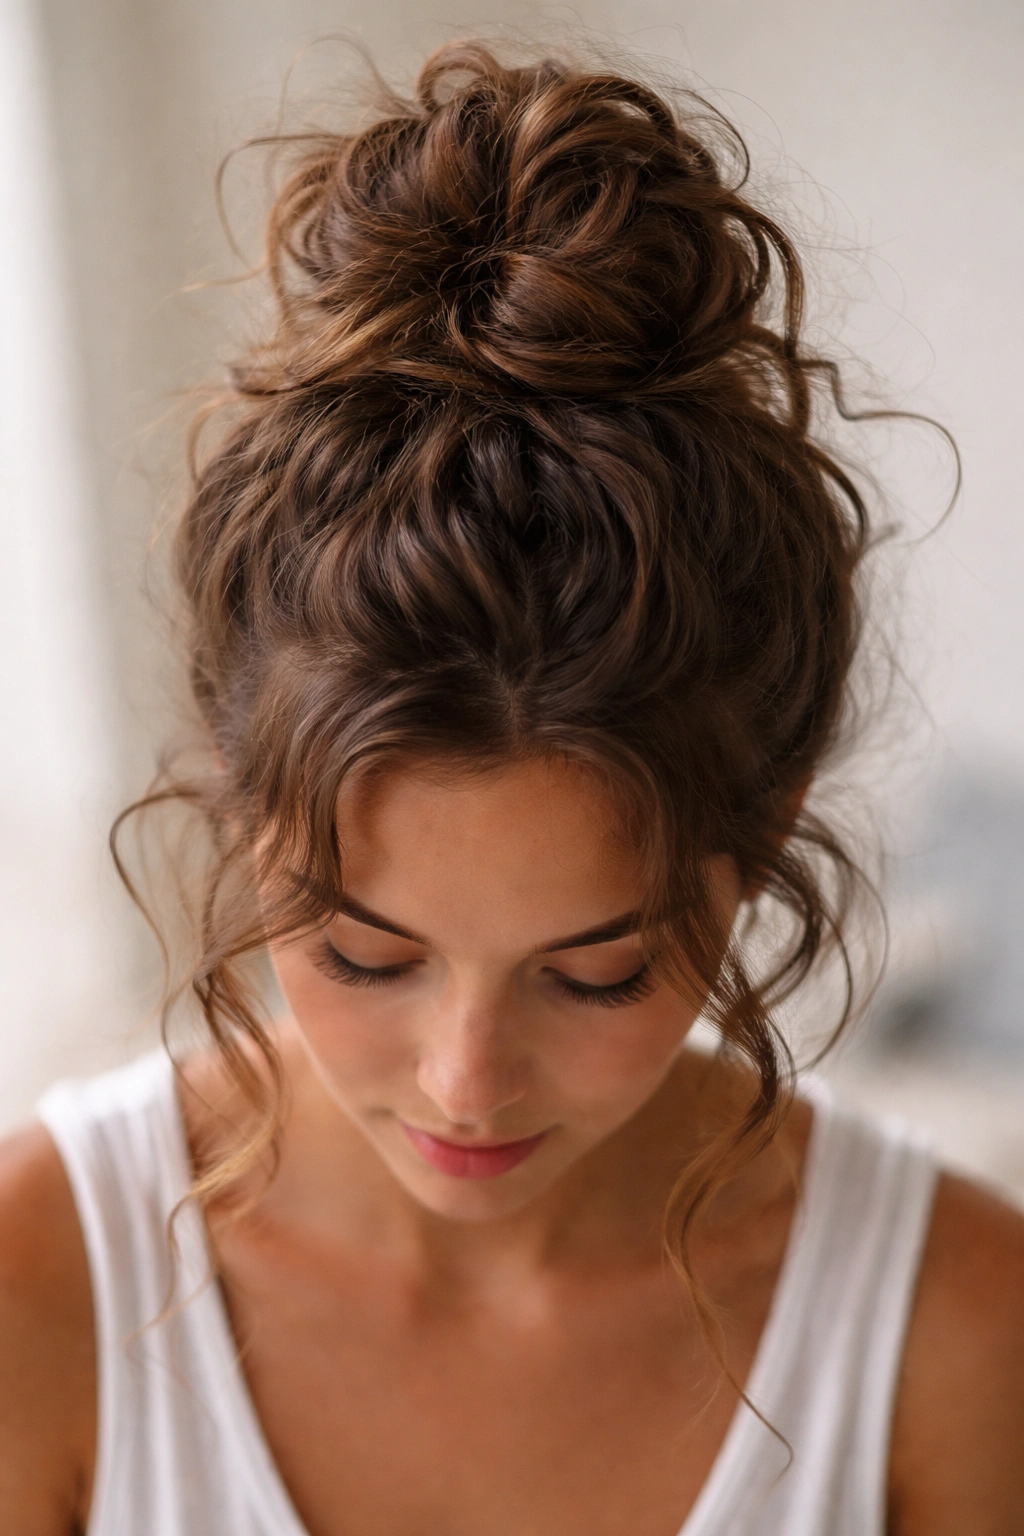
If you love the casual, effortless vibe that works for wavy hair, the messy topknot is your answer. This style sits at the very crown of your head and intentionally looks a bit tousled and loose, which is actually the goal rather than a styling mistake. It’s perfect for yoga, running errands, work from home, or any day when you want your hair up but don’t want to look like you spent an hour styling.
Why Messy Works Better Than Sleek for Your Hair Type
Messy topknots are designed to show texture and movement, which means wavy and curly hair is absolutely ideal for this style. Whereas a sleek topknot on straight hair requires smoothing and taming, you’re working with your natural wave pattern in a messy knot. The individual curls and waves actually make the style look more intentional and put-together, not less.
Creating Your Messy Topknot
- Apply a light texture spray to damp or dry hair to give your waves grip and definition
- Gather all your hair at the very crown of your head (directly on top, not back at the crown—this is important for the topknot silhouette)
- Use your hands (not a comb) to gather the hair loosely, creating a high ponytail
- Secure with an elastic, leaving a few inches of hair loose to wrap around the base
- Twist or loosely braid the ponytail tail, then wrap it around the elastic to form a topknot shape
- Secure with bobby pins, leaving strands intentionally loose and not fully tucked in
- Use your fingers to pull out small sections and gently scrunch them to emphasize your wave or curl pattern
- Mist with a flexible hold spray (not a crunchy one) to secure the loose strands without flattening them
Quick facts:
- Topknots work best on hair that’s at least shoulder-length, though they’re possible with shorter lengths
- You can create this style on wet hair and let it air-dry for extra definition and texture
- This is ideal for second-day hair, which has more grip and holds the loose style better than freshly washed waves
7. The Side-Swept Wave Clip
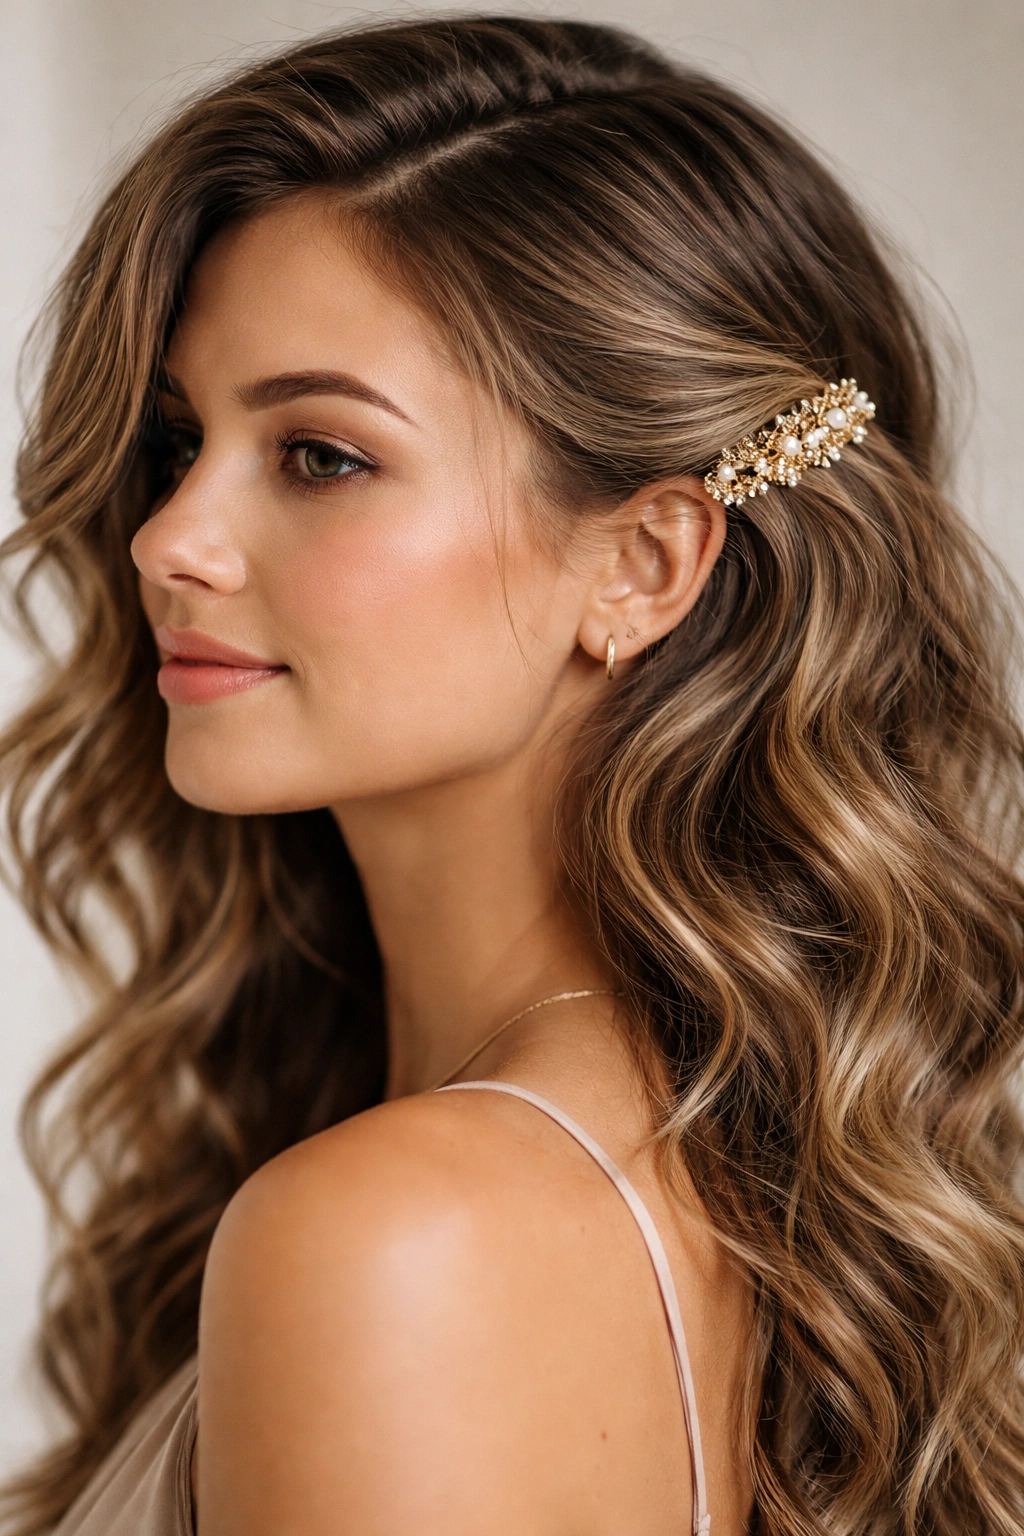
This is the easiest updo on this list, and it’s perfect for days when you want your hair mostly down but need it off your face and off your neck. A side-swept clip is technically not a full updo, but it’s a fantastic styling option for wavy hair that keeps texture visible while controlling bulk.
The Beauty of Simplicity
You don’t always need an elaborate updo to look polished and intentional. A side-swept clip that gathers one side of your hair back and to the side creates an elegant, asymmetrical look that’s flattering for most face shapes and works for almost any occasion. The best part? This takes about two minutes to create, so it’s perfect for busy mornings.
How to Create a Side-Swept Clip Style
- Start with air-dried wavy hair that has natural definition and movement
- Section off about one-third of your hair from the opposite side (if sweeping right, take from the left)
- Gently lift this section and sweep it behind your ear and back toward the opposite side of your head
- Secure with a decorative clip, bobby pin, or claw clip positioned at an angle where it blends with your wave pattern rather than sitting stiffly against your head
- Leave the rest of your hair down and textured, allowing it to cascade over your shoulder
- Gently run your fingers through the swept section to loosen it slightly and maintain your wave pattern
Pro tip: This style looks best when you don’t smooth the swept section—keep your waves and curls loose and flowing. You want the effect of casually pulling hair back, not sculpting it.
8. The Braided Updo Crown
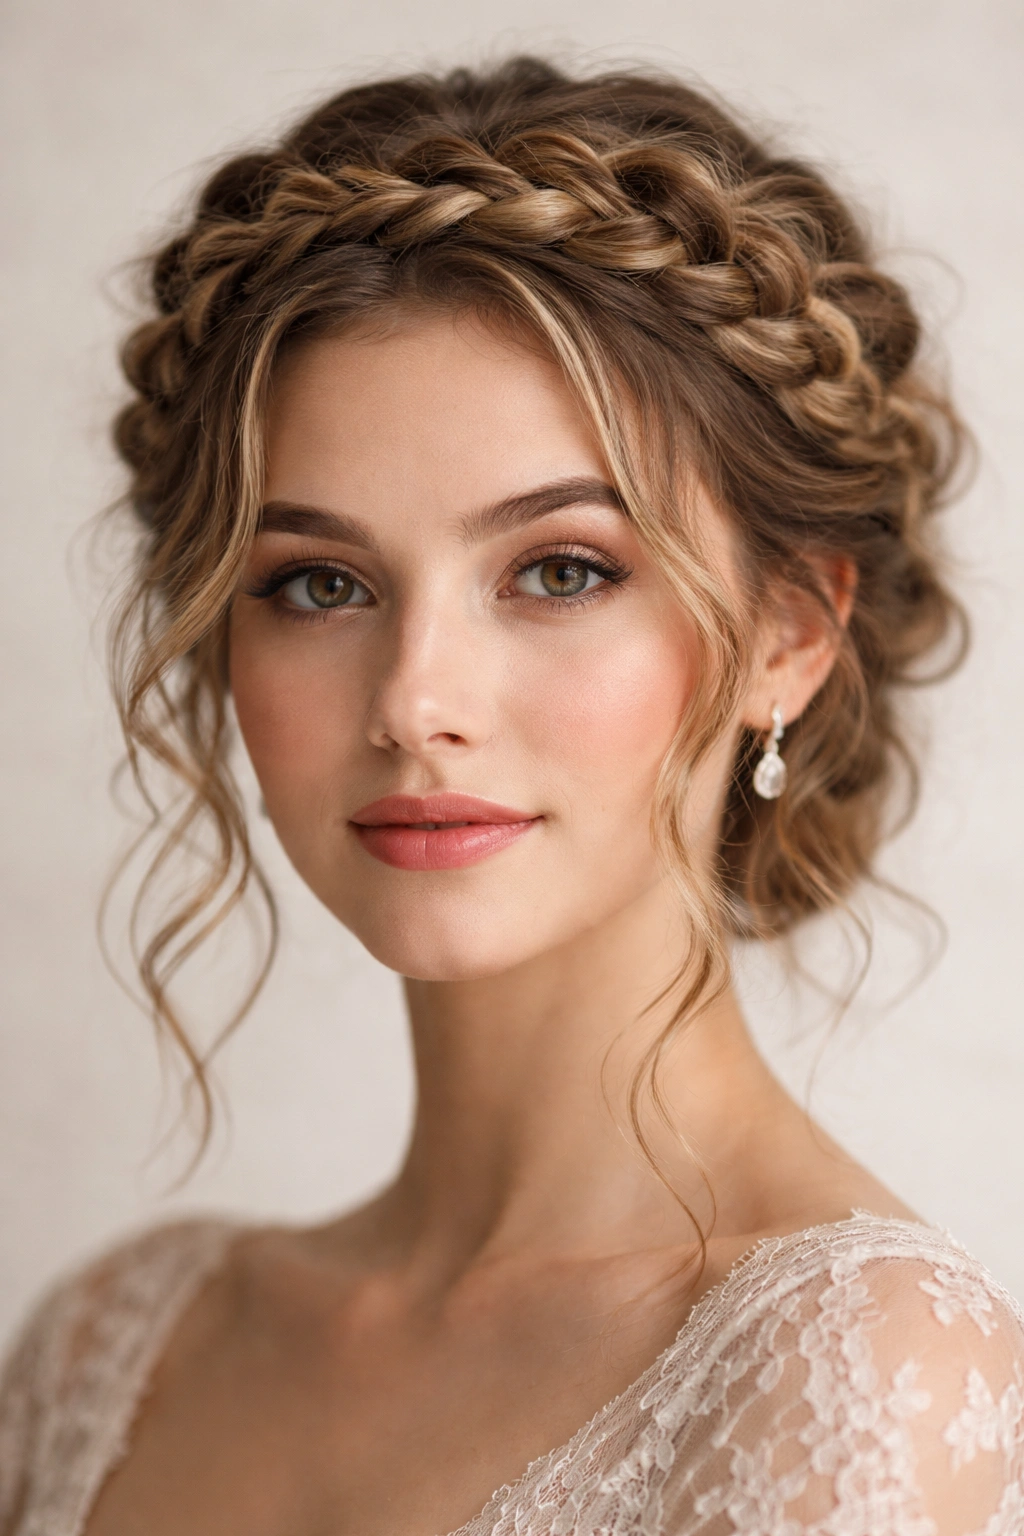
This style creates a statement look that’s both romantic and structured, perfect for special occasions or when you want to feel extra polished. By braiding sections of hair and creating a crown effect around your head, you’re showcasing your texture while creating an updo that’s clearly intentional and thought-out.
Creating Crown-like Drama With Braids
A braided crown updo works incredibly well for wavy and curly hair because braids naturally take advantage of your texture. Each braid shows off your wave or curl pattern, and when multiple braids are woven together, they create a rich, dimensional look. This style has serious wedding-guest or date-night energy without requiring professional styling help.
Steps for Your Braided Crown Updo
- Start with wavy hair that’s been air-dried or diffuser-dried for maximum texture
- Section off a piece from one temple area about two inches wide
- Create a loose French braid that starts at the temple and braids back toward the crown, incorporating hair as you go
- Pin the braid at the crown and set it aside
- Repeat on the opposite side, creating a second French braid that mirrors the first
- Braid a third section from the nape of your neck upward, incorporating side sections as you go
- Bring all three braids together at the crown and secure with bobby pins, forming a crown-like effect
- Gently loosen each braid by pulling strands slightly outward to create fullness
- Any hair not incorporated into the braids can be twisted and pinned or left loose below the crown
Worth knowing: You can adjust how dressy this looks by how much you loosen the braids—tight, structured braids look formal, while loosened, tousled braids look more romantic and modern.
9. The Twisted Wrap Ponytail
This style is a hybrid between a ponytail and a fuller updo, offering the simplicity of a ponytail with visual interest that comes from twisted sections wrapped around the base. It’s perfect for professional settings, casual days, or anywhere you want your hair off your face and neck without looking too formal.
Why Twists Create More Visual Interest Than Smooth Ponytails
When you work with twists instead of smoothly-gathered sections, you maintain the texture and dimension of your wavy or curly hair. A twisted wrap ponytail actually benefits from the natural waves in your hair—the twists become more visible and interesting because they follow your hair’s natural pattern rather than trying to smooth it out.
Building Your Twisted Wrap Ponytail
- Apply a light texture spray to give your hair grip and definition
- Gather your hair at the crown into a high or mid-height ponytail, securing with an elastic
- Take a small section (about one inch wide) from underneath the ponytail and gently twist it
- Wrap this twisted section around the elastic at the base of your ponytail, securing the end with a bobby pin
- Take another small section from the remaining ponytail and twist it the same way
- Wrap this second twist around the base, overlapping with the first, and secure
- Continue until you’ve wrapped 3-4 twisted sections around the base, creating a textured, wrapped effect
- Let the main ponytail tail hang loose, and gently scrunch it with your fingers to enhance your wave or curl pattern
Quick facts:
- This style works best when the twists are loose rather than tight—tight twists look severe, while loose twists look modern and intentional
- You can create this style on freshly washed hair or second-day hair; both work beautifully
- The wrapped base hides the elastic completely, giving a more finished appearance than a traditional ponytail
10. The Coiled Bun With Face-Frame Pieces
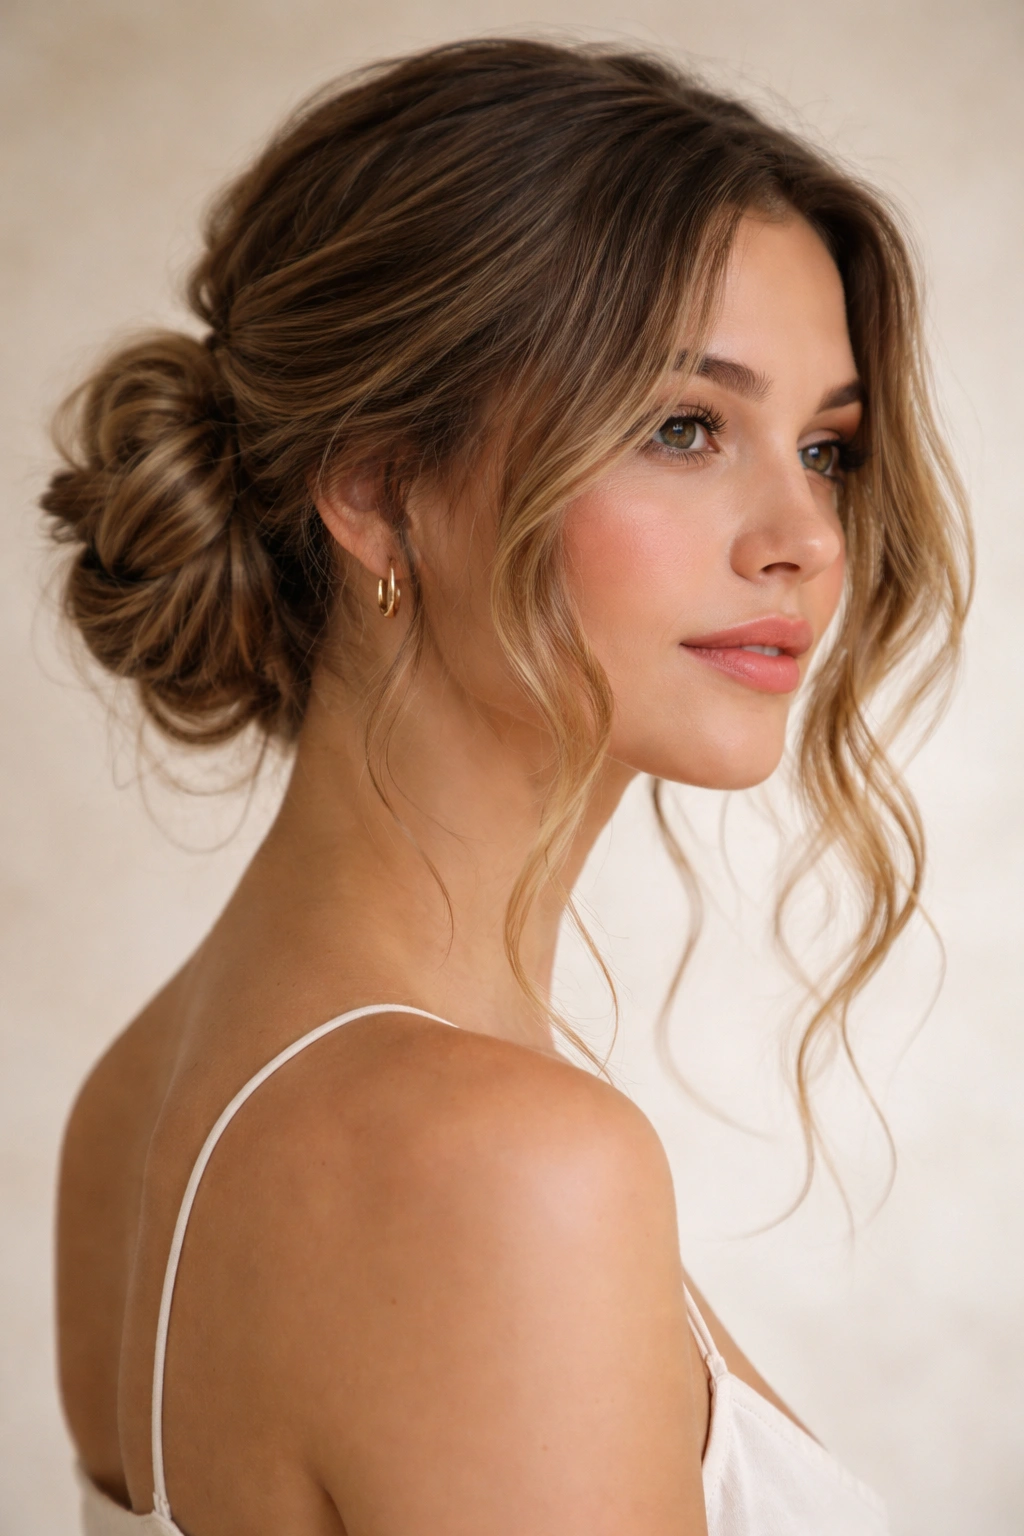
This is the most romantic and feminine updo on this list, combining a soft, textured bun with strategic loose pieces that frame your face. It’s elegant enough for weddings or formal events but relaxed enough for everyday wear when you want to feel special.
The Power of Face-Framing Pieces
Face-framing pieces change the entire vibe of an updo, softening the look and adding movement and dimension. On wavy and curly hair, these loose pieces showcase your texture beautifully while the bundled-up hair creates a cohesive style. This combination of structured updo and loose, flowing pieces is incredibly flattering for most face shapes and hair types.
How to Create a Coiled Bun With Face-Frame Pieces
- Start with air-dried or diffuser-dried wavy hair that has natural definition
- Gently pull out three to four small sections from around your face—one from each temple, one from near the center, and one from the nape (you’re reserving these to leave loose)
- Gather the remaining hair at the nape of your neck into a low ponytail and secure with an elastic
- Take the ponytail and gently twist or loosely braid it, then coil it around the base of the ponytail to form a bun
- Secure the bun with bobby pins, allowing the natural curl and wave pattern to show
- Take each of the reserved face-framing pieces and gently curl them around your finger or with a curling iron (if desired, though your natural texture may already be perfect)
- Use a flexible-hold hairspray to hold the loose pieces in place without making them stiff or crunchy
Pro tip: The key to this style looking intentional rather than like pieces fell out is positioning—make sure the face-frame pieces are distributed evenly around your face and at varying lengths, rather than all the same length or all on one side.
Final Thoughts
Updos for wavy and curly hair are an opportunity to celebrate the texture you’ve naturally got rather than fighting against it. The styles in this guide all work with your waves and curls, using your hair’s natural grip, volume, and dimension to create updos that are easier to execute, longer-lasting, and genuinely more beautiful than styles designed for straight hair.
The most important thing to remember when styling updos on your wavy or curly hair is that you’re not aiming for sleek perfection—you’re aiming for intentional, textured beauty. The curls that escape, the waves that frame your face, the texture visible in your bun or braid—these aren’t styling mistakes. They’re what makes updos on curly and wavy hair genuinely special and flattering.
Start with whichever of these styles resonates most with your hair type, your lifestyle, and your aesthetic. You might find that the messy topknot becomes your daily go-to, while the braided crown updo becomes your special-occasion signature. The wonderful thing about these techniques is that they’re all adaptable—you can loosen them more or keep them tighter, add accessories, adjust the height, and make them work for your specific curl pattern and personal style. With practice, you’ll develop a sense for which styles work best for your hair on different days, depending on your hair’s moisture level, your waves’ tightness, and how much time you have to style. That’s when updos become not just a practical way to manage your hair, but a fun part of your styling toolkit.