Cornrow updos are a stunning choice for weddings, combining elegance, cultural significance, and versatile styling in ways that feel both timeless and modern. Whether you’re the bride, a bridesmaid, or a wedding guest, cornrows offer an incredibly polished foundation for updo styles that can transition beautifully from ceremony to reception. The beauty of cornrow updos lies in their ability to look intricate and intentional while keeping hair secure and comfortable throughout a full day of celebration—no flyaways, no frizziness, no constant adjustments needed.
What makes cornrows particularly special for weddings is the way they transform braided texture into something refined and celebratory. They work equally well with natural hair, relaxed hair, textured extensions, or lightweight braiding hair, making them accessible to nearly everyone. Unlike updos that rely solely on loose texture to create volume and dimension, cornrow updos build structure right from the foundation, allowing you to create shapes, styles, and silhouettes that feel intentional and photograph beautifully from every angle.
The styling possibilities range from sleek and minimalist to elaborate and romantic—you can add metallic threads, fresh flowers, decorative pins, or delicate jewelry woven right into the braids. Many of these updo styles also work beautifully for other formal occasions like anniversaries, galas, or festive celebrations, but they hold special meaning at weddings where the hair is part of the overall beauty narrative.
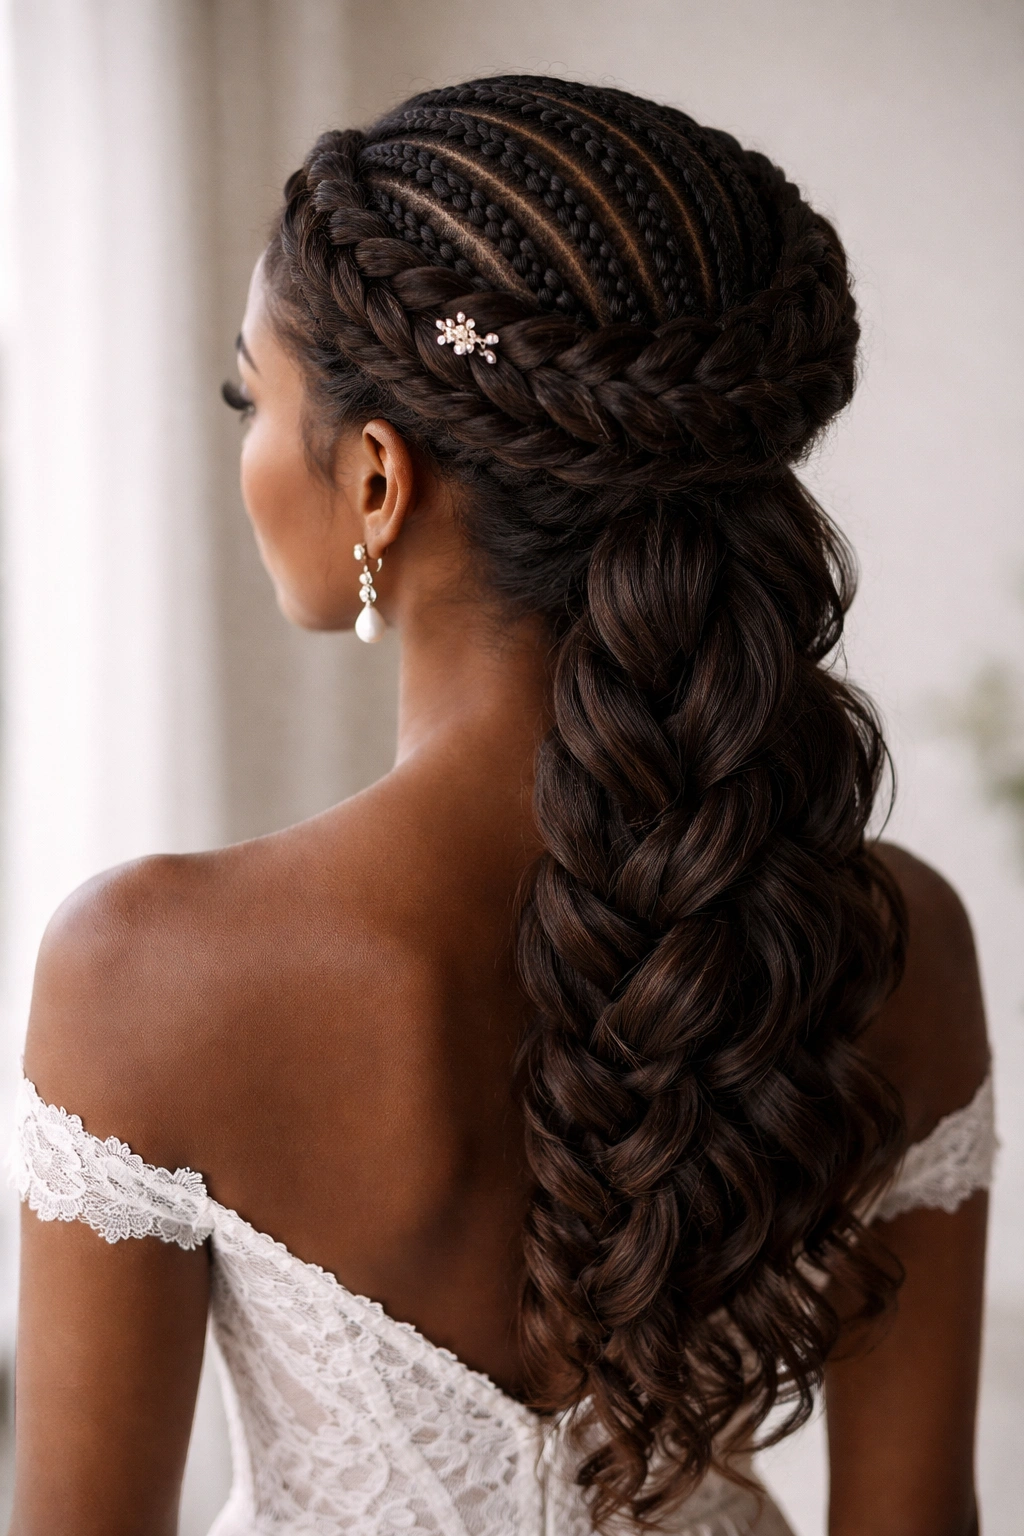
1. Crown Braid Cornrow Updo with Cascading Length
This romantic style features cornrows that wrap around the crown of the head in a circular pattern, creating a halo effect while leaving the remaining length loose or in a soft second-day braid that drapes down the back. The cornrows themselves are typically thicker and spaced slightly further apart than everyday braids, which gives them a more polished, wedding-appropriate appearance while showcasing the texture beautifully.
Why This Works for Weddings
Crown braids instantly evoke a romantic, ethereal quality—they feel both bohemian and formal enough for any ceremony setting. The style frames the face beautifully while keeping hair off the shoulders, which means your neckline and earrings take center stage. The cascading portion adds movement and softness that photographs gorgeously, especially when captured from above or the side.
How to Style and Secure It
- Start with clean, moisturized hair or prelaid cornrows if you’re doing this style over multiple days
- Create 4-6 cornrows that follow the hairline and circle around the crown, each one slightly larger as you move back
- Gather the remaining length into a low ponytail or loose second-day braid and secure with a silk-covered elastic
- Add fresh baby’s breath, delicate pins, or a thin metallic hair cuff along the crown for extra elegance
- Use lightweight products (mousse or light gel) to keep flyaways smooth without weighing down the braids
Pro tip: This style actually improves over a few days if you braid it fresh—by day two or three, the braids develop a softer, more romantic texture that photographs even better.
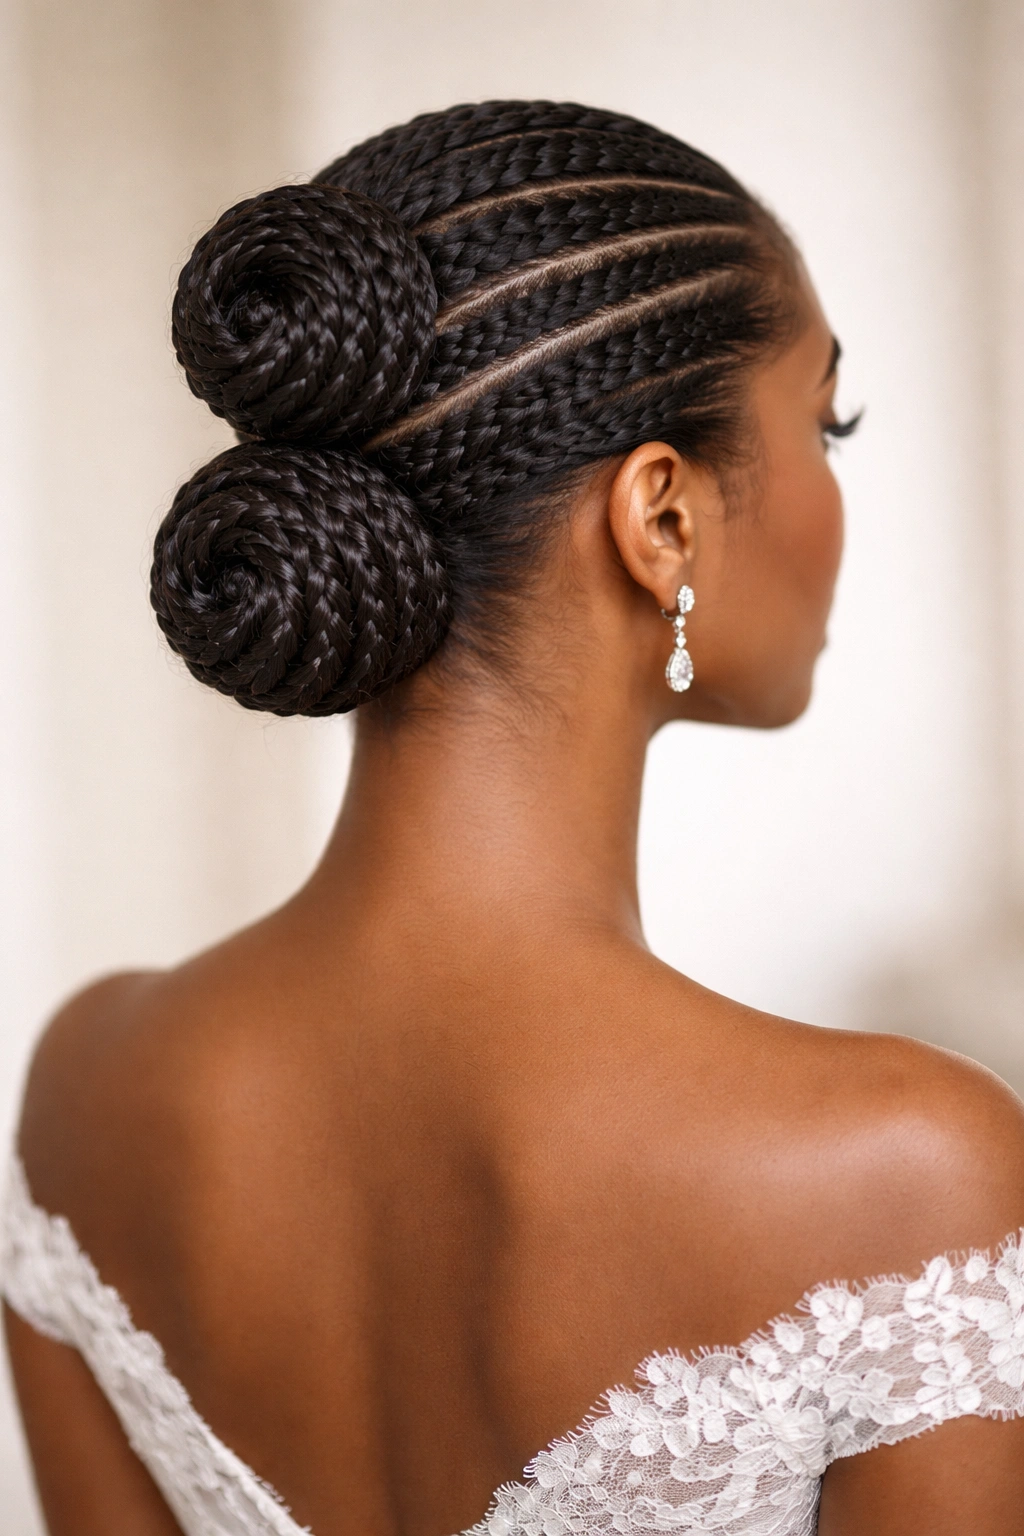
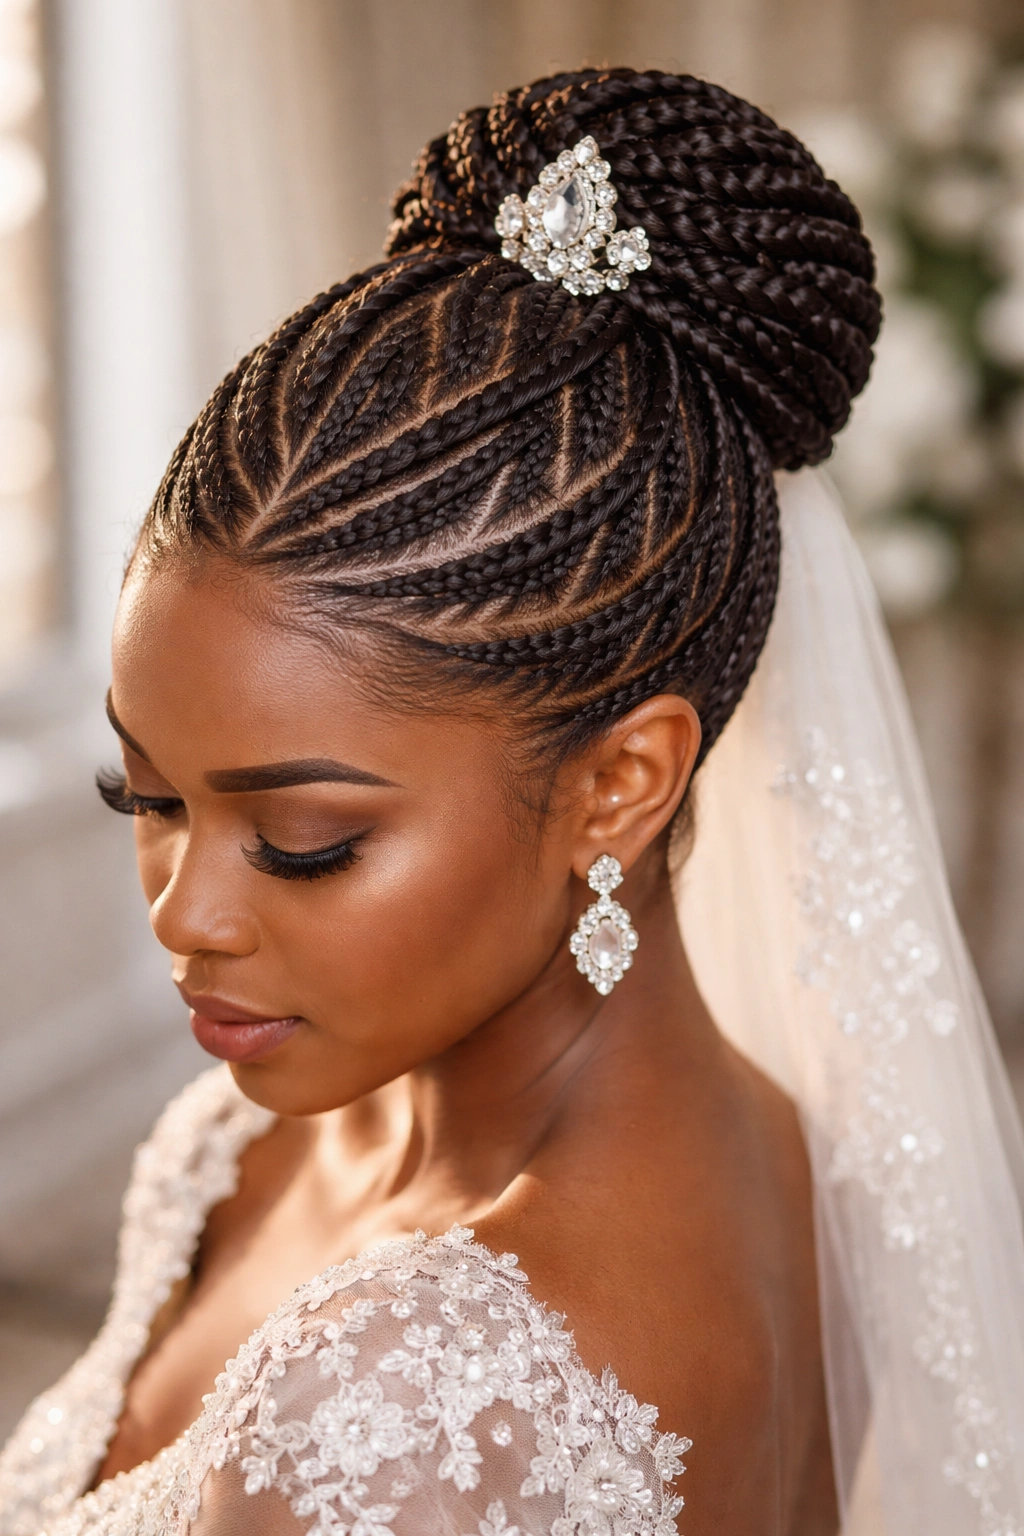
2. Spiral Cornrow Bun with Gold Thread Integration
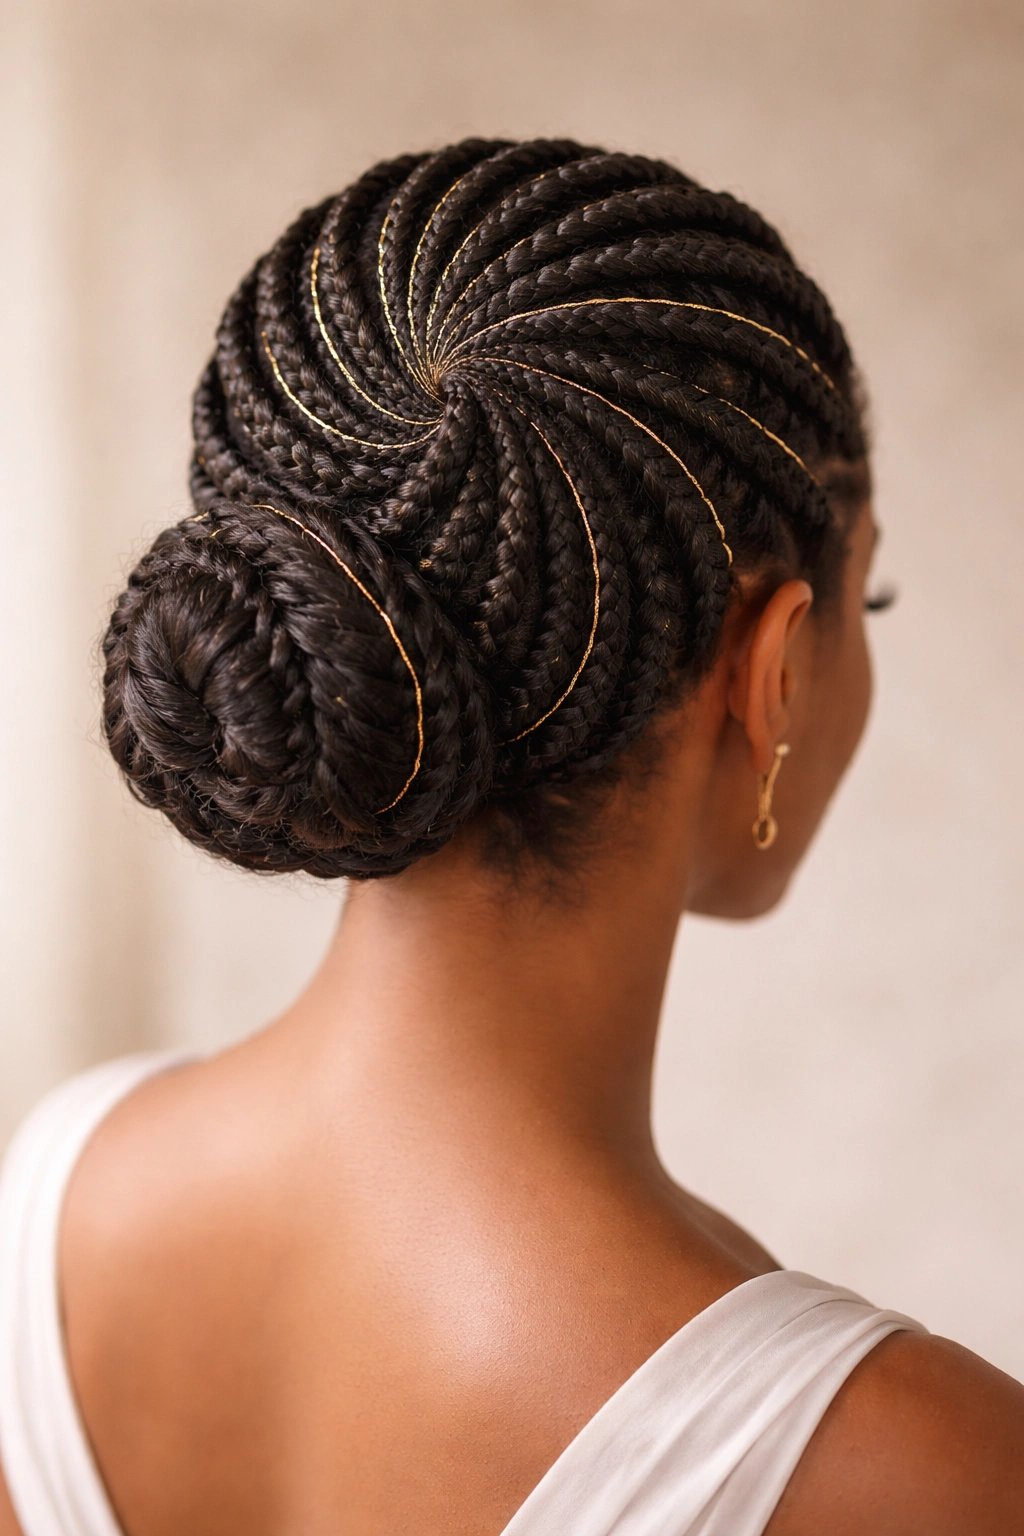
This statement style features thick cornrows that spiral inward from the edges toward the center back of the head, where they feed directly into a rounded, compact bun. Thin gold thread or metallic yarn is woven throughout the braids, creating a cohesive golden shine that catches light beautifully in photographs and adds immediate luxury to the overall look.
What Makes It Special
Spiral patterns are inherently more eye-catching than linear braids, and they show impressive technical skill without looking overdone. The gold thread integration elevates it beyond everyday styling into pure celebration mode. From the front or sides, the spiral creates dimension and movement, while from the back, the finished bun appears beautifully constructed and wedding-ready.
Installation and Longevity
- Have this style installed 1-2 days before the wedding so the braids relax slightly and the metallic thread settles smoothly against the scalp
- The cornrows typically take 2-3 hours to install depending on hair thickness and braid density
- Secure the bun with bobby pins and a light-hold gel or pomade to keep it smooth and refined throughout the day
- Wrap the bun’s base with a coordinating thread or narrow ribbon for a finished, polished appearance
- Mist lightly with a flexible-hold hairspray to manage any texture variations without creating crunchiness
Insider note: If you’re concerned about metallic thread slipping, ask your braider to weave it through several passes of each cornrow rather than just on the surface—this creates much better hold.
3. Low Twisted Knot Updo with Loose Baby Braids
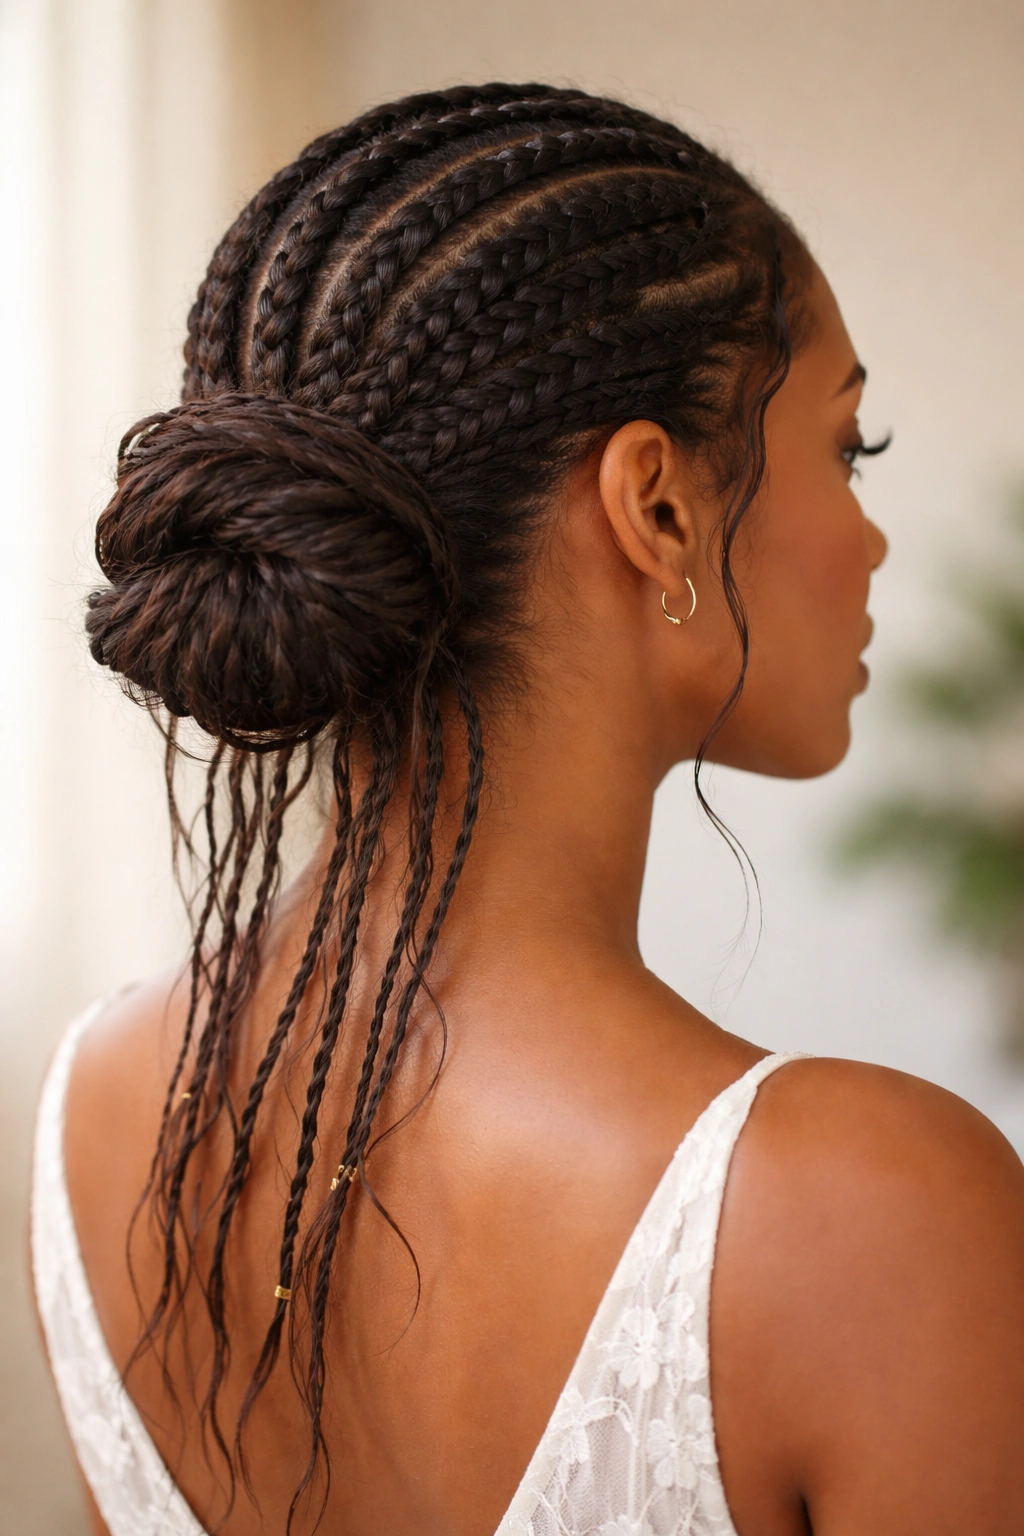
This effortlessly elegant style combines two or three thicker cornrows that travel from the temples back toward the nape, where they’re twisted together and pinned into a loose, romantic knot. Several thinner, looser braids fall from the knot area down the back, creating a cascading effect that feels soft and undone while remaining completely secure underneath.
Why Brides Love This Style
The combination of structured cornrows with loose braids creates the perfect balance between “I put effort into this” and “it feels naturally beautiful.” It’s the kind of style that looks good at the ceremony, photograph session, dinner, and dancing—nothing feels out of place or overdressed. The loose baby braids add movement and interest without requiring any maintenance throughout the day.
Styling Steps and Maintenance
- Begin with damp, conditioned hair or refresh braids you’ve already had in for a few days
- Create 2-3 thicker cornrows that angle from the temples toward the center back of the head
- At the nape, use a small crochet hook or your fingers to gently pull each cornrow into a twisted knot shape and pin with bobby pins
- Take a few sections of remaining length and create loose three-strand braids that fall freely down the back
- Tuck loose sections around the knot and secure with bobby pins and a light pomade
- Spray gently with flexible hairspray to keep everything in place without visible product buildup
Worth knowing: This style works beautifully with or without additional accessories—you can add a delicate hair vine, thin metallic pins, or even tuck a small cluster of baby’s breath directly into the knot for a romantic detail.
4. Geometric Grid Cornrow Pattern with Central Bun
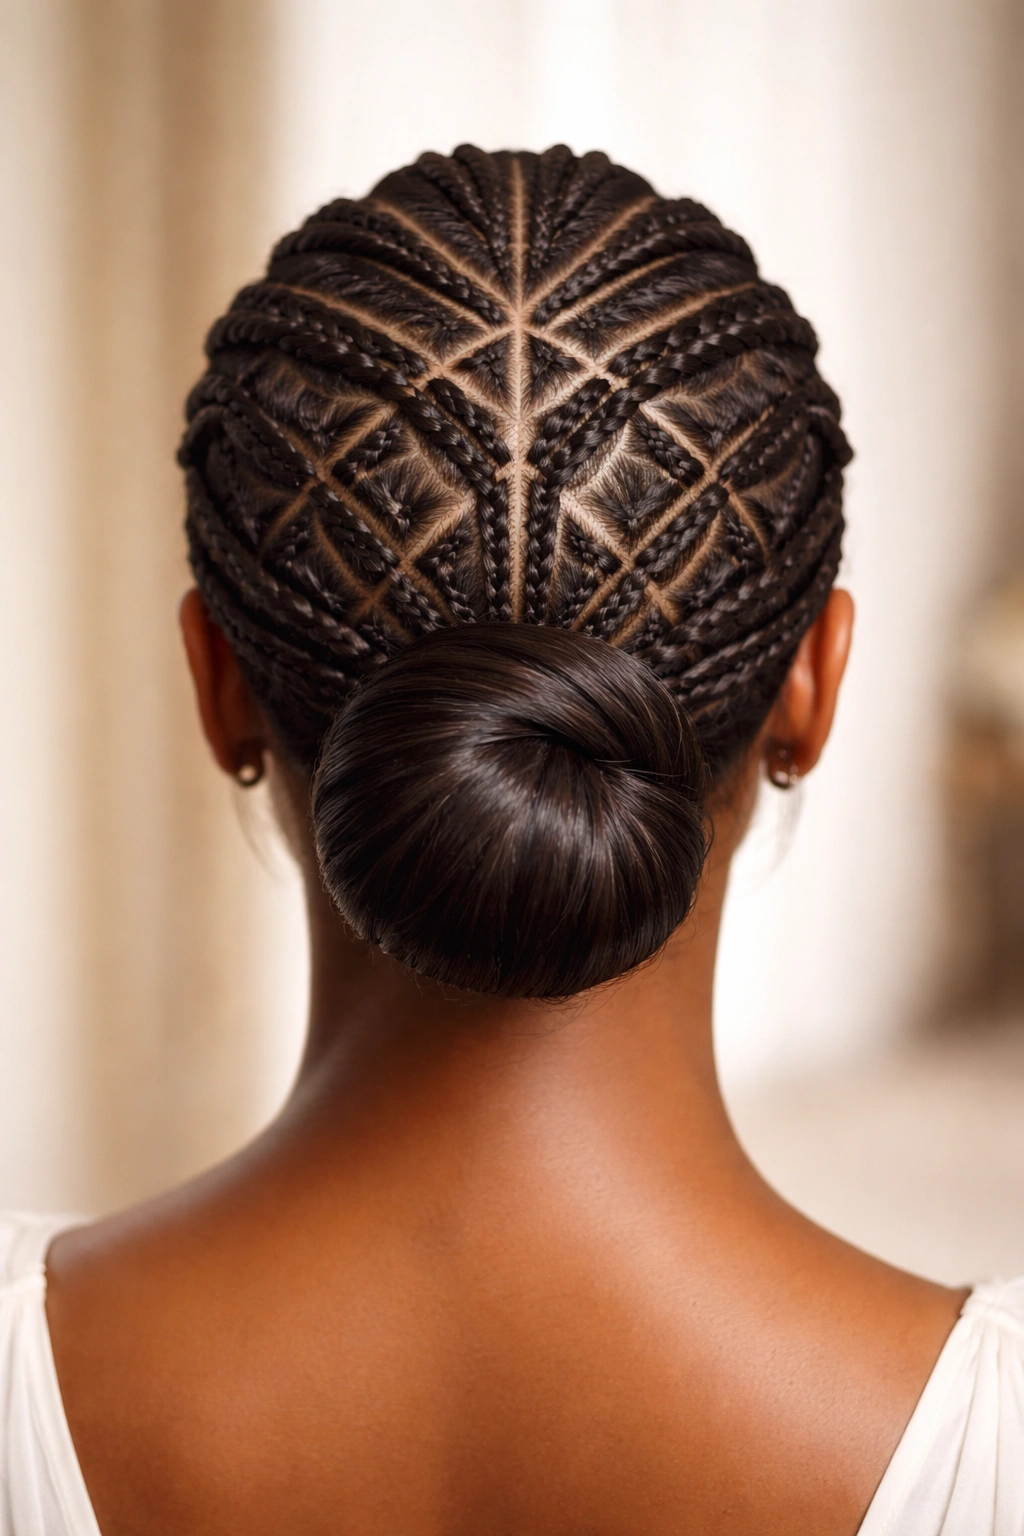
This modern, artistic approach creates a mathematical grid pattern of cornrows across the entire crown, all converging at a centered point where they feed into a sleek, compact bun. The pattern is visually striking from the back of the head and shows true technical artistry—this style makes a bold statement for brides who want something fashion-forward and completely unique.
The Modern Wedding Appeal
Geometric patterns feel contemporary and artistic without sacrificing elegance or formality. This style photographs exceptionally well, especially from overhead or from behind, and it’s the kind of distinctive choice that gets remembered and remarked upon. It reads as high-fashion bridal styling that feels both current and timeless.
Creating the Grid and Bun
- This style requires an experienced braider familiar with pattern work—plan for 3-4 hours of installation
- The grid is typically created by braiding cornrows in both vertical and horizontal directions, creating a woven appearance
- Each cornrow should be of relatively even thickness to create visual balance across the pattern
- All cornrows converge at the center back where they’re gathered and twisted or wrapped into a smooth, rounded bun
- Finish with a coordinating thread wrap, narrow metallic band, or decorative cuff around the bun’s base
- Use a medium-hold pomade to keep the bun completely smooth and defined throughout the day
Pro tip: Have your braider create a test pattern with thread or string before braiding to ensure the grid is perfectly balanced and symmetrical—this extra prep work ensures a flawless finished result.
5. Side-Swept Cornrow Updo with Flower Crown Integration
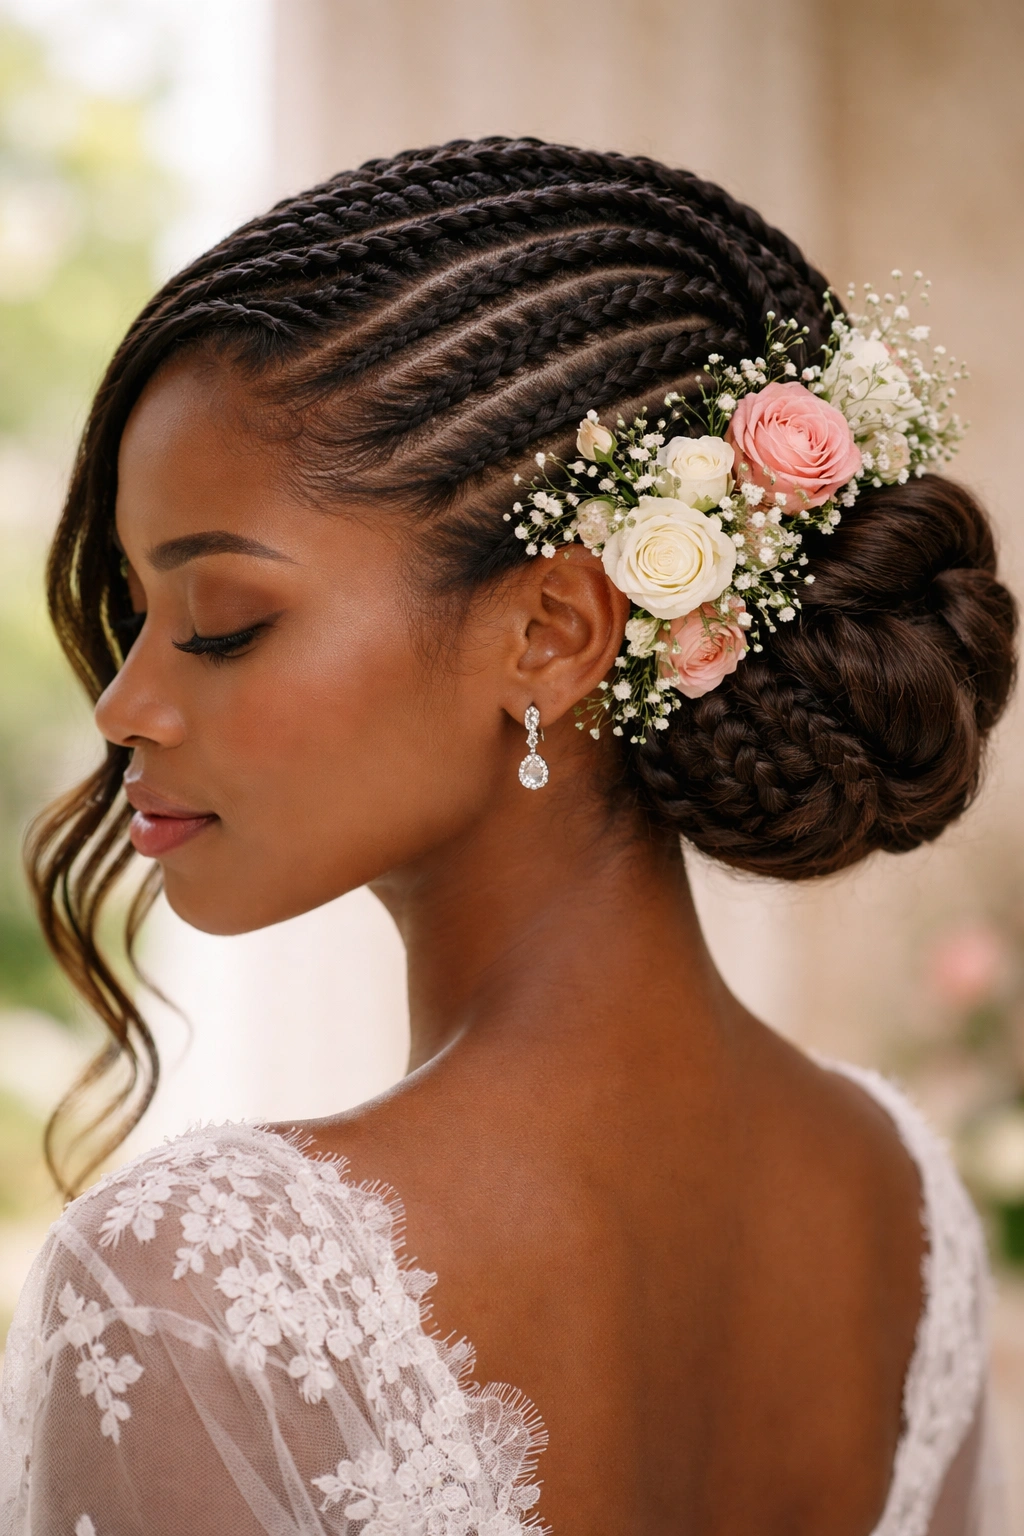
This romantic, feminine style features cornrows that angle from one side of the head toward the opposite ear, creating a sweeping diagonal line. The braids gather into a low side bun at the ear, and fresh flowers are tucked throughout the cornrows and around the bun, creating the effect of a living flower crown that feels utterly bridal.
Perfect for Garden and Outdoor Weddings
The combination of cornrows with integrated florals feels particularly special for outdoor ceremonies, garden receptions, or any celebration with natural beauty as a backdrop. The diagonal line is incredibly flattering on most face shapes, and it allows for showcasing one side of the face beautifully in photographs. The fresh flowers add color, fragrance, and a romantic detail that feels special without being overdone.
How to Create This Style
- Start with braids installed 2-3 days prior, allowing them to soften and relax slightly
- Create 3-5 cornrows starting at the crown on one side and sweeping diagonally toward the opposite ear
- Gather all braids at the ear and secure into a low, rounded bun shape using bobby pins and light pomade
- Tuck small clusters of fresh flowers (roses, baby’s breath, eucalyptus, or seasonal blooms) directly into the braids, starting from the crown and continuing down to the bun
- Insert delicate floral pins or greenery picks throughout for additional hold and visual interest
- Mist very lightly with water (not hairspray, which would damage the flowers) to keep everything fresh
Real talk: Coordinate with your florist to ensure the flowers you’re using are food-safe and won’t stain your hair or skin throughout the day—eucalyptus and baby’s breath are excellent choices because they’re hardy and won’t wilt quickly.
6. Triple Crown Cornrow Stacked Buns
This playful, artistic style features three distinct cornrow tracks that each spiral inward and form their own individual bun at different heights along the back of the head—creating a stacked, tiered effect that’s both whimsical and beautifully structured. It’s a style that reads as intentional art rather than accident, and it feels particularly special for bridesmaids or younger members of the wedding party.
The Visual Impact
Stacked buns create immediate visual interest and dimension—they’re eye-catching without being over-the-top, and the tiered effect is deeply flattering when photographed from the back or side angles. This style also works beautifully for weddings where the dress has interesting back details you want to complement rather than cover up.
Installation and Styling Details
- Begin with hair that’s clean and moisturized, or refresh pre-laid cornrows 2-3 days before styling
- Create three distinct cornrow tracks—one along the center, one along each side—that spiral gently inward
- Each cornrow spirals to form a separate bun at a different height: one at the crown, one mid-back, one lower
- Secure each bun with bobby pins and smooth with light pomade for a polished appearance
- Connect the three buns visually with delicate thread, thin ribbon, or hair jewelry for a cohesive finished look
- Add individual decorative pins or small hair cuffs to each bun for a luxe touch
Fun fact: This style is excellent for someone with a lot of natural hair volume—the three buns don’t pull hair as tightly as a single large bun, making it more comfortable to wear for 8-10 hours.
7. Sleek Low Cornrow Ponytail with Twisted Detail
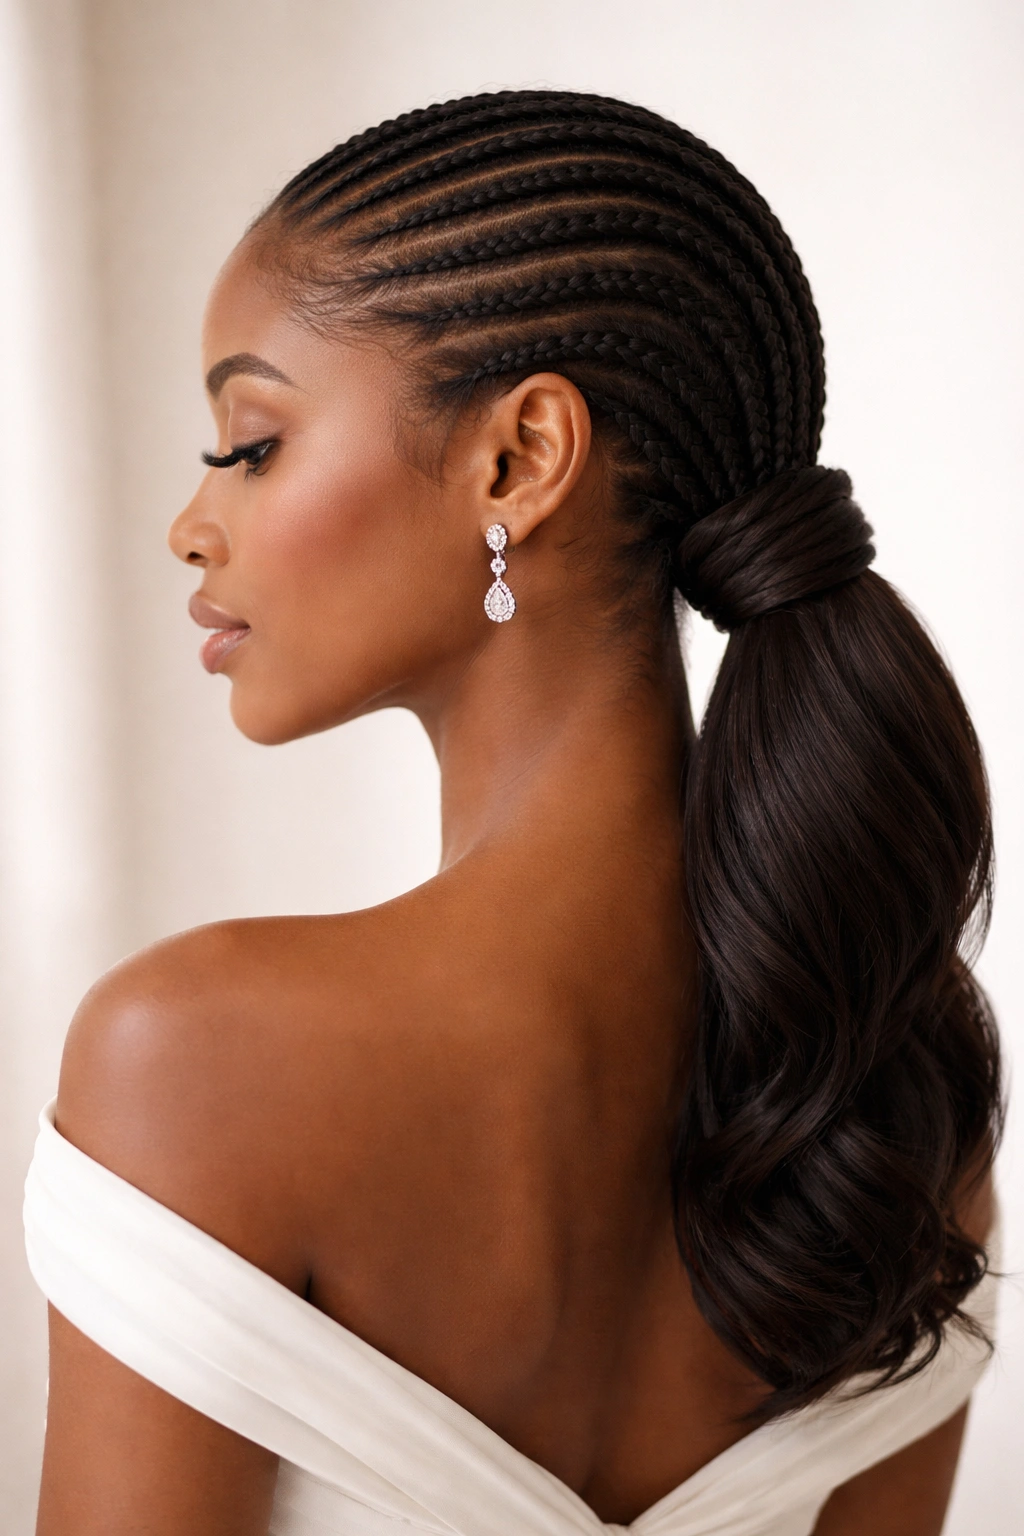
This refined, minimalist style features sleek cornrows that start at the crown and travel straight back, converging into a low, tight ponytail at the nape. A section of the ponytail is then separated out, twisted, and wrapped around the base of the ponytail to create a sophisticated chignon effect that feels elegant and intentional.
Why It’s Timeless for Weddings
The combination of cornrows with a traditional low ponytail creates the perfect bridge between contemporary and classic—it’s modern enough to feel fresh, but the low ponytail placement keeps it firmly in elegant, timeless territory. This style is especially stunning on brides who want their makeup, neckline, and back details to be the stars, as the hairstyle supports rather than dominates the overall look.
Creating the Polished Ponytail
- Cornrows should be installed fresh the day before or morning of the wedding for maximum sleekness
- Create 2-4 cornrows starting at the temples or crown and traveling straight back to the nape
- Gather all cornrows and remaining loose hair into a low, centered ponytail just above the nape
- Secure tightly with a silk-covered elastic in a shade matching your hair color
- Take a 1-2 inch section from the ponytail, gently twist it, and wrap it around the elastic to hide it completely
- Secure the wrapped section with bobby pins and smooth everything with pomade for a unified appearance
- Finish with a light hairspray to ensure no texture shifts throughout the day
Pro tip: Use a silk or satin-covered elastic rather than standard rubber—it’s gentler on the hair and looks more refined in close-up photos.
8. Romantic Cornrow and Pearl Braid Fusion
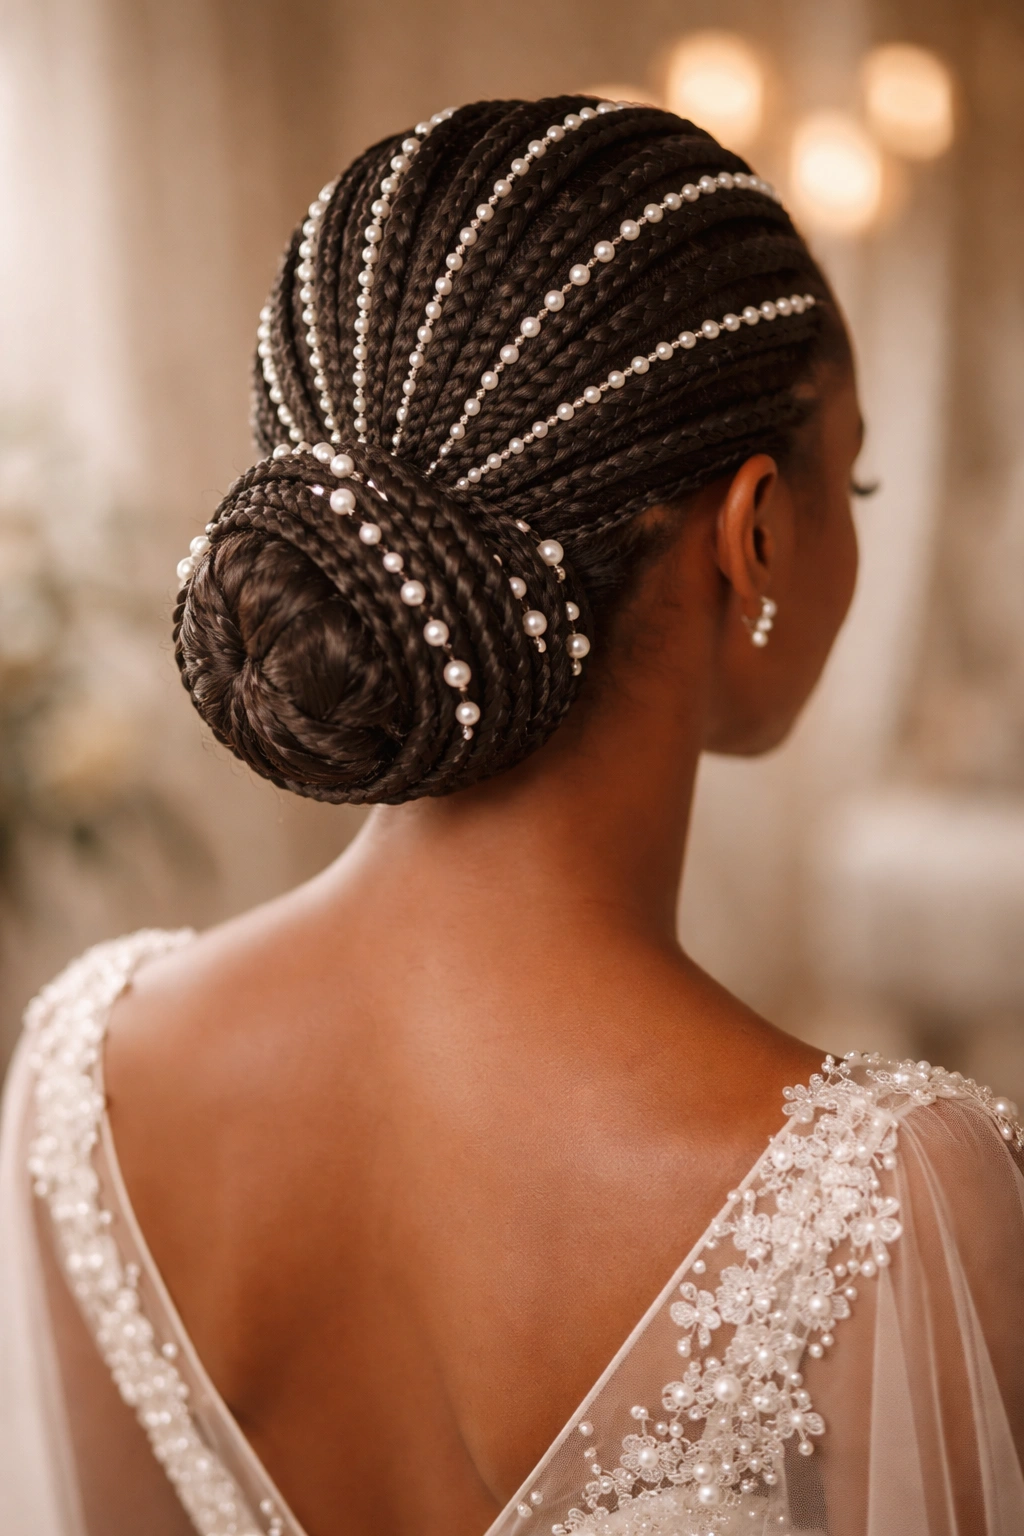
This dreamy, intricate style combines traditional cornrows with sections of thinner, looser pearl-threaded braids that are interwoven throughout, creating a luminous, delicate effect. The braids gather into a low, rounded bun where both cornrows and pearl braids are tucked and secured, creating a multidimensional, jewelry-like appearance.
The Luxury Feel
Pearl or crystal-threaded braids catch light beautifully and create an instant sense of luxury and celebration—they feel particularly special for formal evening weddings or ceremonies with elegant, refined aesthetics. The combination of structured cornrows with delicate pearl-threaded sections creates visual interest and sophistication that photographs beautifully from every angle.
Installation and Special Considerations
- This style typically requires 2.5-3.5 hours of installation due to the multiple braid types and threading complexity
- Install the day before the wedding to allow the braids to relax and the pearl threads to settle smoothly
- Create your base cornrows first, spacing them to allow room for pearl-threaded braids between them
- Weave thinner pearl or crystal-threaded braids through the gaps, creating an alternating pattern
- Gather all braids at the back into a low, rounded bun and pin securely
- Wrap the bun’s base with a coordinating thread or ribbon to hide elastic and bobby pins
- Use a light pomade to smooth any texture variations without dulling the pearl thread’s shine
Worth knowing: If you have any sensitivity to metals or crystals against your scalp, ask your braider to use a smooth, fabric-wrapped thread base under pearl threads for comfort throughout the day.
9. Half-Up Cornrow Style with Waterfall Detail
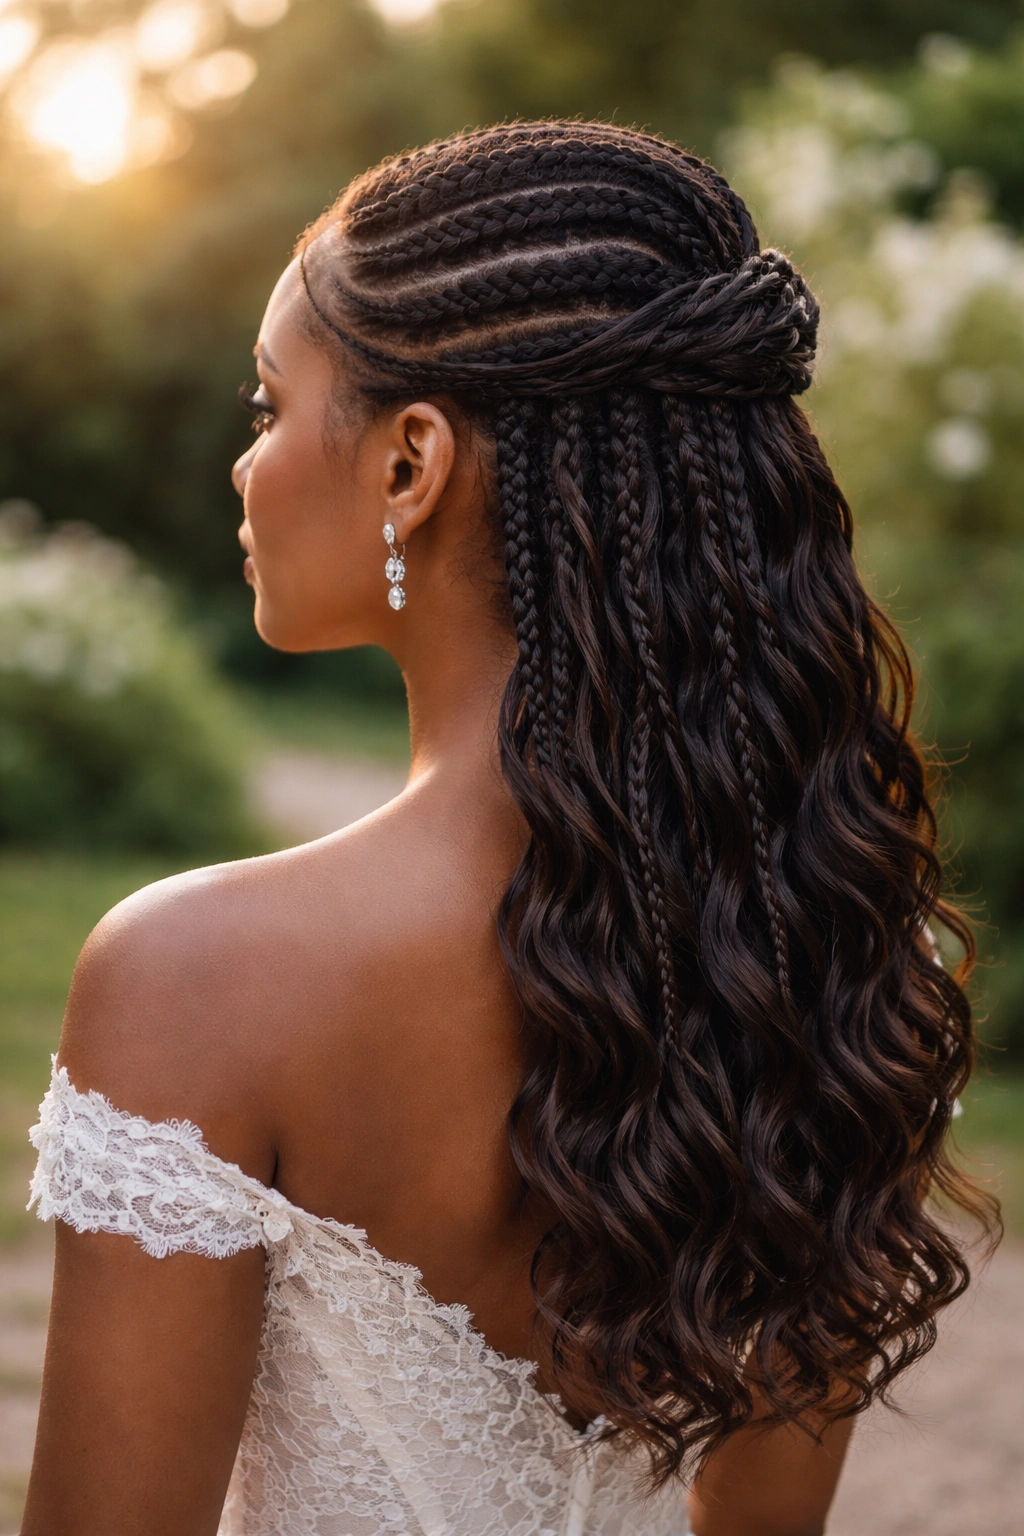
This bridging style keeps approximately half the hair in cornrows that sweep from the sides toward the center back, where they’re pinned into a small bun or gathered section, while the remaining length flows freely. Additional cornrows are woven through the loose hair creating a “waterfall” effect—delicate braids that tumble down from the gathered section, creating movement and softness.
The Best of Both Worlds
Half-up styles appeal to people who want the security and polish of an updo but with the romantic softness of down hair. The waterfall detail adds dimension and visual interest without requiring the hair to be entirely contained. This style feels particularly special for outdoor weddings or celebrations with relaxed, romantic vibes.
Step-by-Step Creation
- Begin with clean, lightly moisturized hair to create smooth, controlled braids
- Create cornrows on both sides starting at the temples and angling toward the center back of the head
- Pin the cornrows together with bobby pins at the center back, creating a small gathered section or tiny bun
- Take several small sections from the gathered hair and create loose three-strand braids that flow down
- Gently pull and texture the braids to create the “waterfall” effect, using a fine-tooth comb or your fingers
- Secure the base with bobby pins and light pomade, and tuck bobby pins under loose braids to hide them
- Finish with a flexible-hold hairspray that allows the waterfall braids to move naturally
Insider note: The waterfall braids look most romantic when they’re slightly textured and intentionally loosened—don’t pull them too tight, as the softness is what creates the cascading effect.
10. Ornate Diamond-Patterned Cornrow with Central Gemstone Bun
This showstopping style creates diamond-shaped geometric patterns across the entire crown using cornrows, with the entire pattern converging at a center point where a decorative hair cuff, ornamental headpiece, or cluster of gemstone hair jewelry anchors a rounded bun. This style makes a dramatic statement and feels particularly special for brides who want their hair to be a true focal point of their beauty look.
A Statement for Bold Brides
This style is for someone who loves attention to detail, appreciates artistry, and wants their hair to be a genuine conversation piece. It’s the kind of look that photographs extraordinarily well and creates an unforgettable visual impact. The geometric pattern reading as deliberate, intentional, and completely confident.
Creating the Geometric Masterpiece
- This style absolutely requires a highly skilled braider experienced in pattern work—plan for 3.5-4.5 hours of installation
- The pattern is created by braiding cornrows in multiple directions to form interlocking diamond shapes across the crown
- Each diamond should be roughly the same size for visual balance, though slight variation can add organic beauty
- All cornrow lines converge at a center point at the back of the crown where they feed into the bun
- Form a smooth, rounded bun and secure with bobby pins and medium-hold pomade
- Crown the bun with an ornamental cuff, decorative hair jewelry, or a simple metallic band that complements your wedding aesthetic
- Optional: integrate small gemstone hair picks or delicate chains throughout the diamond pattern for extra glamour
Real talk: Before committing to this style, request a consultation with your braider and see reference photos of pattern work they’ve done—this style’s success depends entirely on technical skill and pattern symmetry.
Final Thoughts
Cornrow updos represent some of the most versatile, stunning, and celebration-worthy hairstyling options available for weddings. Whether you choose a minimalist, elegant style or an ornate, artistic creation, cornrows provide a secure foundation that keeps you looking polished and camera-ready from the ceremony through the last dance of the reception.
The real magic of cornrow updos lies in their ability to work beautifully across different wedding aesthetics, hair textures, and personal styles. A romantic garden wedding looks perfect with flower-adorned crown braids, while a modern, elegant ballroom celebration shines with geometric patterns and statement details. The versatility means you’re not limited to one “bridal” look—you can choose based on your genuine aesthetic preferences and what makes you feel most beautiful.
Start planning your cornrow style early, book an experienced braider well in advance, and don’t hesitate to bring reference photos and have detailed consultations about what’s realistic for your hair type and the timeline you’re working with. Consider scheduling a trial installation if possible—this allows you to see the actual finished style rather than relying on photos, and it gives you time to make adjustments before the wedding day itself.