Cornrows are a protective styling powerhouse, and they’re especially transformative for thick 4C hair. If you’ve got the kind of crown that demands serious styling respect—the kind that commands attention and requires intentional care—you already know that not every cornrow style works equally well with your texture.
Here’s the thing about 4C hair: it’s beautifully dense, with a tight coil pattern that means volume comes naturally, but that same texture also means you need styles that account for how your hair actually moves and holds. Cornrows aren’t just a protective hairstyle for your hair’s health—they’re a way to showcase your natural texture while keeping things neat, manageable, and undeniably gorgeous. The best cornrow styles for thick 4C hair aren’t generic; they work with your texture’s specific properties rather than against them.
What makes a cornrow style actually work for thick 4C hair? The key is understanding how tension interacts with your coils, how moisture moves through your braids, and which patterns and sizes suit the density you’re working with. Too many cornrow tutorials ignore these realities and serve up advice designed for other hair types. You deserve better than that. The styles we’re breaking down here are tested, proven approaches that respect both your hair’s integrity and your styling ambitions.
Whether you’re looking for a protective style that’ll last weeks, something you can wear to the office or out on the town, or a low-manipulation look that gives your natural curls space to breathe and stay healthy, there’s a cornrow style in here that speaks to exactly what you’re trying to accomplish.
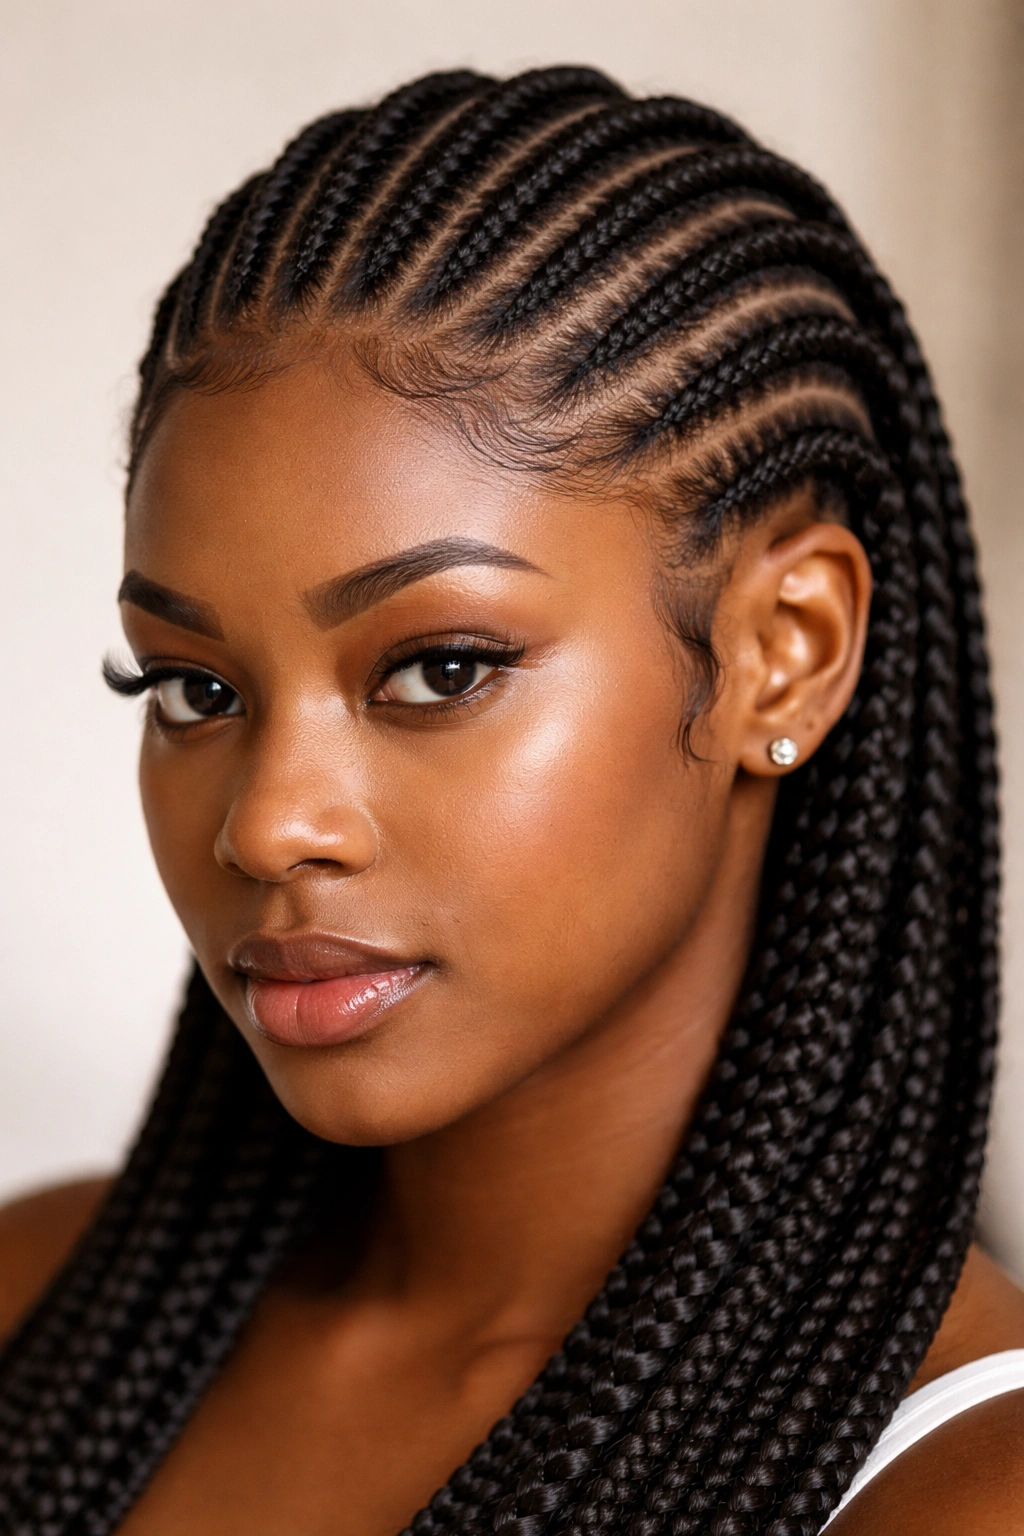
1. Classic Straight-Back Cornrows
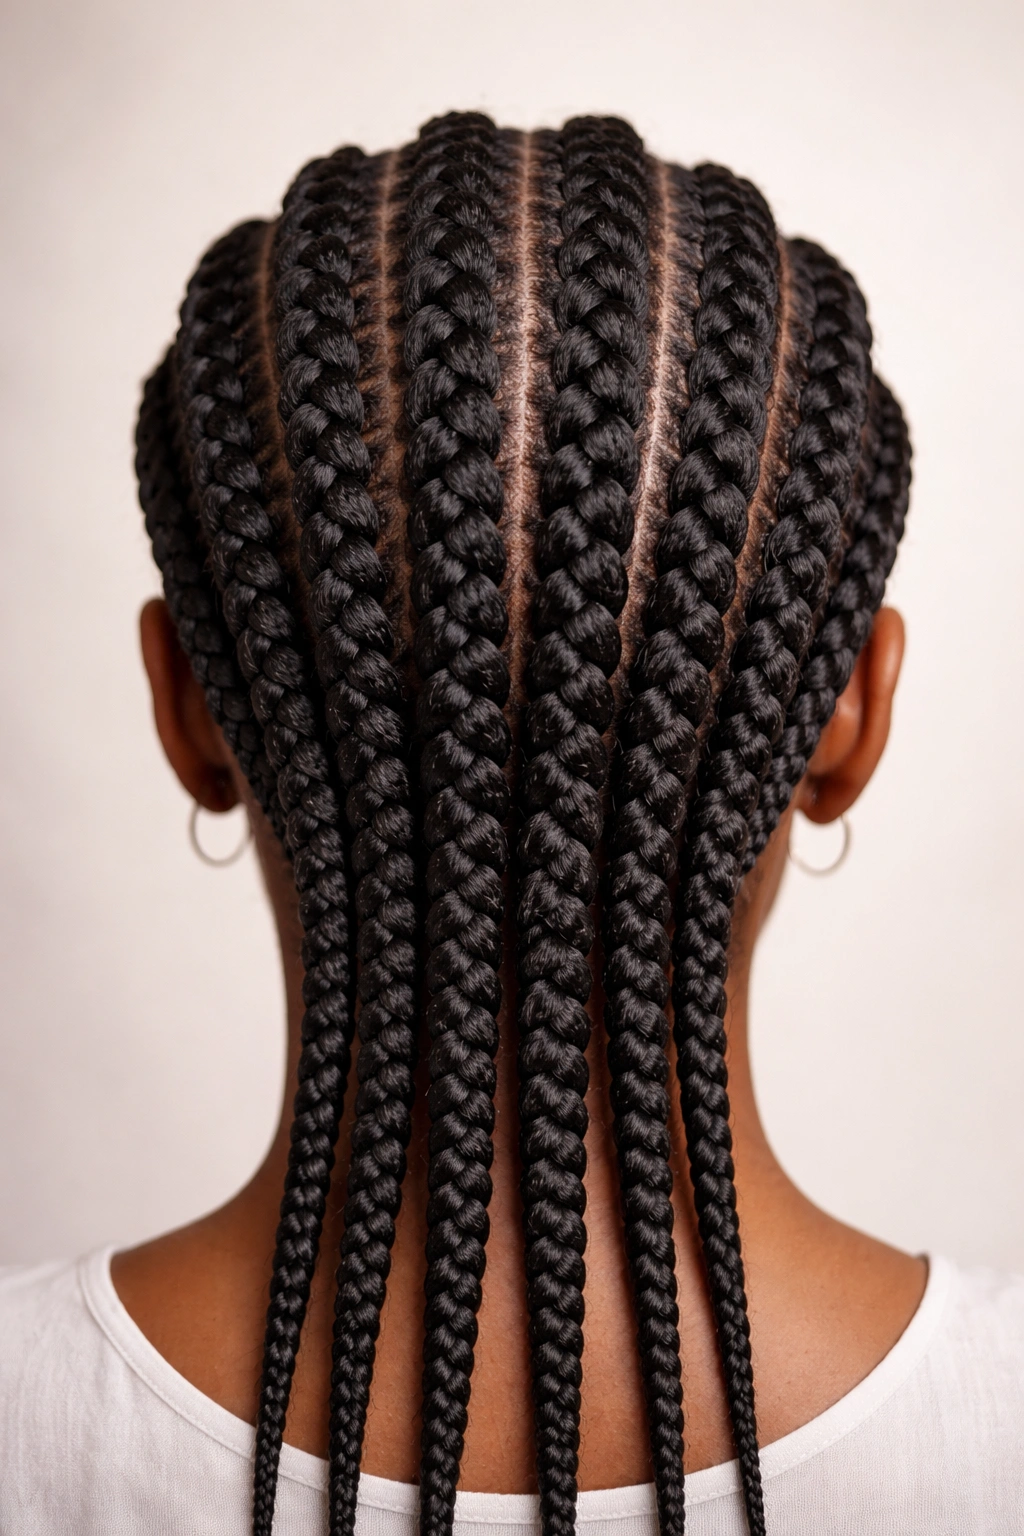
Straight-back cornrows are the foundation—the style that works in almost any situation and never goes out of fashion. With thick 4C hair, straight-back braids take on a sculptural quality, with each individual braid appearing defined and substantial. The key to getting this right is starting with properly section hair into even, rectangular parts that align perfectly from hairline to nape.
How to Get the Structure Right for Thick Hair
The most common mistake with thick 4C hair is making the sections too wide. When your hair is naturally voluminous, wider sections can make cornrows appear sloppy or uneven, even if your braiding technique is solid. Instead, aim for sections about the width of your index finger at the roots—this gives you substantial braids that still look intentional and precise. Start by using a rat-tail comb to create perfectly straight lines from your forehead straight back, then subdivide as needed based on the density of your hairline.
Installation and Maintenance Tips
- Work in sections to avoid tangling during the braiding process, especially if you’re doing this yourself or in multiple sessions
- Use a braiding gel or edge control designed for 4C hair that provides hold without flaking or buildup—the wrong product will show every flaw in your parting lines
- Keep the tension firm but not scalp-damaging; you should be able to fit one finger comfortably under each braid at the root
- Apply moisturizing oil or braid spray to your cornrows every 2-3 days to prevent dryness, which causes frizz and weakens the braids
This style typically lasts 2-4 weeks depending on how well you maintain moisture.
2. Goddess Braids with Curved Patterns
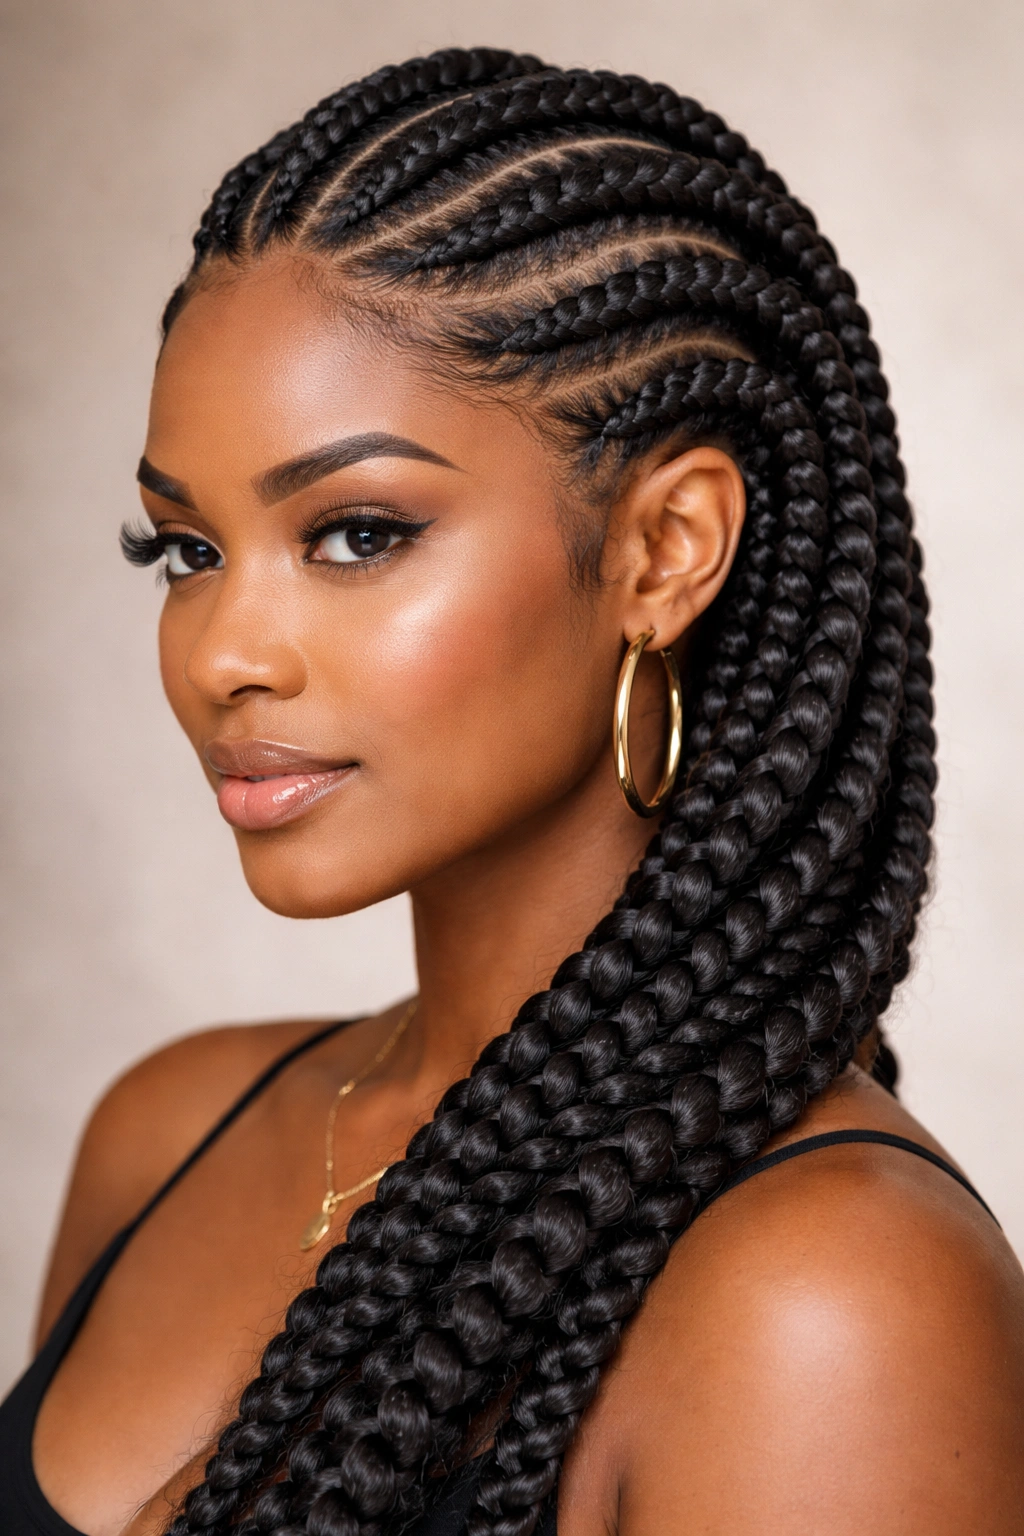
Goddess braids are thicker, more ornate cornrows that curve and swirl across the scalp in patterns that frame the face and follow the natural contours of your head. For thick 4C hair, goddess braids create movement and visual interest without sacrificing the protection that cornrows provide. The fuller braid width means less tension on individual strands and faster installation time.
Creating the Curved Design
The magic of goddess braids is in the pattern. Rather than going straight back, the braids curve diagonally, arc across the crown, or sweep from temple to temple. Start by mapping out your pattern with a comb before you even begin braiding—mark the intended path of each braid with light scratches in the hair or by visualizing the curves. For thick 4C hair, curves that follow the natural shape of your head look most flattering and feel most secure because they work with your hair’s density rather than against gravity.
Styling Variations and Finishes
- Braid thickness: Make goddess braids thicker than straight-back cornrows (about thumb-width) to balance the complexity of the curved pattern
- Scalp exposure: Curved patterns naturally create areas where your scalp shows between braids—this is intentional and beautiful, showing off your edges
- Face-framing details: Run one thinner braid along your hairline or temple on each side to frame your face, or leave face-framing space unbraided for a softer look
- Finish options: Let the braids hang loose at the ends, curl the ends around your finger for loops, or tuck the ends under for a polished look
Goddess braids can last 3-4 weeks and actually look better after the first week as they settle.
3. Zigzag Cornrows for Movement and Dimension
Zigzag cornrows create dramatic visual movement across the scalp, with braids following a sharp zigzag or sawtooth pattern from one side of your head to the other. This style is playful and youthful while still being practical and protective. For thick 4C hair, the zigzag pattern breaks up the visual weight of the braids and creates the illusion of movement even when your hair is in a static protective style.
Mapping and Executing the Zigzag
Before you start, use your comb to lightly draw the zigzag pattern across your scalp—this prevents mistakes and ensures your pattern is symmetrical. The key is making your “peaks” and “valleys” roughly equal in width so the pattern looks intentional rather than accidental. For thick hair, slightly exaggerated zigzags (making the points more dramatic) creates more visual pop than subtle, shallow angles.
Why Thick 4C Hair Shines With This Pattern
- The density of 4C hair naturally emphasizes angular patterns, making the zigzag appear more defined
- The three-dimensional coil pattern of 4C hair catches light differently along curved versus straight sections, enhancing the visual movement
- Zigzag braids distribute tension more evenly across the scalp than straight-back styles, making them easier to wear for longer periods
- The pattern provides built-in visual interest, so you don’t need to add beads, cuffs, or other adornments to make the style pop
4. Stacked Cornrows With Varied Braid Sizes
Stacked cornrows—where you braid multiple rows that sit close together rather than spreading them across your entire head—create a bold, high-impact look. By varying the braid thickness (thick, medium, thin, thick, medium, thin as a repeating pattern), you add visual rhythm and make the style feel intentionally curated rather than random.
Creating Intentional Texture Contrast
Thickness variation works beautifully with thick 4C hair because the varying widths create different visual weights that play with light and shadow. A thick braid next to a thin one creates more contrast than you’d get with uniform widths. Use your sections strategically: some sections can be three times as wide as others, creating a deliberate pattern of thick and thin.
Styling Approach for Maximum Impact
- Stack the braids at the back or one side of your head rather than spreading them across the whole scalp for a more dramatic focal point
- Pair stacked braids with an undercut or fresh edge-up to amplify the contrast
- Use different moisturizing products on different braid widths—heavier oils on thicker braids that hold moisture longer, lighter sprays on thinner braids that dry faster
- The stacked placement naturally creates a lot of height at the crown, so pair this style with clothing that complements the boldness
Because of the increased volume from thick braids, stacked cornrows can last 4-5 weeks.
5. Feed-In Cornrows for a Seamless Look
Feed-in cornrows use the technique of feeding in small pieces of your natural hair as you braid, creating braids that appear to grow directly from your scalp rather than sitting on top of it. This creates an incredibly clean, polished aesthetic and is especially flattering for thick 4C hair because it shows off your edges and natural hair pattern while still protecting your hair.
The Feed-In Technique Explained
Instead of picking up hair in thick sections as with traditional cornrows, you start with a small section and feed in tiny pieces of your natural hair as you braid downward. This requires more time and precision than traditional cornrows, but the result is braids that look impossibly neat and elegant. For thick 4C hair, feed-in cornrows are worth the extra time because your texture’s natural definition makes each braid appear incredibly detailed and intentional.
Best Practices for Your Hair Type
- Start with thoroughly detangled hair—feed-in braiding on tangled 4C hair will cause breakage and frustration
- Keep the initial section small (about pencil-width) to make the braids appear thinner and more refined despite your hair’s density
- Work in a well-lit space so you can see exactly which hairs you’re feeding in; poor visibility leads to mistakes and uneven-looking braids
- Apply leave-in conditioner to sections before braiding to ensure moisture is locked in—feed-in braids don’t trap as much moisture as thick traditional cornrows
- The additional manipulation required means some stylists charge more for feed-in cornrows; factor this into your budget
Feed-in cornrows typically last 2-3 weeks because the more delicate appearance means you’ll notice any loosening or frizzing sooner.
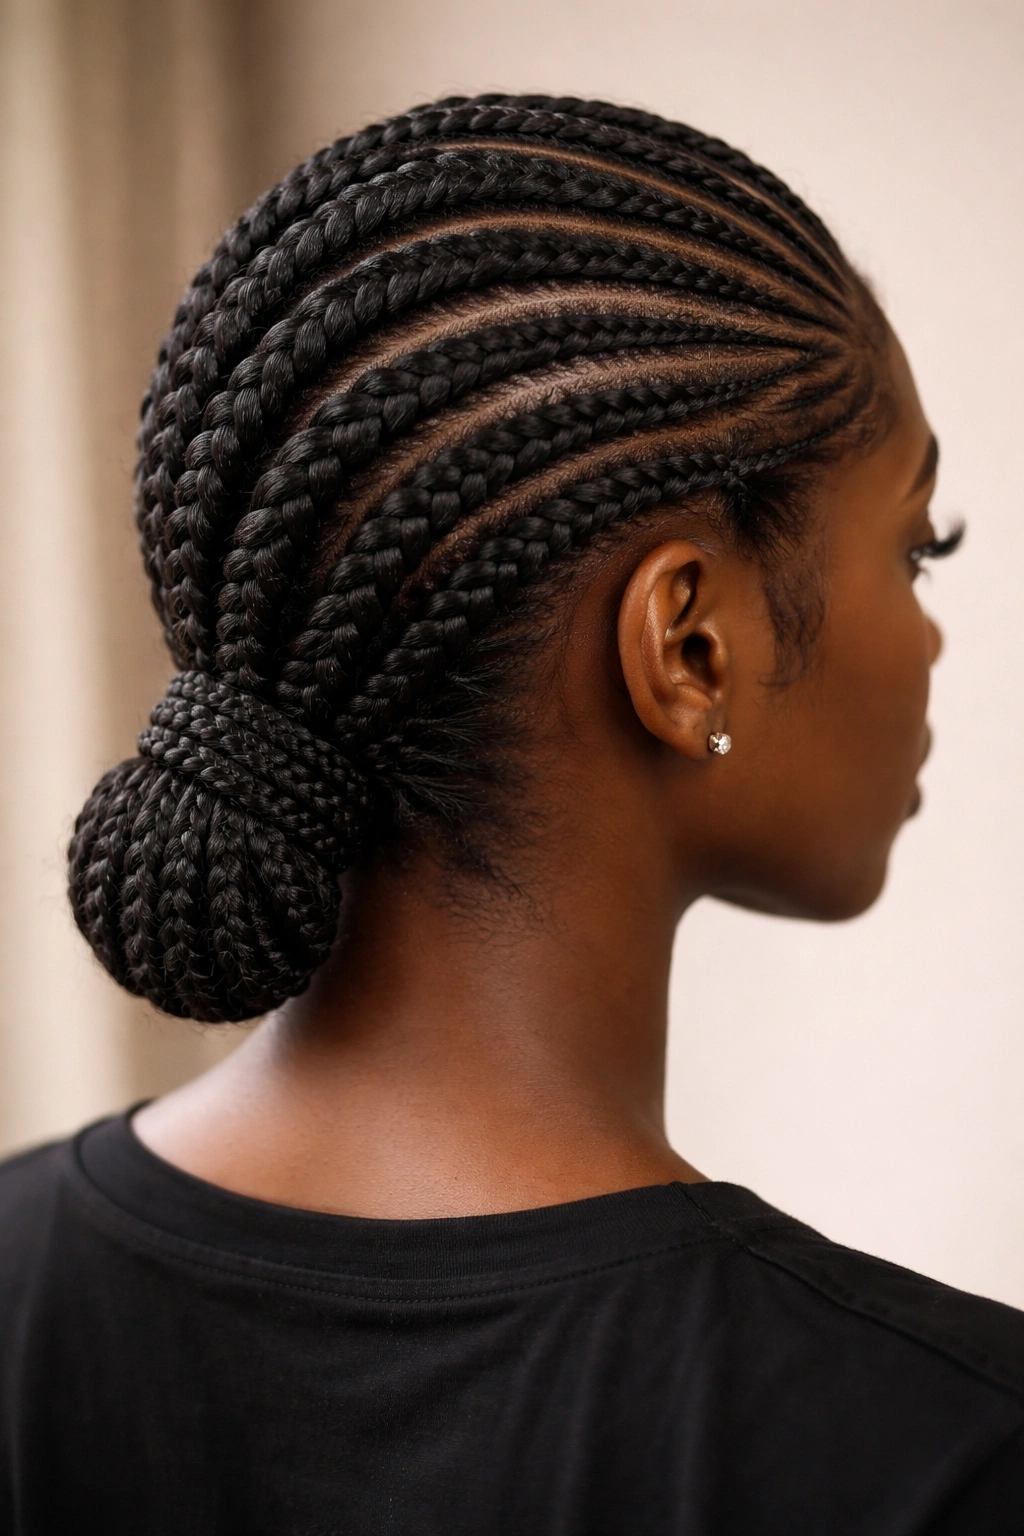
6. Cornrow Bun With Thick 4C Coils
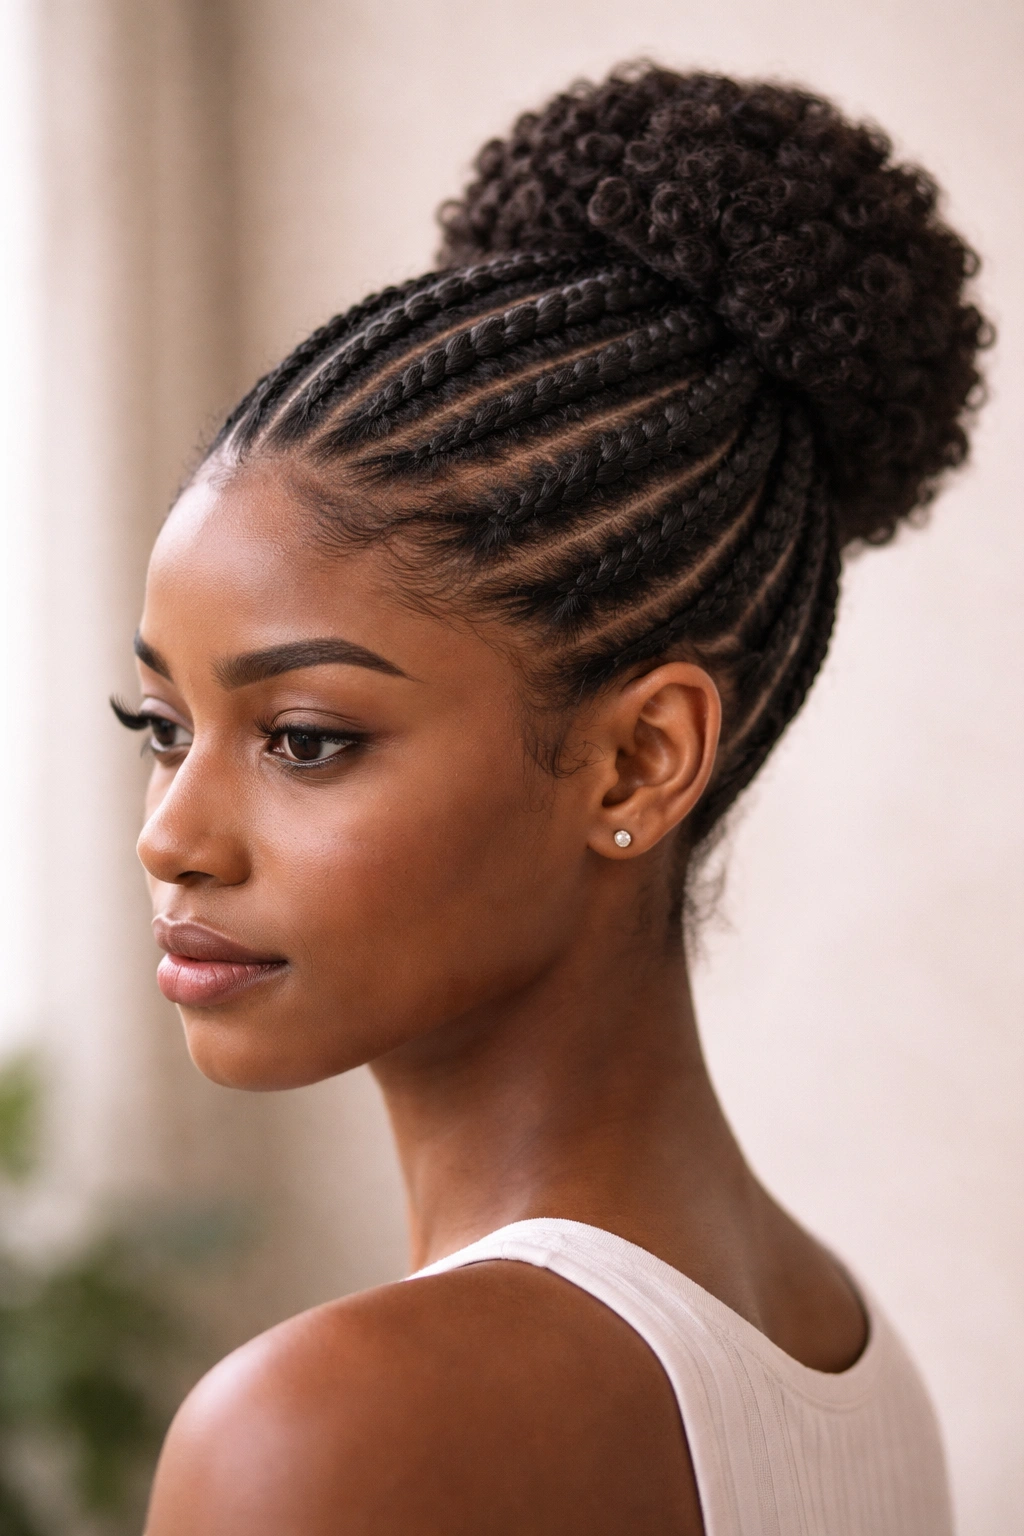
A cornrow bun combines the protective benefits of cornrows with the sophisticated, polished look of an updo. You can braid cornrows from your hairline back to the crown, then gather the remaining length into a bun, creating a style that’s professional, elegant, and completely protective.
Creating a Balanced Bun From Braided Hair
The secret to a gorgeous cornrow bun is planning how many braids you’ll need and where they’ll converge. For thick 4C hair, aim for 4-6 cornrows that all lead back to a central point at the crown or nape, depending on the bun placement you prefer. Use a seamless hair tie or scrunchie (no metal), and gently coil the braid ends around the base of the bun, securing with bobby pins positioned so they don’t show.
Styling Options for Different Occasions
- Low bun at nape: Professional and office-appropriate, works especially well for days when you want to show off your edges and face shape
- High bun at crown: More playful and youthful, creates impressive height which suits thick 4C hair beautifully
- Slightly off-center bun: Asymmetrical and interesting, creates a modern, fashion-forward impression
- Bun with loose ends: Braid the front sections, then let the ends hang loose around your face for a softer, more romantic version of this style
7. Thin Cornrows for Maximum Longevity
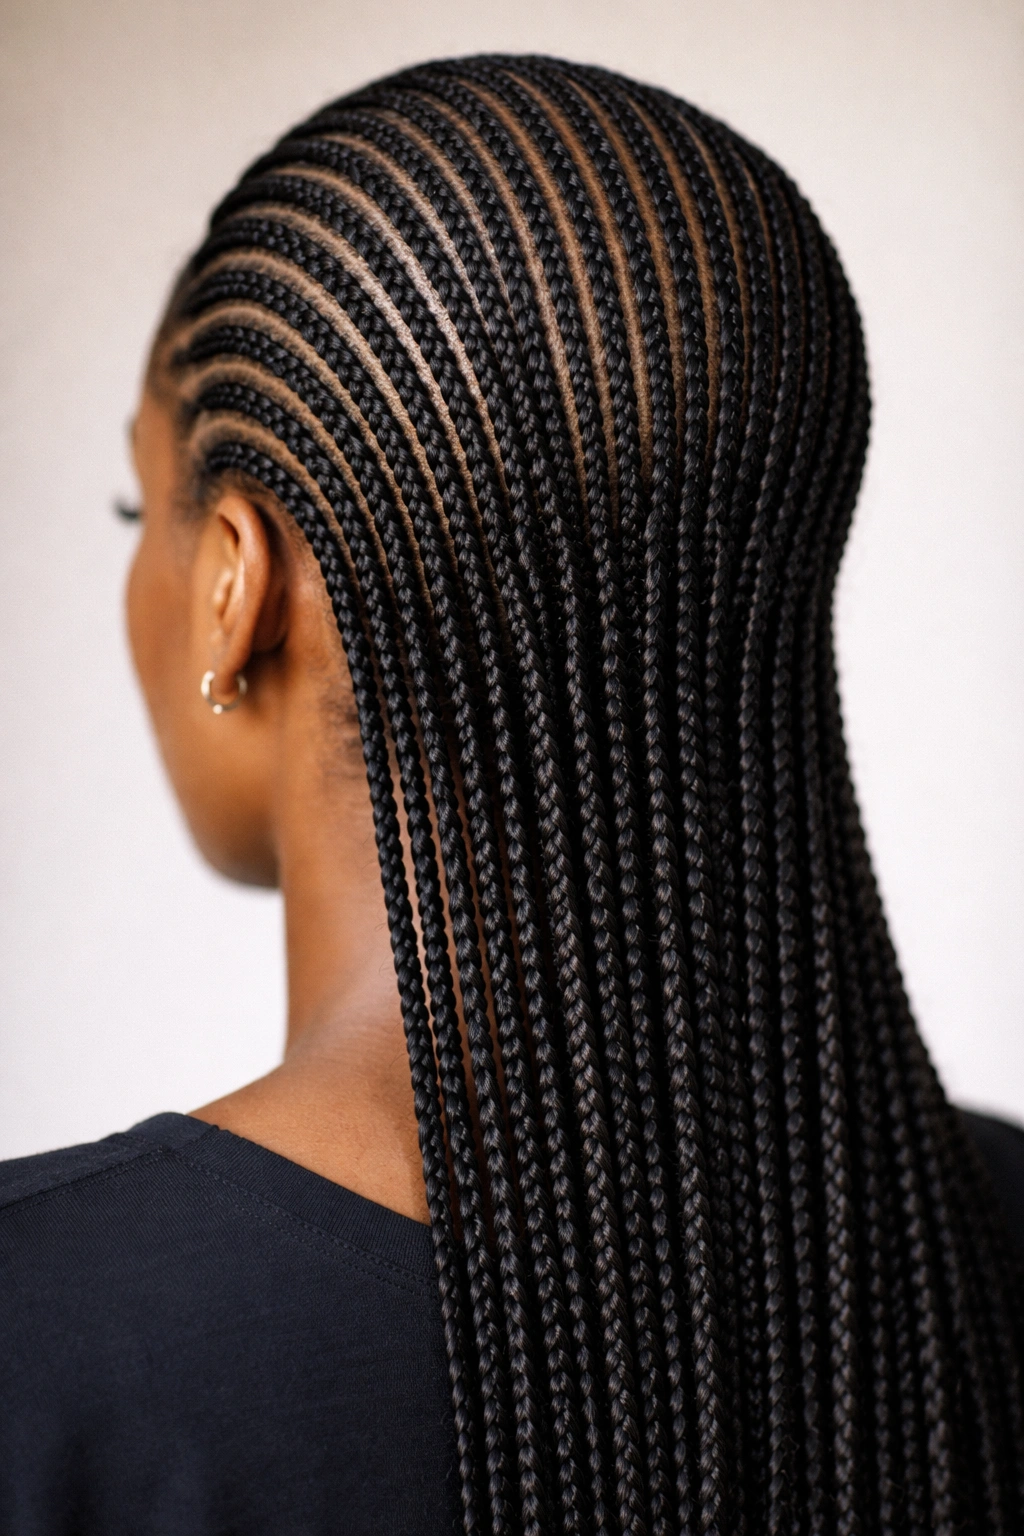
Thin cornrows—the kind that are no thicker than a pencil—require more time during installation but offer the longest-lasting protective style available. For thick 4C hair, thin cornrows can last 6-8 weeks because each individual braid can maintain its integrity longer, and your hair’s natural density means even thin braids look substantial and intentional rather than sparse.
Installation Strategy for Thin Braids
The primary challenge with thin cornrows on thick 4C hair is that your natural hair volume means you’ll need many more braids to cover your entire head completely. Rather than fighting this, lean into it: create beautiful, even patterns that showcase just how many braids you can fit. Consider braids that cover just your crown and part-way down the back of your head, leaving the bottom section of hair free, rather than trying to braid every single inch.
Managing Multiple Thin Braids
- Thin braids require more frequent moisturizing because water and product don’t penetrate as deeply as they do with thicker braids
- Apply moisturizing spray or diluted leave-in conditioner every 2-3 days without fail
- Avoid heavy oils that can accumulate on thin braids and make them appear matted; instead use lightweight sprays and creams
- Sleep on a silk or satin pillowcase to minimize frizz, which shows immediately on thin, delicate braids
- The installation time for thin braids can stretch 6-8 hours or longer; plan accordingly and bring snacks and entertainment to your braiding appointment
8. Cornrows With Beads and Cuffs
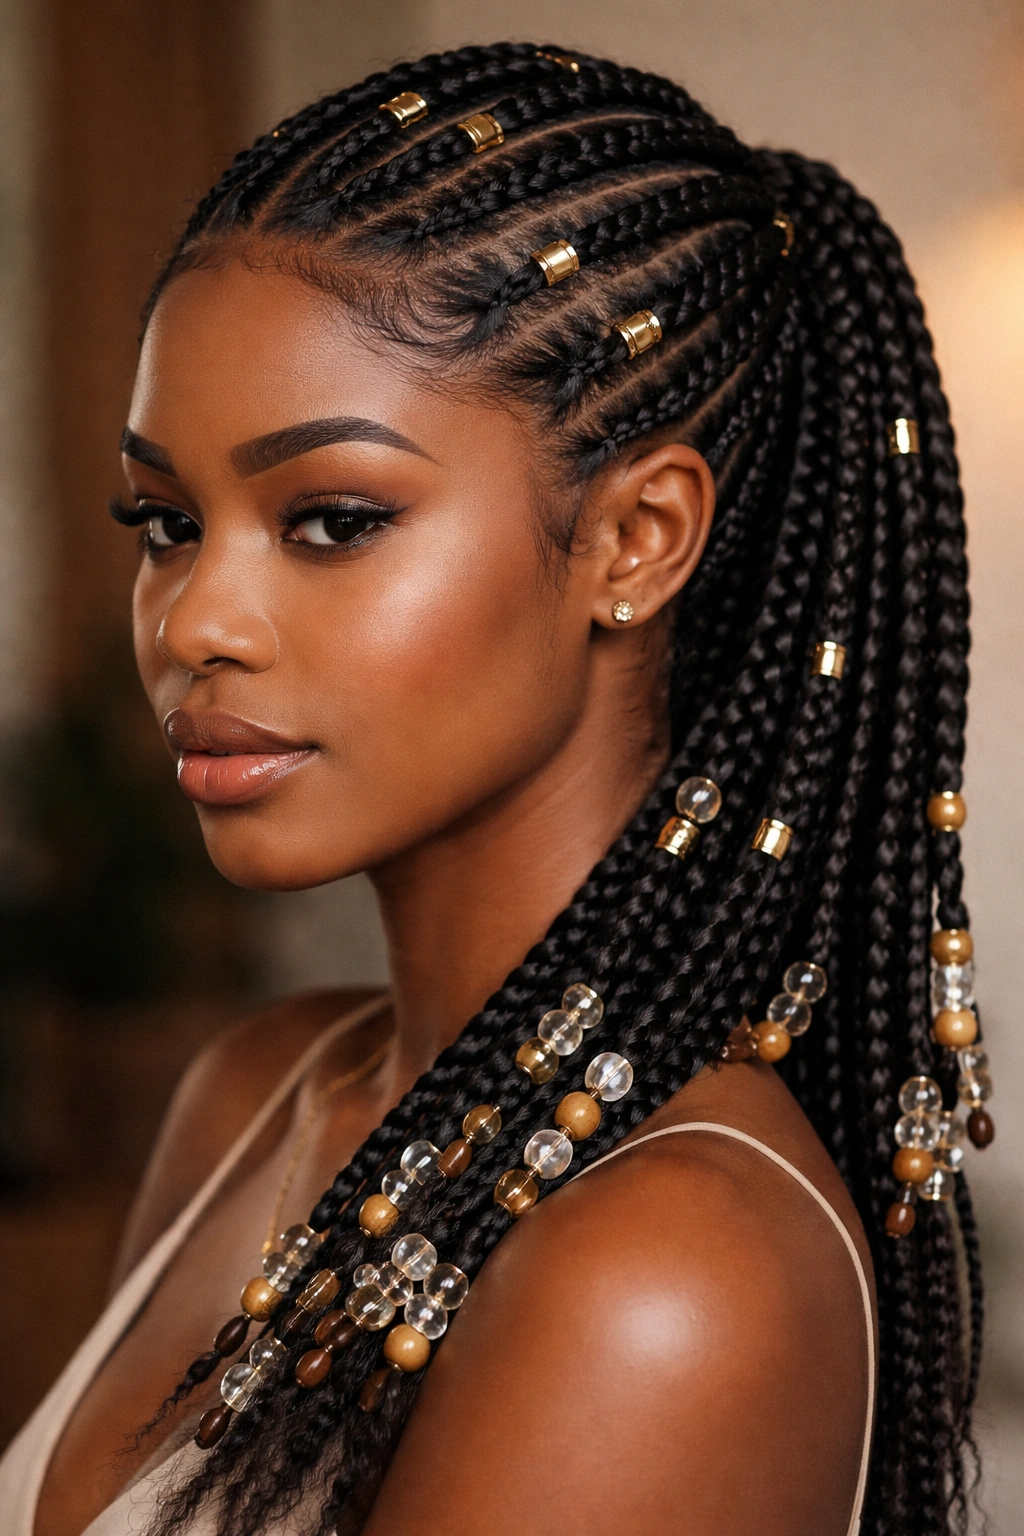
Adding beads or metal cuffs to cornrows transforms the protective style into something more glamorous and decorative. With thick 4C hair, beads catch light beautifully and add visual personality to your braids. Gold, copper, and brass tones complement warm skin tones, while silver works beautifully with cooler undertones.
Choosing Beads and Placement Strategy
Select beads with openings large enough to slide over your braids without requiring you to force them—forcing beads damages both your braids and the bead itself. Wooden beads are lighter and gentler on your braids, while metal or crystal beads create more dramatic visual impact. You can cluster beads at the ends of braids, space them evenly throughout each braid, or place them strategically to draw attention to certain sections.
Practical Considerations for Durability
- Glass and metal beads are heavier than resin or wood; too much weight on one braid can cause it to loosen or even break off
- Thread beads on using a thin wire or beading thread rather than trying to slide them directly onto your braids
- If a bead becomes tight (as your braids naturally relax and loosen), gently wiggle and rotate it rather than forcing it, which can break your hair
- Beads do add weight, which can sometimes cause braids to frizz more quickly; check your braids daily and apply frizz cream as needed
- Remove beads gently when you take down your cornrows to avoid pulling out your natural hair
9. Two-Toned or Multi-Colored Cornrows
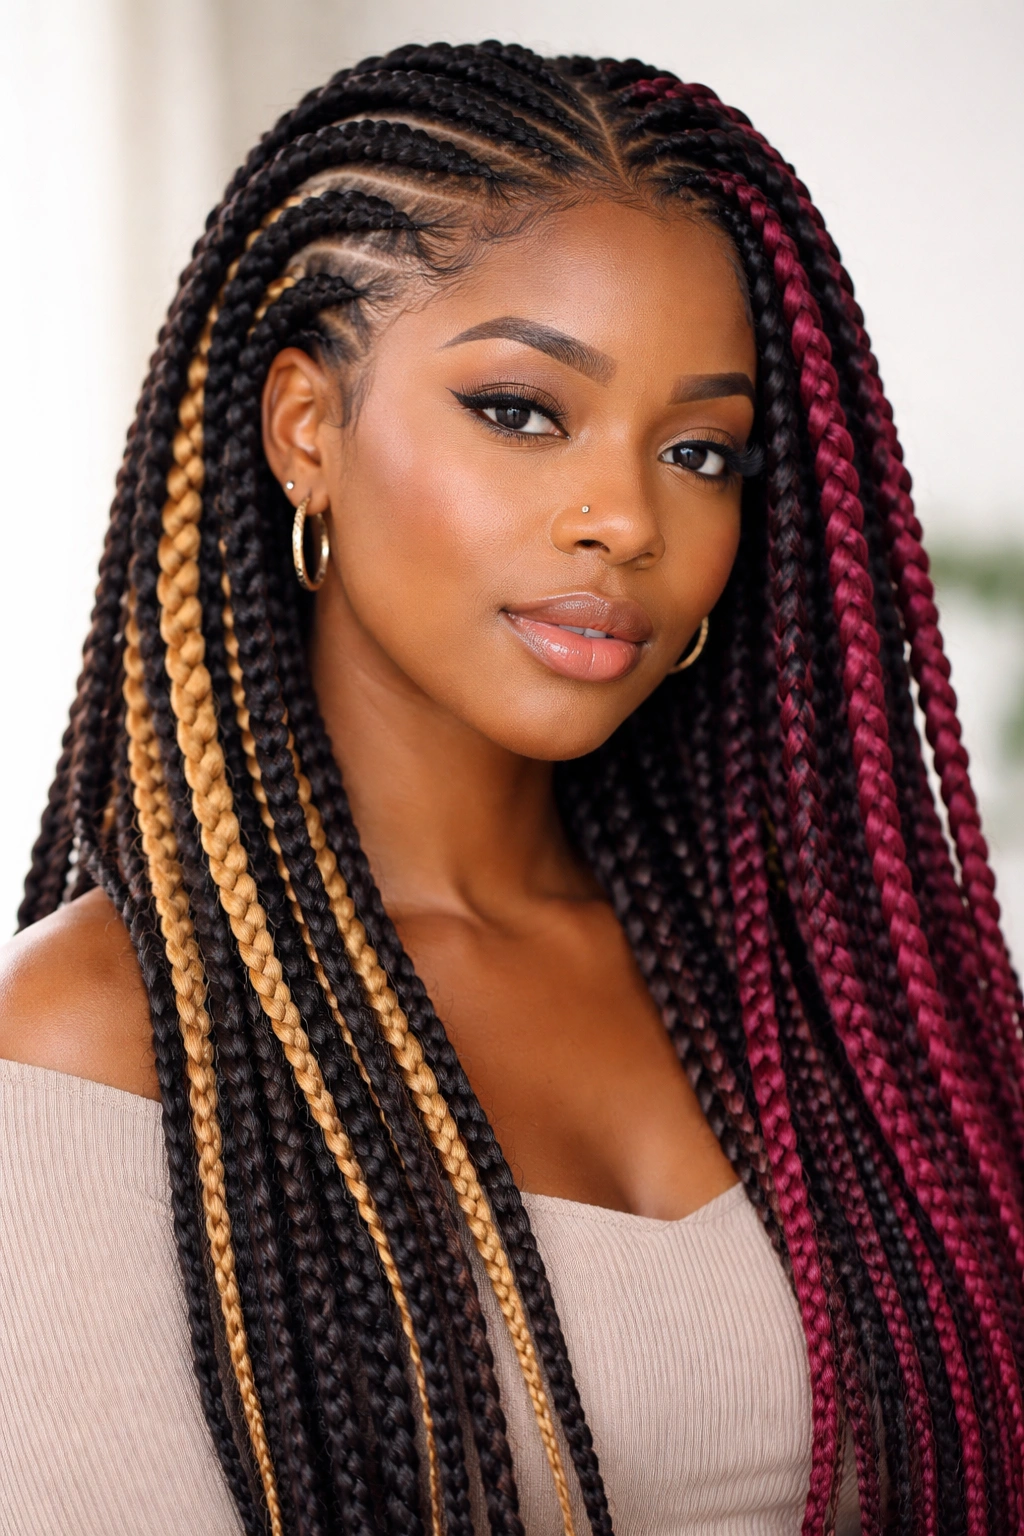
Adding color through braiding hair extensions in contrasting shades creates a striking visual effect. You can use subtle color extensions (a shade lighter or darker than your natural hair) or bold contrasts (blonde with dark roots, bright jewel tones, or pastels). With thick 4C hair, color extensions are particularly visible and dramatic because of your hair’s natural texture and density.
Color Combination Ideas for Different Looks
- Subtle dimension: Use extensions that are one or two shades lighter than your natural hair for an understated, blended look
- Bold contrast: Pair dark roots with blonde ends, or use entirely contrasting colors like copper with black for maximum impact
- Rainbow: Use different colors for different braids to create a vibrant, artistic look—this especially suits free spirits and creative types
- Underlights: Keep the top layer of braids your natural color and hide bright colors underneath, creating a peek-a-boo effect when you move
Working With Extensions in 4C Hair
- Use kanekalon, human hair, or high-quality synthetic extensions designed for braiding; cheap extensions tangle, frizz, and break easily
- The added bulk of color extensions can increase weight and tension on your scalp, so avoid creating too many braids or adding beads to extension-containing styles
- Extensions hold frizz differently than your natural hair, so you may need to use different products on extensions versus your natural texture
- Check the extensions frequently for loose hairs—they can tangle with your natural hair if not properly maintained
10. Cornrows Styled Into Loops or Ponytails
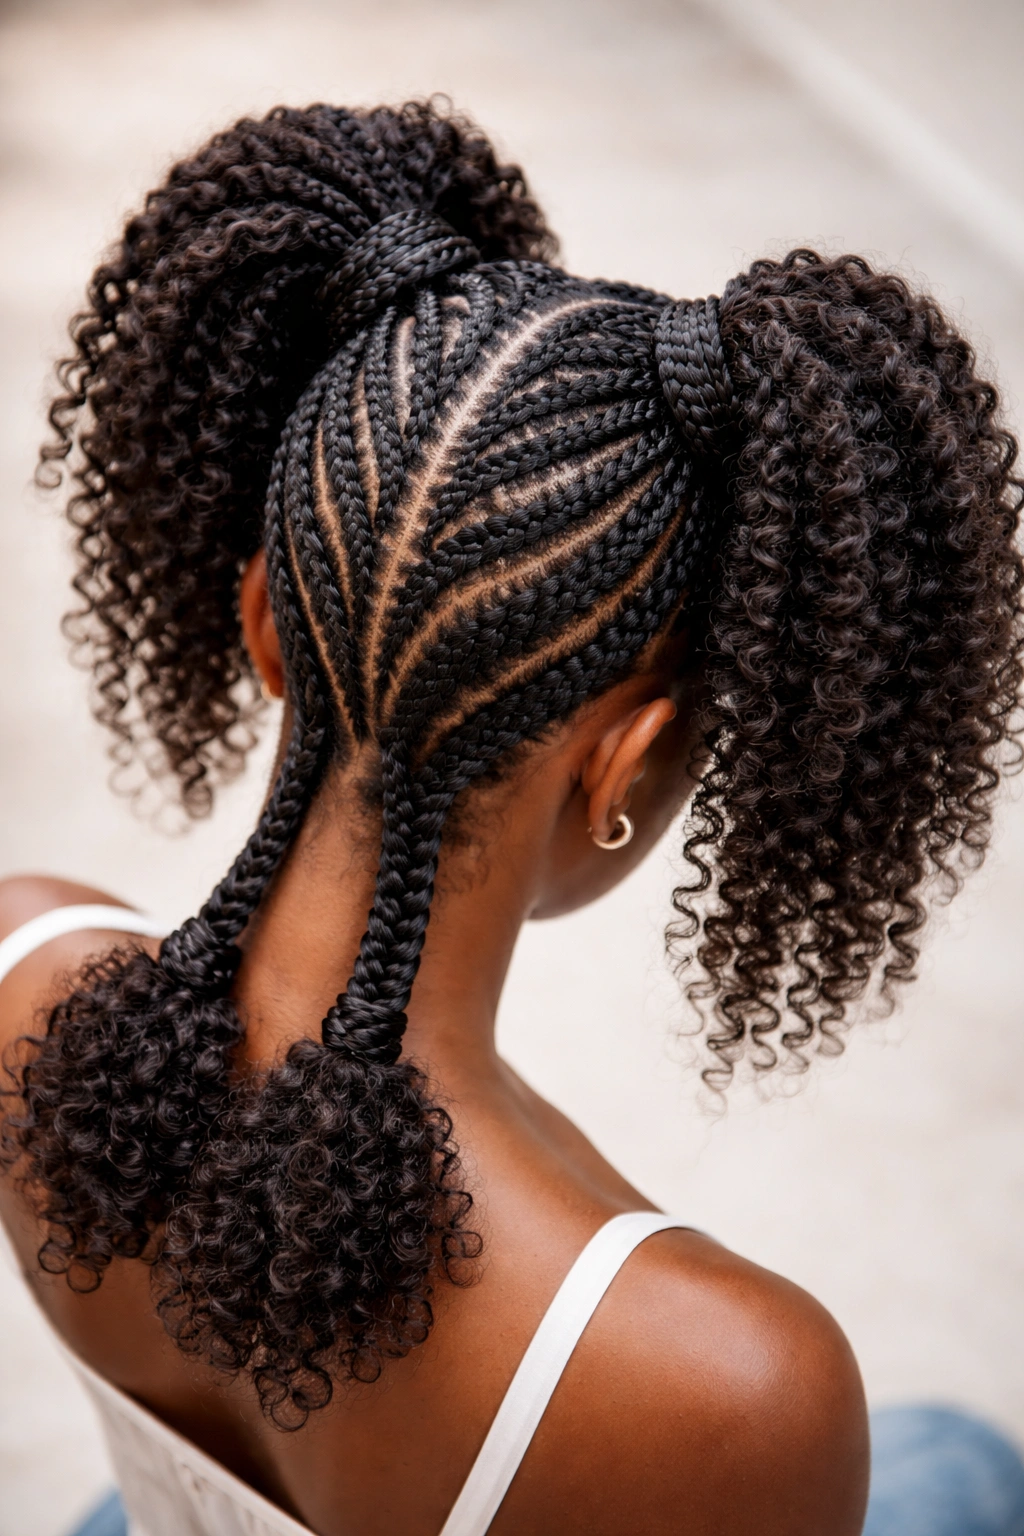
Rather than letting cornrows hang straight, you can style the braids into loops, curls, or gather them into one or multiple ponytails. This creates a completely different aesthetic—more playful and youthful than traditional cornrows—while maintaining all the protective benefits. For thick 4C hair, coiled or looped braid ends take advantage of your natural curl pattern and create stunning volume.
Looping Technique for Maximum Drama
After braiding your cornrows, take the end of each braid and gently coil it around your finger to create a loop, then secure the loop with bobby pins or a small elastic. This works especially well with longer braids and creates height at the crown. For thick 4C hair, the natural coil pattern of your hair means loops appear rounded and full rather than flat.
Multiple Ponytail Variations
- High crown ponytail: Gather all cornrows into one high ponytail at the crown for a sleek, confident look
- Two-ponytail style: Divide braids down the middle and create two ponytails, one on each side—playful and youthful
- Low side ponytail: Gather braids to one side for an asymmetrical, sophisticated approach
- Stacked ponytails: Create one ponytail, then use a few braids from lower down to create a second ponytail below it
- Space buns: Create two small, tight buns by gathering braids into two points on top of your head
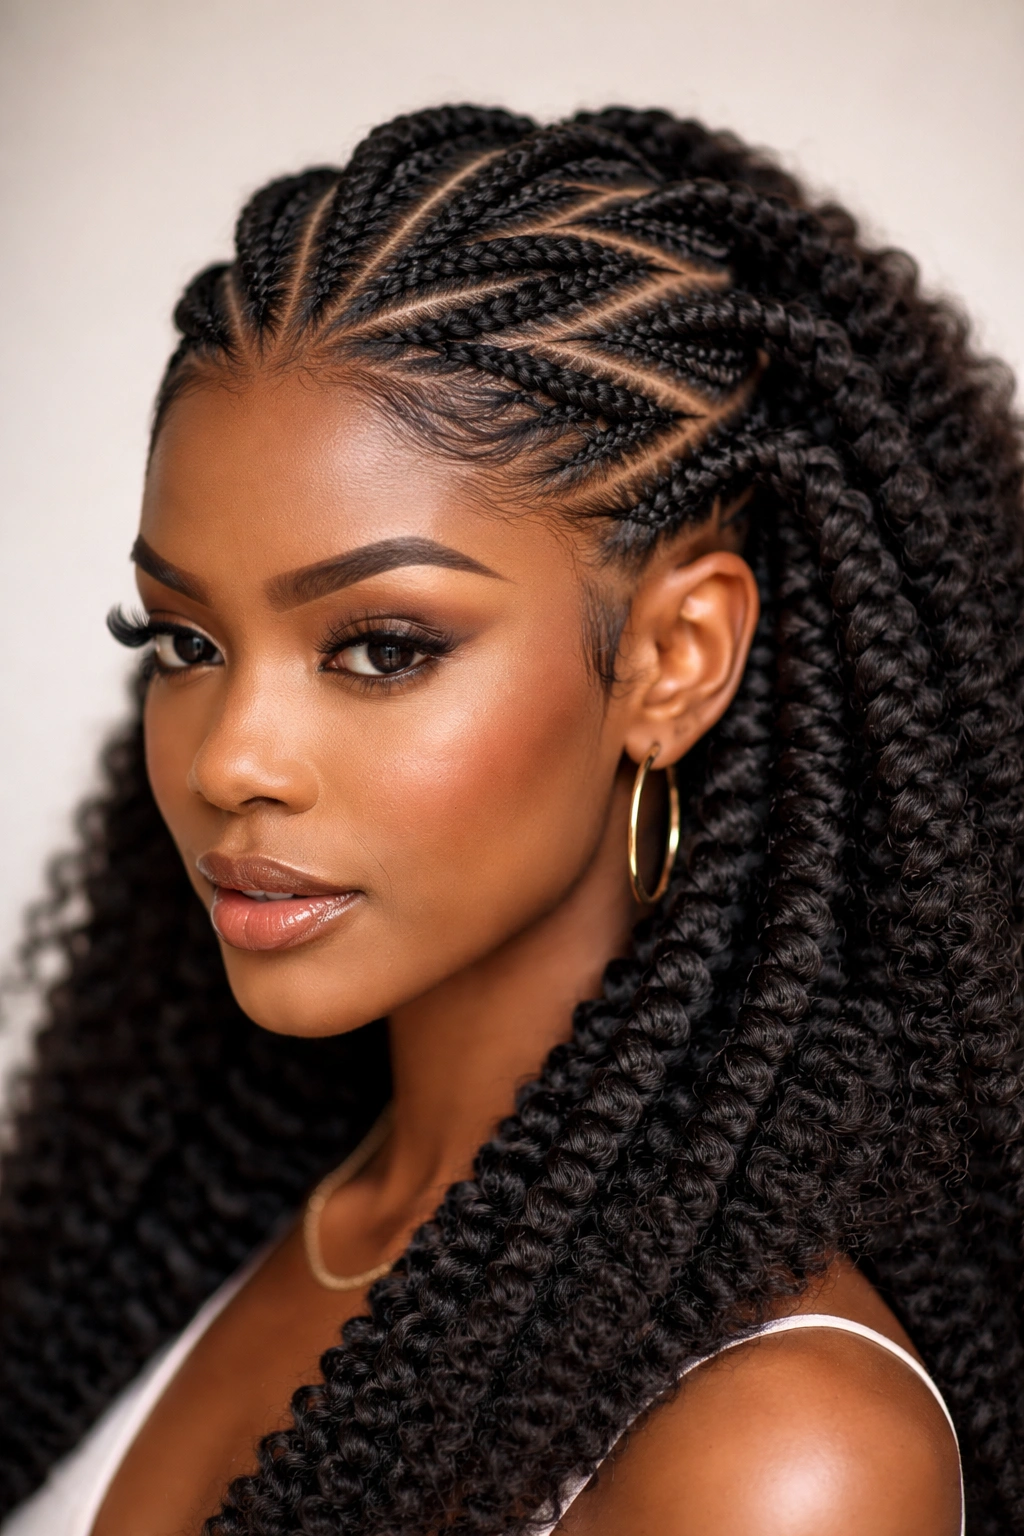
11. Cornrow Crown With Free Ends
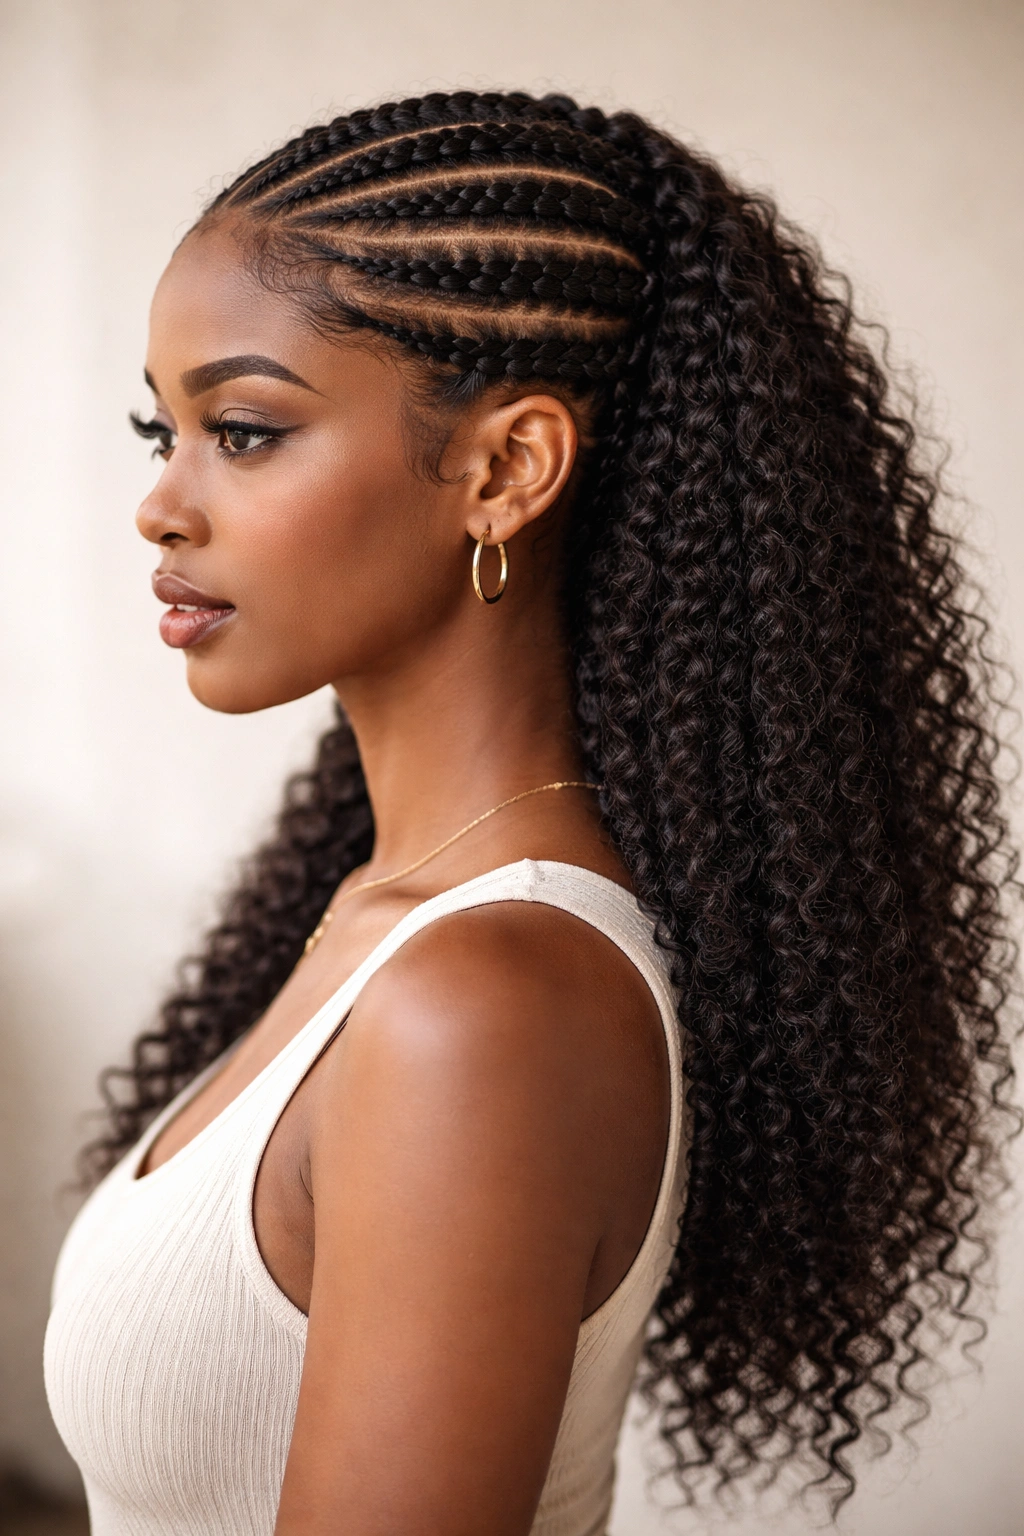
A cornrow crown—where you braid from temple to temple across the crown of your head, framing your face—paired with free hair hanging down your back creates an elegant style that looks intricate while keeping your most vulnerable hair (at the hairline and crown) protected. This style works beautifully with thick 4C hair because the crown braids frame your face while the free-hanging hair showcases your natural texture.
Creating a Flattering Crown Design
Start your braids at your temples and follow the natural curve of your head around to the other temple. The crown braid should sit at roughly the same height all the way across, creating a consistent visual line that flatters most face shapes. You can make this one thick braid on each side that connects, or create multiple thinner braids that work together as a crown effect.
Styling the Free Hair Section
- If you’re leaving hair free, detangle and moisturize the free section thoroughly; it doesn’t have the same water retention as braided hair and will dry out faster
- Apply a heavy leave-in conditioner and sealing oil to the free section to prevent frizz and breakage
- Consider putting the free hair in a puff, twist-out, or braid-out to create dimension and keep the overall style looking intentional
- The contrast between the sleek braids and textured free hair creates visual interest and lets your natural curl pattern shine
Who This Style Suits Best
- People who like showing off their natural curl pattern while still getting protective styling benefits
- Anyone concerned about tension alopecia at the hairline (since only the crown is braided, tension is minimal)
- Those wanting a style that’s dressy enough for special events but still allows natural hair visibility
- People who enjoy the process of refreshing and restyling their free-hanging sections between braid appointments
Final Thoughts

Cornrows for thick 4C hair aren’t a one-size-fits-all situation. Your hair’s density, your lifestyle, your styling preferences, and how much time you’re willing to invest in installation all play a role in finding the perfect cornrow style. The styles we’ve covered span everything from quick, straight-back classics to elaborate, artistic designs—because versatility matters when you’re protecting and celebrating your hair.
Here’s what matters most: choose a style that you genuinely love looking at in the mirror, not one that’s trending or that someone else says looks good. Your confidence when wearing a style shows, and that confidence is half the beauty. Whether you’re going classic and polished, bold and artistic, or somewhere in between, your thick 4C hair deserves a cornrow style that honors its texture, protects its health, and makes you feel absolutely incredible.
The best cornrow style is the one you’ll maintain properly—moisturizing consistently, sleeping on a silk or satin surface, and keeping tension reasonable throughout the weeks you wear it. That’s the real secret to stunning cornrows that not only look gorgeous but actually help your hair thrive.