Short natural hair opens up styling possibilities that longer hair sometimes can’t quite pull off—and didi weaving is one of the most transformative protective styling techniques available. Also called goddess braids or feed-in braids when done with extensions, didi weaving creates the illusion of longer, fuller hair while keeping your actual strands tucked away and protected. The beauty of this technique lies in its versatility: you can wear the woven sections loose and flowing, bundle them into a bun, wrap them around your crown, or let them cascade down your back in ways that feel sophisticated and deliberate.
The challenge with short natural hair is finding protective styles that don’t feel restrictive, don’t require excessive tension, and don’t leave your edges in worse condition than before you started. Didi weaving solves this problem elegantly. Unlike styles that require your natural hair to be braided tightly from the root, didi weaving sits on top of small, loosely braided sections—your hair stays relatively unstressed, and you get a polished look that reads as intentional and styled rather than just protective. When done with quality extensions in a shade that complements your skin tone and natural texture, didi weaving can take you from your regular routine to red-carpet ready in a single day.
What makes didi weaving especially ideal for short hair is that it works with what you have rather than against it. Your natural hair provides the anchor, and the weaving creates extension and fullness. The styles below showcase the range—from sleek and minimal to ornate and attention-grabbing—so you can find the version that matches both your hair texture and your personal aesthetic.
1. The Smooth Crown Didi with Loose Ends
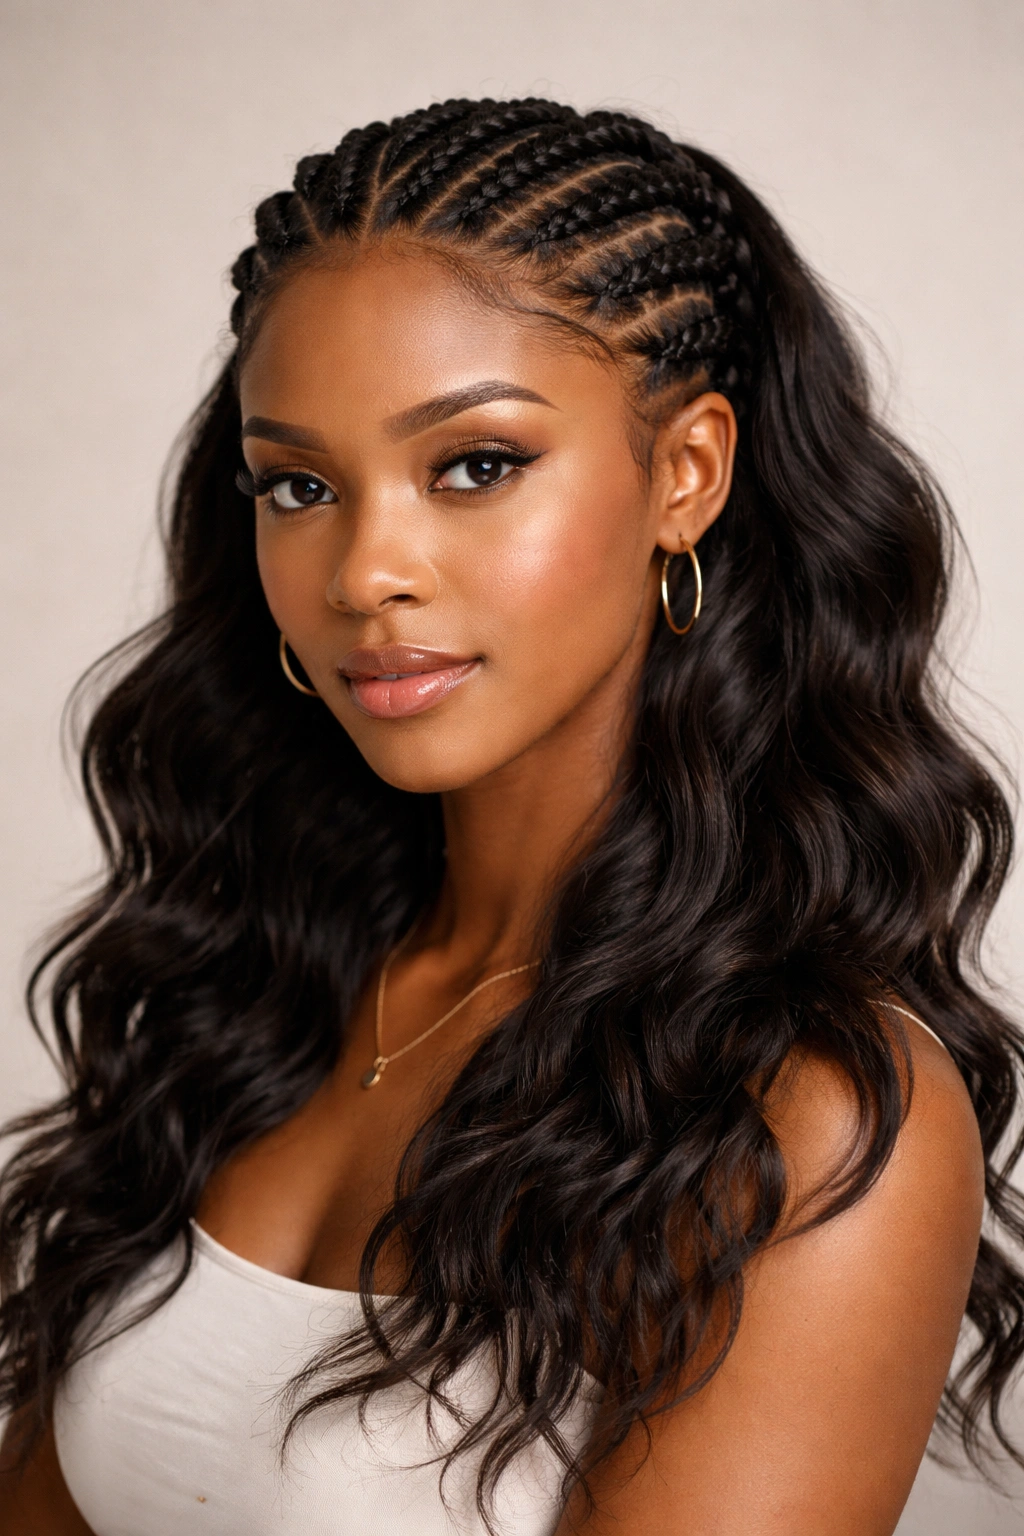
This style starts with small, flat two-strand twists or loosely braided sections around your entire head, then weaves extended hair through or over each section, leaving the woven portions loose and wavy at the ends. The result is a polished crown of defined waves that sits close to your scalp while the length flows freely, creating height and volume that reads expensive and editorial.
Why It Works for Short Hair
The crown detail keeps your short natural hair secured and protected while the loose woven ends do all the visual heavy lifting. You’re getting the aesthetic length and movement without requiring much of your own hair to support the style. This approach also distributes weight evenly around your head rather than concentrating it at any single point, which means less stress on your edges and hairline.
How to Style It
- Start with clean, damp natural hair and let it air dry slightly or blow dry on low heat until it’s just barely damp
- Create small sections around your entire head—aim for sections about the width of your pinky finger
- Loosely braid or two-strand twist each section using only your natural hair
- Using a crochet hook or your fingers, weave pre-separated extension hair through or over the base braids
- Gently separate and fluff the woven sections to create a soft, undefined wave pattern rather than tight ringlets
- Seal the ends by dipping them in hot water or using a curling iron on low heat to set the waves
Styling note: This style photographs beautifully in natural light and creates an illusion of significantly more hair. The loose texture also makes it easy to refresh daily with a light mist of water and some finger-fluffing.
2. The Sleek Back Didi with High Puff

Pull your didi weavings tight and secured into a high puff at the crown, letting them bunch into a voluminous knot while keeping your hairline and the sides of your head completely smooth and polished. This is the athletic-meets-elegant option—you can wear it to the gym, to work, or out for the evening with nothing but a change of jewelry and lip color.
The Appeal for Short Natural Hair
With short hair, creating volume at the crown is key to proportioning your overall look. A high puff made from didi weaving gives you that volume without needing a massive amount of your own hair to work with. The smooth, controlled sides and front also frame your face while the gathered volume at the back creates visual interest and height.
Execution Details
- Braid small, flat sections moving toward your crown, gathering them all toward a single point at the top or back of your head
- Weave extension hair through these braids as you work upward
- Once all sections are woven and gathered, twist or braid the combined woven sections together
- Wind the twisted mass into a tight coil and secure with bobby pins or a small elastic band
- Smooth the front and sides of your hair with a toothbrush and edge control for a polished finish
- You can leave woven pieces hanging loose from the puff for added texture, or tuck them all inside for a cleaner look
Pro tip: Gel your hairline lightly before creating the puff, then go over it again once everything is gathered—this prevents flyaways and keeps the style sharp for days.
3. The Side-Swept Didi Weave with Exposed Natural Hair
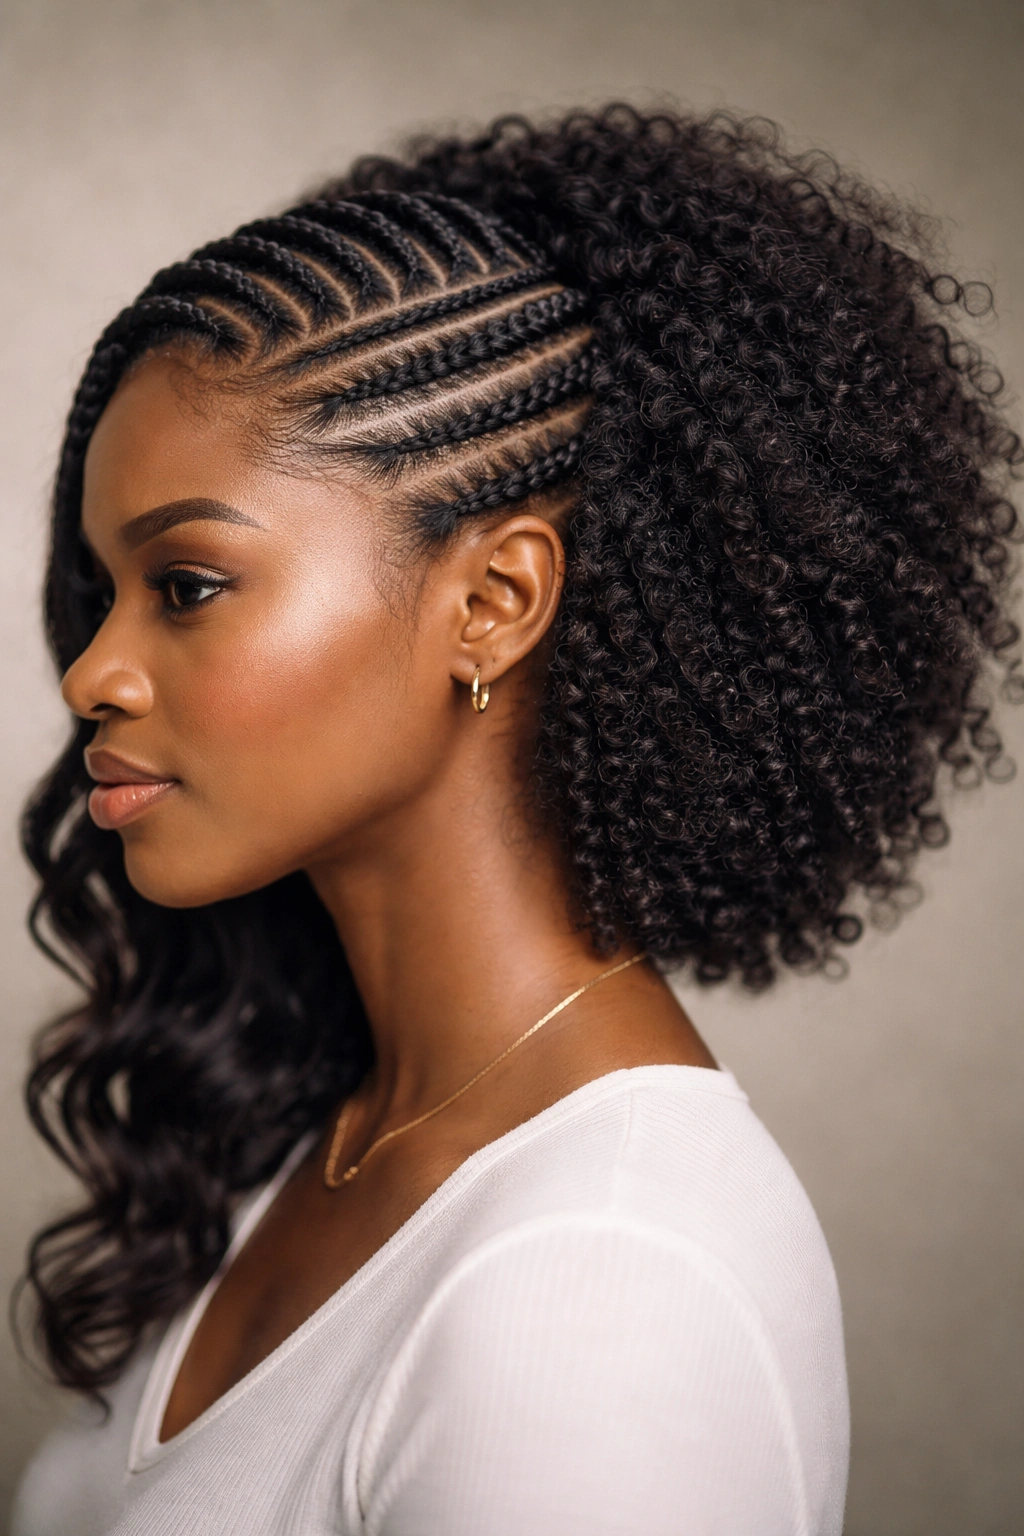
This style emphasizes asymmetry: weave sections on one side of your head while leaving the opposite side showing your natural hair texture, which sits right next to the woven sections. The contrast between your coily or kinky natural texture and the smoother waves of the extensions creates visual interest and works especially well if your natural hair is at an awkward in-between length.
Why Short Hair Shines Here
Asymmetrical styling actually suits short hair better than longer styles because it creates movement and visual complexity without overwhelming your frame. The exposed natural hair on one side proves authenticity and grounds the style, while the woven side demonstrates your willingness to experiment and transform.
Creating the Look
- Determine which side will showcase your woven sections and which will show your natural texture
- On the woven side, create small, neat braids or twists moving from your hairline backward
- Weave extension hair through these sections, keeping the texture smooth and defined
- On the natural hair side, enhance your natural texture with a curl cream or defining product—apply it while your hair is damp and let it air dry into its natural pattern
- Use a light touch: you want the natural side to look intentionally styled, not neglected
- You can add subtle edge definition to frame your face, or leave edges completely natural depending on your vibe
Worth knowing: This style works best when you have at least one to two inches of natural hair on both sides—it ensures the natural side has enough texture to read as deliberate rather than unfinished.
4. The Spiral Didi Coils with Defined Spirals
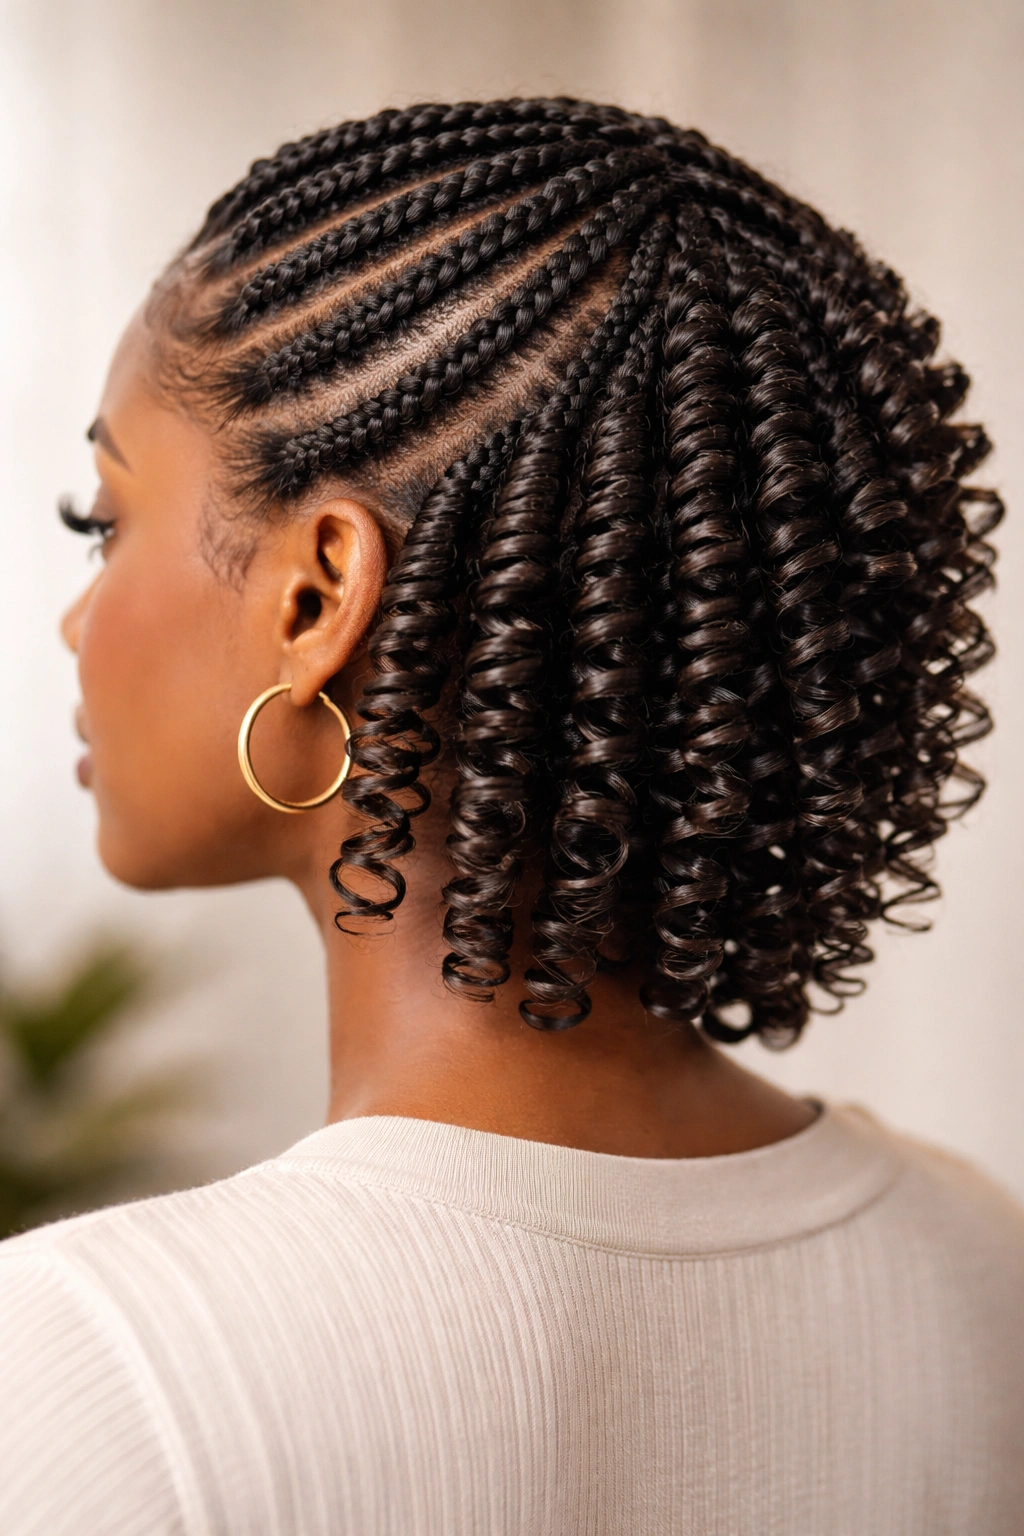
Instead of loose waves or smooth textures, take the woven sections and spiral them tightly using a curling iron, braiding tool, or by hand-coiling them around a rod to create defined ringlets that last the entire duration of the style. The spirals sit close to your head, creating an intricate, almost sculpture-like appearance that reads as high-fashion and intentional.
Benefits for Short Natural Hair
Defined spirals create a denser appearance than loose waves, which means your short hair instantly looks fuller and more textured. The defined coils also hold their shape for weeks without needing daily refresh, making this one of the more low-maintenance didi styles despite its high-impact appearance.
How to Create Structured Spirals
- Braid or weave your sections first, using quality human hair extensions
- Once woven, take each section individually and wrap it tightly around a medium-sized curling rod or smooth tool
- Apply heat to set the spiral (low to medium heat is safer than high)
- Allow the spirals to cool completely before removing the rod—this sets the shape permanently
- Gently separate each coil to create definition and prevent them from looking matted
- Apply a light oil or shine spray to enhance the spirals and add shine without weighing them down
Insider note: If you’re spiraling extensions yourself, do this on the day you create the style or the day after—wet extensions spiral more easily than hair that’s been sitting for a few days.
5. The Braided Didi with Geometric Patterns
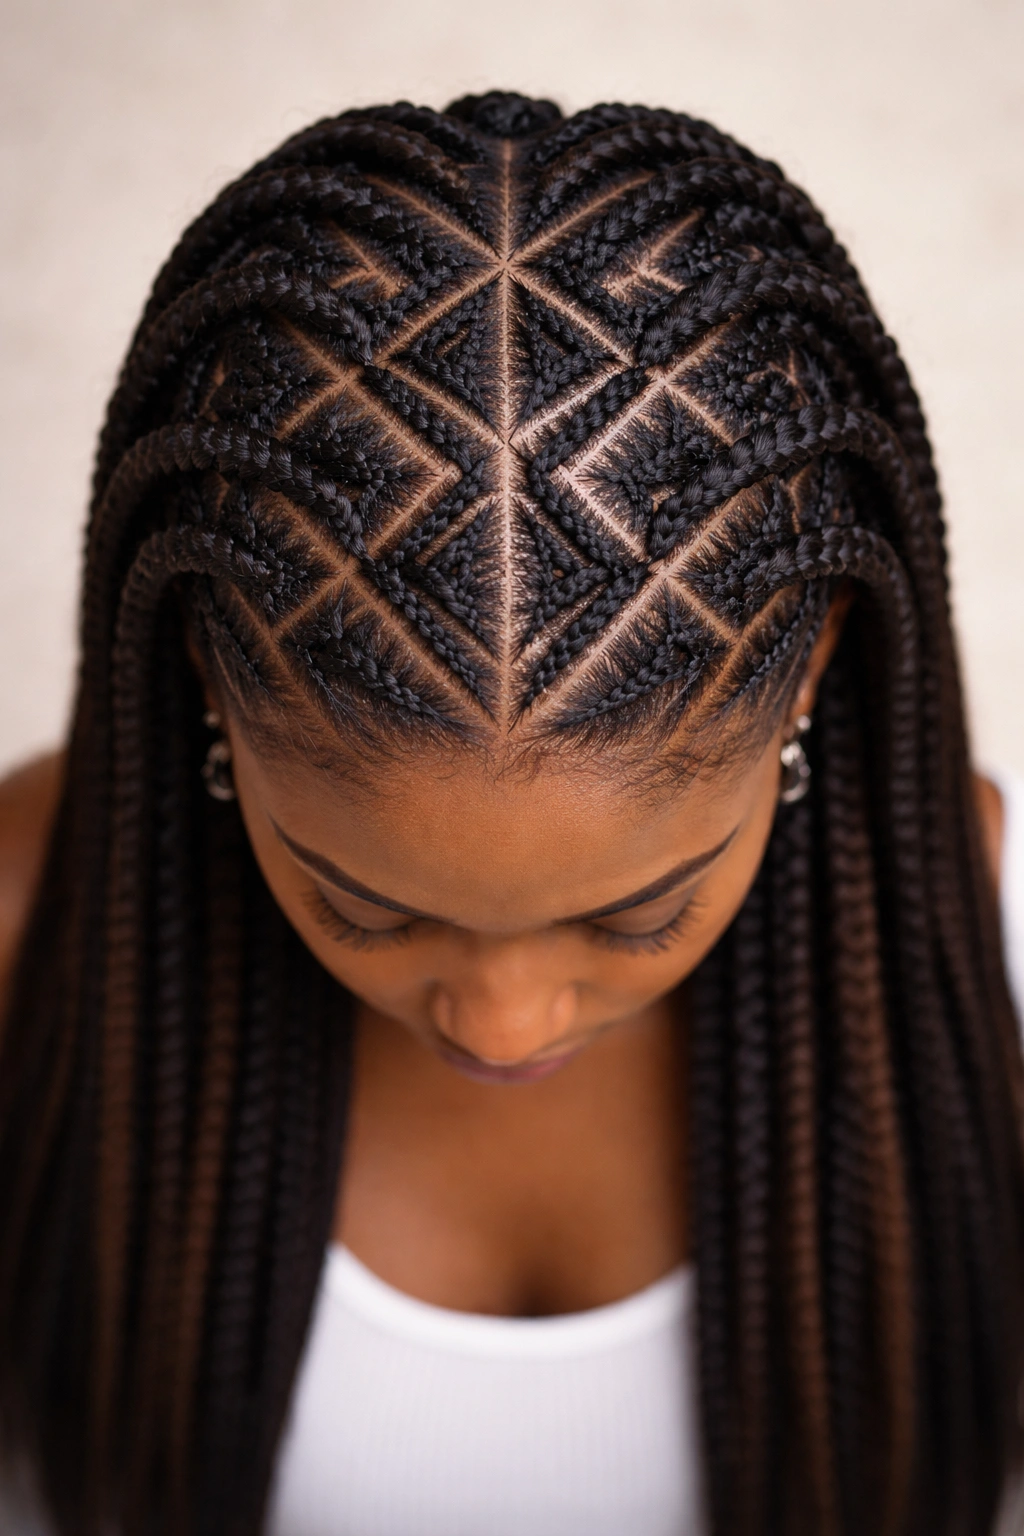
Instead of simple single sections woven individually, create the foundation using grid-like or geometric braiding patterns—then weave extensions through these patterns to create visual designs on your scalp. This is wearable scalp art: the style looks intricate and intentional, and the geometric foundation actually makes the overall style more stable.
Why It’s Perfect for Short Hair Canvas
Your short hair provides a perfect canvas for scalp design work. The proximity of the design to your face means people see every detail, and the shorter the hair, the more visible and impressive the pattern work becomes. This style also works for anyone who loves creativity and wants their protective style to be an actual statement piece.
Designing Your Pattern
- Sketch your pattern lightly on your scalp with a water-soluble pencil or just use your fingers to map it out
- Common patterns: triangles, diamonds, rectangles, or organic curved lines
- Braid the outline of your pattern using your natural hair or fine, thin braids
- Weave extensions through and across the braided framework to fill in the pattern
- The weaving should follow the lines of your braided grid, creating a cohesive visual design
- Finish the loose woven ends however you like: waves, coils, or bunched-up height
Real-talk: This style requires either significant skill doing it yourself or a very talented stylist. Budget extra time and possibly extra money, but the results are genuinely unique and worth the investment.
6. The Wrapped Crown Didi with Bun Base
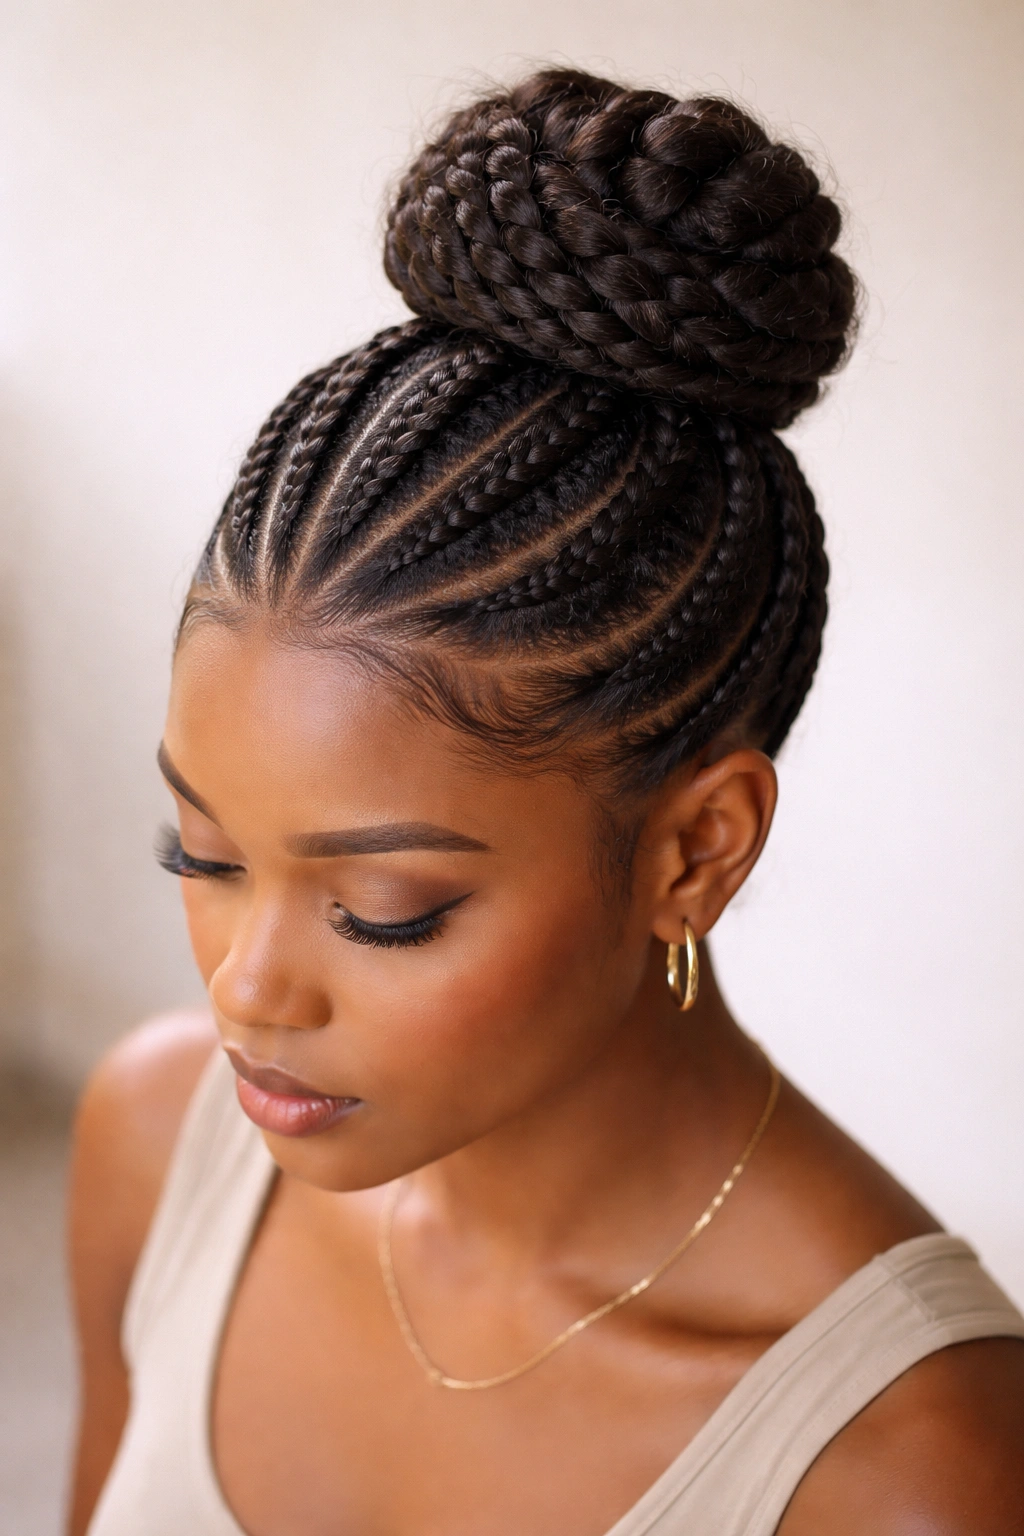
Create didi weaving sections that gather at the crown, then wrap the woven pieces around each other to form a secure base for an elevated bun that sits high and centered on top of your head. This style is the sweet spot between high fashion and undeniable functionality—you can wear it to work, to the gym, to a wedding, or to run errands with equal confidence.
The Advantage for Short Hair
Short hair often doesn’t hold traditional buns well, but a wrapped didi weaving bun base gives you sculptural volume and a polished finish that makes your short hair look intentionally styled rather than limited. The wrapping technique also secures everything so tightly that the bun lasts for weeks without loosening.
Step-by-Step Construction
- Create small sections around your entire head, moving toward the crown
- Braid or weave each section with extensions, keeping everything moving upward and inward toward a central point
- Once all sections are woven, gather them together at the crown and begin wrapping them around each other in a coil formation
- Secure the coiled bundle with bobby pins inserted at multiple angles to distribute the weight
- Tuck the ends of the woven sections underneath the coil for a finished look
- If desired, leave a few shorter pieces loose in front to frame your face
Pro tip: Don’t make the bun too tight—leave a tiny bit of looseness in the wrapping so the style is comfortable to wear for 8+ hours and doesn’t create stress on your edges.
7. The Half-Up Didi with Flowing Bottom
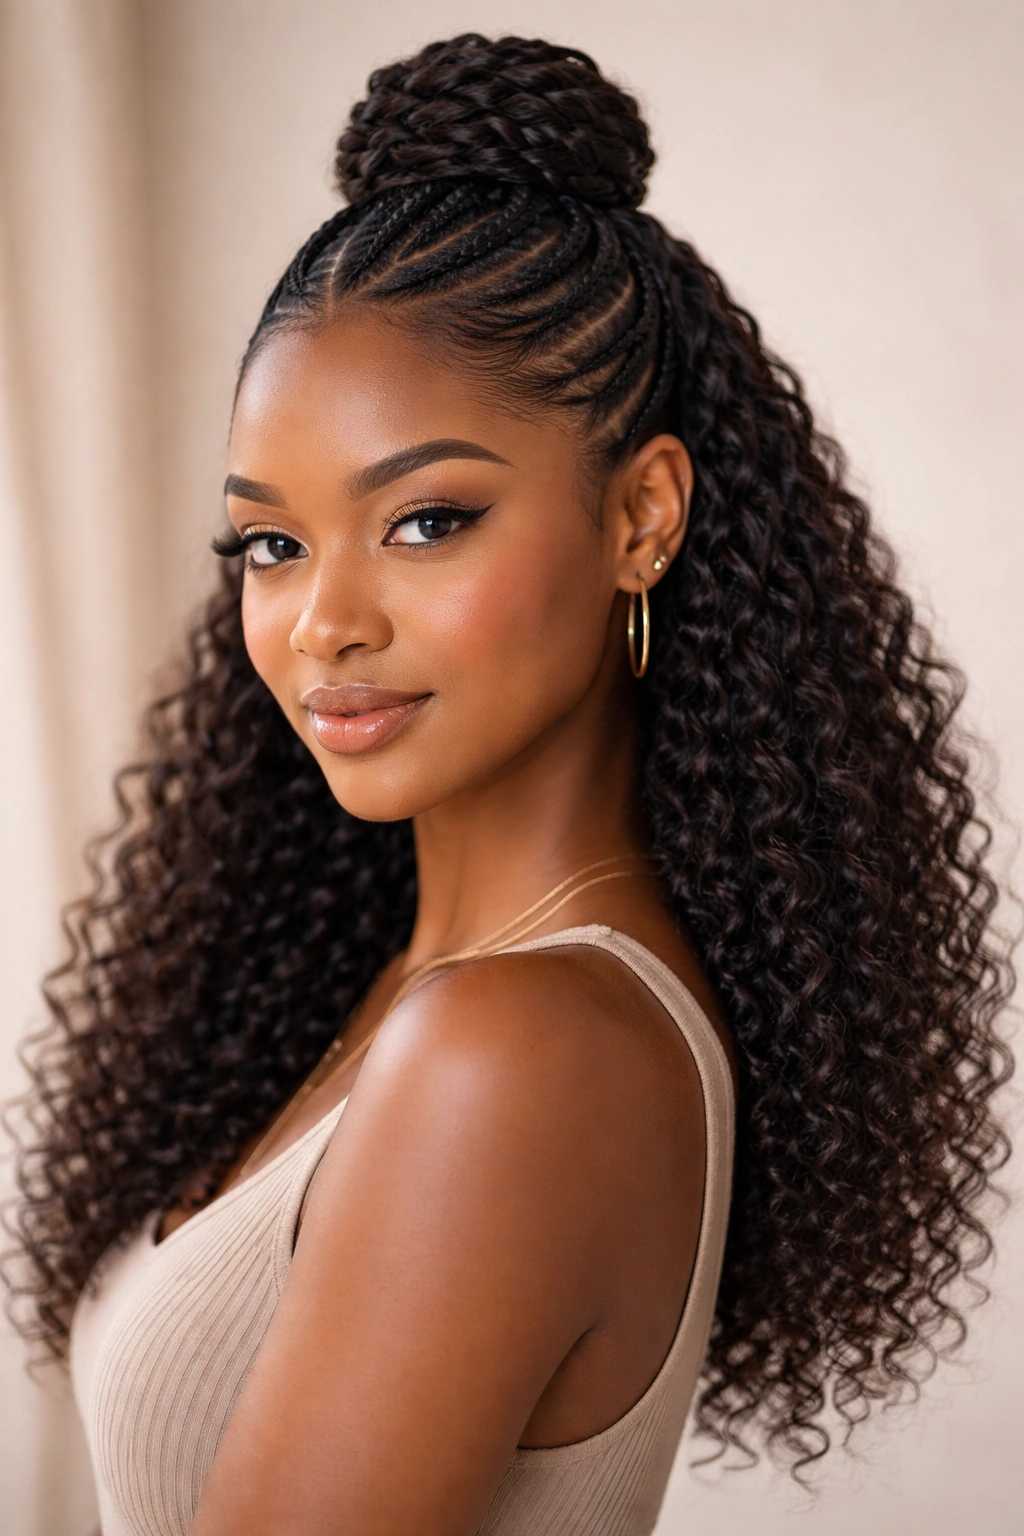
Weave extensions into only the top half of your head, then gather those woven sections into a knot or cluster at the back of your crown, leaving your natural hair on the bottom half loose and styled with your natural texture showcasing itself. This hybrid style gives you protection where you need it while celebrating your natural hair where you want it visible.
Why Short Hair Benefits From This Approach
The half-up structure adds height to short hair and creates a visual break that makes short hair feel less severe. The woven top section also adds fullness and texture that contrasts beautifully with your natural texture at the bottom, creating a multi-dimensional final appearance.
Creating the Separation
- Decide where your natural-hair-to-woven transition will sit—usually around the ears or slightly higher
- Create braids or sections only on the upper portion of your head above that line
- Weave extensions through the upper sections only
- On the lower half, style your natural hair with curl cream, mousse, or your regular styling product
- Gather the woven upper sections back and secure them, leaving them to cascade or bunch together
- The lower half of your natural hair frames your face and falls however naturally
- You can add edge definition around your hairline if desired
Important to know: Make sure the transition between woven and natural is intentional—a too-abrupt line reads unfinished, while a well-planned transition reads editorial.
8. The Faux Locs Didi Hybrid
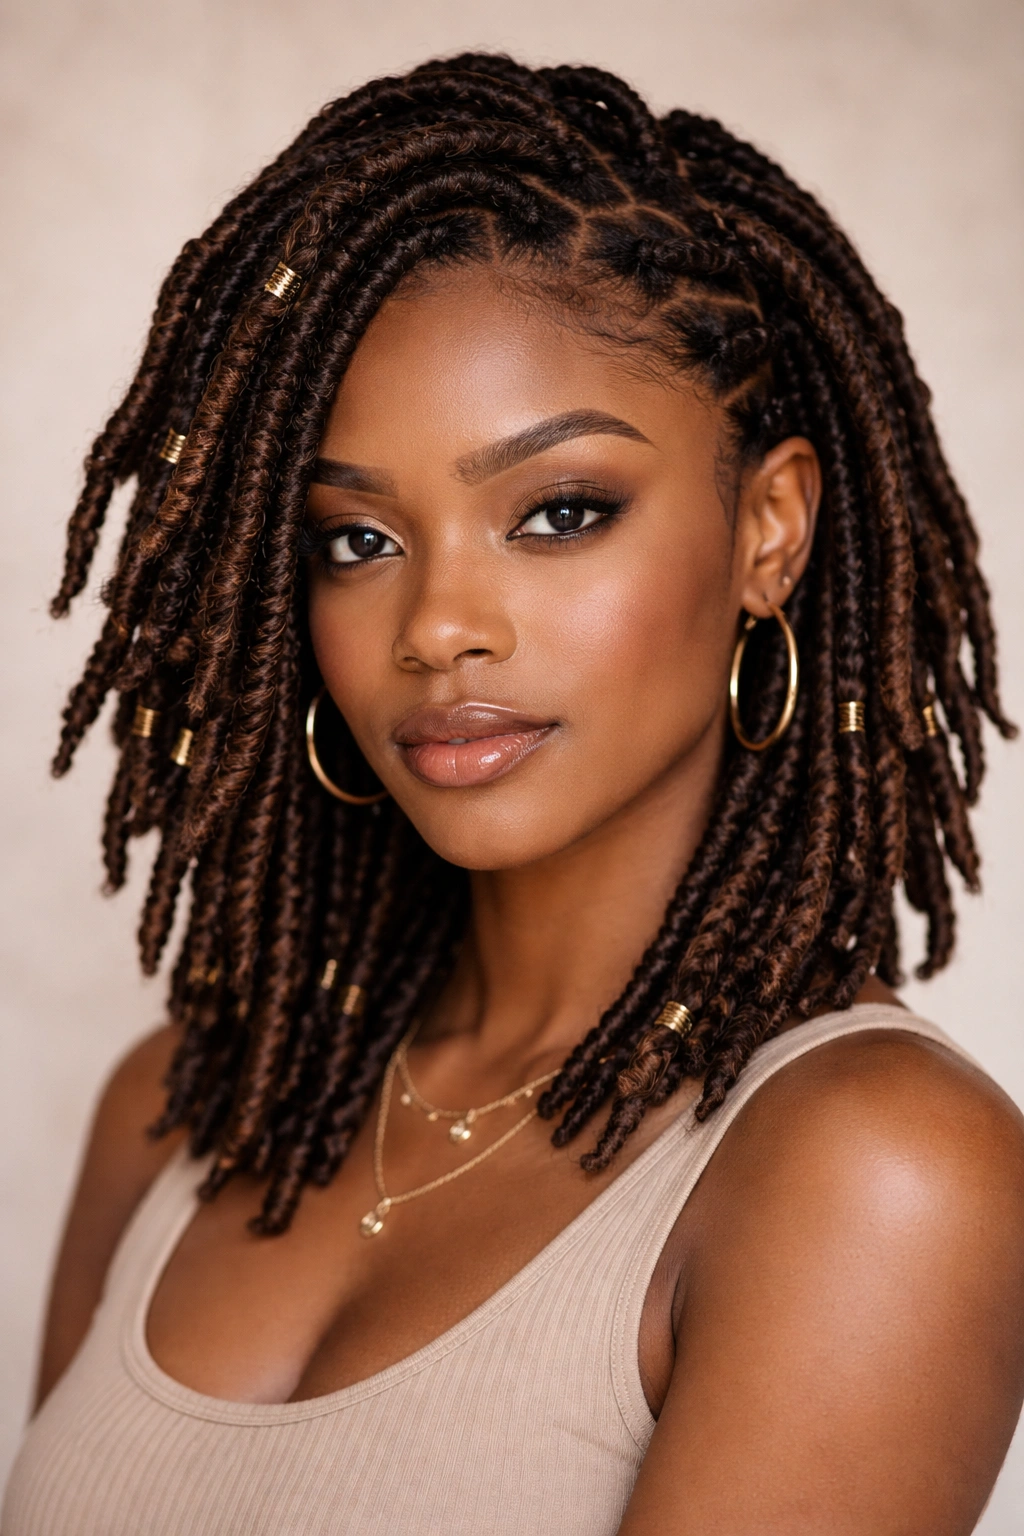
This is technically a hybrid style: you’re creating the appearance of faux locs using the didi weaving method, but instead of maintaining a braided or woven base, you’re creating sections that look like individual locs by wrapping extensions around loosely woven or twisted bases. The result sits somewhere between traditional faux locs and a woven style, giving you texture, length, and a bohemian aesthetic.
The Short-Hair Advantage
Faux locs typically require a lot of hair to look full and substantial, but didi-method faux locs need less. Your short natural hair provides the anchor, and the wrapped extensions do the visual work. The result is faux locs that don’t feel heavy and don’t create the tension that traditional locs can impose on shorter edges.
Building the Look
- Create small sections all over your head—these will become individual “locs”
- Two-strand twist or loosely braid each section using your natural hair
- Wrap pre-separated extension hair tightly around each twisted or braided base, starting at the root and moving downward
- Vary the tightness of the wrapping slightly so some locs look more solid and some look slightly more textured
- You can coat each “loc” with lightweight wax or twisting cream as you build them to help the wrapping stay smooth
- Once complete, you can leave them as-is or dip the ends in hot water to fuse the wrapping and create a finished edge
Styling note: These faux locs last 6-8 weeks with proper maintenance—the longer lifespan compared to some other didi styles makes them worth the upfront time investment.
9. The Sleek Goddess Crown Didi with Face-Framing Pieciness
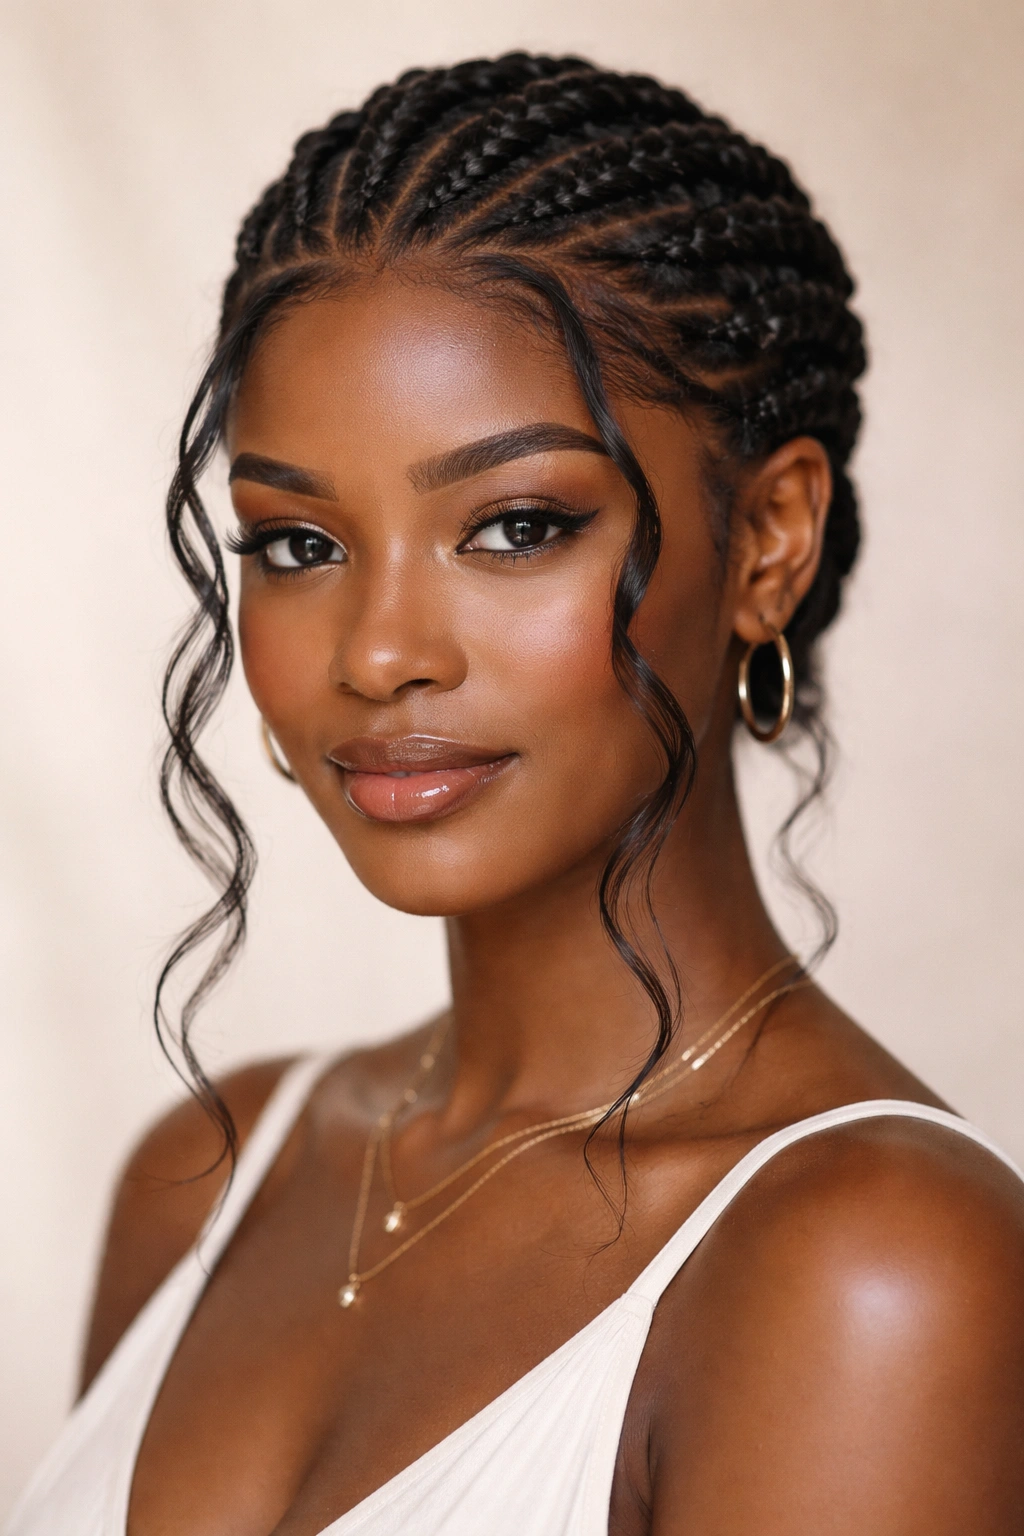
This is the most romantic and feminine option: weave extensions using the didi method while leaving small pieces of woven hair loose around your face and ears, creating soft, romantic layers that frame your features. The overall style sits polished and sleek at the base of your head and crown, then intentionally transitions to loose, piece-y softness at face level.
Why It’s Flattering for Short Hair
Face-framing pieces draw attention to your features and add softness that balances a shorter silhouette. This style also works regardless of your face shape because the placement of the loose pieces can be customized—wider pieces for rounder faces, longer pieces for angular faces, etc.
Execution and Customization
- Create small sections around your head as you normally would for didi weaving
- As you work toward the front and sides, intentionally leave every third or fourth woven section slightly loose and shorter
- Weave the sections farther back and at the crown with more defined texture—these become your structured base
- The front and side pieces should fall just past your ears or jawline depending on what suits your face
- Use a light gel or cream on the structured sections to keep them smooth, while leaving the face-framing pieces slightly tousled for contrast
- You can add subtle waves to the face-framing pieces with a curling iron on low heat
Pro tip: This style photographs beautifully because the piece-y softness around the face creates flattering dimension, but it also maintains enough polish to look intentional rather than disheveled.
Final Thoughts
Didi weaving gives short natural hair a level of versatility that feels almost surprising—you can go from minimal and sleek to maximalist and ornate, sometimes literally overnight by changing how you style the woven sections. The technique works specifically well for short hair because it doesn’t demand much of your natural hair; instead, it lets your natural hair do what it does best (protect itself and stay healthy) while the extensions handle the visual transformation.
The key to making any didi weaving style work is starting with quality extensions and giving yourself grace during the learning curve. Your first attempt might not look as polished as styles created by professionals, but the technique itself rewards practice. Each time you do it, you’ll develop faster hands, better intuition for sizing sections, and a personal style within the style.
Protective styling should protect your hair, yes, but it should also make you feel beautiful and intentional while you’re wearing it. These nine didi styles exist on a spectrum from low-key and understated to high-impact and commanding—find the version that matches your personality and your hair goals, and don’t be afraid to revisit them seasonally or whenever your hair or mood demands a change.