There’s something undeniably elegant about half up half down hairstyles — they strike that perfect balance between polished and romantic, formal without feeling stiff or overly done. Whether you’re attending a wedding, gala, formal dinner, or any upscale event, a well-executed half up half down style communicates sophistication while keeping your face open and your shoulders free from heavy, full-updo weight. For long hair, this style category opens up an almost limitless range of possibilities, from intricate braided designs to sleek twisted updos to soft, romantic waves anchored by delicate details.
The versatility of half up half down formal styles is one of their greatest strengths. You can adapt them to match your gown’s neckline, incorporate accessories that complement your jewelry, adjust the sleekness or softness to match your overall aesthetic, and personalize them with texture, color, or embellishments that make the look uniquely yours. A half up half down style works brilliantly whether your long hair is naturally straight, wavy, or curly — each texture takes on a different character while maintaining that inherently elegant silhouette.
What makes these styles particularly powerful for formal occasions is that they photograph beautifully from every angle. Your face remains visible and framed, the updo portion looks intentional and controlled, and the flowing lower section adds movement and dimension that reads elegantly in person and in photographs. This is also a style category where you can experiment with more elaborate techniques — braids, twists, loops, and intricate pinning — without the commitment of a full formal updo.
Below, you’ll find twenty detailed half up half down formal hairstyles specifically designed for long hair, each with step-by-step guidance on how to achieve the look, why it works for formal settings, and tips for making it your own. Whether you’re looking for timeless elegance, modern sophistication, or something with a touch of romantic flair, there’s a style here that will make you feel confident and stunning.
1. The Classic Twisted Half-Up with Center Part
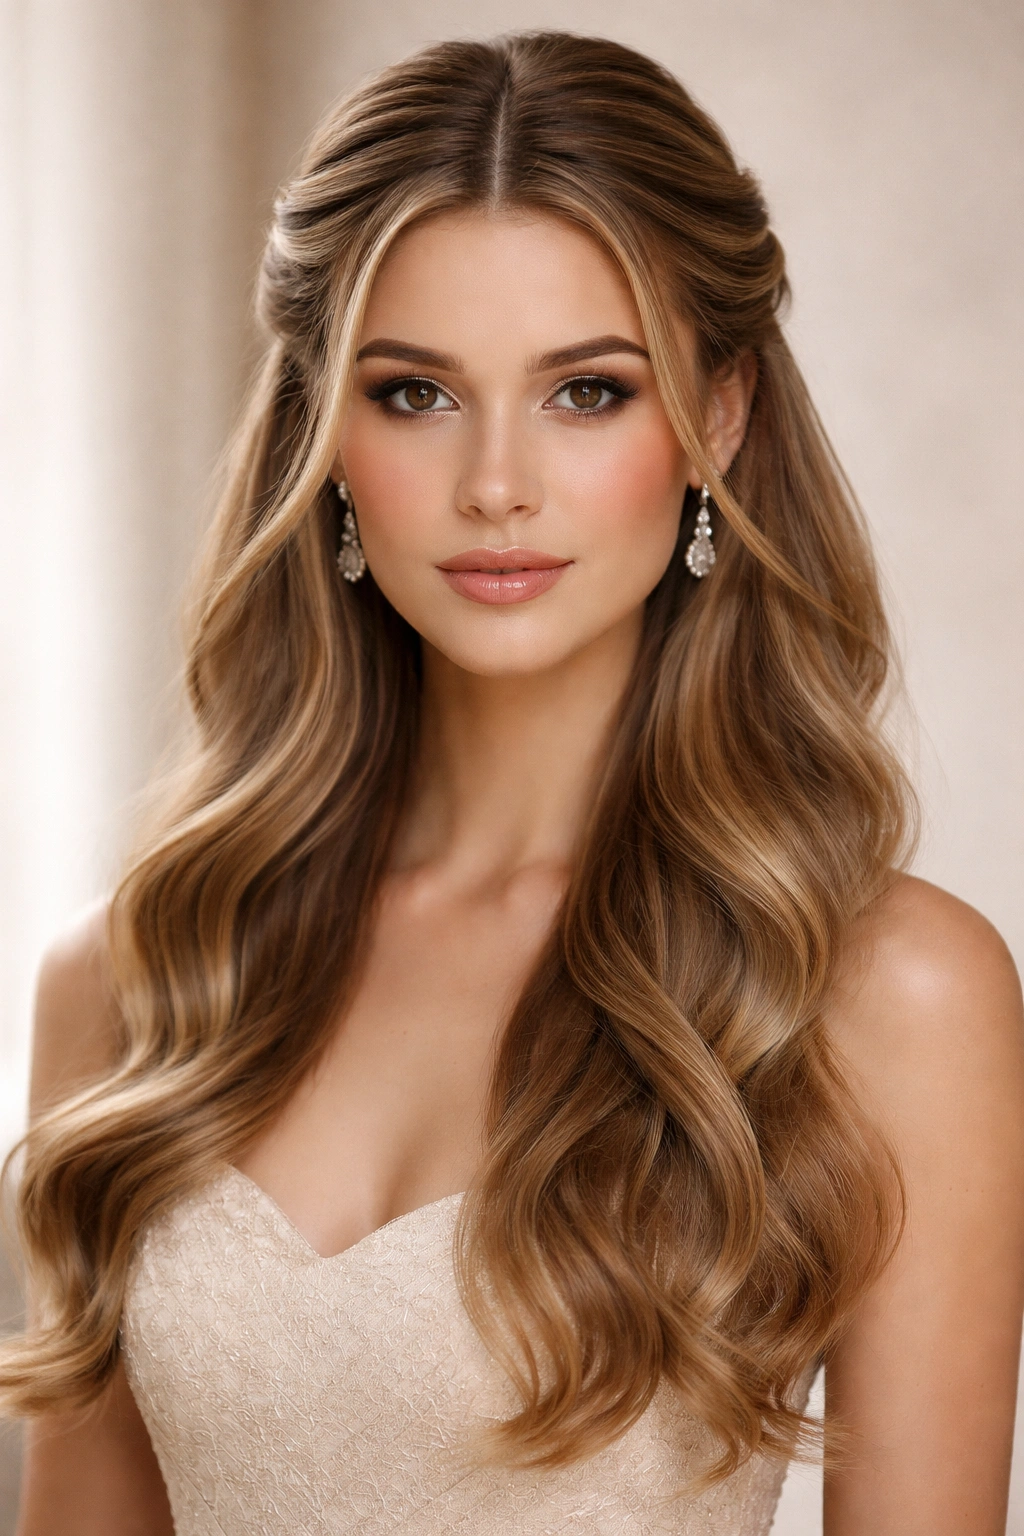
This timeless style begins with a deep center part and features symmetrical twisted sections pulled back from each temple, meeting at the crown and secured with an elegant bobby pin or small clip. The simplicity of this look is deceptive — it’s sophisticated enough for black-tie events while remaining approachable enough to wear to a formal dinner or cocktail party. The center part elongates the face and creates a frame that draws attention to your features, while the twisted sections add visual interest without overwhelming the overall silhouette.
Why This Style Reads as Formal
The clean center part and symmetrical twists communicate intentionality and polish. There’s a mathematical precision to the design that elevates it beyond casual, while the loose lower waves maintain femininity and movement. This is the kind of style that looks equally stunning on a bride or a wedding guest, which is precisely why it’s endured as a formal favorite for decades.
How to Achieve It
- Start with center-parted hair that has a slight wave or bend. Spray the roots with volumizing spray for lift at the crown.
- Take a 2-inch section from your right temple and twist it back loosely toward the center of your head, maintaining the twist’s integrity as you go.
- Repeat on the left side with a matching section, twisting it toward the center until it meets the right twist.
- Secure both twists together with bobby pins hidden beneath the crown, or use a small decorative clip if you prefer a visible accent.
- Leave the remaining length down in soft waves, curling the ends slightly outward for dimension.
- Finish with a light hairspray that holds without making hair look stiff or overly controlled.
Pro tip: The secret to this style looking expensive is keeping the twists loose and slightly imperfect — too-tight, too-neat twists can look costumey rather than elegant. Gently pull at the twists to loosen them slightly after you’ve secured them.
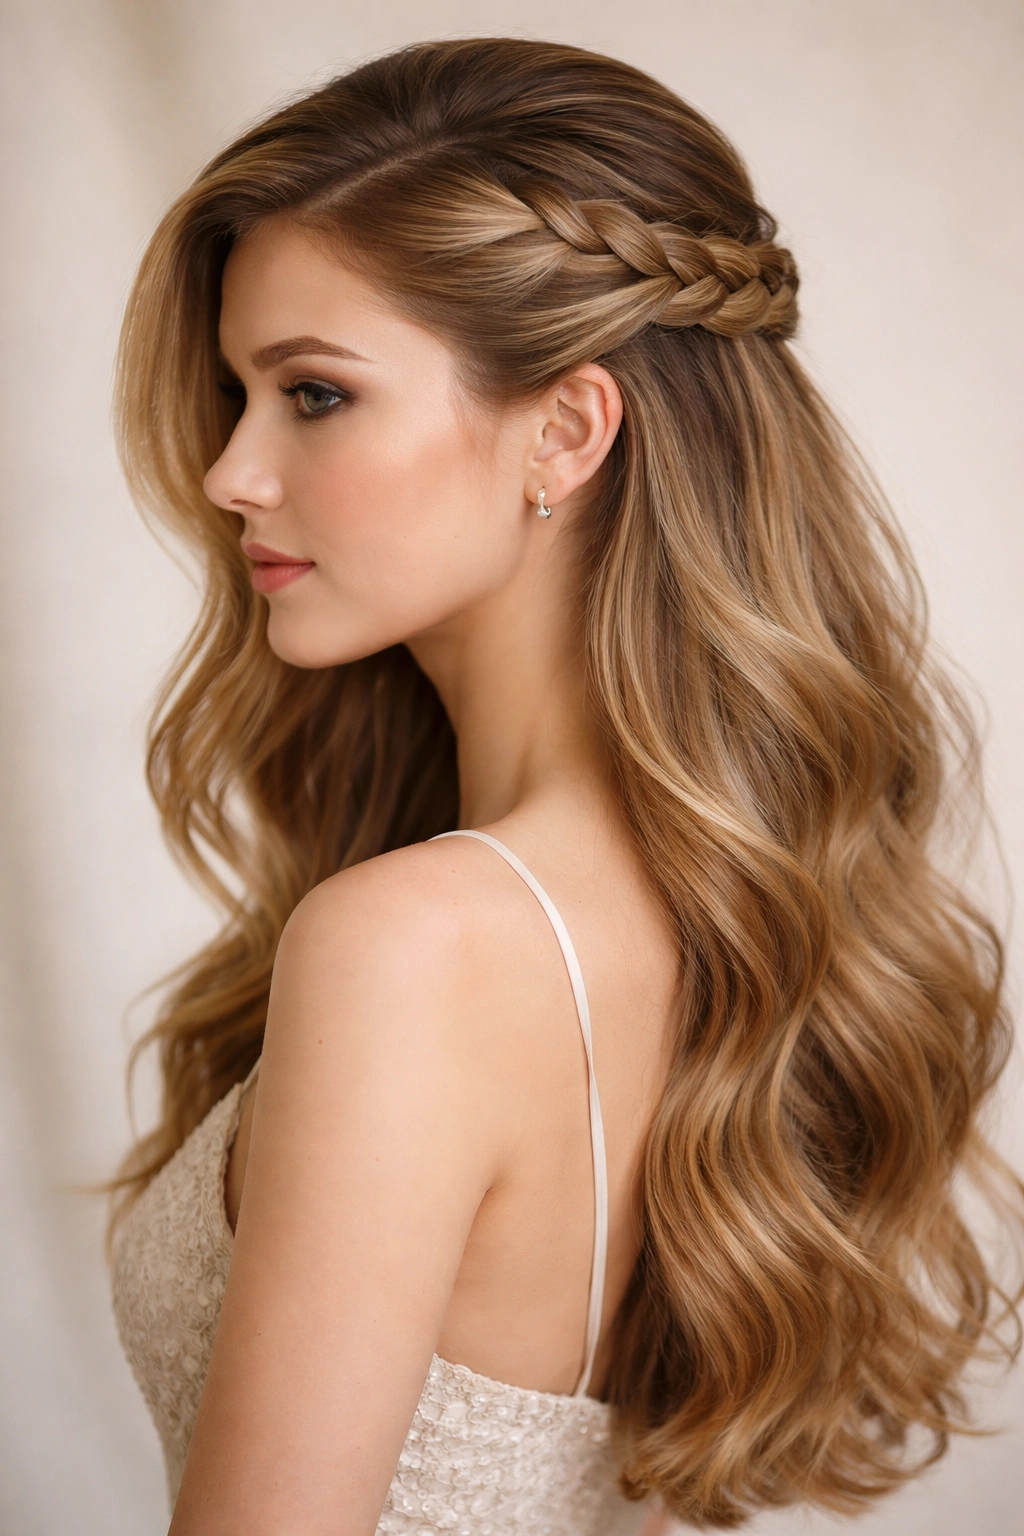
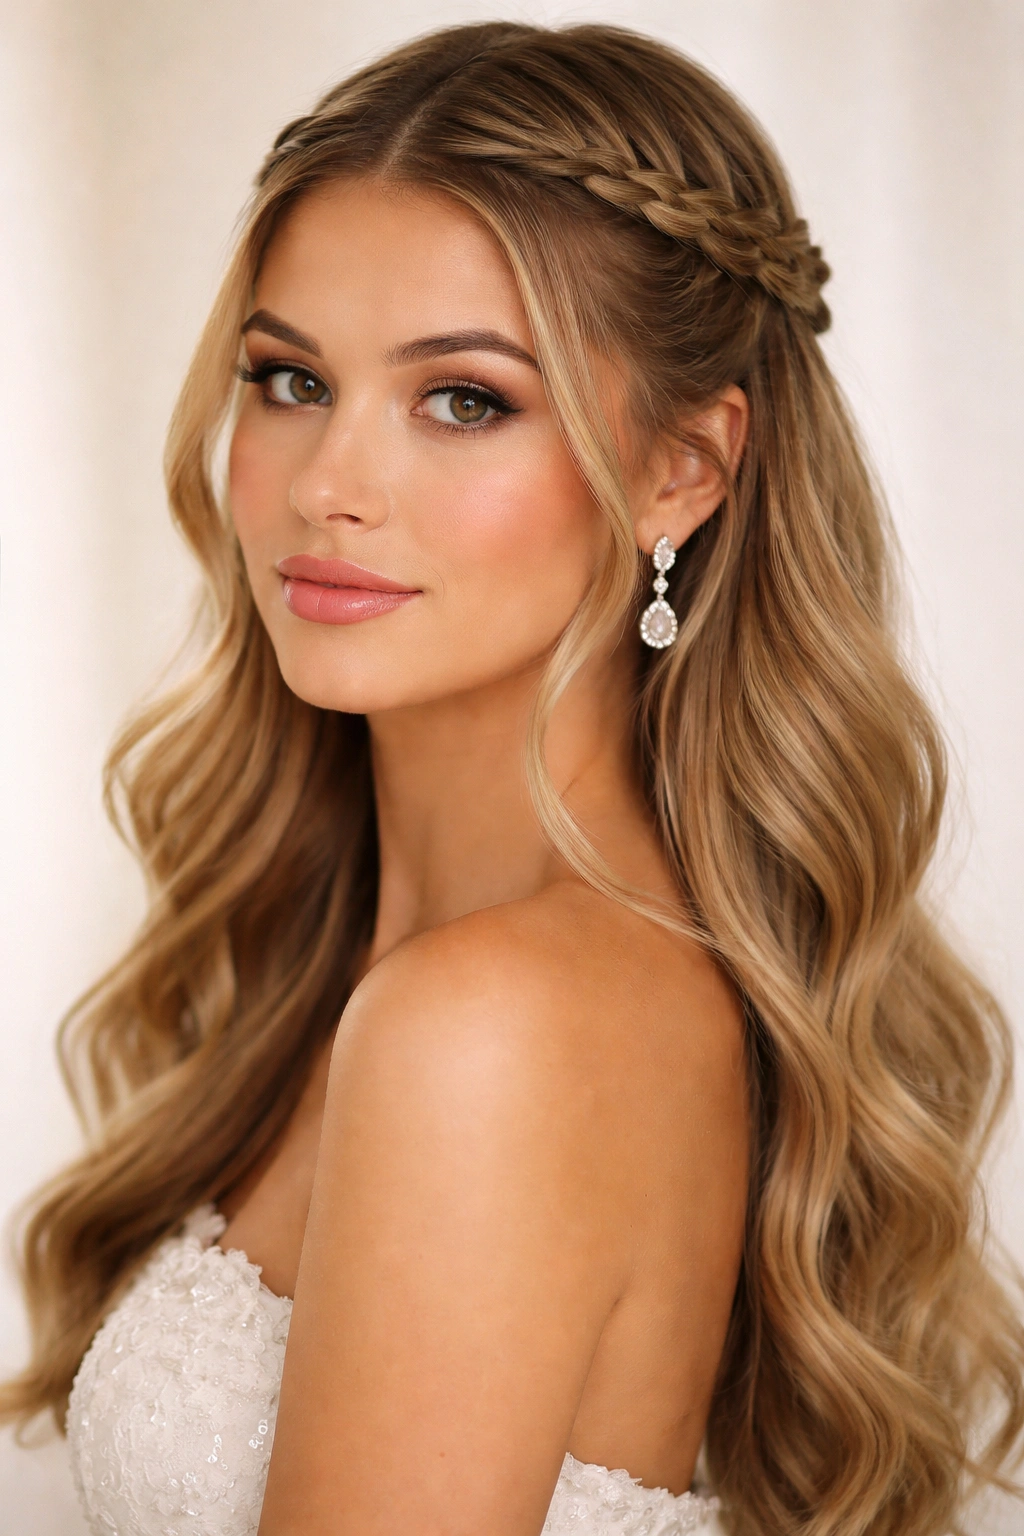
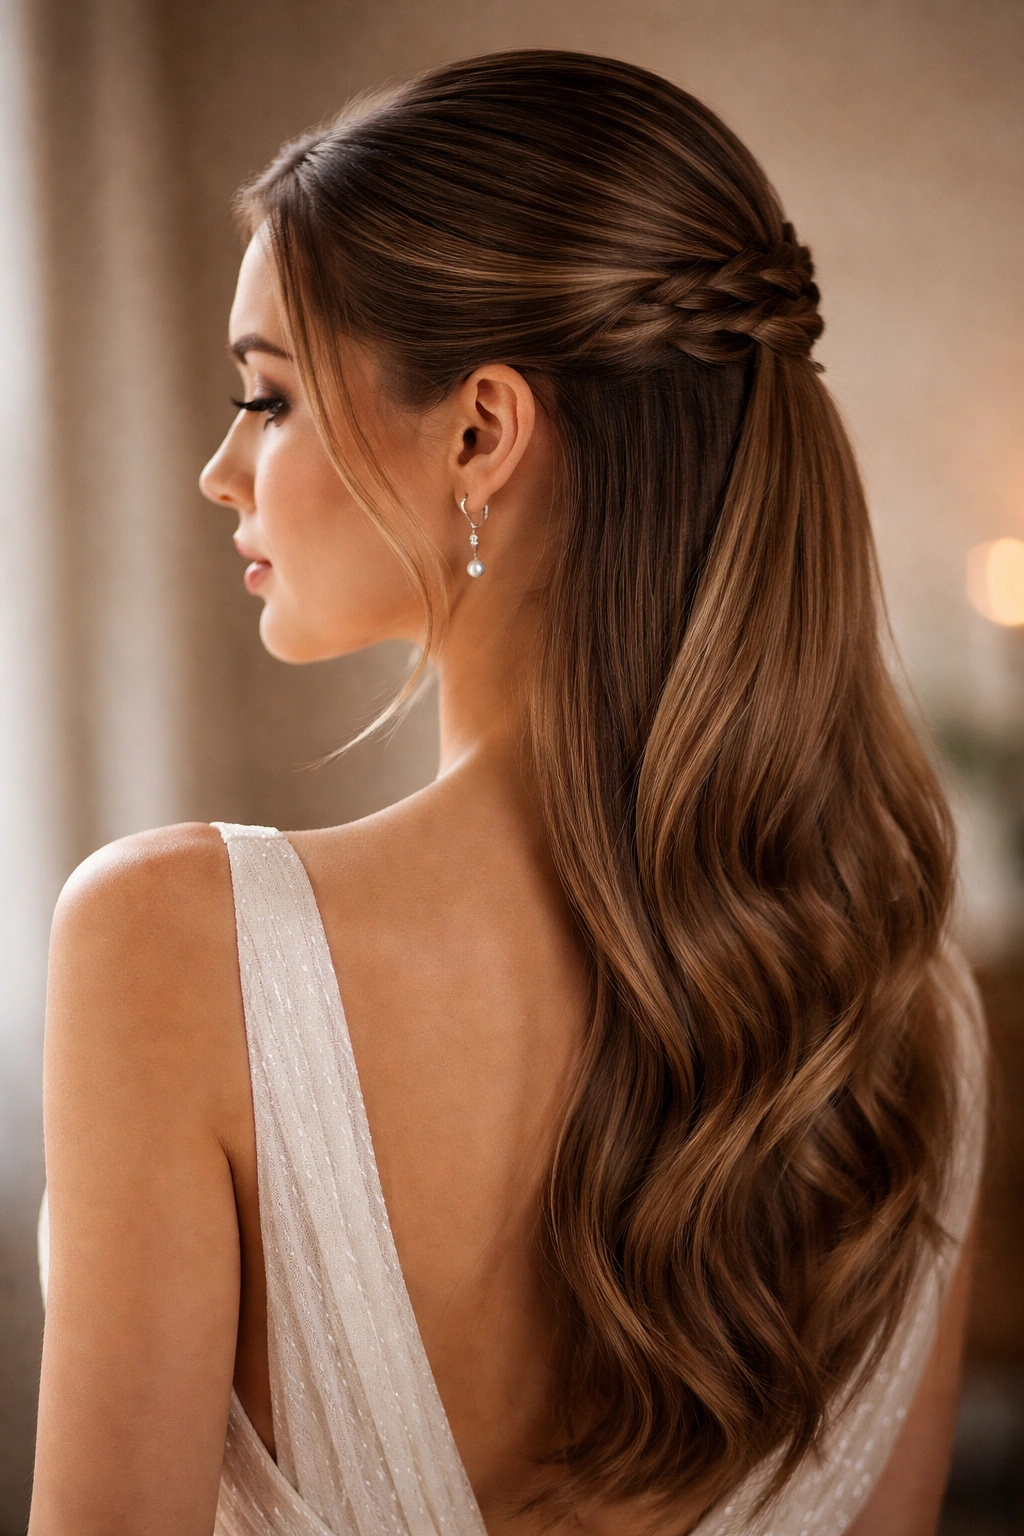
2. The Braided Crown Half-Up
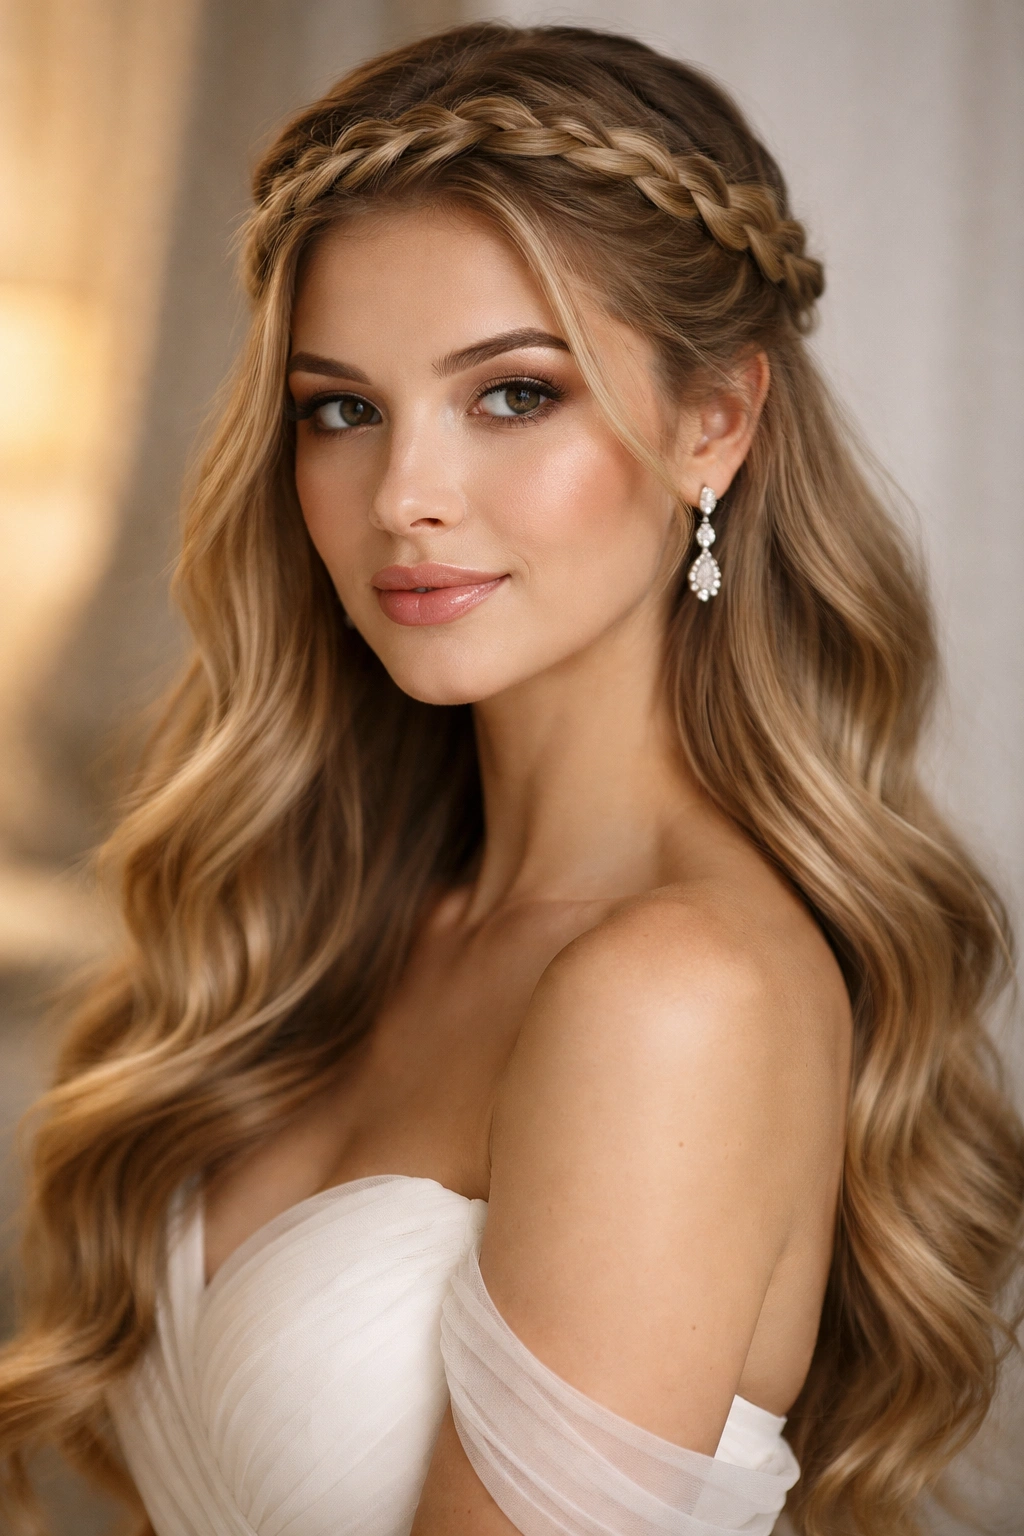
This romantic style features a Dutch or French braid running across the crown from ear to ear, with the remainder of the hair left down in loose waves. The braid sits high enough that it’s clearly intentional and formal, yet it’s still loose enough to feel romantic and soft. This is an excellent choice if you want visible texture and intricacy in your updo portion while maintaining an undone, romantic quality in the lower section. The braid works beautifully on thick hair, and on finer hair, a looser braid with gentle pulling creates beautiful dimension.
What Makes This Style Stand Out for Formal Events
A braided crown naturally frames the face and creates a focal point at the crown without requiring tight, pulled-back styling. The braid can incorporate ribbon, delicate hairpins, or fresh flowers threaded throughout, making it easy to personalize and adapt to your specific event or color scheme. It’s also surprisingly forgiving — a slightly imperfect braid actually enhances the romantic quality rather than detracting from it.
How to Execute It Perfectly
- Begin with hair that has a soft wave established. Part your hair on one side for a more modern look or down the center for balance.
- Starting at your hairline just above one ear, begin a Dutch or French braid (working backward so the braid sits on top of the head rather than sinking into it).
- Braid across the crown to just above the opposite ear, incorporating hair smoothly as you go.
- Secure the braid end with a small, clear elastic that will be hidden beneath the hair.
- Release the remaining length, which should fall down your back in soft waves.
- Gently pull at the braid to loosen it and create a fuller, more romantic appearance.
- Pin any flyaways and finish with flexible hold hairspray.
Worth knowing: If braiding feels intimidating, start by practicing on damp hair where it’s easier to control, and remember that braids inherently become looser and more romantic-looking as the day progresses.
3. The Sleek Gel Half-Up with High Pony
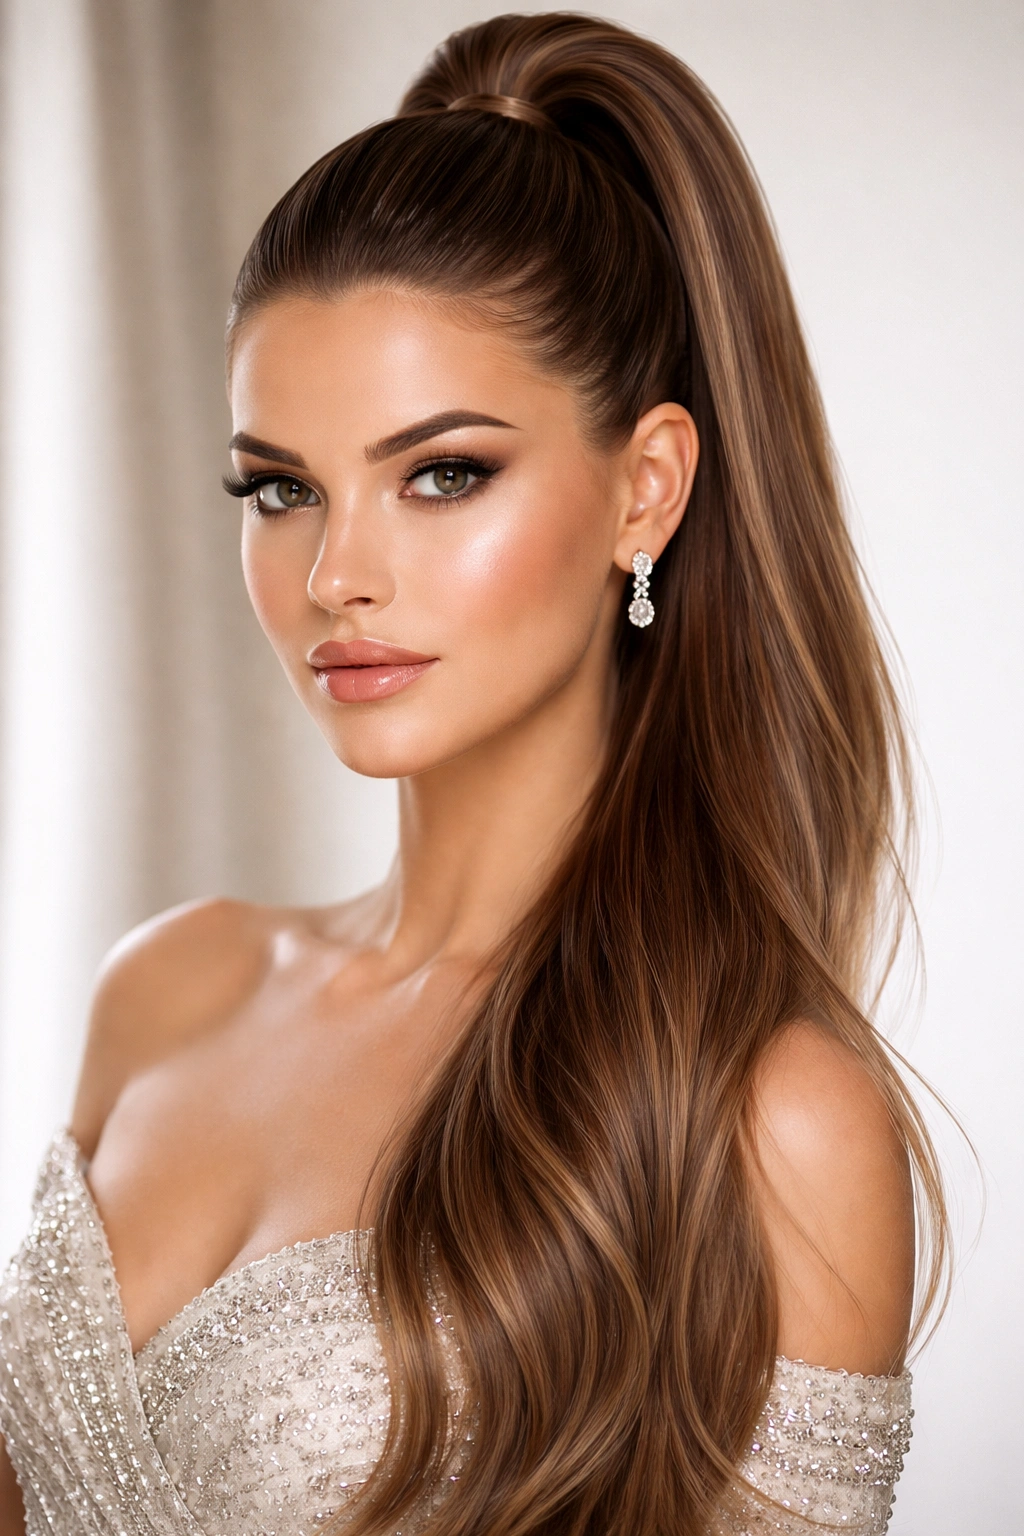
This ultra-modern style combines a slicked-back upper section with a high, tight ponytail at the crown, leaving the lower section sleek and straight or in controlled waves. The polished gel finish gives this style a fashion-forward edge that works brilliantly for contemporary formal events, galas, and upscale celebrations where you want to project confidence and modern sophistication. This is the style choice when you want people to notice your bone structure and your styling rather than getting lost in soft, romantic details.
Why It’s Perfect for Modern Formal Settings
The sleek finish creates clean lines and a sculptural quality that photographs beautifully. The high positioning of the secured portion draws the eye upward and emphasizes your cheekbones and forehead, making it an excellent choice if you have a strong facial structure you want to highlight. This style also tends to read younger and more contemporary than softer half-up styles, which can be precisely the impression you want to make.
Building This Look Step-by-Step
- Start with smooth, straight hair (blow dry if necessary to create a sleek base).
- Apply a smoothing gel or edge control cream to your hairline and brush your hair straight back from your face with a fine-tooth comb.
- Gather hair at the crown into a tight, high ponytail and secure it with an elastic.
- Create a small section at the base of the ponytail (about 1 inch), pull it out of the elastic, and wrap it around the elastic to conceal it.
- Secure the wrapped section with a bobby pin.
- For the lower section, you can leave it sleek and straight for maximum polish, or gently wave it for texture.
- Apply edge control to your hairline and any flyaways for a finished, controlled appearance.
- Finish with strong-hold hairspray.
Insider note: If your hairline is sensitive to tight styling, use flexible edge control rather than harsh gels, and don’t pull the style as tightly as you might be tempted to — secure but comfortable is more sustainable through a long event.
4. The Twisted Infinity Loop Half-Up
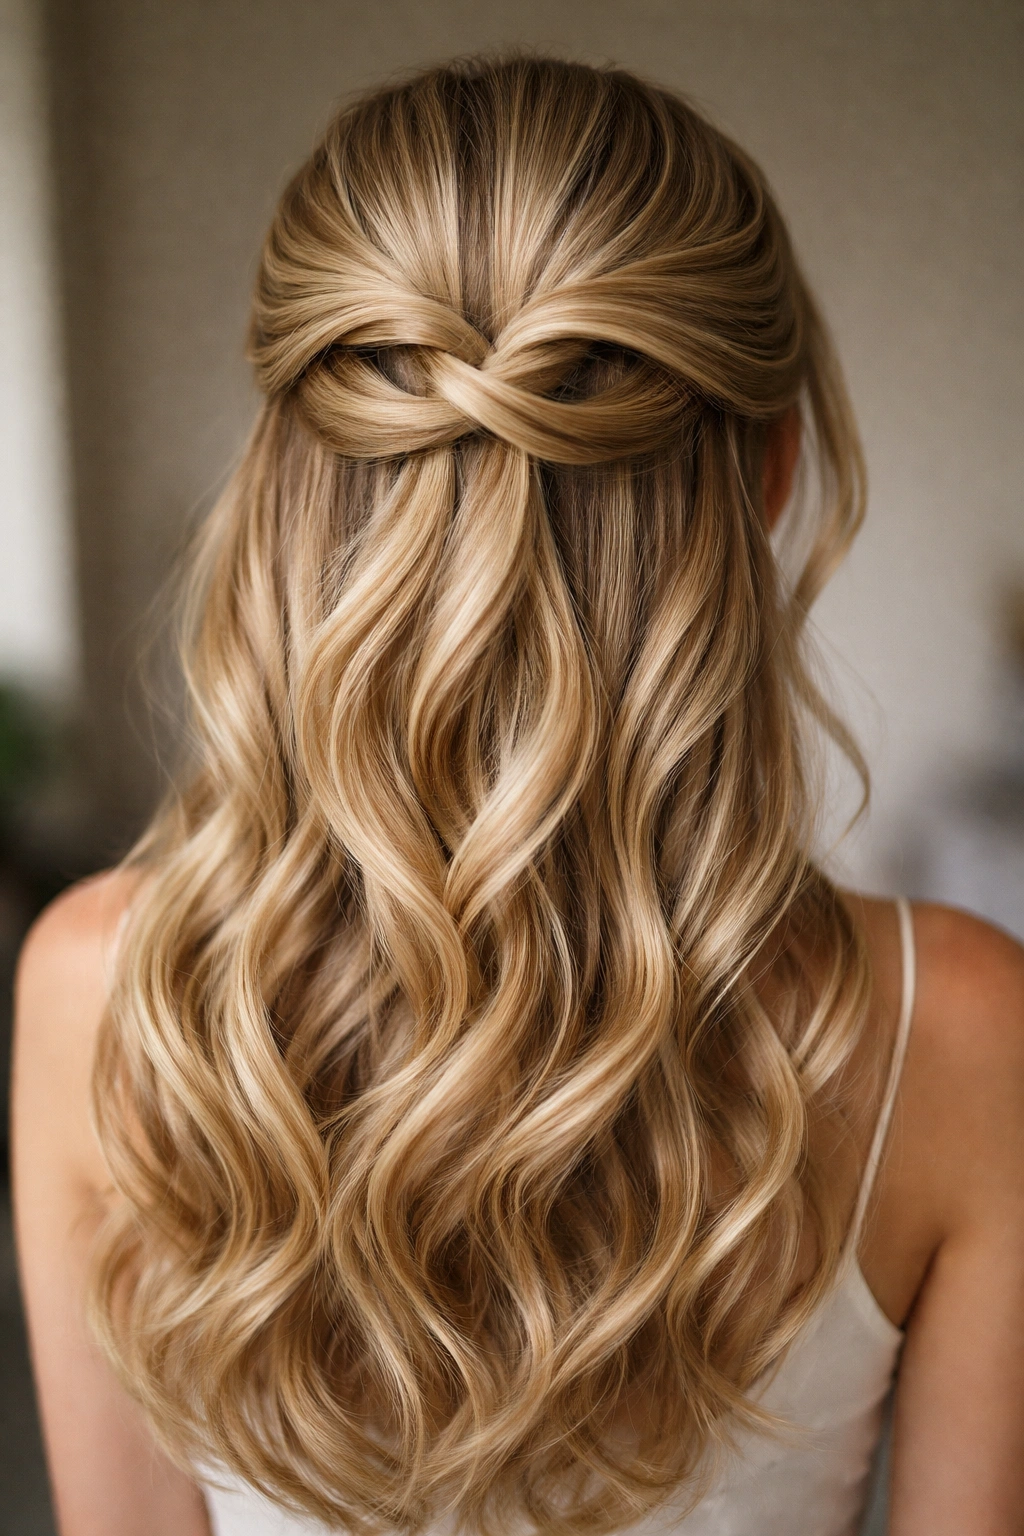
This intricate-looking style features two thick twists that wrap around each other in a loop at the crown before the rest of the hair falls freely below. While it looks complicated, it’s actually quite achievable and creates the impression of a more elaborate updo while maintaining the easy elegance of a half-up style. The infinity loop reads as intentional and thoughtful without requiring braiding skills or complex techniques — just confident twisting and strategic pinning.
Why This Design Works for Formal Occasions
The twisted loop creates architectural interest and a three-dimensional quality that’s especially striking from behind or from the side. It’s feminine and romantic without being fussy, and the visible twist work demonstrates that effort and intention went into the styling. This is a style that photographs exceptionally well because it creates a clear focal point at the crown while keeping the face open and unframed.
How to Create the Infinity Loop
- Start with softly waved or curled hair for texture and grip. A light texture spray helps hair hold twists better.
- Take a 3-inch section from your right temple and twist it back loosely toward the center of your head.
- Take an equal section from your left temple and twist it back in the same manner.
- Before securing either twist, cross the right twist over and through the left twist, creating a loop or infinity shape at the crown.
- Secure both twisted sections together with bobby pins hidden beneath where they cross, using at least three pins for security.
- The remaining length should flow freely down your back.
- Gently pull at the twists to loosen and enhance the loop shape.
- Finish with a flexible-hold hairspray.
Quick note: Practice this once or twice beforehand — the looping motion becomes intuitive after the first attempt, and the second time you’ll execute it with confidence.
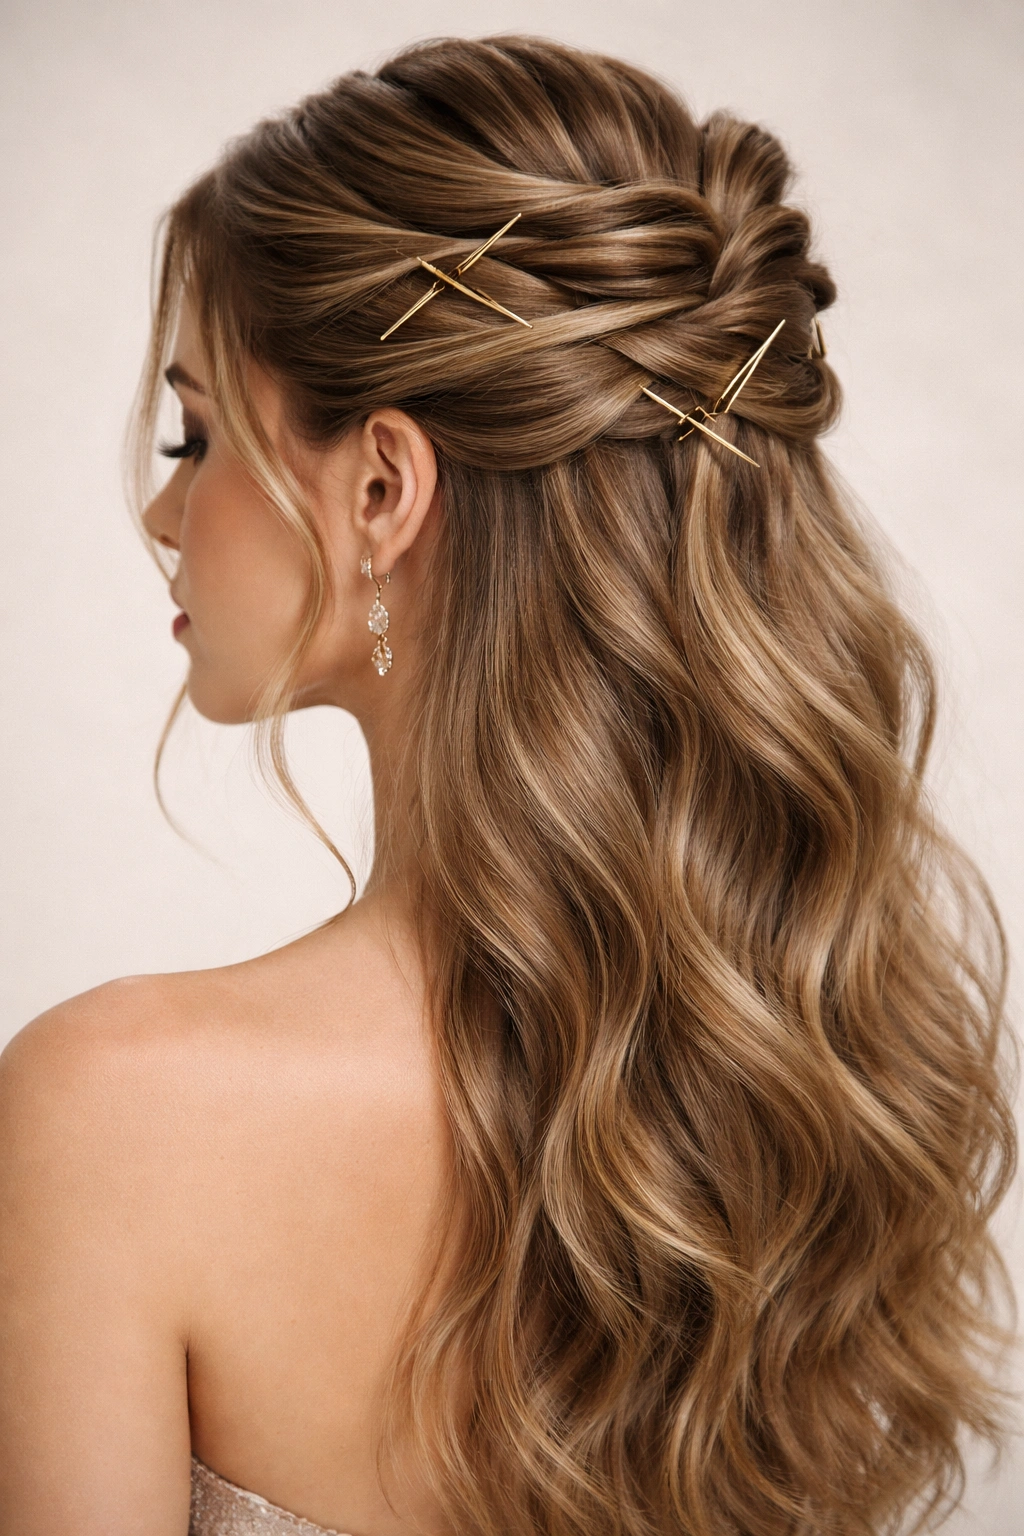
5. The Double Twisted Half-Up with Center Accent
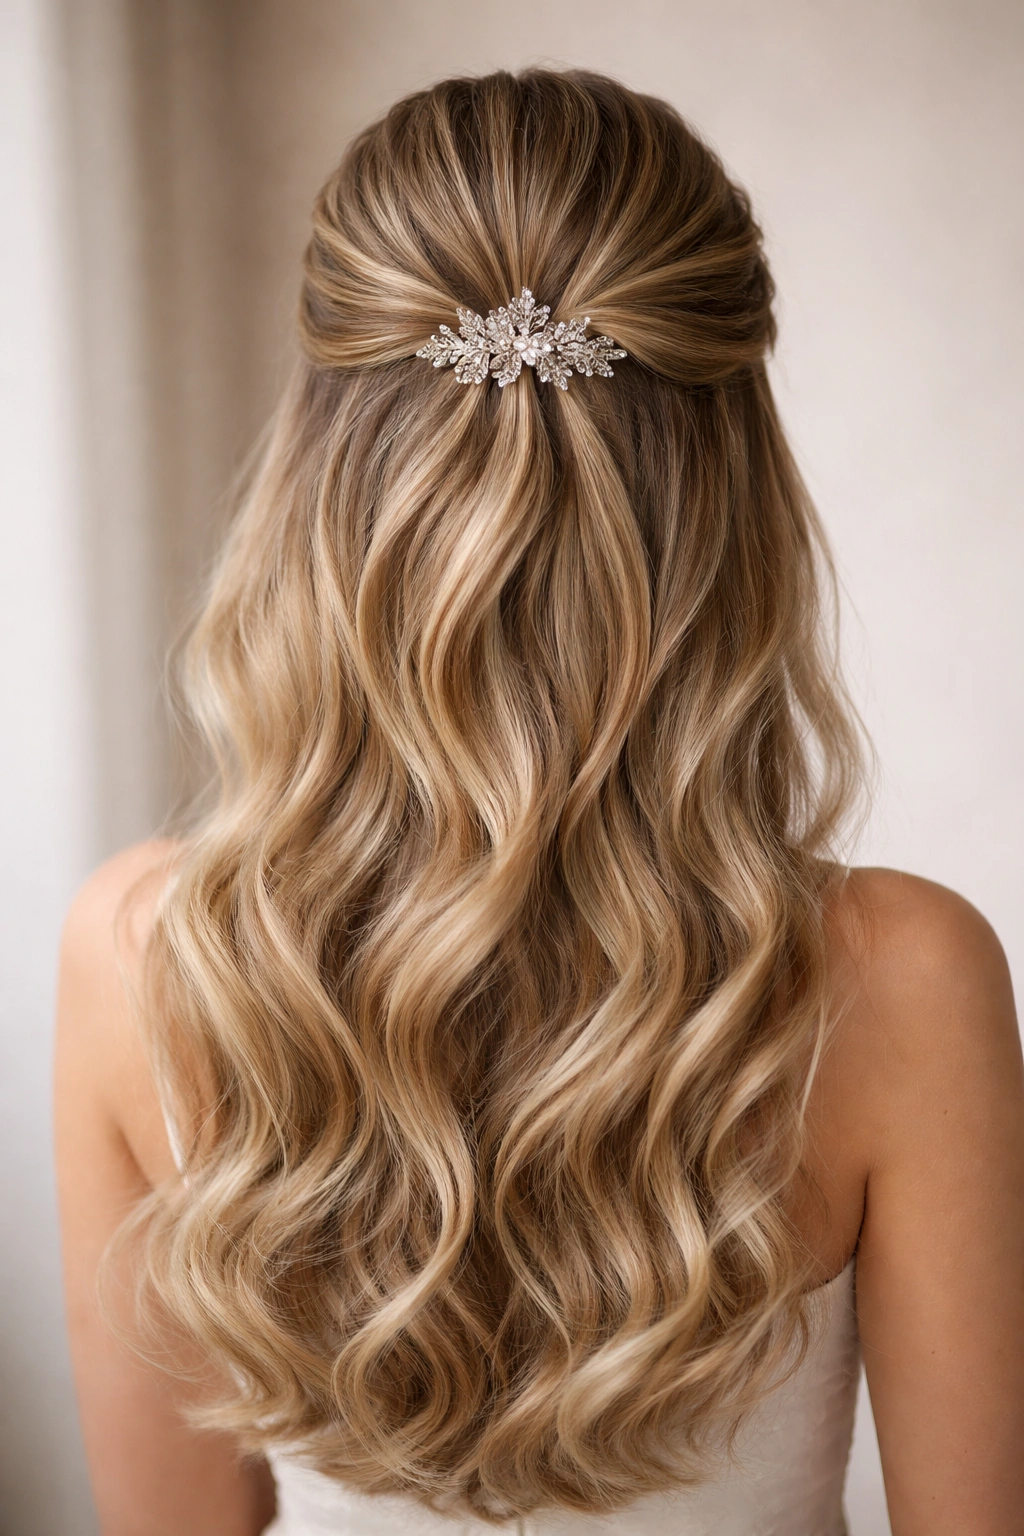
This balanced style features two independent twists, one from each side of the head, meeting at the center crown and secured with a decorative hair clip, comb, or accessory that becomes a focal point of the design. The symmetry of the double twists creates a polished, intentional look, and the accessory allows you to tie the hairstyle directly into your overall aesthetic. This works beautifully for formal events where you’re wearing statement jewelry or a decorative hair comb that should be visible and celebrated.
What Makes This Style Elegant and Intentional
The dual twists create balance and symmetry that read as formal and controlled, while the decorative accessory serves as a punctuation mark that anchors the entire look. This style works on all hair types and textures, and the looseness or tightness of the twists can be adjusted based on your hair’s characteristics and how long you need the style to hold.
Step-by-Step Instructions
- Begin with hair that has a light wave or curl for texture and grip. Smooth the front sections with a brush but maintain volume at the crown.
- Take a 2-inch section from just above your right ear and twist it back smoothly toward the center crown, twisting loosely for a soft, romantic quality.
- Mirror this on the left side, twisting a matching section from above your left ear toward the center crown at the same angle and with the same looseness.
- Meet both twists at the center of the crown, overlapping them slightly.
- Secure the twists with bobby pins placed horizontally beneath them, ensuring they’re completely hidden.
- Slide your chosen decorative clip, comb, or small hair pin through both twists or over the secured area where they meet.
- The remaining hair flows down in soft waves or curls.
- Mist gently with flexible-hold hairspray, keeping the twists soft rather than stiff.
Pro tip: Choose an accessory that coordinates with your neckline or dress detail — if you’re wearing an open neckline, a delicate, visible clip elevates the entire look; if you’re in a high neckline, keep the accessory smaller and more understated.
6. The Romantic Curl Half-Up with Ribbon
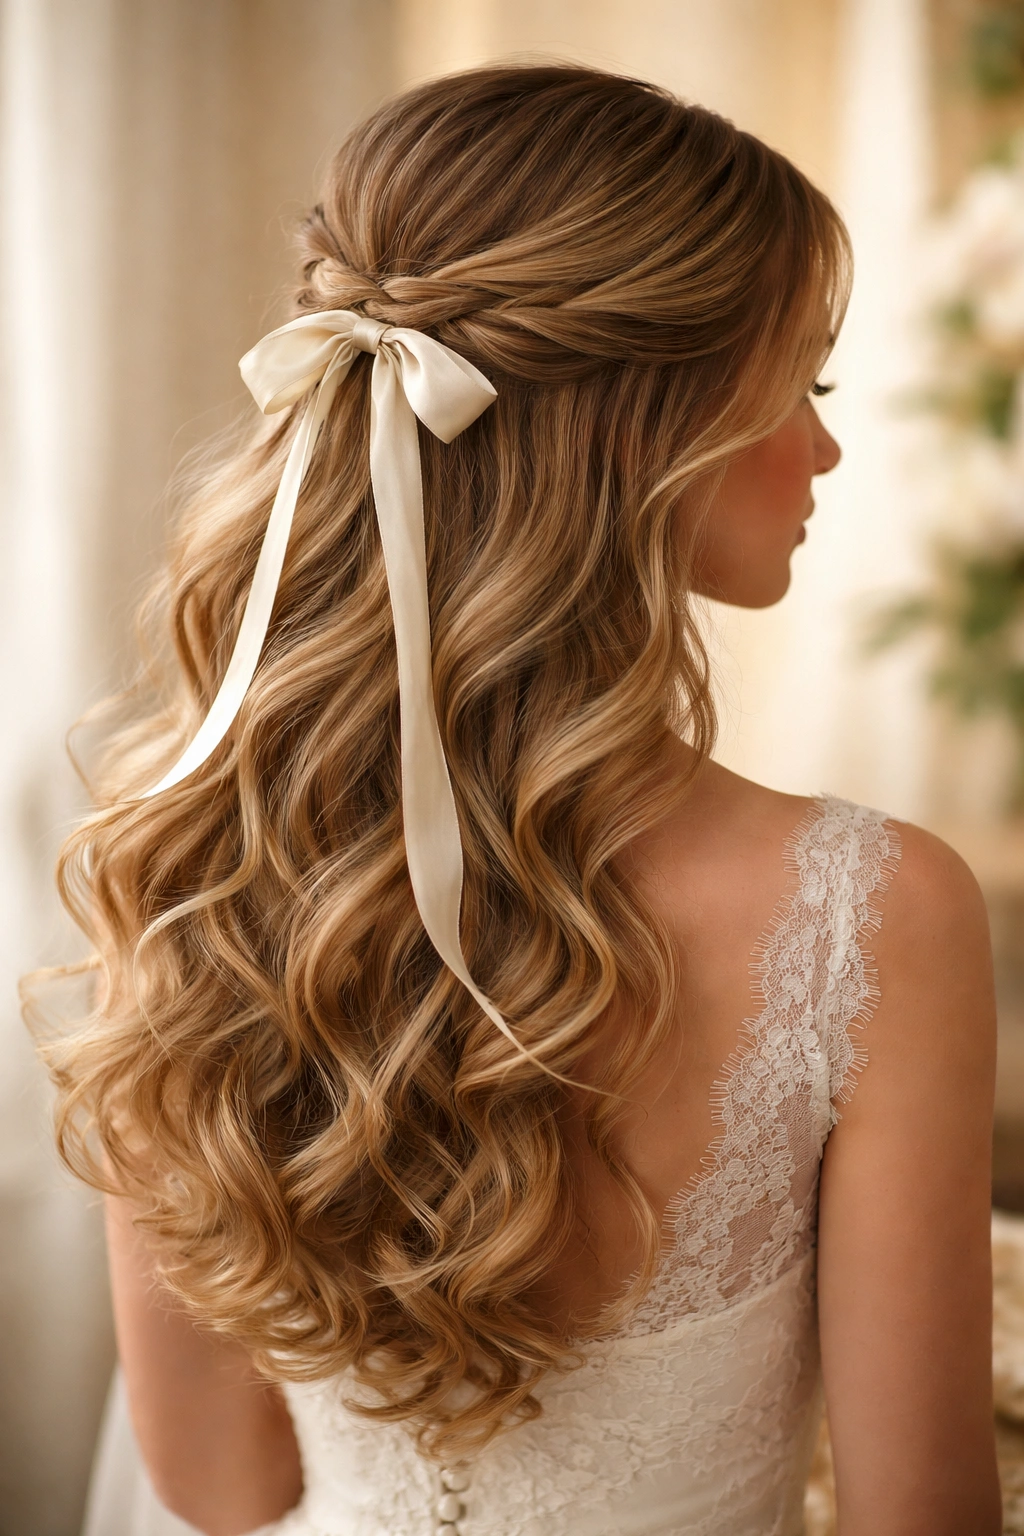
This soft, dreamy style features lightly curled hair throughout, with a delicate ribbon or silk cord weaving through the back sections and tying or pinning into a half-up position at the crown. The ribbon adds luxury and texture while creating a focal point that feels wedding-appropriate and completely feminine. This is the style for formal events where you want to project romance and elegance, and it works beautifully whether your event is in an ornate ballroom or an intimate garden setting.
Why Ribbon Adds Sophistication
A silk ribbon or delicate cord transforms a simple half-up style into something that feels heirloom-quality and intentional. The ribbon can be chosen to match your dress, your flowers, or your overall color scheme, making it easy to tie the entire look together visually. The ribbon also adds a tactile element that catches light and creates dimension that photographic flash picks up beautifully.
Creating This Romantic Look
- Curl your entire head with a curling iron or by pin-curling and allowing to set. Aim for loose, large curls rather than tight ringlets for an elegant, romantic quality.
- Gently brush through the curls to create soft waves and merge them into a unified texture rather than individual curls.
- Attach a ribbon or silk cord to your hair near the hairline at your left temple using a small bobby pin (you can hide the pin beneath curls).
- Create a gently twisted or braided section as you move the ribbon back toward the center crown, weaving the ribbon in and out of the hair.
- Secure the twisted section at the crown with bobby pins and tie or pin the ribbon into a decorative loop or bow.
- Leave the remainder of your hair in full, loose curls falling down your back.
- Gently separate and shape curls into a unified, voluminous wave pattern.
- Use a light-hold hairspray — you want the curls to move slightly with you rather than staying completely rigid.
Worth knowing: Natural light makes ribbon details more visible than indoor light, so if your event is outdoors or has abundant natural light, a shimmering or silk ribbon will be especially striking.
7. The Waterfall Braid Half-Up
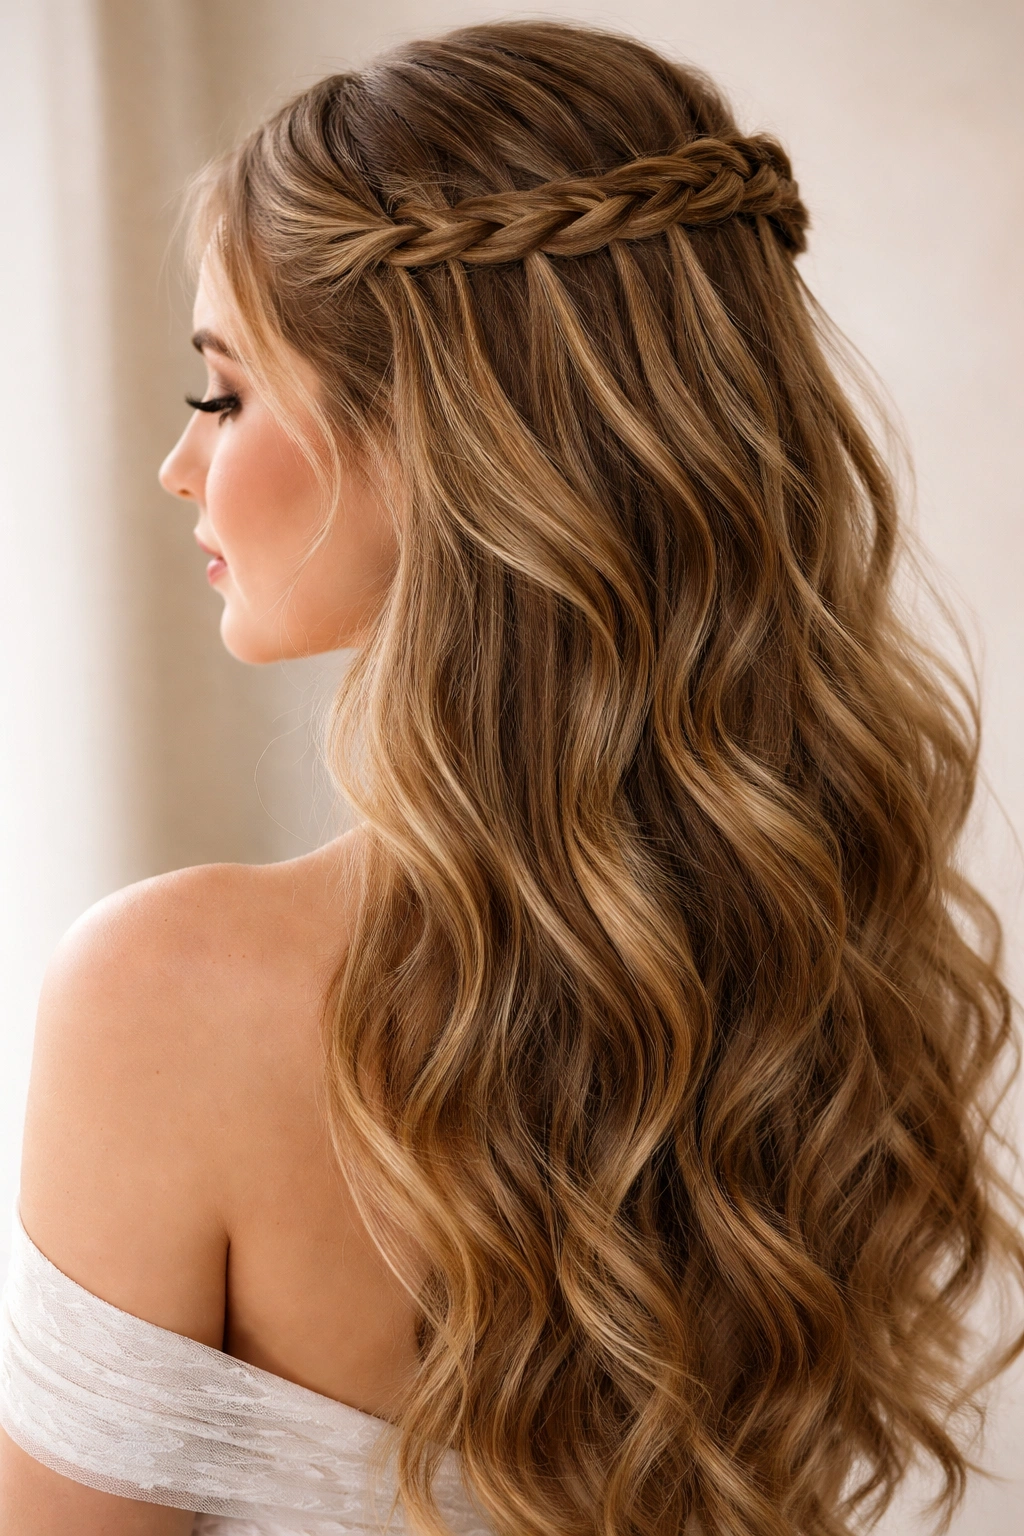
This intricate-looking style features a thin French braid running diagonally from one temple, with small sections dropped out along the way to create a waterfall effect that cascades down the back. The remaining hair flows freely, but the braid weaves through it, creating movement and texture that’s both formal and distinctly romantic. This is an excellent choice if you’re comfortable with braiding and want a style that looks more complex than it actually is — the waterfall element creates visual interest without requiring a full updo.
Why This Braid Style Reads as Highly Intentional
The waterfall braid demonstrates technical skill and attention to detail without appearing severe or overly controlled. The falling sections create a cascade effect that’s naturally beautiful and photographs gorgeously from any angle. It’s a style that works for both daytime and evening formal events, and it maintains an inherently romantic quality that suits almost any dress style.
How to Execute a Waterfall Braid
- Start with hair that has a natural wave or light curl — this helps the braid hold and the falling sections maintain dimension.
- Create a deep side part and begin your braid at your hairline, just behind the part, working toward the opposite ear.
- Instead of adding all hair into the braid as you would with a traditional French braid, use the classic French braid technique but drop out small (approximately 1-inch) sections every 2-3 inches as you braid.
- Each time you drop a section, allow it to fall freely down your back; it will be anchored by the braid above it, creating the waterfall effect.
- Continue the braid toward the opposite ear and secure the end with a small elastic at your temple area.
- The dropped sections will naturally create waves and texture cascading down your back.
- Curl the entire lower section loosely to enhance the waterfall effect and create movement.
- Use flexible-hold hairspray to maintain the braid’s structure while allowing curls to move naturally.
Insider tip: If this is your first waterfall braid, practice it in a mirror beforehand to get comfortable with the dropping technique — it becomes second nature once you’ve done it once or twice.
8. The Sleek Low Half-Up with Center Accessory
This modern, minimalist style pulls hair back into a low half-up position at the nape of the neck rather than at the crown, creating an elongated, elegant line. The lower positioning gives this style a contemporary feel while maintaining formal polish, and the nape area leaves room for a delicate necklace or back neck jewelry to be fully visible. This is perfect for formal events where you’re wearing an open back dress, a deep V-neck, or any style where you want your neck and shoulder area to be prominent.
Why Lower Half-Ups Work for Certain Formal Looks
A lower half-up position creates a different silhouette than a crown-positioned style — it elongates the neck and makes the face appear more open and refined. This positioning also pairs beautifully with dramatic back necklines and allows jewelry to take center stage. The sleek approach gives this style a fashion-forward, editorial quality that’s especially striking at sophisticated urban formal events.
Building the Lower Half-Up Style
- Blow dry your hair straight and smooth, or create a sleek wave using a flat iron. The key is a polished base without texture.
- Apply smoothing serum or anti-frizz cream to create shine and smooth any flyaways.
- Take a 2-3 inch section at each temple and gently twist or section each back toward the nape of your neck.
- Gather the twisted sections at the base of your head (at your neck level) and secure with an elastic or decorative clip.
- Smooth the upper portions of the style, ensuring no bumps or imperfections are visible.
- Leave the remainder of your hair flowing down your back in full, sleek waves or completely straight.
- Wrap a small section around the elastic to conceal it, and secure with a bobby pin.
- Finish with strong-hold hairspray and reapply as needed to maintain smoothness throughout the event.
Quick tip: This style is especially striking when paired with a delicate back necklace or jewelry — the open neck area becomes a design element of your overall look.
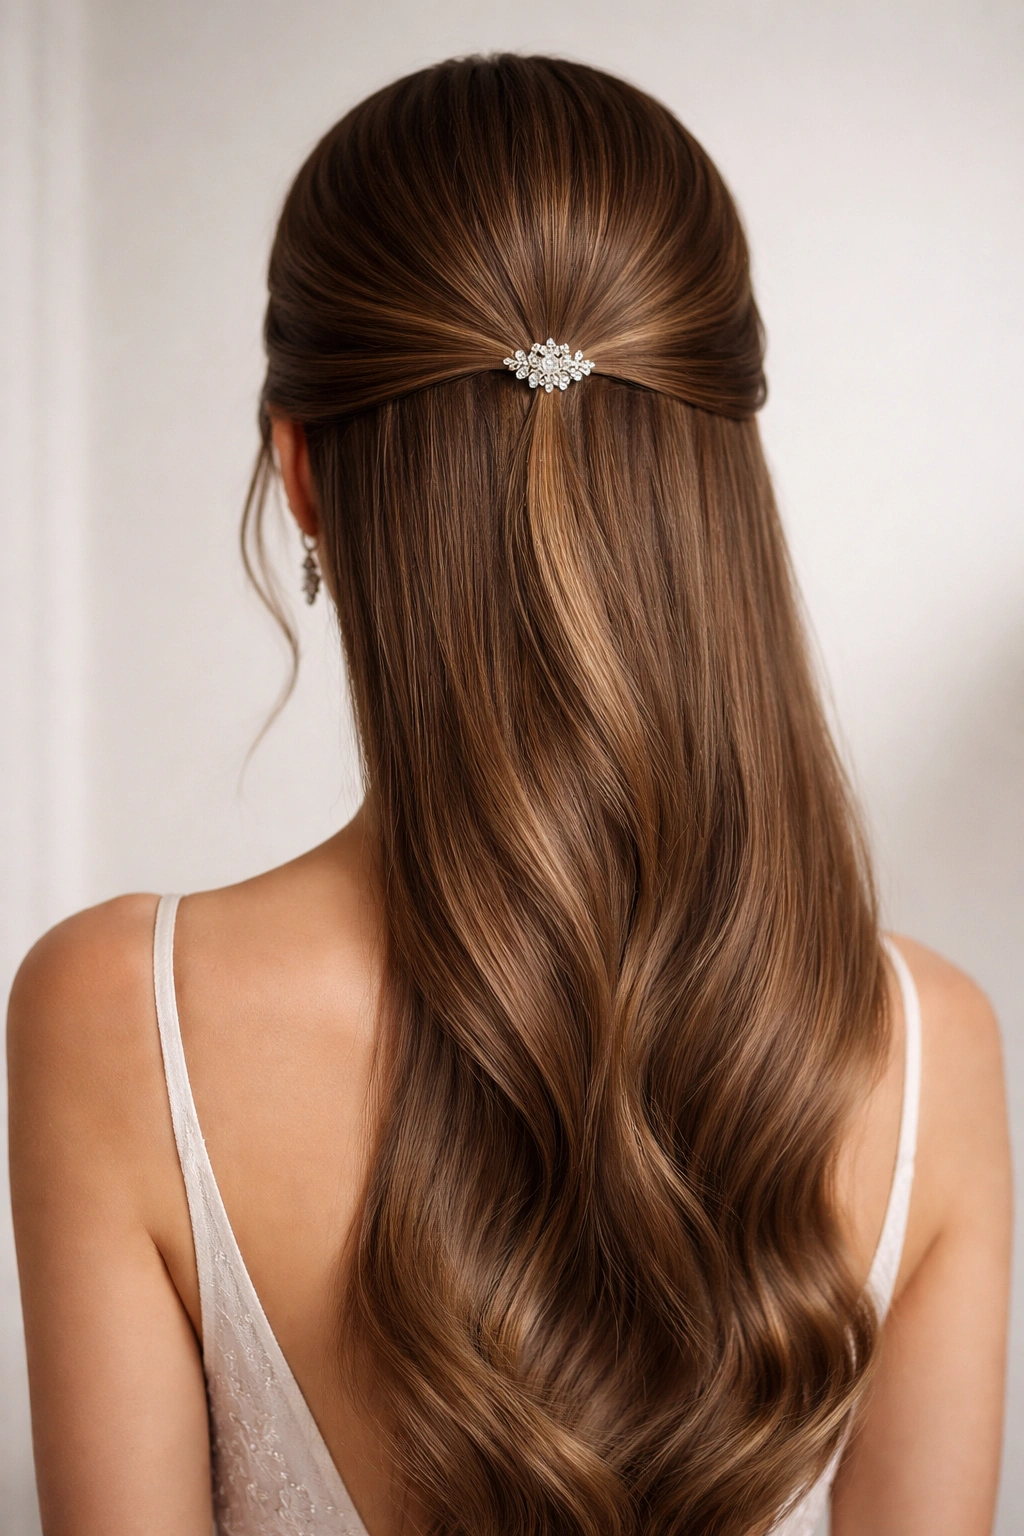
9. The Twisted Half-Up with Pearl or Crystal Accent
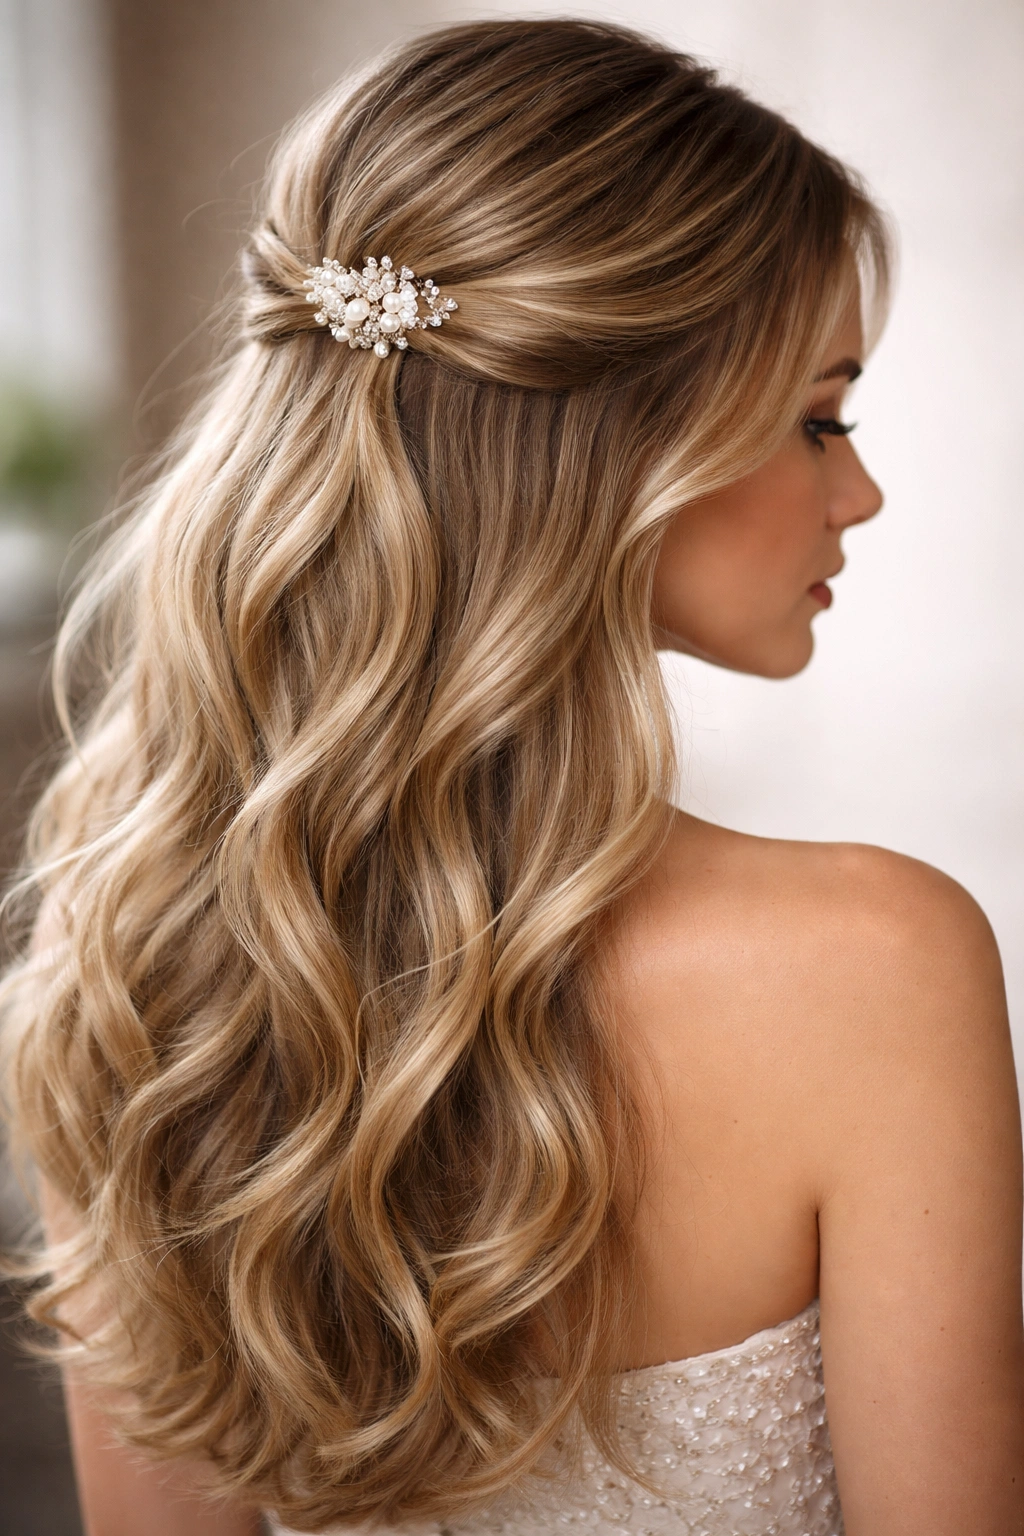
This elegant style features one or two loose twists meeting at the crown and secured with a jeweled clip, pearl pin, or crystal accent that serves as both functional and decorative element. The sparkle or subtle shine of a quality accent piece immediately elevates the style and ties it directly to your jewelry and overall aesthetic. This works beautifully for evening formal events and creates just enough visual interest to feel intentional without appearing overly fussy.
Why Accessory Details Matter for Formal Styling
A quality accent piece does more than secure your hair — it becomes a focal point that draws the eye and adds luxury to your overall appearance. A pearl clip feels classic and timeless, while crystal or diamond-like pieces feel contemporary and sparkly. Choosing an accessory that complements your jewelry creates visual cohesion that reads polished and intentional.
How to Create This Detailed Style
- Start with softly waved or curled hair for texture and natural grip. Avoid slick, sticky products that make twisting difficult.
- Take a 3-inch section from just above one ear and twist it back loosely toward the crown, maintaining the twist’s definition without pulling tightly.
- Take a matching section from the opposite side and twist it in the same manner.
- Meet both twists at the center crown, crossing them slightly to create a layered look if desired.
- Secure firmly with bobby pins placed at the base where the twists meet, using multiple pins for security.
- Gently pull at the twists to create a fuller, softer appearance — this is a key step to elevate the look from basic to polished.
- Slide your chosen accent piece (jeweled clip, pearl pin, or crystal accent) over the secured area or through the twisted sections.
- Position the accent piece so it’s visible from behind and from the side, creating a focal point.
- Allow the remaining hair to flow down your back in soft waves or curls.
- Finish with flexible-hold hairspray.
Worth noting: Pearl or crystal accents work beautifully whether your event is daytime or evening — they catch light in different ways depending on the lighting environment, making them versatile choices.
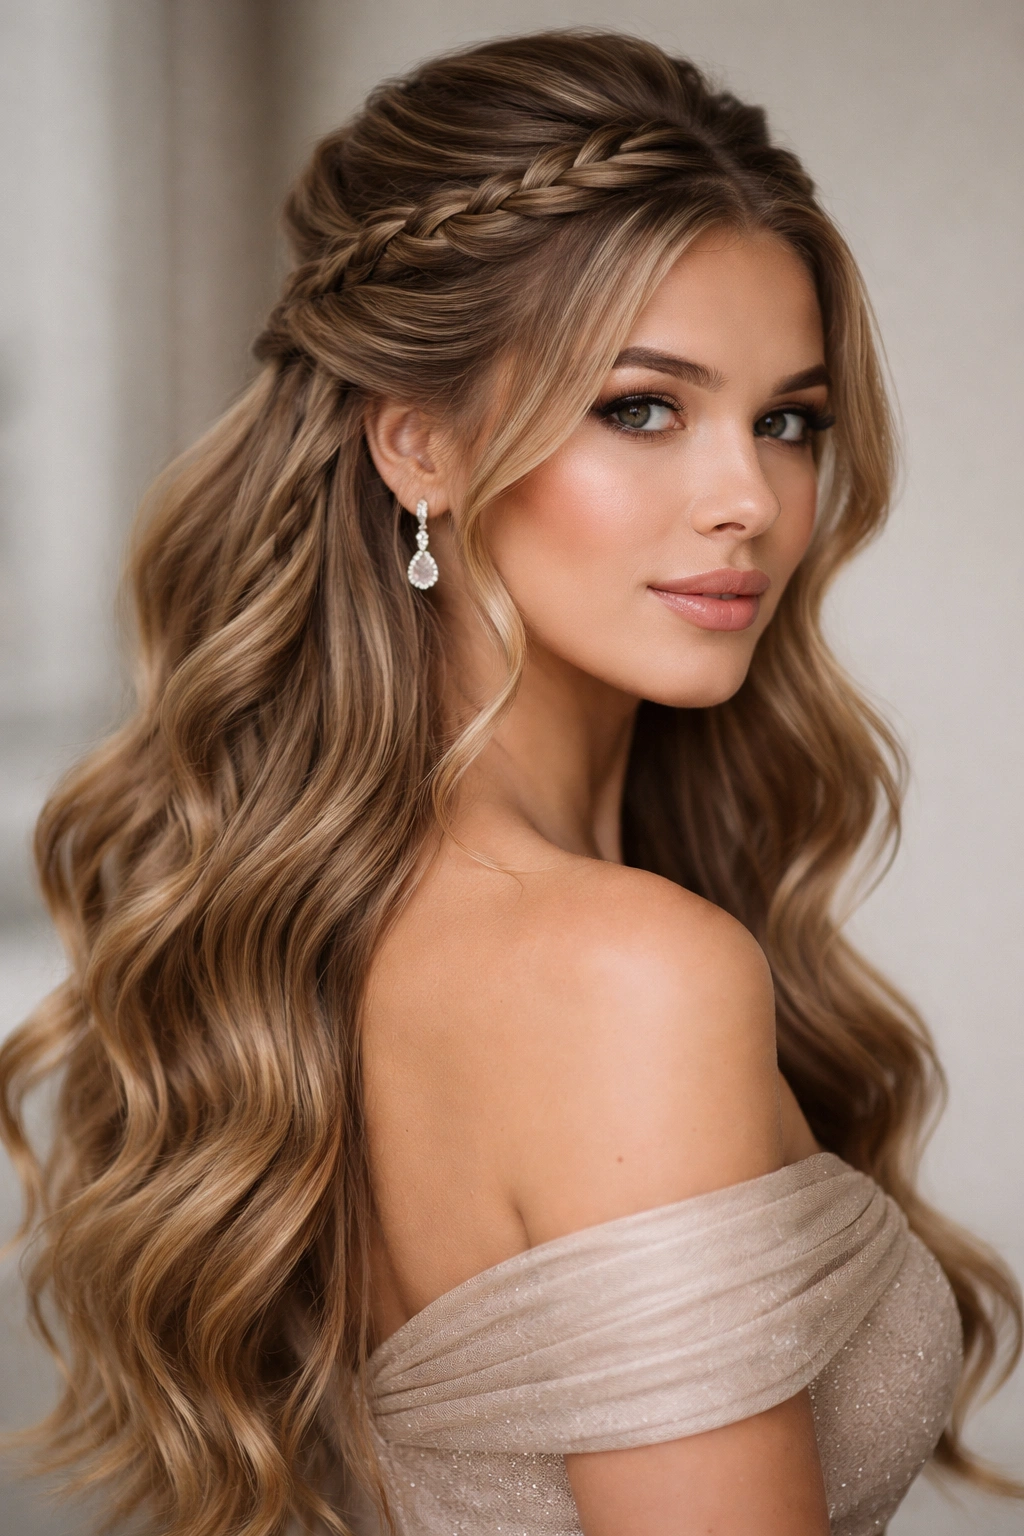
10. The Braided Half-Up with Deep Side Part
This sophisticated style features a thick, side-parted braid pulled back and secured at the crown, with the deep side part creating an asymmetrical, modern silhouette. The braid can be a Dutch, French, or simple three-strand variety, and the deep part allows you to frame your face while creating visual interest. This style is especially striking if you have strong, defined features or a face shape you want to show off, as the deep side part draws attention to one side of your face while the opposite side shows the length and flow of your hair.
What Makes This Asymmetrical Design Feel Elegant
Asymmetry, when executed with intention, reads as modern and sophisticated rather than casual. The deep side part creates architectural interest while the braid demonstrates technical skill. This combination makes the style feel polished and intentional without appearing overly formal or constrained. It’s a style that works beautifully for both traditional formal events and more contemporary celebrations.
Creating the Deep Side Part Braid
- Create an exaggerated side part, angling it from one temple toward the back of your head rather than down the center. The part should be obvious and intentional.
- Starting at your hairline just behind the part, begin a thick French braid working backward toward the opposite temple.
- Braid loosely and generously, incorporating large sections of hair to create a chunky, substantial braid rather than a delicate one.
- Continue the braid until you reach approximately 2-3 inches past the center of your head.
- Secure the braid with an elastic and then wrap a small section of hair around the elastic to conceal it.
- Secure the wrapped section with a bobby pin placed where it won’t be visible.
- Gently pull at the braid to loosen it and create a fuller, more romantic appearance.
- Leave the remaining hair in soft waves or curls falling freely down the opposite side of your body.
- The shorter side (above the part) should frame your face smoothly, creating an elegant shape.
- Finish with flexible-hold hairspray.
Pro tip: If braiding feels challenging, a thick three-strand braid is often easier to execute cleanly than a French braid, and it creates an equally sophisticated result.
11. The Wrapped Half-Up with Circular Detail
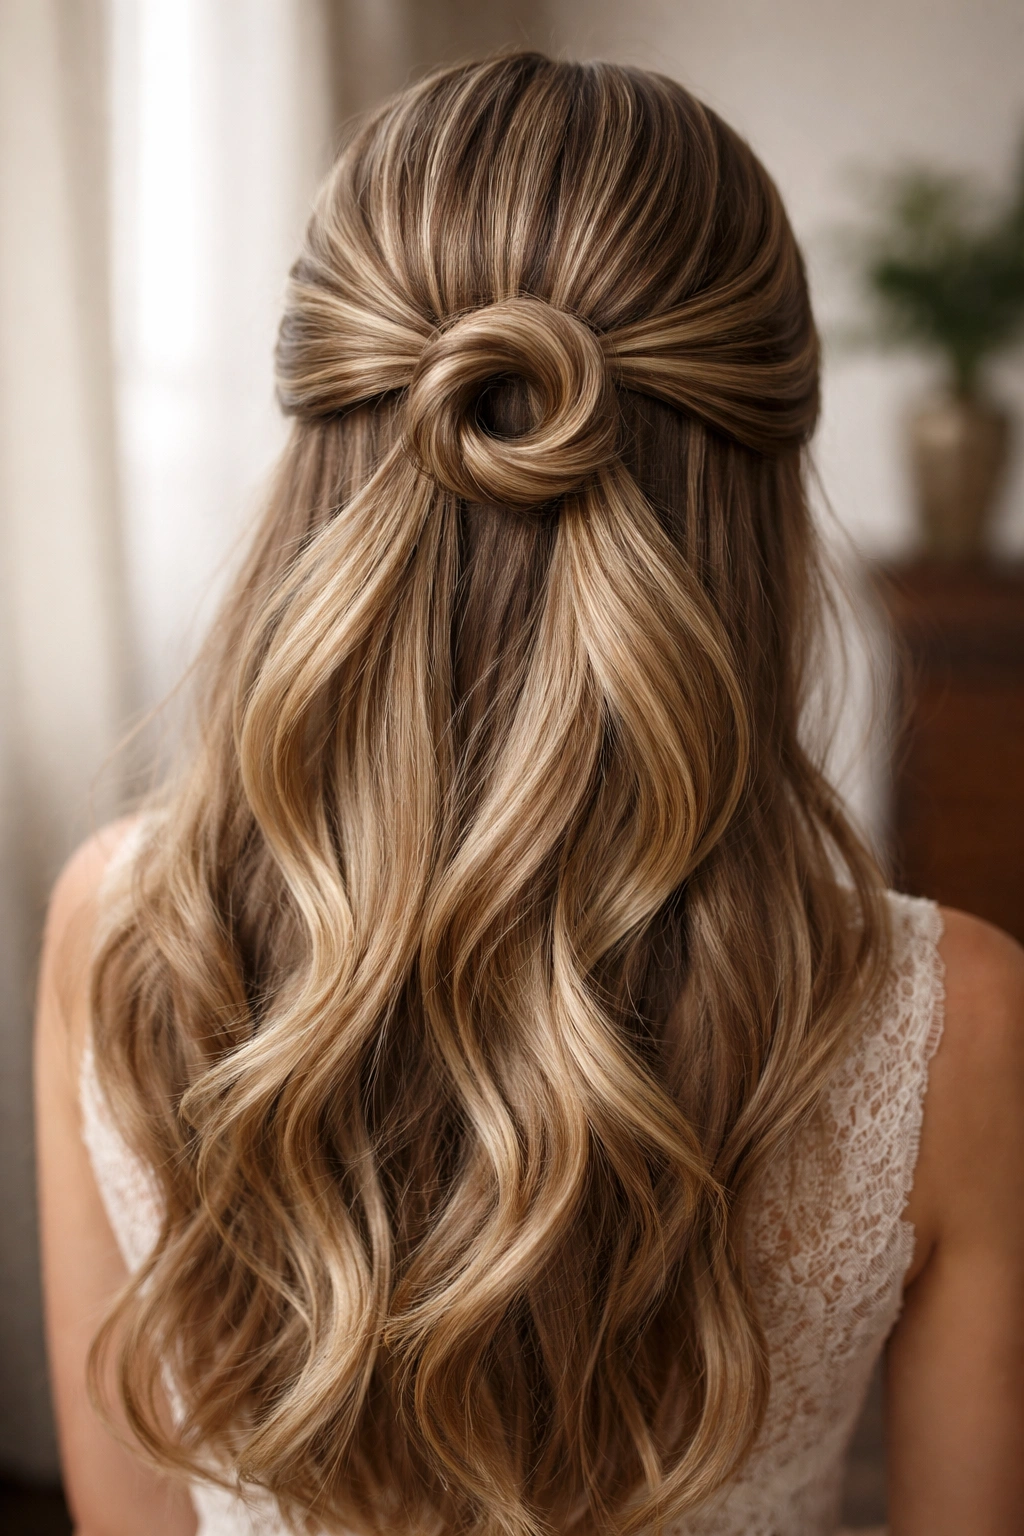
This modern style features two twists or sections meeting at the crown and then wrapped around each other in a circular or spiral pattern before being secured, creating a three-dimensional focal point. The circular detail is achieved through deliberate wrapping and pinning, and it creates visual interest and architectural quality that reads distinctly formal and intentional. This is an excellent choice if you want a style that demonstrates clear technique without requiring intricate braiding.
Why Circular Design Details Feel Contemporary and Elegant
A wrapped circular detail creates a modern, geometric focal point that’s eye-catching from behind and adds dimension to your crown area. This style also works beautifully with small, delicate pins or clips placed strategically, allowing you to add sparkle or color without overwhelming the design. It’s a style that photographs exceptionally well because the circular motion creates clear visual interest.
Building the Wrapped Circular Detail
- Start with softly waved or curled hair that has enough texture to hold twists securely.
- Take a 3-inch section from your right temple and twist it back loosely toward the crown.
- Take a matching section from your left temple and twist it in the same manner.
- Meet both twists at the center crown, overlapping them slightly.
- Take the right twist and wrap it over and around the left twist, creating a circular shape at the crown (think of wrapping one strand around another in a spiral motion).
- Secure the wrapped detail with bobby pins placed strategically throughout the circular element, ensuring they’re hidden beneath the twists.
- Use at least three pins to ensure the wrapped detail holds securely throughout the event.
- Gently pull at the twisted sections to loosen them and create a softer, more romantic appearance.
- Leave the remaining hair in soft waves flowing down your back.
- You can tuck small pins or crystal accents into the wrapped detail for added sparkle if desired.
- Finish with flexible-hold hairspray.
Quick note: This style takes a bit of practice to perfect, but once you understand the wrapping motion, it becomes quite intuitive. The second time you create it, you’ll work faster and with more confidence.
12. The Slicked Back Half-Up with Ornate Comb
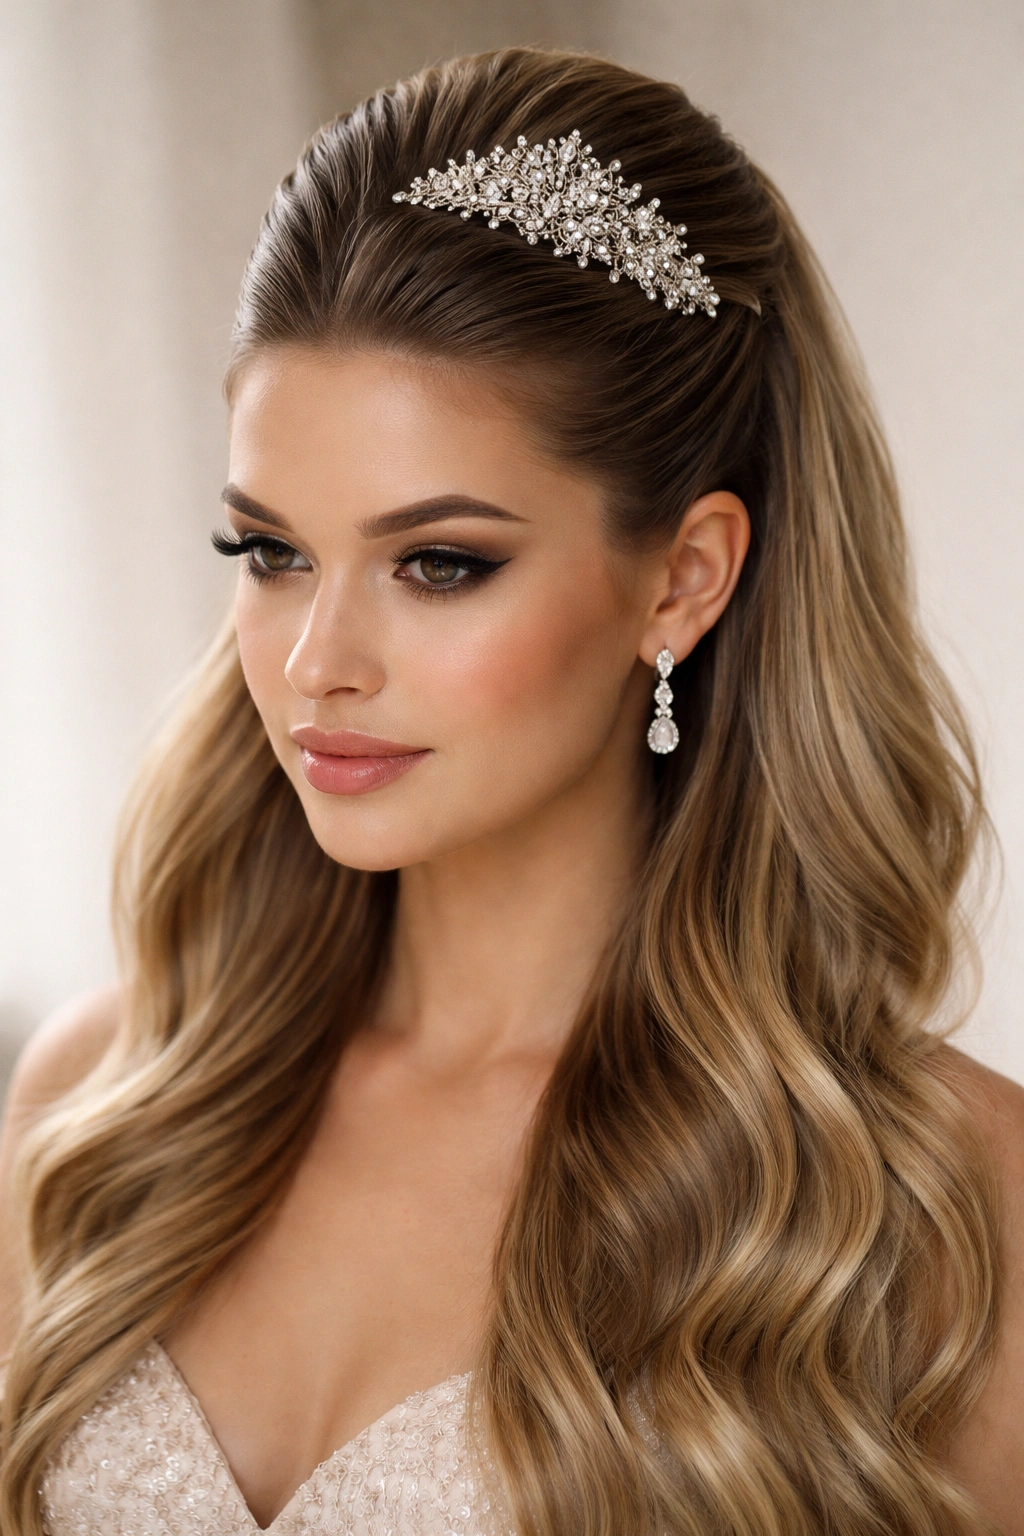
This ultra-sleek style pulls all hair straight back from the face into a high, tight half-up position secured with an ornate comb or decorative hair piece that becomes the focal point. The completely slicked back approach creates maximum face exposure and a fashion-forward, editorial quality that’s especially striking for formal events where you want to project confidence and modern sophistication. This style emphasizes facial bone structure and works beautifully if you have strong cheekbones, a defined jawline, or striking features you want to showcase.
Why This Maximalist Slicked Look Commands Attention
The slicked-back approach with a statement comb creates a bold, confident impression that photographs beautifully. The ornate comb becomes jewelry for your hair, and choosing one with visual interest (ornate detailing, pearls, crystals, or bold color) makes it a focal point of your entire look. This is a style that broadcasts that you’ve made intentional, considered choices about your appearance.
Creating the Slicked-Back Half-Up with Ornate Comb
- Begin with hair that’s been blow-dried straight or smoothed completely with a flat iron.
- Apply a strong smoothing gel or pomade to your hairline and brush your entire crown section straight back and away from your face.
- Continue smoothing your hair back and toward one side (typically you’ll gather more hair to one side for visual interest), using a fine-tooth comb to ensure absolutely no flyaways or bumps.
- Gather the smooth, slicked-back section at the crown into a half-up position and secure it temporarily with an elastic.
- Apply edge control to your hairline to create a finished, controlled appearance.
- Remove the temporary elastic and instead secure the half-up section with your ornate comb, inserting it horizontally through the gathered hair so it sits visibly and becomes a focal point.
- Ensure the comb is secure and won’t slip — you can add bobby pins beneath it if needed.
- The lower section can remain slicked back to the sides or flow in controlled waves.
- Finish with strong-hold hairspray and reapply as needed throughout the event.
Worth knowing: This style requires regular touch-ups with edge control or smoothing products throughout an event to maintain its polished appearance, especially if you’re moving, dancing, or in warm conditions.
13. The Soft Wave Half-Up with Flower Crown Accent
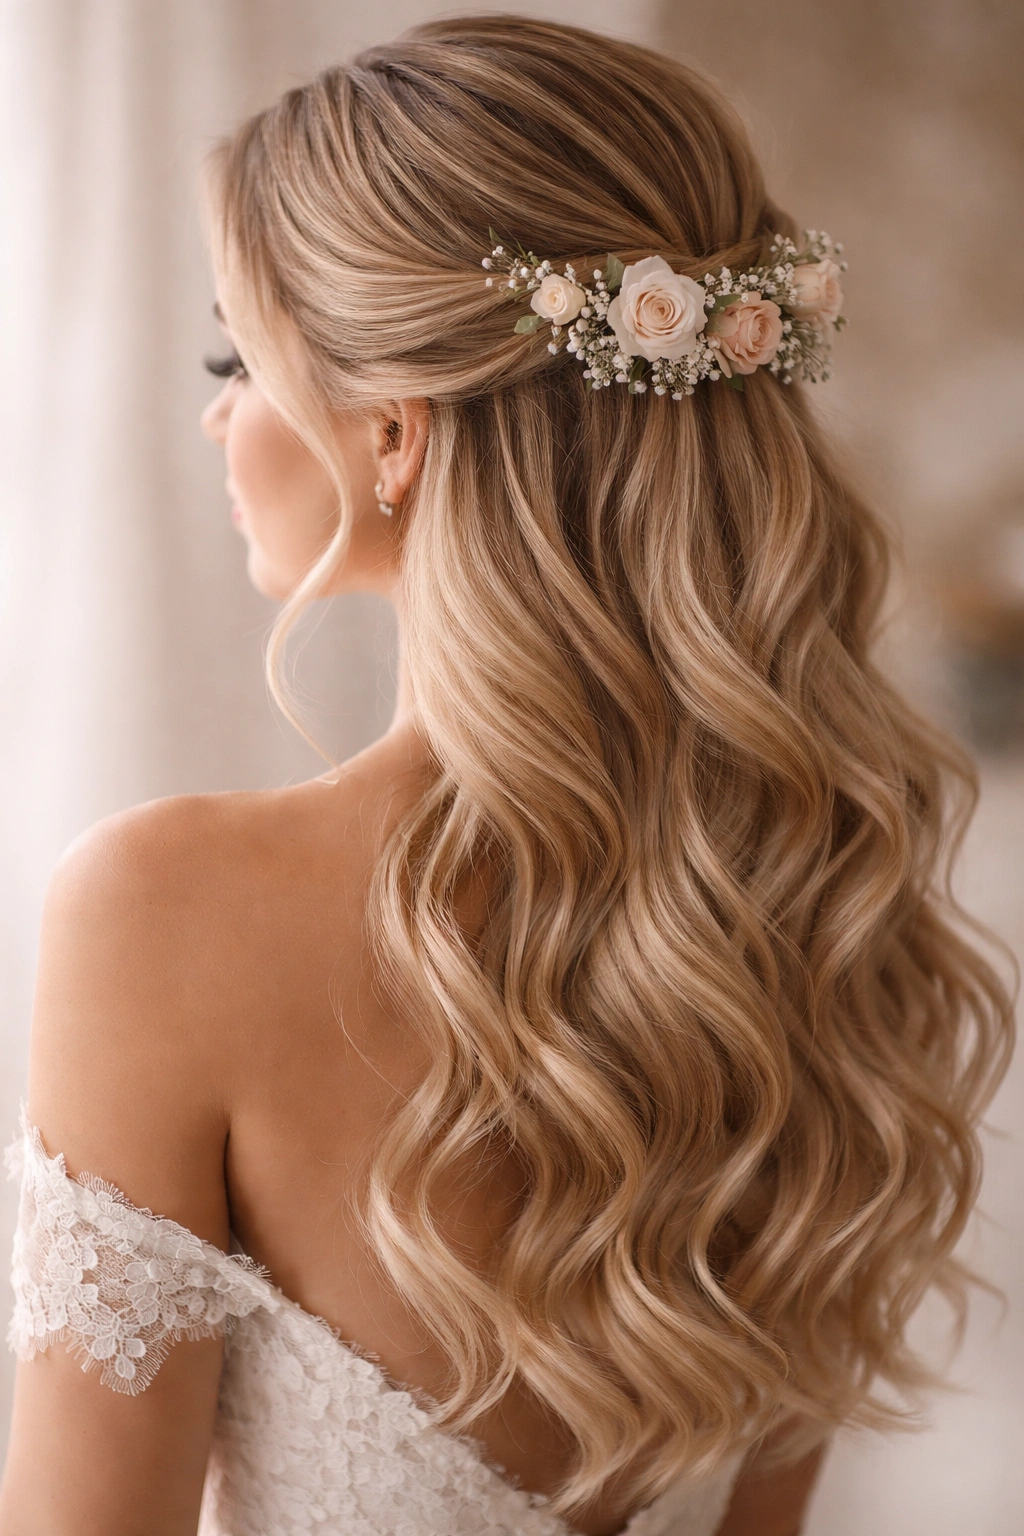
This romantic, bridal-appropriate style features soft waves throughout, with a delicate flower crown or floral accent piece positioned at the base of the half-up section where it meets the crown of the head. The flowers can be fresh, faux, or a combination, and they create an undeniably romantic, ethereal quality that’s perfect for evening formal events and especially appropriate for wedding celebrations. The soft waves and flower combination evoke a timeless, garden-romantic aesthetic that never dates.
Why Floral Accents Add Romance and Dimension
Flowers immediately transform a hairstyle from polished to romantic and create a three-dimensional element that catches light and photographs beautifully. Fresh flowers add natural beauty and fragrance, while high-quality faux flowers offer durability throughout a long event. Either way, the floral accent becomes a focal point that enhances the overall romantic quality of the styling.
Creating the Flower Crown Half-Up
- Curl your entire head with a curling iron or create waves through pin curling and setting.
- Brush through the curls gently to merge them into soft, unified waves rather than individual ringlets.
- Take a 3-inch section from above each ear and twist or lightly braid these sections back toward the center crown.
- Meet these sections at the crown and secure with bobby pins.
- Gently pull at the twists or braids to loosen them and create a fuller appearance.
- Create or purchase a small flower crown or floral accent piece (typically 4-6 inches in diameter).
- Position the flower crown so the flowers sit at the base of your half-up section, right where the twists or braids converge at your crown. The flowers should frame this area beautifully.
- Secure the flower crown with bobby pins placed through the base mechanism into your hair, ensuring it won’t shift throughout the event.
- Leave your remaining hair in full, soft waves falling freely down your back.
- If using fresh flowers, mist lightly with water an hour before the event and again as needed to keep petals fresh.
- Finish with light-hold hairspray so waves move naturally with you.
Insider tip: Choose flowers that coordinate with your dress or bouquet — this creates visual cohesion that makes your entire appearance feel intentionally styled rather than assembled.
14. The Double Crown Braids Half-Up
This intricate-looking style features two thin French or Dutch braids framing the face and running toward the back, where they meet and are secured at the crown to create a half-up position. The braids frame the face beautifully while the crown meeting point creates a focal area of gathered detail. This style is especially striking if you’re wearing your hair off to one side or if you want a style that photographs beautifully from multiple angles, as the dual braids create interest and dimension from virtually any viewpoint.
Why Symmetrical Crown Braids Feel Intentional and Formal
The dual braids demonstrate technical skill and create a sense of symmetrical balance that reads as intentional and polished. The braids frame the face while the crown meeting point creates architectural interest. This style also photographs exceptionally well because it’s visually interesting from behind, from the side, and from the front as you turn to show off your braided details.
Creating the Dual Crown Braids
- Part your hair down the center for perfect symmetry, or part slightly to one side if you prefer a more modern, asymmetrical look.
- Starting at your left hairline just above your temple, begin a Dutch or French braid (working backward so the braid sits on top of your head) and braid toward the center back of your head.
- Simultaneously, create a matching braid on the right side, working from your right temple toward the center back.
- Both braids should meet at approximately the crown or slightly below, at the same point at the back of your head.
- Secure both braids together at the meeting point with bobby pins, creating a combined secured point at the crown.
- Gently pull at both braids to loosen them and create fuller, more romantic braids.
- The remaining length falls freely in soft waves or curls.
- You can secure the combined braid point with a decorative clip if desired.
- Finish with flexible-hold hairspray.
Pro tip: These braids look more polished if you work with hair that has some natural texture or slight wave — it grips the braid sections better and creates a fuller appearance than slick hair.
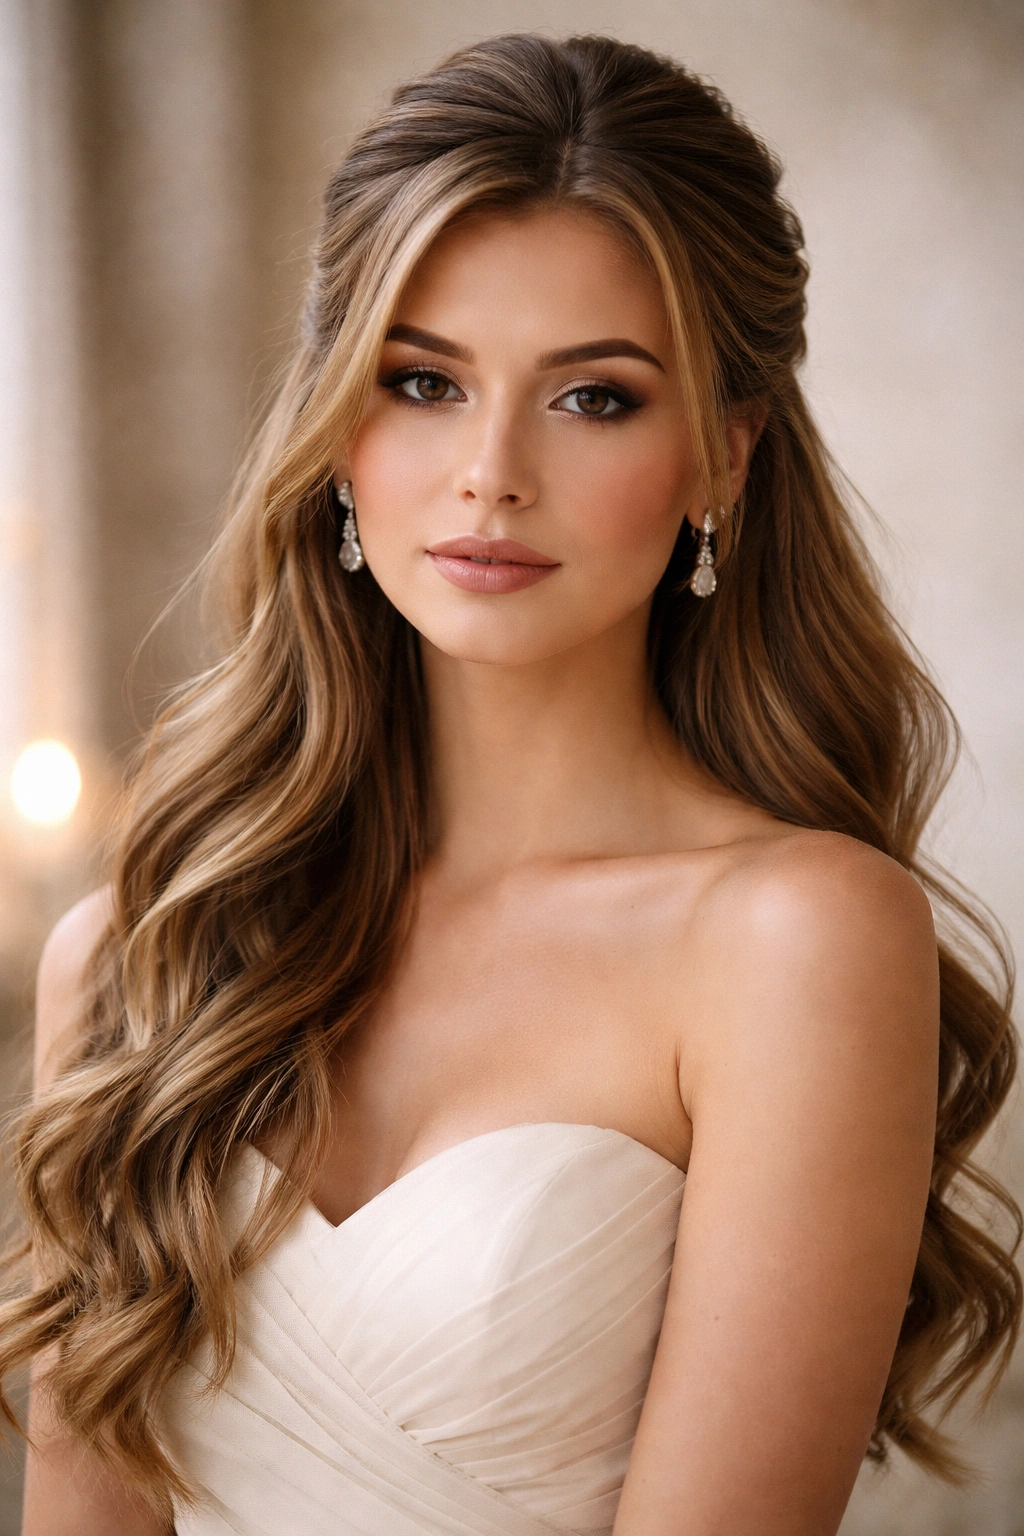
15. The Modern Twisted Half-Up with Sleek Finish

This contemporary style combines two smooth, tight twists with a polished, sleek finish — no softening or loosening — creating a streamlined, fashion-forward look. The precision of the styling and the intentional tightness gives this style a modern, editorial quality that’s especially appropriate for upscale contemporary formal events, galas, and celebrations where fashion-forward styling is appreciated. The sleek finish also creates clean lines that photograph beautifully in professional photography.
Why Tight, Intentional Styling Reads as Modern Formal
A deliberately tight, sleek finish (as opposed to a loose, romantic one) communicates controlled sophistication and editorial awareness. This approach shows that your styling is intentional, technically skilled, and fashion-forward rather than effortlessly romantic. It’s a style choice for confident people who understand the impact of precision and control.
Building the Modern Tight Half-Up
- Begin with sleek, straight hair or hair smoothed completely with a flat iron.
- Apply smoothing serum or gel to create shine and smooth surface.
- Take a thin (approximately 1.5-inch) section from just above your right ear and twist it smoothly and tightly back toward the center crown.
- Create a matching thin, tight twist on the left side.
- Pull these twists snugly so they’re visibly tight and controlled — this is intentional and modern, not a loose, romantic aesthetic.
- Meet the twists at the center crown and secure with bobby pins, ensuring no visibility.
- Smooth any flyaways with additional smoothing serum or edge control.
- Leave the remaining hair completely straight and sleek, falling down your back without wave or curl.
- Finish with strong-hold hairspray.
- The entire look should read as controlled, polished, and intentional.
Quick note: This style requires smooth base hair and regular touch-ups with smoothing products to maintain its polished appearance throughout an event. It’s not a style that becomes more beautiful as it naturally loosens — it’s designed to maintain precision.
16. The Romantic Twisted Half-Up with Loose Waves

This soft, dreamy style features two loose, imperfect twists meeting at the crown and secured gently, leaving the rest of the hair in full, loose waves that create movement and dimension. The intentional looseness and imperfection of the twists creates a romantic, effortless quality that’s absolutely timeless for formal events. This is the style for people who want to look polished and intentional without appearing overly structured or controlled — the goal is romantic elegance.
Why Intentional Imperfection Enhances Romance
Slightly loose, imperfect twists combined with full waves read as romantic and effortlessly beautiful rather than stiff or overdone. This approach suggests that you woke up this beautiful — which is the ultimate compliment to any styling. The looseness allows curls and waves to fall naturally, creating dimension and movement that photographs gorgeously.
Creating the Romantic Loose Half-Up
- Curl your entire head with a curling iron, creating loose, large waves rather than tight ringlets. Aim for waves that are relaxed and romantic.
- Gently brush through the curls or use your fingers to separate them, merging individual curls into soft, unified waves.
- Take a 3-inch section from above one ear and twist it loosely back toward the crown — this twist should visibly move and have texture; it shouldn’t be tight or controlled.
- Repeat on the opposite side, creating a matching loose twist.
- Meet both twists at the crown and secure with bobby pins, but keep the twists loose and slightly undone-looking.
- Gently pull at the twists from the base outward to loosen them further and enhance their romantic quality.
- Leave the remaining hair in full, voluminous waves that frame your face and cascade down your back.
- Mist gently with light-hold hairspray — you want waves to have movement and bounce rather than staying completely rigid.
- The overall effect should be romantic, soft, and effortlessly beautiful.
Worth knowing: This style actually improves as the event progresses and curls naturally loosen slightly — the initial style is quite polished, and as it relaxes, it becomes increasingly romantic and undone-looking, which is exactly the goal.
17. The Hybrid Braid-and-Twist Half-Up
This dynamic style combines elements of both braiding and twisting, creating a more complex and visually interesting half-up section. The hybrid approach might feature a braid running through the center with twists framing either side, or twists that incorporate small braided elements within them. The combination of techniques creates a more elaborate appearance than either technique alone while remaining achievable without advanced braiding skills. This is an excellent choice if you want a style that reads as particularly intentional and demonstrates clear styling effort.
Why Hybrid Techniques Create Visual Interest
Combining two techniques creates more visual complexity and interest than using a single technique throughout. A viewer’s eye moves through the style, discovering different textural elements — braids beside twists, tight sections beside loose sections — creating a more dynamic overall appearance. This approach also creates more dimension and three-dimensionality than a simpler style.
Building the Hybrid Braid-and-Twist Design
- Start with softly waved or curled hair that has texture and grip.
- Take a 2-inch section from the center of your hairline and begin a thin French braid working straight back toward the crown. This central braid becomes the anchor of your design.
- Continue this center braid until you reach approximately the crown area, then secure the braid end with a small elastic.
- On either side of the center braid, take a 2-inch section and twist it loosely back toward the crown, angling the twist to frame either side of the central braid.
- Secure all elements (both side twists and the central braid) together at the crown with bobby pins.
- Gently loosen the twists and braid to create a fuller, more romantic appearance.
- Leave the remaining hair in soft waves or curls.
- The overall effect should be a central braid with twisted frame elements, creating a more complex and interesting design than a simple single-element half-up.
- Finish with flexible-hold hairspray.
Insider tip: If you’re working with finer hair, use the twists-around-braid approach (twists frame a central braid) rather than attempting braids on finer hair, which can appear thin and less impressive visually.
18. The Sleek Low Braid Half-Up with Nape Accent
This refined style features a sleek French or Dutch braid pulled back into a low half-up position at the nape of the neck rather than the crown, creating an elongated, elegant line. The lower positioning creates visual interest while keeping the focus on the nape area and any jewelry you might wear there. This style is especially perfect for formal events where you’re wearing an open back dress, deep V-neck, or any style where you want your neck and shoulder area to be a focal point of your overall look.
Why Lower Braid Positions Create Elongated Elegance
A braid positioned low at the nape creates a different silhouette than a crown-positioned braid — it elongates the neck, makes the face appear more open, and allows jewelry or back neck details to be prominent. This positioning also works beautifully for hair that’s not quite long enough for a full updo but is long enough to gather into a half-up style, making it a versatile choice for many hair lengths.
Creating the Nape-Level Braid Half-Up
- Begin with smooth, sleek hair. Blow dry or flat iron to create a polished base.
- Part your hair on one side or down the center, depending on your preference.
- Starting at your hairline just behind the part, begin a French or Dutch braid working toward the opposite ear.
- Instead of braiding toward the crown, angle your braid toward the nape of your neck, creating a diagonal line that runs from the top of your head down toward the back of your neck.
- Continue the braid until you reach the nape area, then secure the braid with an elastic at the nape point.
- Wrap a small section of hair around the elastic to conceal it.
- Smooth the upper sections of your hair, ensuring they’re sleek and polished with no bumps or imperfections.
- Leave the remainder of your hair flowing down from the nape braid in soft waves or curls, or keep it completely straight for a sleek appearance.
- Apply edge control to any flyaways or your hairline.
- Finish with flexible-hold hairspray if you’ve added waves, or strong-hold if you’ve kept everything sleek.
Quick note: This positioning is especially striking when you’re moving — people see the braid detail as you walk or dance, creating an element of visual interest from behind that crown-positioned styles don’t offer.
19. The Sculptural Twisted Crown with Architectural Pin Placement
This modern, artistic style features multiple thin twists arranged in a sculptural pattern at the crown, creating visual interest through strategic pin placement and three-dimensional arrangement. The twists are positioned to create geometric interest rather than simply being pulled back symmetrically, and pins or clips are placed to enhance the architectural quality. This is a style for people who appreciate modern, artistic approaches to hair styling and want something that reads as distinctly contemporary and fashion-forward.
Why Asymmetrical Architectural Styling Feels Modern and Intentional
Asymmetrical, geometric arrangements read as modern and artistic rather than traditionally formal. The strategic placement of elements creates visual interest and demonstrates clear aesthetic intention. This approach to styling celebrates hair as a design medium rather than simply as something to be managed or controlled, which appeals to forward-thinking, style-aware people.
Creating the Sculptural Twisted Crown
- Start with softly waved or textured hair that has grip and holds twists well.
- Create multiple thin twists (3-5 twists, depending on the look you want) from various starting points — from the temple, from the side, from behind the ear.
- Work these twists back toward the crown, arranging them so they create visual interest and three-dimensionality rather than perfect symmetry.
- Secure the twists with bobby pins placed strategically to enhance the architectural quality — crossing pins over twists, angling them in different directions.
- Some twists can wrap around each other; others can sit parallel; some can cross over one another.
- The goal is visual interest and intentional asymmetry rather than balanced symmetry.
- Leave the remaining hair in soft waves or controlled curls.
- The overall effect should read as modern, artistic, and intentionally sculptural.
- Finish with flexible-hold hairspray.
Worth knowing: This style photographs beautifully because it’s visually interesting from multiple angles, and the geometric arrangement creates clear focal points that make photos dynamic and engaging.
20. The Classic Half-Up Half-Down with Loose Ringlets
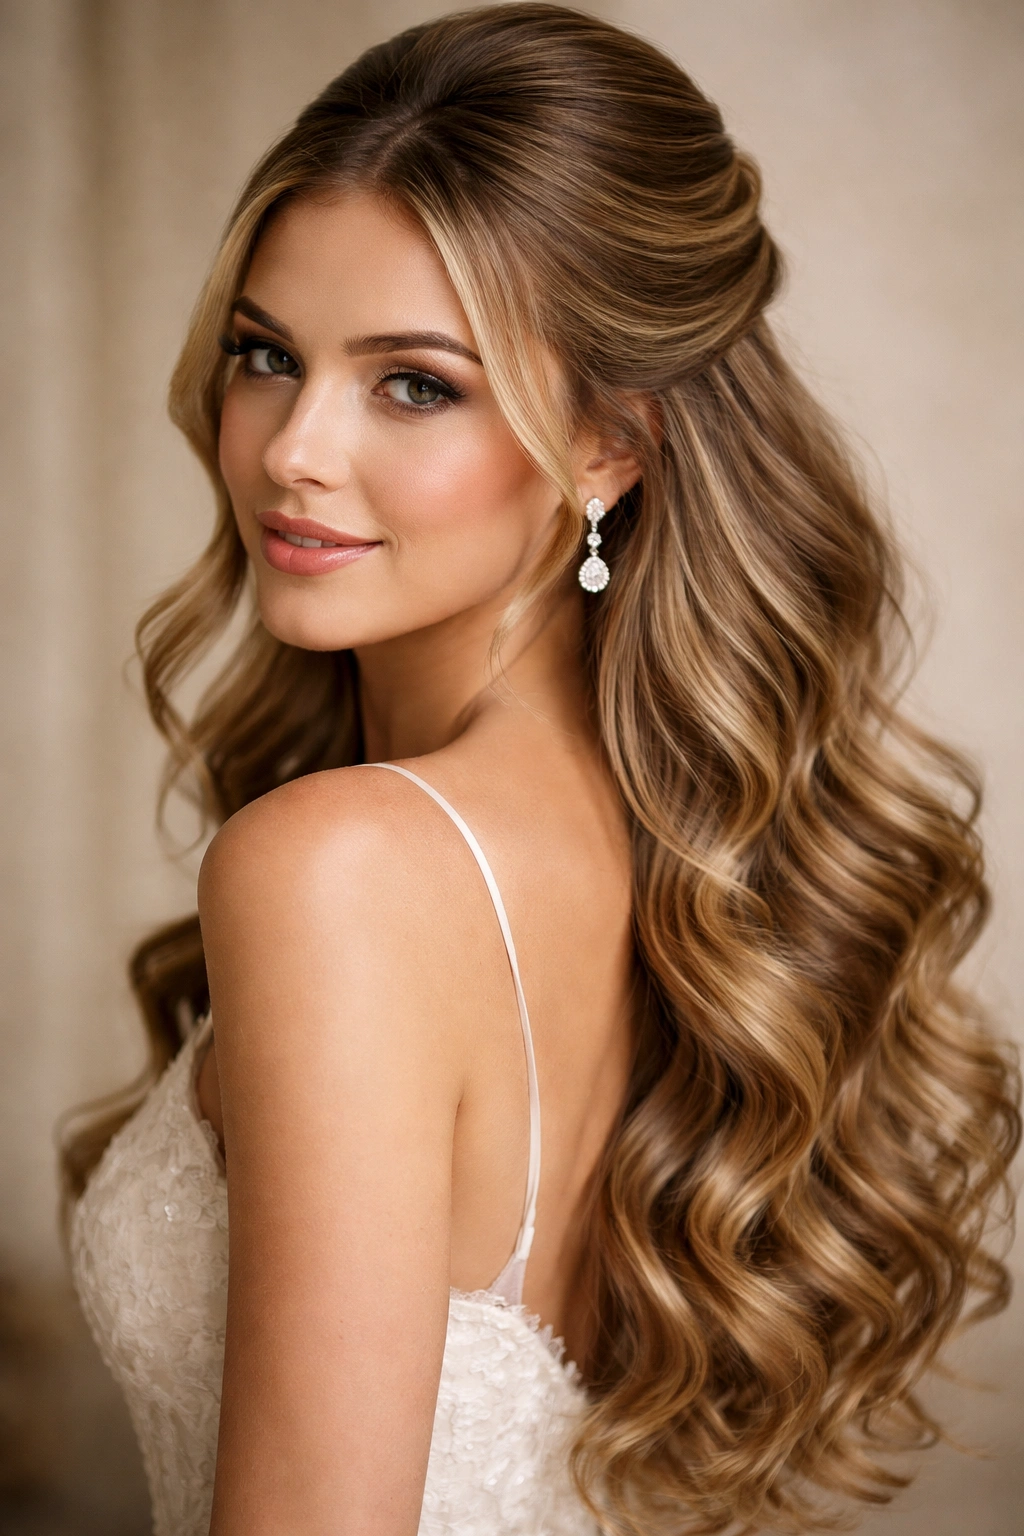
This timeless, universally flattering style features a simple half-up position at the crown with the rest of the hair in full, loose ringlets or spiraling curls that create maximum volume and romantic dimension. The simplicity of the half-up position combined with the glamor of full, loose curls creates an undeniably elegant, wedding-appropriate look that works for any formal occasion. This is the style that has remained a formal favorite for decades because it’s beautiful, achievable, and flattering on virtually everyone regardless of hair type or face shape.
Why This Timeless Combination Never Fails for Formal Events
The balance of a simple, polished half-up position with full, romantic curls creates a look that’s both controlled and flowing, formal and romantic, polished and dimensional. The full curls add volume and glamor that reads as effortless and beautiful rather than overdone. This is a style that photographs gorgeously, looks stunning in person, and maintains its beauty throughout an entire event as curls naturally loosen and relax.
Creating the Classic Half-Up with Full Ringlets
- Curl your entire head with a 1.5-inch curling iron or use the pin-curl method and allow curls to set completely (pin curls can be set overnight for maximum hold and curl definition).
- Aim for spiral curls or loose ringlets rather than bouncy waves — these curls hold their shape longer and maintain more definition throughout an event.
- Once all curls have been set and are completely cool, gently separate them with your fingers to create unified, voluminous curls rather than individual tight ringlets.
- Take a 3-inch section from above each ear and either twist these sections or gather them as simple sections back toward the crown.
- Secure these back-pulled sections at the crown with bobby pins.
- Leave the remainder of your hair in full, loose ringlets cascading down your back and around your shoulders.
- Gently shape and arrange the curls so they fall beautifully and create maximum dimension.
- Mist gently with flexible-hold hairspray — you want the curls to maintain their shape but have slight movement and bounce.
- The overall effect should be romantic, glamorous, and undeniably elegant.
Pro tip: For curls that last all day and night, use a heat protectant spray before curling, allow curls to cool completely before removing rollers or unpin curls, and finish with flexible-hold hairspray rather than heavy product that can weigh curls down.
Final Thoughts
Half up half down formal styles offer a remarkable combination of elegance, versatility, and flattering balance that makes them ideal for virtually any upscale event. Whether you choose a classic, timeless approach or embrace a more modern, sculptural design, these styles communicate intentionality and polish while keeping your face visible and your shoulders free from heavy updo weight. The twenty styles above represent the spectrum of possibilities — from braided romance to sleek modernity, from delicate and feminine to bold and confident.
The beauty of half up half down styling is that it invites personalization. You can adapt any of these styles by adjusting the tightness, adding accessories, incorporating texture, or combining elements from multiple styles to create something uniquely yours. The key is practicing your chosen style once or twice before your event so you feel confident executing it under any circumstances. Long hair is genuinely a styling asset when you approach it with intention, and these half up half down styles showcase why — they’re polished enough for the most formal occasions while remaining beautifully wearable and genuinely flattering.