Short hair doesn’t mean sacrificing style options—especially when your waves give you natural texture to work with. The beauty of wavy hair is that it holds styles beautifully without requiring the heavy products or heat styling that straight hair sometimes demands. An updo on short, wavy hair creates instant elegance and keeps your face open while letting your waves do the heavy lifting in the styling department.
The challenge with short updos isn’t the lack of hair to work with—it’s knowing which techniques actually grip short lengths and which updo styles make the most of what you’ve got. Too many people with waves assume their hair is too short for anything beyond a ponytail, when the truth is that short wavy hair is actually ideal for modern, textured updos that look intentional rather than overdone. The key is understanding how your waves naturally fall and choosing styles that enhance your texture rather than fighting against it.
Whether you’re heading to a casual brunch, an important meeting, or a special event, these fourteen updos are specifically designed for short wavy hair. Each style works with your natural texture, requires minimal product or heat, and takes less time than you’d think to create. You’ll find everything from quick morning styles that look effortless to more formal updos that feel polished and intentional.
1. Twisted Crown with Loose Waves
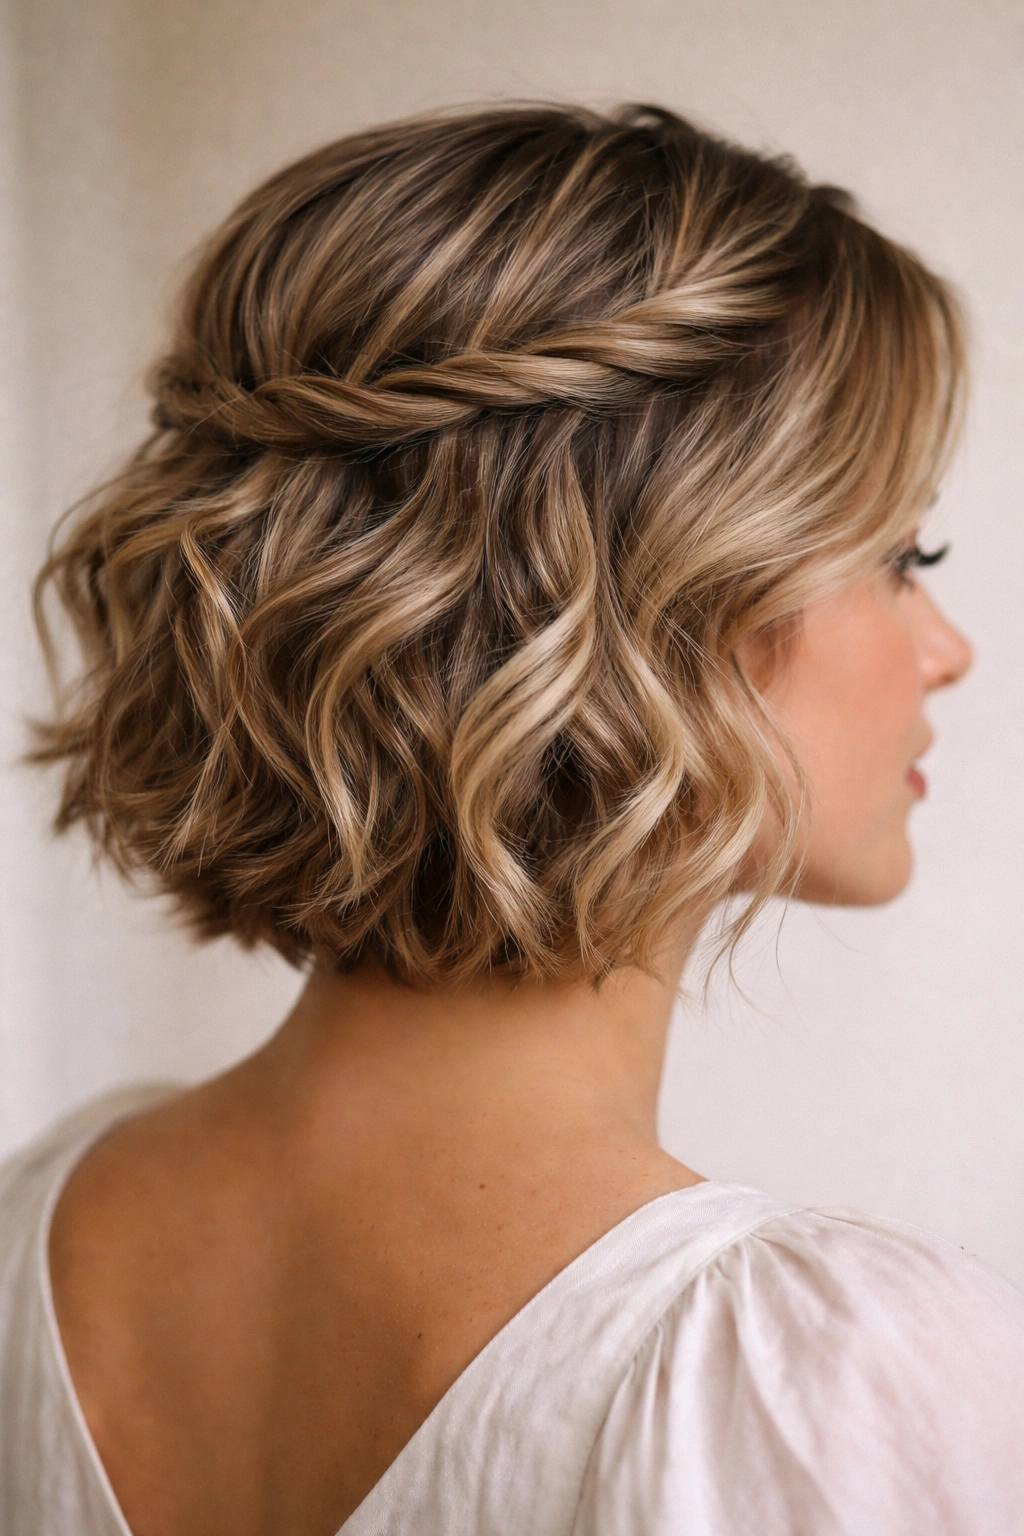
The twisted crown is one of the easiest updos for short wavy hair because it doesn’t require length you don’t have—it just requires texture you already possess. Take a small section of hair from one side of your head, twist it loosely (about an inch thick), and pull it across the crown toward the opposite side. Secure it with bobby pins tucked underneath so they don’t show, then leave the rest of your waves down and slightly tousled.
Why It Works for Short Wavy Hair
This style works because the twist acts as an anchor that keeps hair off your face while the loose waves below give it a casual, intentional look. Your waves naturally create dimension, so you don’t need to add height or volume—the twist just organizes what’s already there. The loose construction means you’re not fighting your hair’s natural texture; you’re framing it.
How to Create It
- Brush your waves gently to smooth them without completely straightening out the texture
- Take a section of hair from your temple, about an inch thick, and twist it loosely as you move toward the back
- Use two bobby pins inserted horizontally to secure the twist underneath where the pins won’t show
- Leave all remaining hair down and slightly piece it apart with your fingers for texture
- Lightly spray the crown section to keep the twist in place through the day
Pro tip: The looser your twist, the more effortless the style looks. Don’t aim for a perfectly tight spiral—let it be a bit undone and organic.
2. Half-Up Bubble Pony
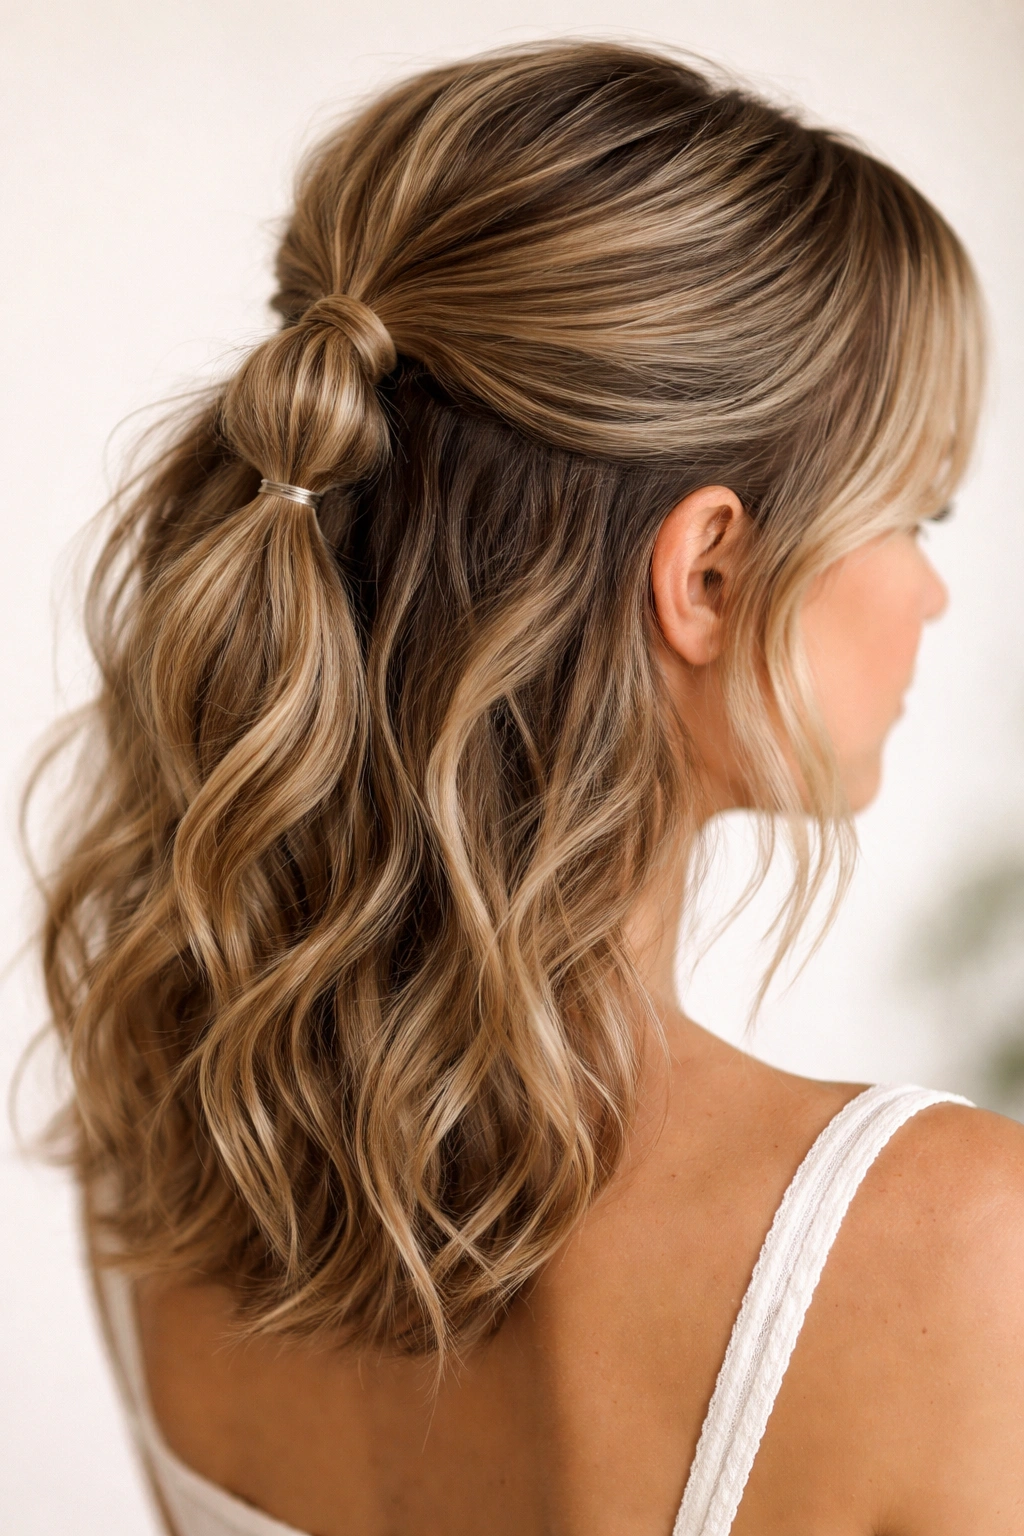
This style combines the practicality of a ponytail with the polished look of an updo. Gather the top half of your hair into a ponytail at the crown, then secure it with a hair elastic. Below that, add another elastic about two inches lower, creating a “bubble” effect. Gently pull the sections outward between the elastics to make each bubble fuller and more textured.
Why It’s Great for Wavy Hair
Wavy hair naturally has the texture needed to make each bubble look full and dimensional. The multiple elastics break up the length and create visual interest without requiring complicated techniques. Because you’re only securing half your hair, it feels less severe than a traditional updo while still getting most of your hair off your face.
Quick Tips for Best Results
- Use clear or matching-colored elastics so they blend into your hair rather than standing out
- Don’t pull each section tight—leave them with a soft, relaxed shape
- Gently smooth the secured sections with your fingers to eliminate fly-aways while maintaining texture
- Add a small decorative clip or hair stick through the bubbles for an elevated look
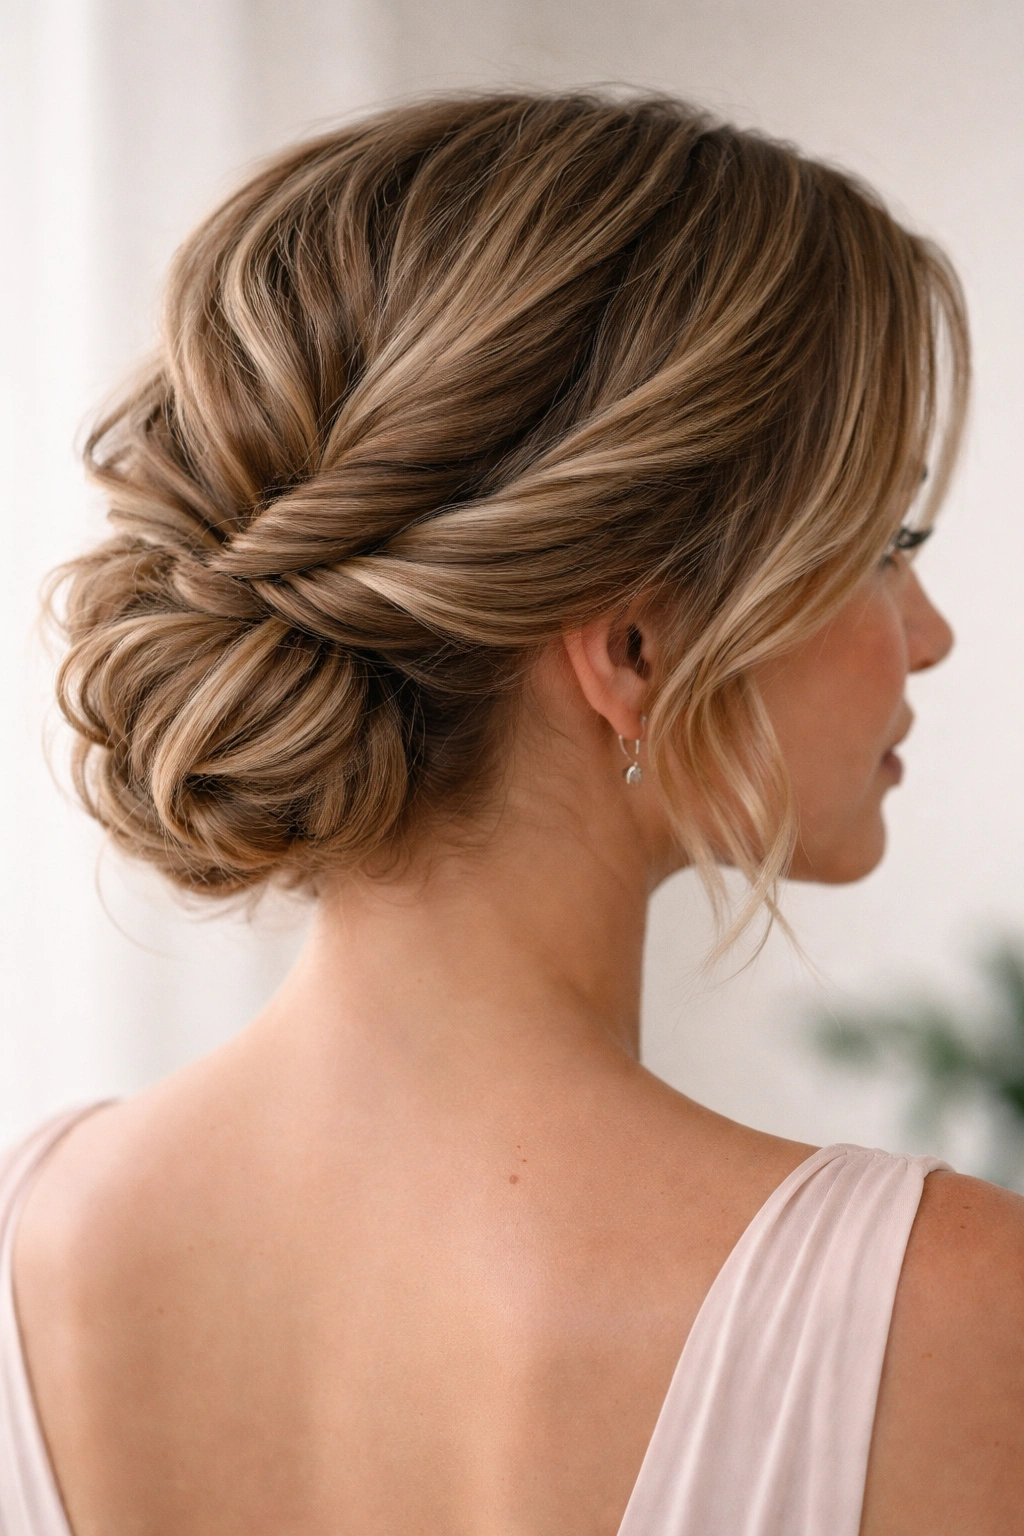
3. Low Messy Bun with Braided Detail
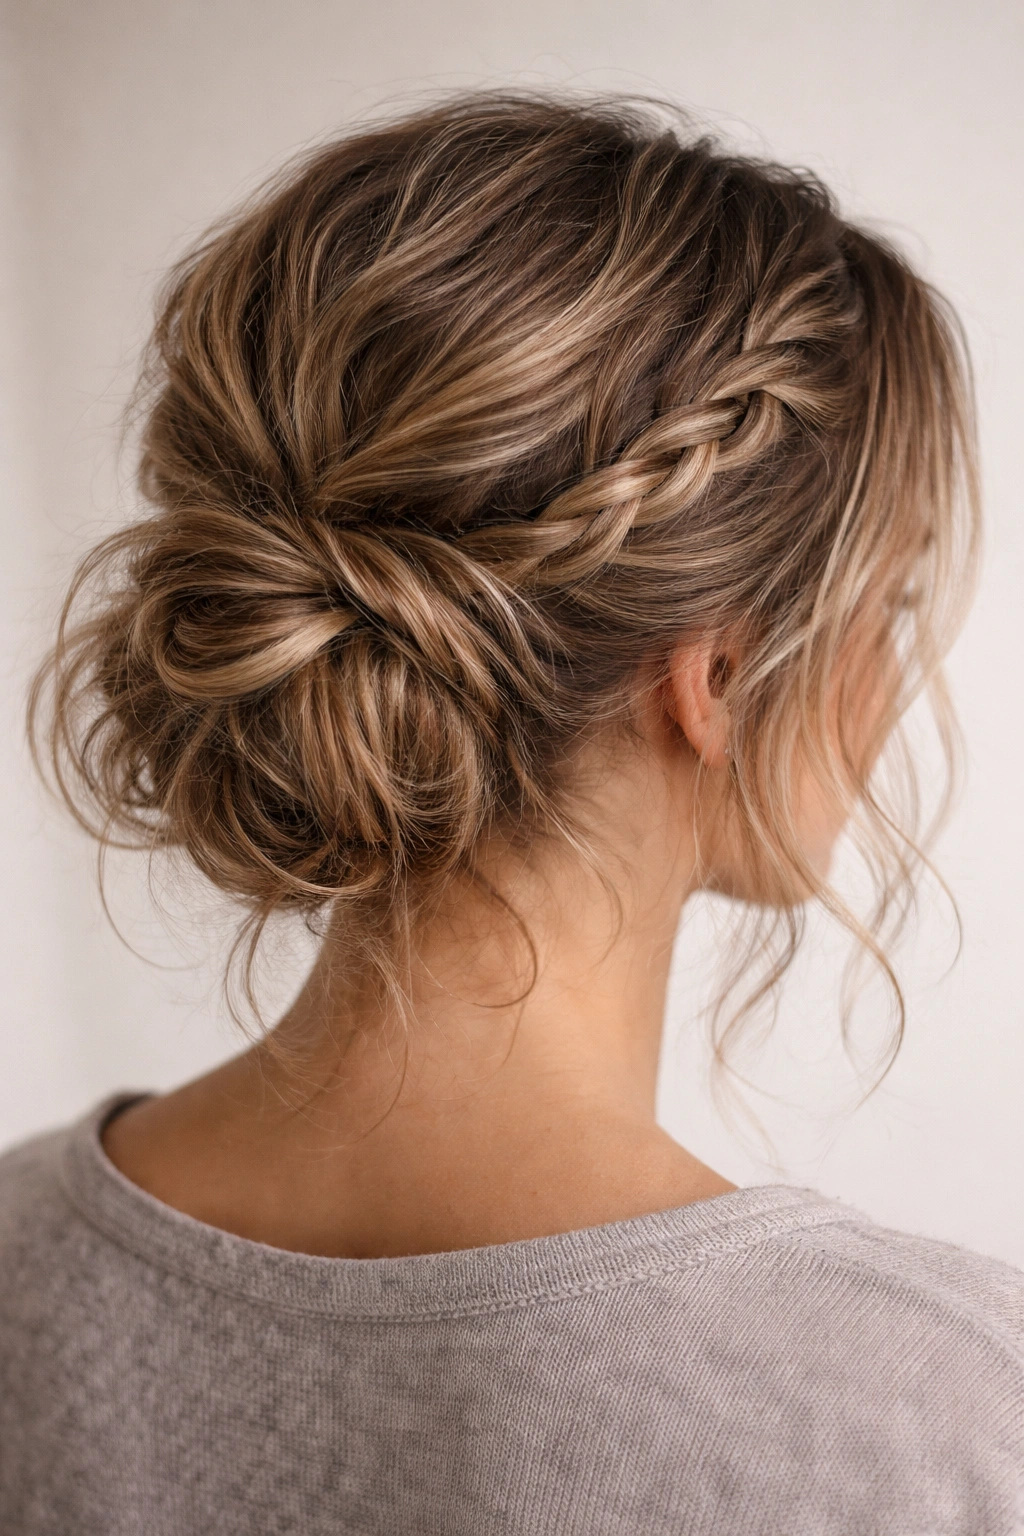
A low, loose bun sits at the nape of your neck and works beautifully on short wavy hair because you’re gathering what you have into one secure point rather than trying to create height. Gather your hair into a low ponytail, then twist it loosely and wrap it around the base to form a soft bun. Before securing it, weave a small braid into one side of the bun for unexpected detail.
Why Messiness Matters Here
The whole point of this style is that it looks intentionally undone. Your waves give you natural texture, so a bun that’s slightly loose and a bit tousled actually looks more elegant than a perfectly smooth one. The braided detail prevents it from looking like you just threw your hair up—it shows you put thought into it.
Steps to Execute
- Gather your hair into a low ponytail at the nape of your neck
- Before twisting, separate out a small section and create a three-strand braid
- Incorporate the braid into the twisted ponytail as you wrap it
- Secure the bun with bobby pins, leaving some wisps around your face
- Use a texturizing spray to enhance the wavy texture and lock the style in place
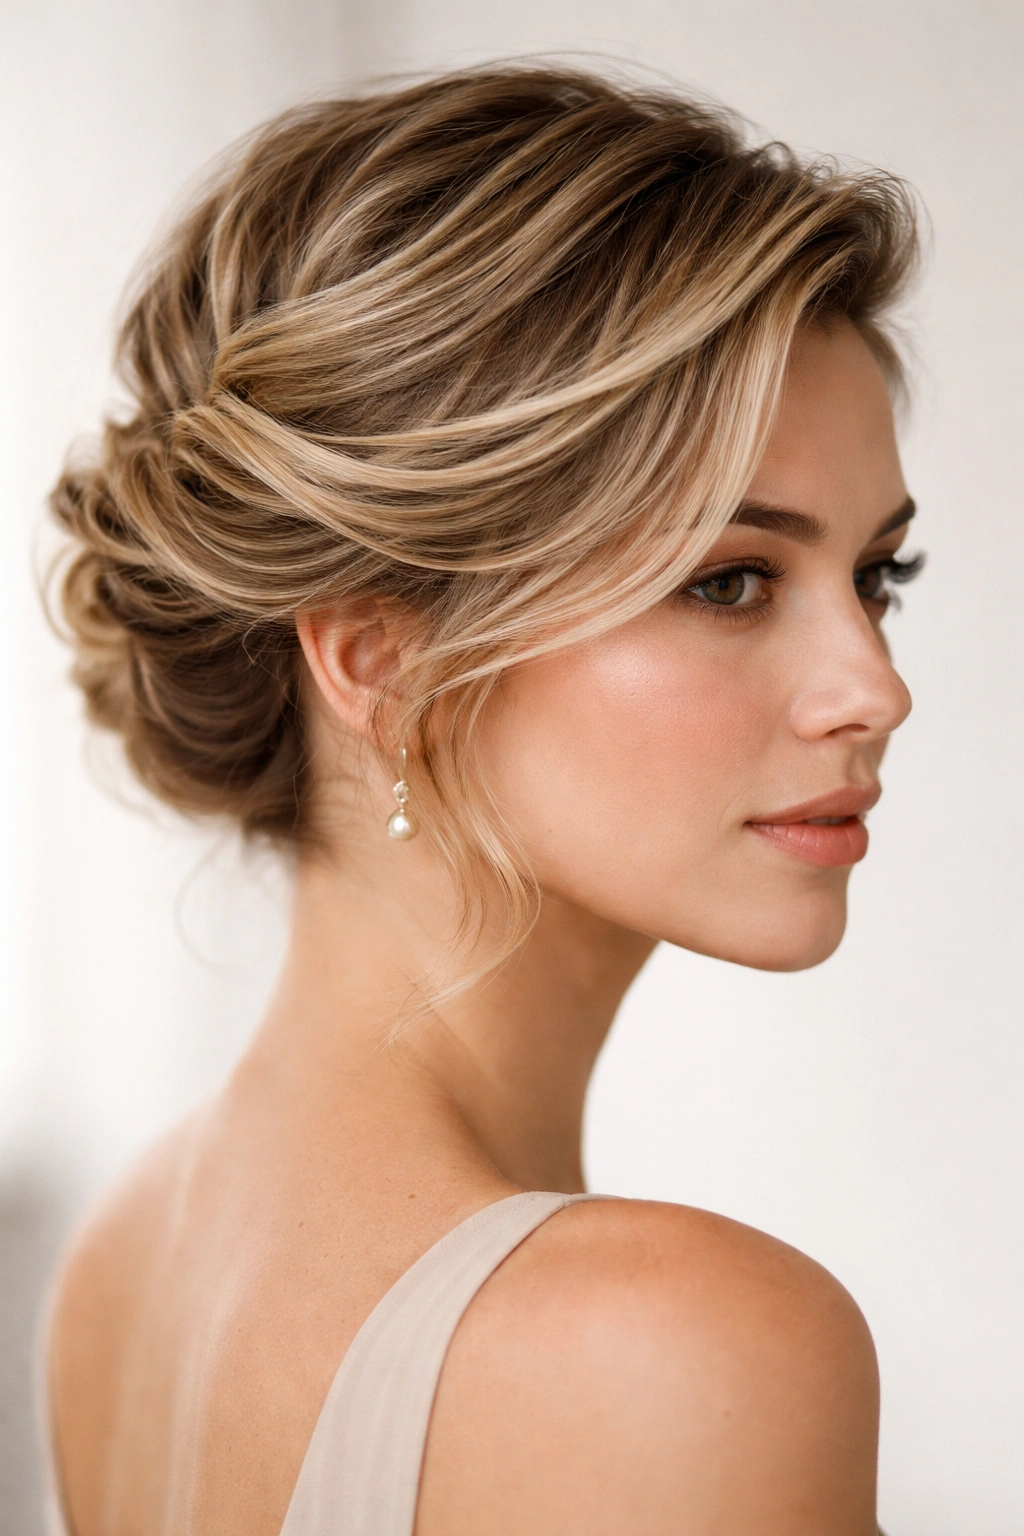
4. Sleek Low Chignon
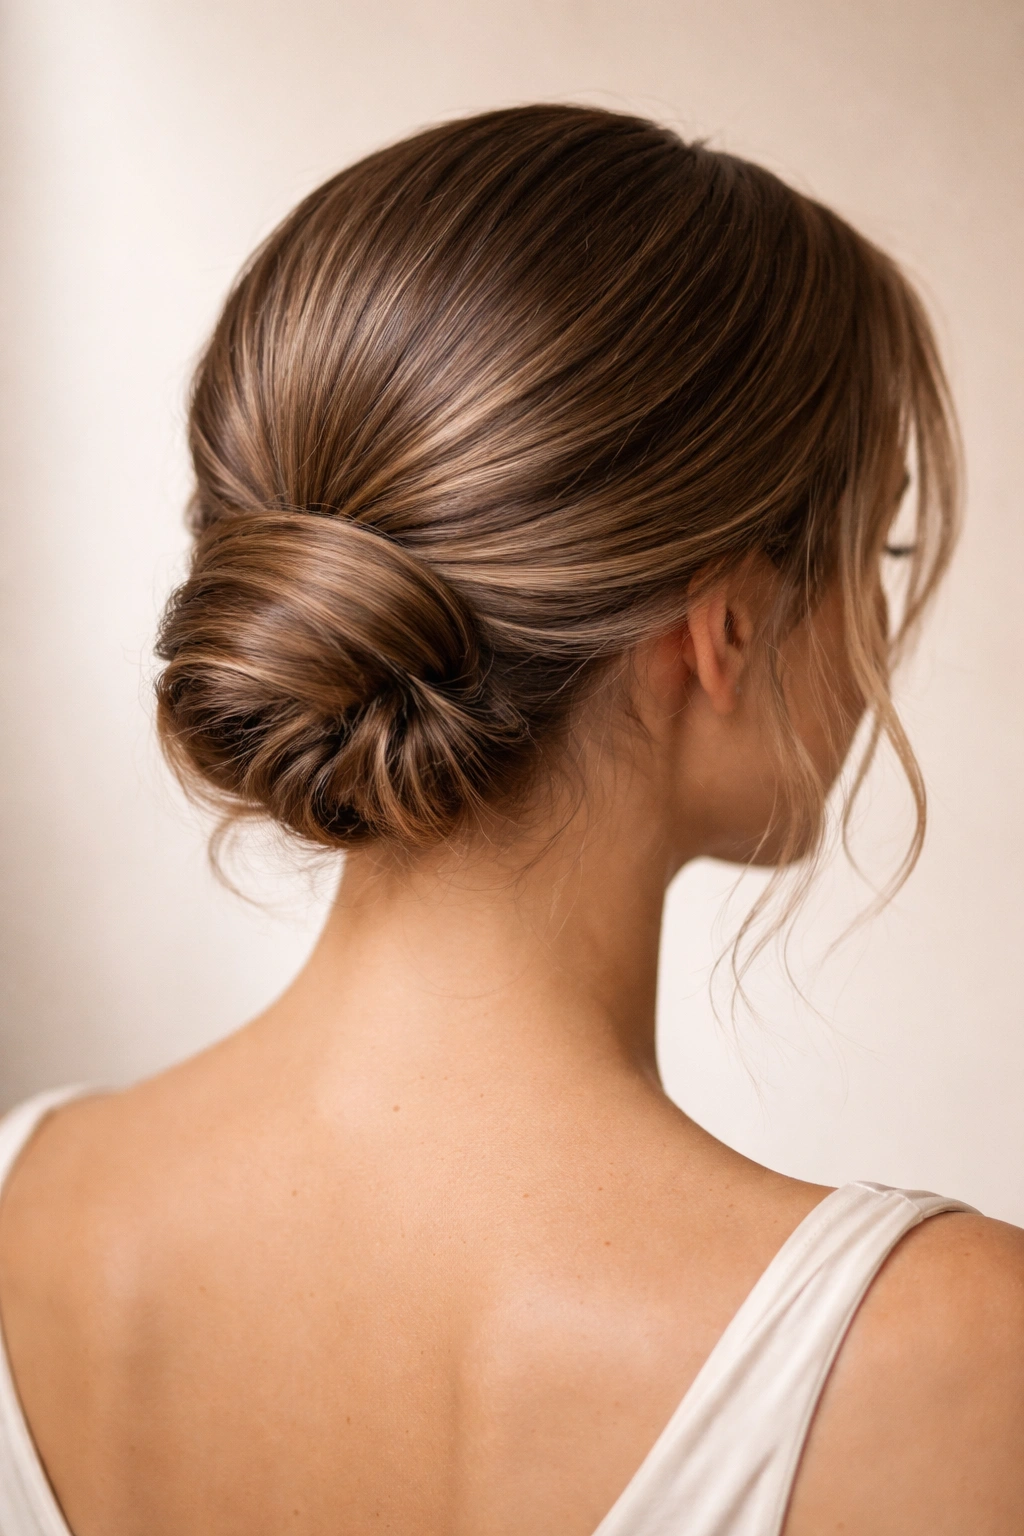
If you want to tone down your waves and create a more polished, sophisticated look, a low chignon works beautifully on short wavy hair. Use a smoothing serum to create a sleeker base while keeping the waves intact underneath, then gather your hair into a low ponytail. Twist the ponytail loosely and coil it into a small, neat bun at the nape. Secure with bobby pins and finish with a light hairspray.
The Balance Between Sleek and Textured
A chignon doesn’t have to be completely smooth—the key is controlling the surface while allowing texture underneath. This works perfectly for wavy hair because you can tame the top layer while your waves create natural structure underneath. The result looks refined without feeling stiff or overly formal.
Creating Polished Elegance
- Apply a smoothing serum or gel to the hair you’ll be gathering, not your entire head
- Use a fine-tooth comb to smooth the surface as you create your low ponytail
- Twist the ponytail and coil it very loosely around the base—avoid a tight, hard bun
- Tuck the ends underneath and secure with bobby pins placed strategically
- Finish with a light-hold spray that won’t weigh down your waves
5. Textured Side Knot
This updo sits to one side and requires just enough hair to knot together—perfect for short lengths. Take one side of your hair and gently tie it into a loose knot as close to your head as you can. Secure the knot with bobby pins, then let the remaining waves fall naturally around it. The asymmetry creates visual interest, and the knot itself becomes a design element rather than just a way to hold hair.
Why Side Styles Work on Short Hair
Side styles automatically balance short proportions by creating diagonal lines and visual interest. A side knot isn’t competing with your length because it’s not trying to create height—it’s creating dimension through positioning. Your waves enhance this because they catch light differently than straight hair would.
How to Tie the Perfect Knot
- Section off the hair you want to knot (about half your hair or slightly less)
- Take that section and gently cross one strand over the other to form a loop
- Pull the end through the loop to create a basic knot shape
- Keep it loose and slightly undone-looking—a perfect knot would look too staged
- Secure underneath with two bobby pins placed parallel to the knot
- Gently tousle the remaining waves around it with your fingers
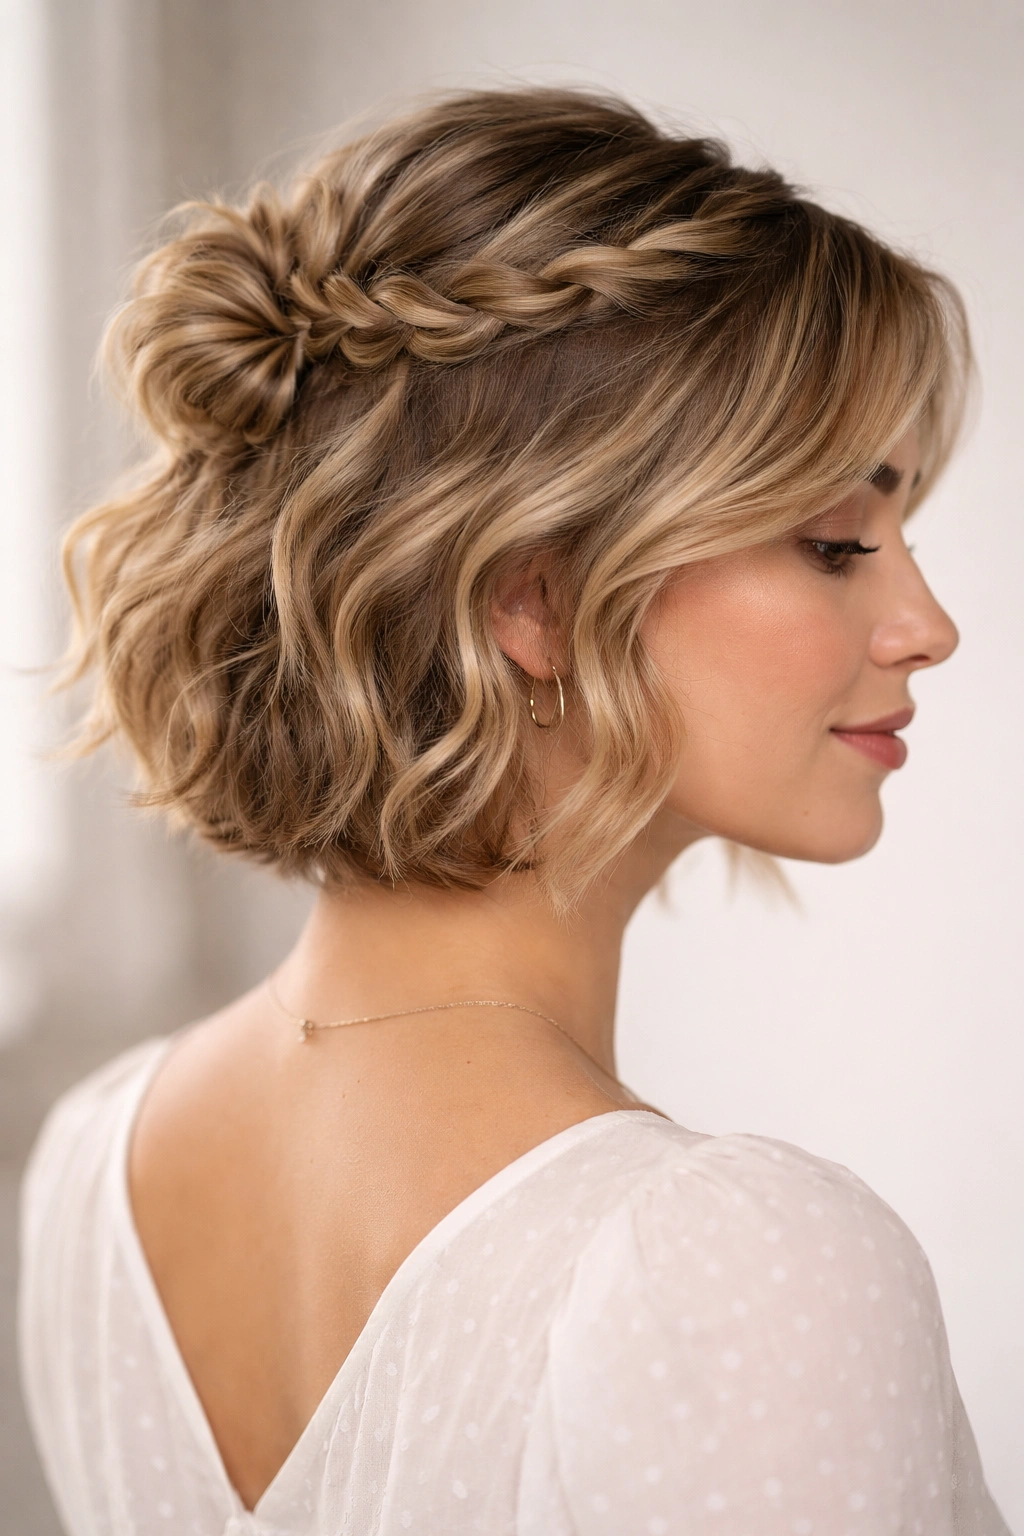
6. Quad-Braid Crown Updo

For a more intricate look that still suits short hair, create four small braids (two on each side) and pin them across the crown of your head in a crisscross pattern. The braids don’t need to be long because you’re wrapping them around your head, and your wavy hair gives each braid definition. Leave the back loose and wavy, which balances the detail work on top.
Why Multiple Braids Work for Waves
Four braids create visual complexity without requiring length. Because your hair is wavy, each braid will have texture that makes it pop against your scalp. The crisscross pattern adds dimension that short hair sometimes lacks, and it’s detailed enough for special occasions while still being secure for all-day wear.
Braiding Technique for Short Hair
- Create four sections: two at the temples and two at the sides above your ears
- Braid each section loosely (loose braids look better and suit wavy hair better than tight ones)
- Arrange the first temple braid across the crown and secure with bobby pins
- Layer the second temple braid over it in the opposite direction
- Pin the side braids to meet them in the middle, creating a crown effect
- Spray lightly and adjust for a soft, lived-in look rather than perfect symmetry
7. Twisted Ponytail with Wrapped Section
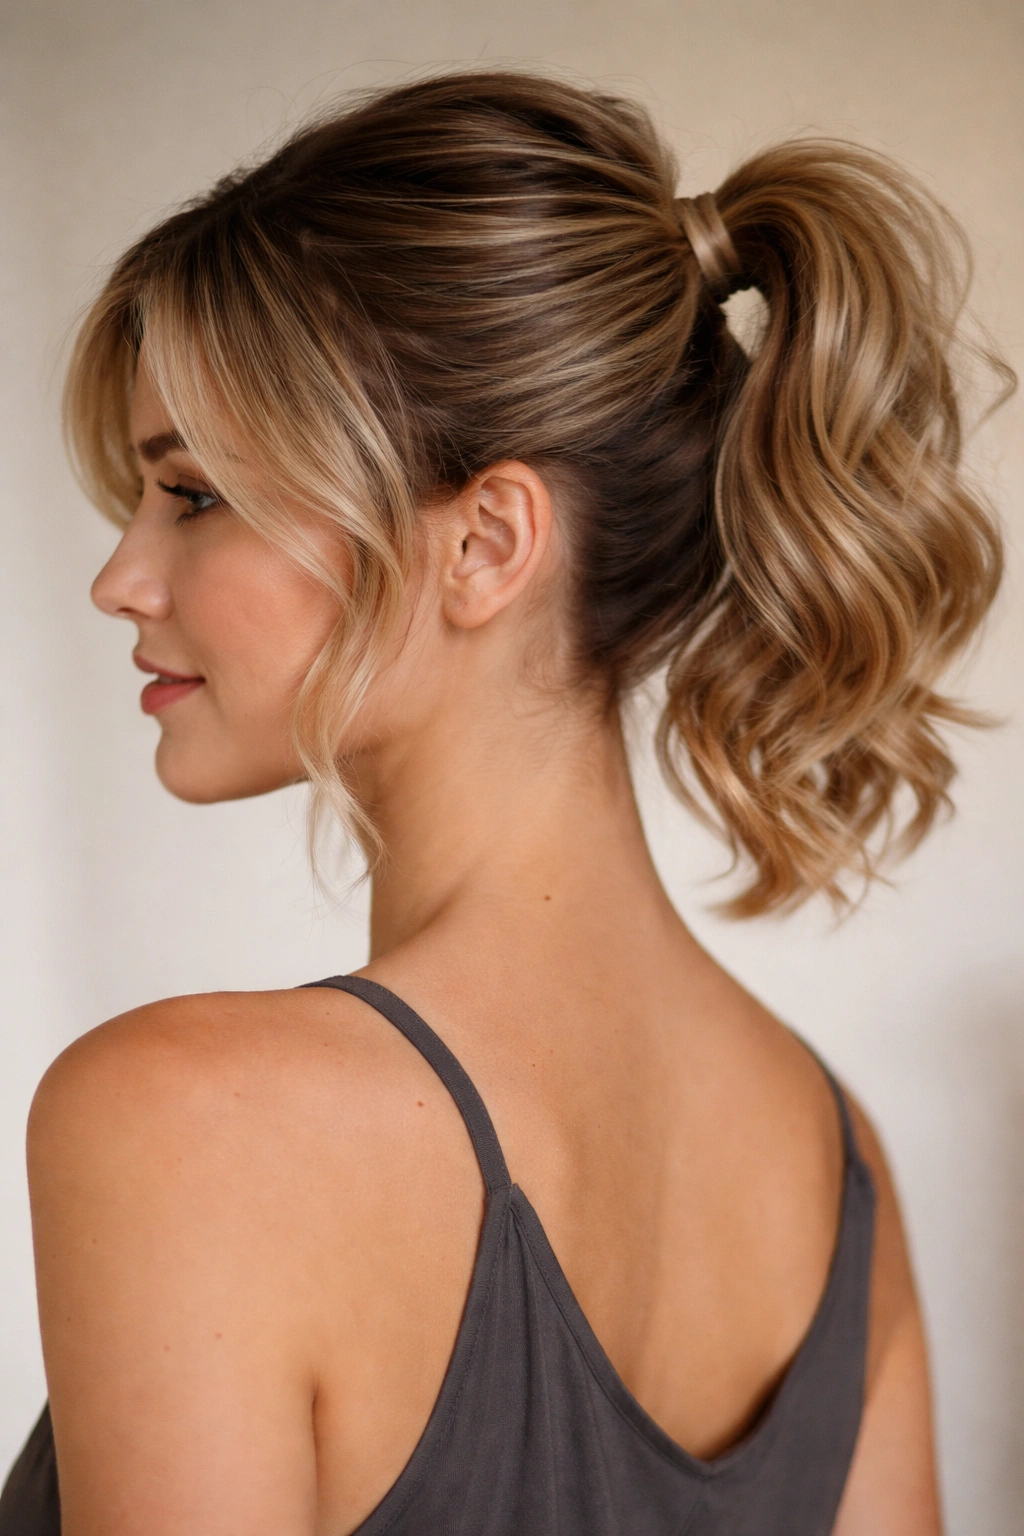
This hybrid style combines the ease of a ponytail with the polish of an updo. Create a high ponytail at the crown, then take a small section of hair from the ponytail and wrap it around the base to hide the elastic. Secure the wrapped section with a bobby pin, then gently loosen the ponytail by pulling outward on sections to create volume. Your waves will naturally add texture and dimension to this wrapped section.
The Appeal of Hybrid Styles
Hybrid styles work well on short wavy hair because they give you options—you get the security of a ponytail with the finished look of an updo. The wrapped section makes a basic ponytail feel intentional and polished, which is exactly what you want when you’re short on time but need to look put-together.
Step-by-Step Execution
- Use a texturizing spray on your roots before creating the ponytail for more grip and hold
- Gather your hair into a ponytail at the very crown of your head and secure tightly
- Take a thin section (about ½ inch thick) from the ponytail
- Wrap this section around the base of the elastic two or three times
- Secure the end underneath with a bobby pin that matches your hair color
- Gently pull sections outward from the ponytail to create volume and texture
- Finish with a flexible-hold spray that maintains shape without stiffness
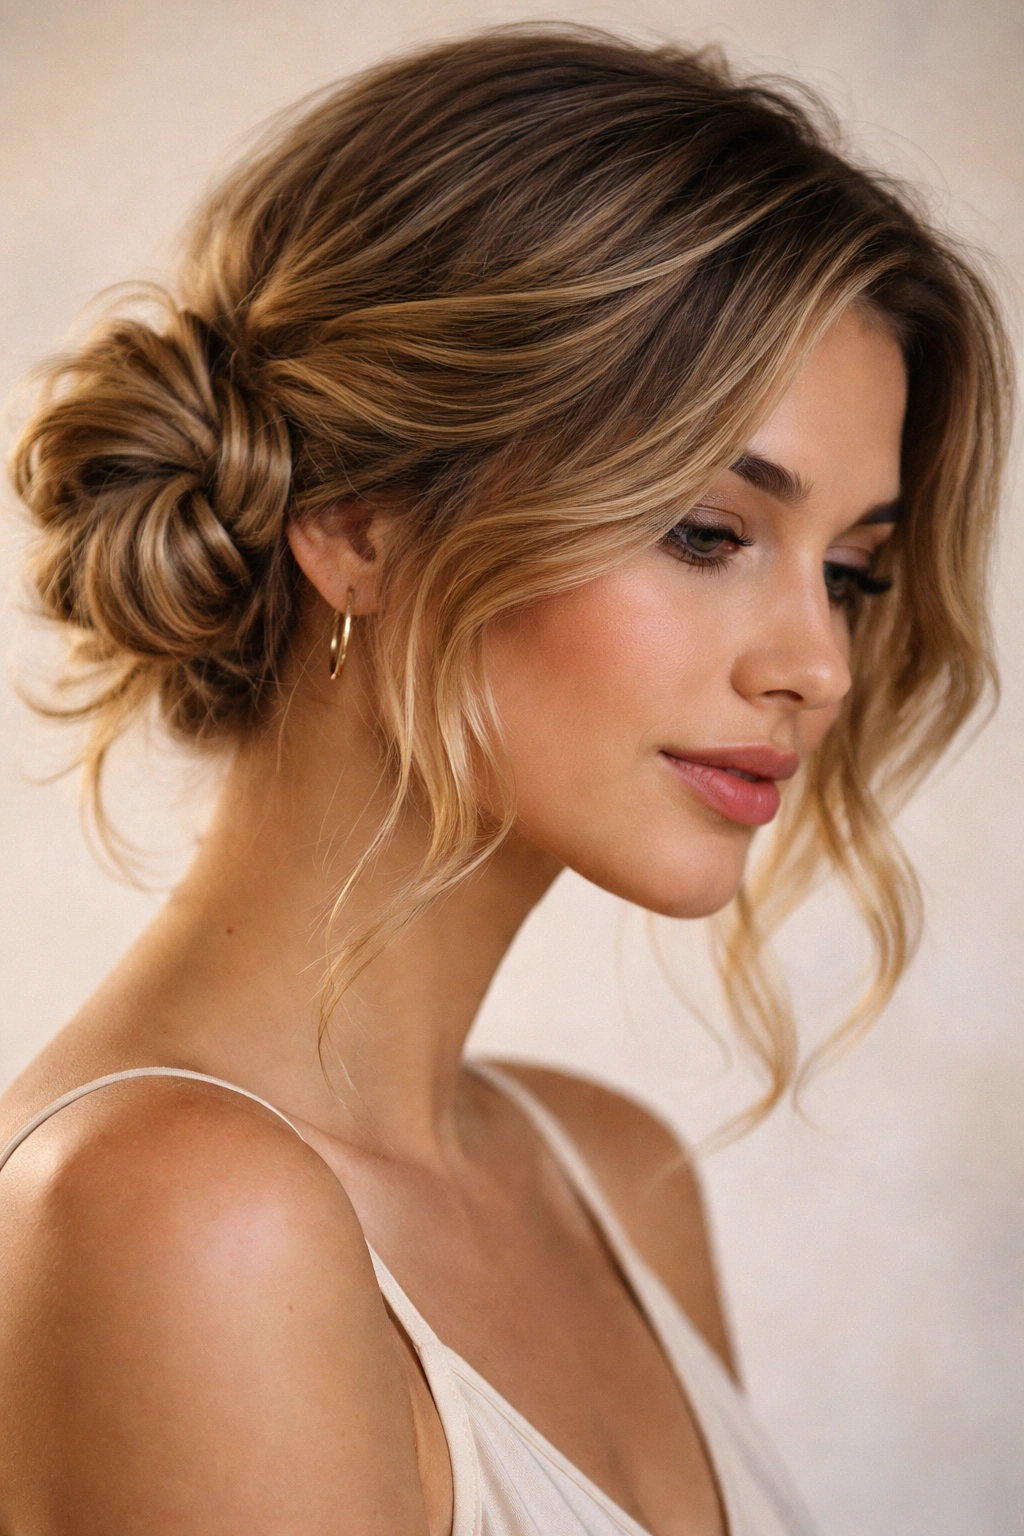
8. Flowing Romantic Updo with Face-Framing Pieces
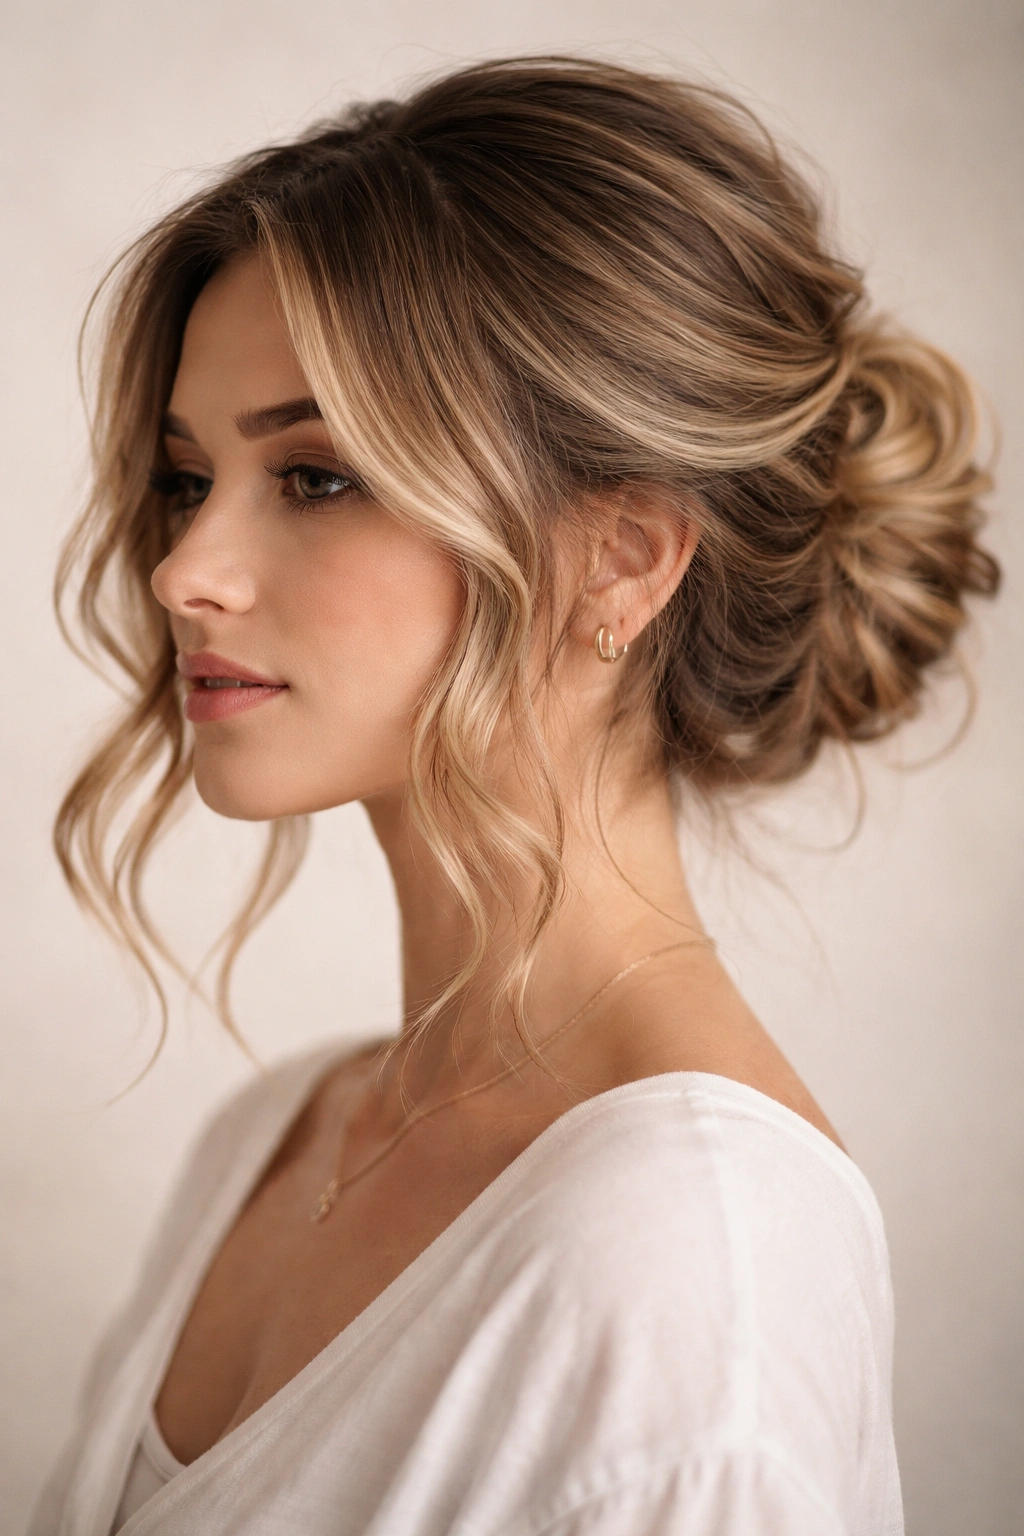
This style is specifically designed to feel elegant and romantic while working with short wavy hair. Gather most of your hair into a low updo (a twisted bun, braided knot, or coiled style), but intentionally leave face-framing pieces on both sides. These pieces should be longer, wavy strands that fall naturally around your face. The contrast between the secured updo and the flowing pieces creates the romantic effect.
Why Face-Framing Matters
Face-framing pieces soften the proportions of short hair and prevent an updo from looking too severe. Your waves in these pieces create movement and texture, so they don’t just hang straight and flat. The result feels balanced—not as severe as a full updo, but more intentional than completely loose waves.
Creating Romantic Balance
- Before gathering your hair, determine which pieces you want to frame your face (usually temple and cheekbone length)
- Create your main updo in the back with the remaining hair
- Arrange your face-framing pieces around your face and slightly wave them with a curling iron if needed
- Make sure the updo portion looks intentional and finished, not like you just didn’t have enough hair for a full style
- Use a light hairspray that allows the face-framing pieces to move naturally
- Consider subtle face-framing makeup or a delicate earring that echoes your style
9. Dutch Braid Wrapped into a Low Bun
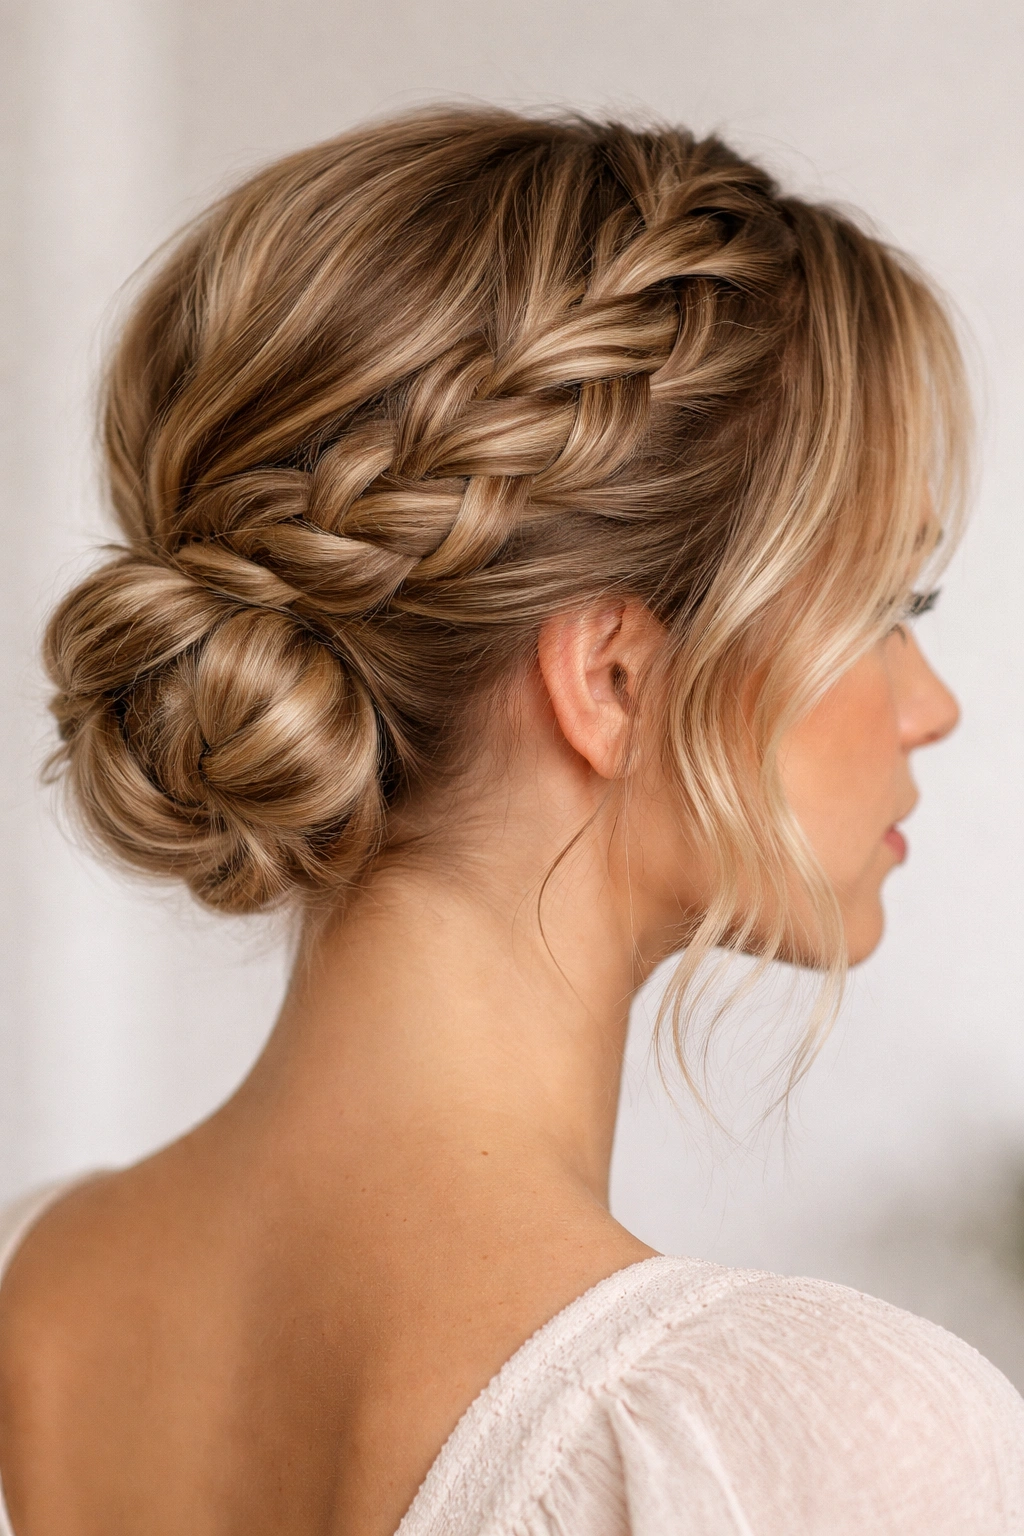
For a more structured, intricate look, Dutch braid your hair from one side of your head toward the back, then wrap the braid into a low bun. A Dutch braid (where you braid underneath rather than over) creates incredible visual impact and texture, especially on wavy hair. Because you’re only braiding one side, it’s manageable even on shorter lengths.
How Dutch Braiding Enhances Wavy Hair
A Dutch braid makes your waves look intentional and woven rather than just loose and tousled. The underneath placement creates shadow and dimension that flatters short hair. Even a simple Dutch braid looks elevated when your natural waves add texture to each strand being woven together.
Dutch Braid to Bun Process
- Start the Dutch braid at your temple and move diagonally toward the back of your head
- Keep the braid slightly loose to maintain the texture of your waves
- As you reach the nape of your neck, gather all remaining hair (including the braid end) into a low ponytail
- Twist the ponytail and coil it into a small bun
- Tuck the braid end into the bun and secure with bobby pins
- Gently pull the braid sections outward to emphasize the texture and woven pattern
- Use a texturizing spray to enhance the details and keep everything in place
10. Curved Sweep with Hidden Pins
This style uses curved pins or decorative hair clips to sweep your hair from one side to the other, creating a soft, curved line that follows the shape of your head. Gather a section of hair from one side, smooth it gently across the back, and secure with curved pins that tuck underneath. The remaining waves stay down, but the sweep itself becomes a design element rather than just a practical way to move hair.
Curved Pins as Design Elements
Modern updos don’t always require elastics or invisible bobby pins—sometimes the fastening itself becomes part of the design. Curved pins create a visible line that adds structure to short hair, especially when you choose pins in a contrasting color or with a decorative detail. Your wavy texture shows beautifully in the swept section while the pins create intentional geometry.
Creating the Sweep
- Choose decorative curved pins or claw clips in a color that coordinates with your hair
- Take the section you want to sweep (usually from one temple)
- Gently smooth it across the back of your head in a curved line
- Secure with two or three curved pins placed horizontally so they don’t slip
- Leave the rest of your hair wavy and undone around the sweep
- The contrast between the controlled sweep and loose waves creates the modern look
11. Double Twisted Side Updo
Create two loose twists, one on each side of your head, and pin them together at the nape of your neck to form a low updo that sits to one side slightly. This style requires minimal length but creates maximum impact through the visual interest of two twisted sections meeting at a single point. Your waves add texture to each twist, making them look intentional rather than sparse.
The Power of Double Elements
Double twisted sections create visual balance even on short hair because they draw attention to both sides of your head rather than concentrating it in one spot. They’re also more secure than a single twist because you have two anchor points. Your wavy texture makes each twist look fuller and more substantial than it would on straight hair.
Executing Two Twists
- Create a side part or slightly off-center part as your starting point
- Take a section from one side at temple level and twist it loosely as you move toward the back
- Create a matching twist on the other side, moving in the same direction
- Secure both twists at the nape with bobby pins placed horizontally
- Gently pull the twist sections outward to add volume and texture
- Tousle the remaining waves at the back for a soft, romantic finish
- Use texturizing spray rather than smoothing spray to maintain texture throughout
12. Rope Braid Half-Up Updo
A rope braid is easier than a traditional three-strand braid, making it perfect for short hair. Create a rope braid by twisting two sections of hair around each other, then gather it with the remaining hair into a small bun at the crown. This style sits higher than a low updo but doesn’t require the length a traditional high ponytail would need.
Why Rope Braids Suit Wavy Hair
Rope braids look incredibly textured and substantial, even on short lengths. Because you’re twisting rather than weaving, they work beautifully with wavy hair’s natural dimension. A rope braid looks almost as if your waves have been deliberately arranged rather than styled, which is exactly the effect that makes short wavy hair look intentional and polished.
Creating a Rope Braid Updo
- Take a section of hair from one temple and divide it into two equal sections
- Twist one section clockwise and one counterclockwise, then wrap them around each other
- Continue this rope braid motion as you move toward the back of your head
- Once you reach the back, gather all hair (including the braid end) into a small bun
- Coil the gathered hair loosely and secure with bobby pins
- Gently release some texture from the rope braid by pulling the twisted sections slightly apart
- Finish with a flexible-hold spray that preserves the texture of both the braid and your waves
13. Wrap-Around Ribbon or Scarf Updo
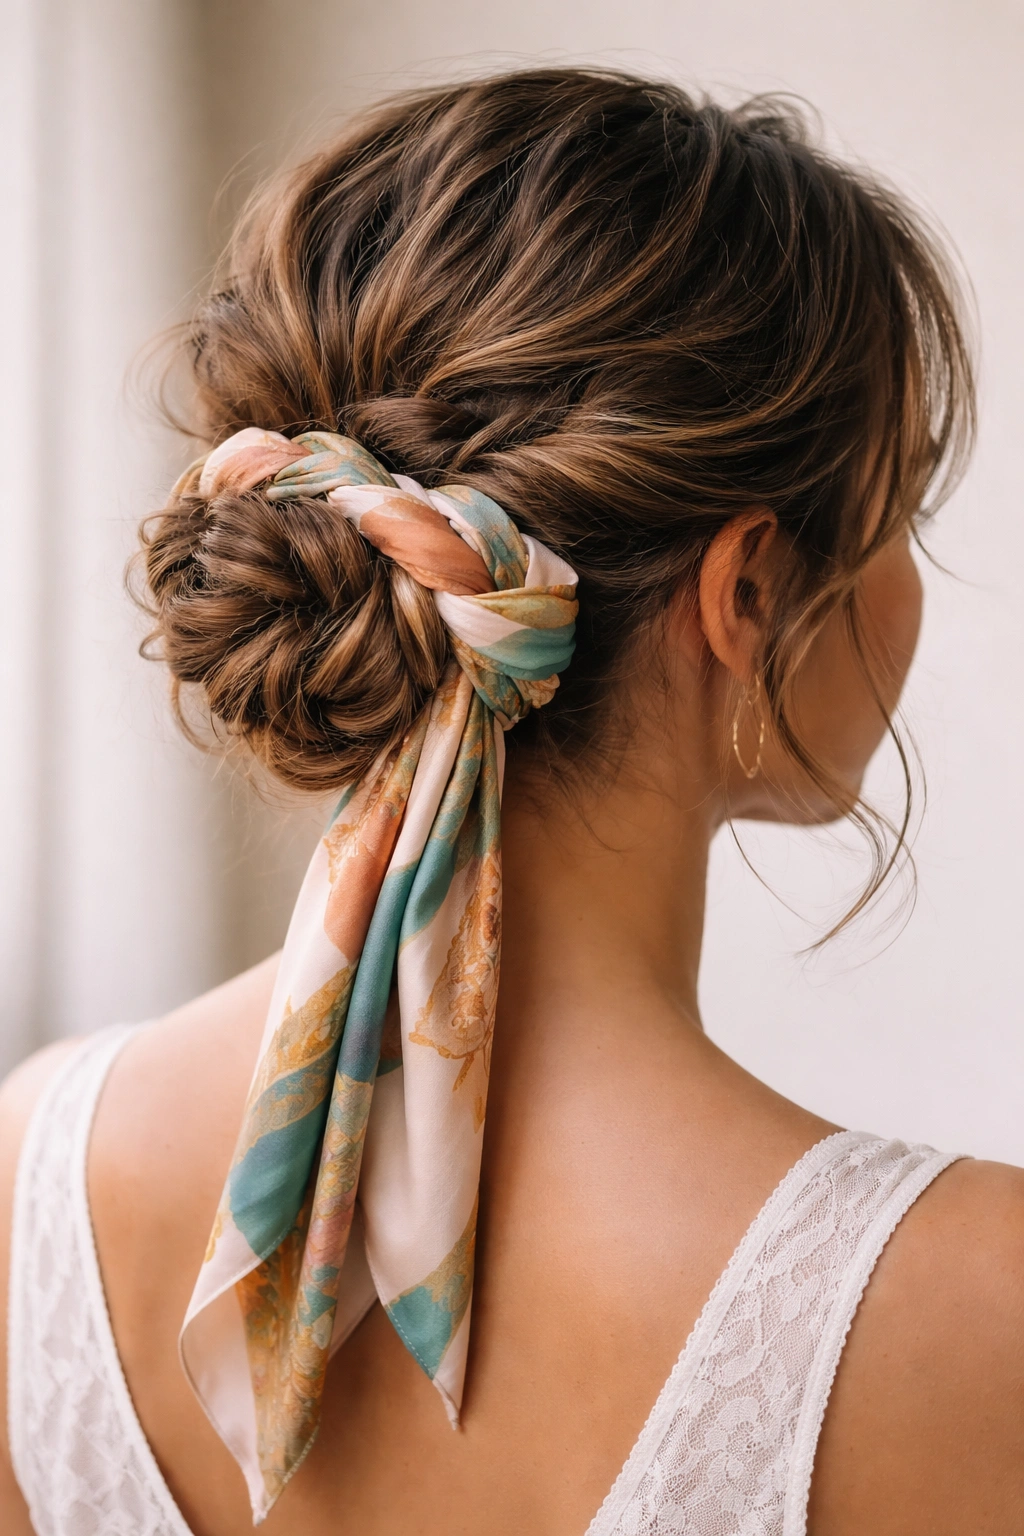
Sometimes the best updo enhancement isn’t another piece of hair—it’s a ribbon, thin scarf, or decorative cord wrapped around your base style. Create a low ponytail or simple bun with your short wavy hair, then thread a ribbon or scarf through the ponytail or around the bun. The ribbon adds color, pattern, and visual interest without requiring more length. It also makes a simple updo feel special and intentional.
Adding Accessories to Short Updos
Accessories become even more important when you’re working with shorter lengths because they add visual drama and detail. A simple low bun becomes instantly elevated with a silk ribbon or gold cord woven through it. Your wavy texture shows beautifully around the ribbon, creating contrast between the controlled accessory and your natural waves.
Ribbon and Accessory Options
- Choose a ribbon that coordinates with your outfit or contrasts intentionally (gold ribbons work on any hair color)
- Create your base updo first—a low ponytail or simple bun works best
- Thread the ribbon through the ponytail or wrap it around the bun multiple times
- Tie the ribbon ends into a bow or let them flow softly down your back
- Try different widths and textures—a thick velvet ribbon looks more formal than a thin silk one
- Secure the ribbon ends with bobby pins if they keep slipping throughout the day
- Consider pins shaped like pearls, flowers, or geometric shapes as alternative accessories
14. Textured Half-Up Twist Back

For a style that works as well on a casual Monday as it does for a Friday dinner, create a half-up twist back. Take the top section of hair from both temples, twist each piece loosely, and secure them together at the back of your crown with a small hair elastic or clip. Leave the bottom half of your hair completely loose and wavy. This style lets your waves shine while keeping hair off your face.
Versatility Through Simplicity
This is the updos that works for literally any occasion because it’s simple enough for everyday but polished enough for anything dressier. Your waves do the heavy lifting in the style—they create dimension and texture that makes a basic half-up look intentional. You can wear it casually to work, add heels and makeup for an evening out, or even incorporate it into a larger style for a special event.
Creating the Perfect Half-Up Twist
- Start with dry or lightly dampened waves that have natural texture
- Take a section of hair from one temple (about 1-2 inches wide)
- Twist this section loosely as you move toward the back center of your head
- Create a matching twist on the opposite temple, twisting in the same direction
- Gather both twists together at the back of your crown with a small elastic or decorative clip
- Leave all remaining hair down and wavy around the secured sections
- Gently separate the twisted sections slightly to emphasize the texture
- Use a light texturizing spray to enhance your waves and keep the twists secure all day
Key Takeaways
Short wavy hair is actually ideal for updos because your natural texture does much of the work that heat styling and products would do on other hair types. The fourteen styles here work because they embrace your waves rather than fighting them—they use your texture as a feature, not something to hide. Each style takes less time than you’d expect and requires minimal products, which means you can create them on your worst hair days and on your best.
The secret to making any short updo look intentional is resisting the urge to make it perfect. Leave wisps around your face, keep your twists and braids slightly loose, and use texturizing spray instead of smoothing spray. Your waves are doing you a favor—let them show.