There’s something undeniably magical about a half-up hairstyle, and when you weave in vintage elements, you get a look that feels both timeless and deeply romantic. Whether you’re drawn to the glamour of Old Hollywood, the delicate romanticism of Victorian eras, or the art deco sophistication of the 1920s, vintage half-up styles offer the perfect balance between polished elegance and effortless beauty. They’re especially stunning for weddings, where you want a hairstyle that photographs beautifully, stays put through the celebration, and makes you feel like the best version of yourself.
The beauty of vintage half-up looks is that they work with almost any hair type, face shape, and dress style. You can adapt them to match your venue’s vibe—whether that’s a garden ceremony, a grand ballroom, or an intimate outdoor celebration. Half-up styles also give you flexibility; your hair moves and flows naturally while the top section remains secure and intentional, creating a look that’s both romantic and practical for a long day of dancing and celebrating.
What makes these styles distinctly vintage is the attention to texture, the way they’re secured with thoughtful accessories, and the care taken in every detail. Forget blunt, one-dimensional hairstyles. Vintage half-ups feature soft curls, intentional tendrils, twisted sections, woven braids, and strategically placed waves that catch the light and create dimension. Paired with vintage accessories like pearl pins, antique combs, delicate hairnets, silk ribbons, and ornate clips, these looks transport you straight to another era while feeling completely fresh and wedding-appropriate.
Let’s explore twelve stunning vintage half-up hairstyles that will make you feel like the romantic, elegant bride you are.
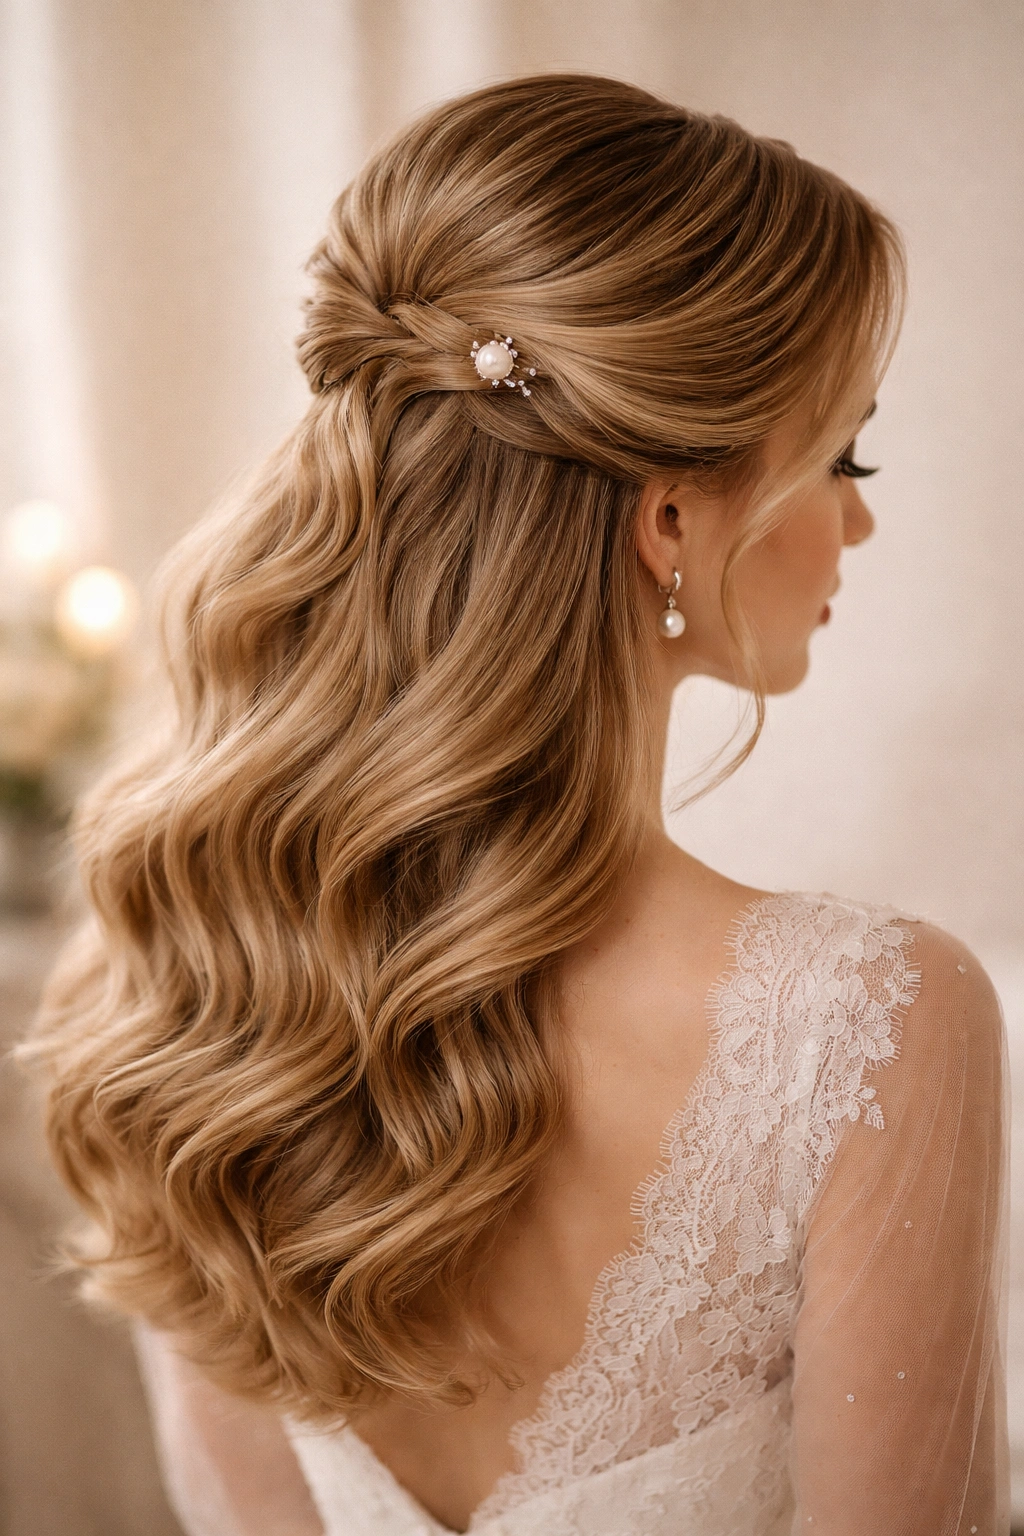
1. Soft Curled Half-Up with Pearl Pins
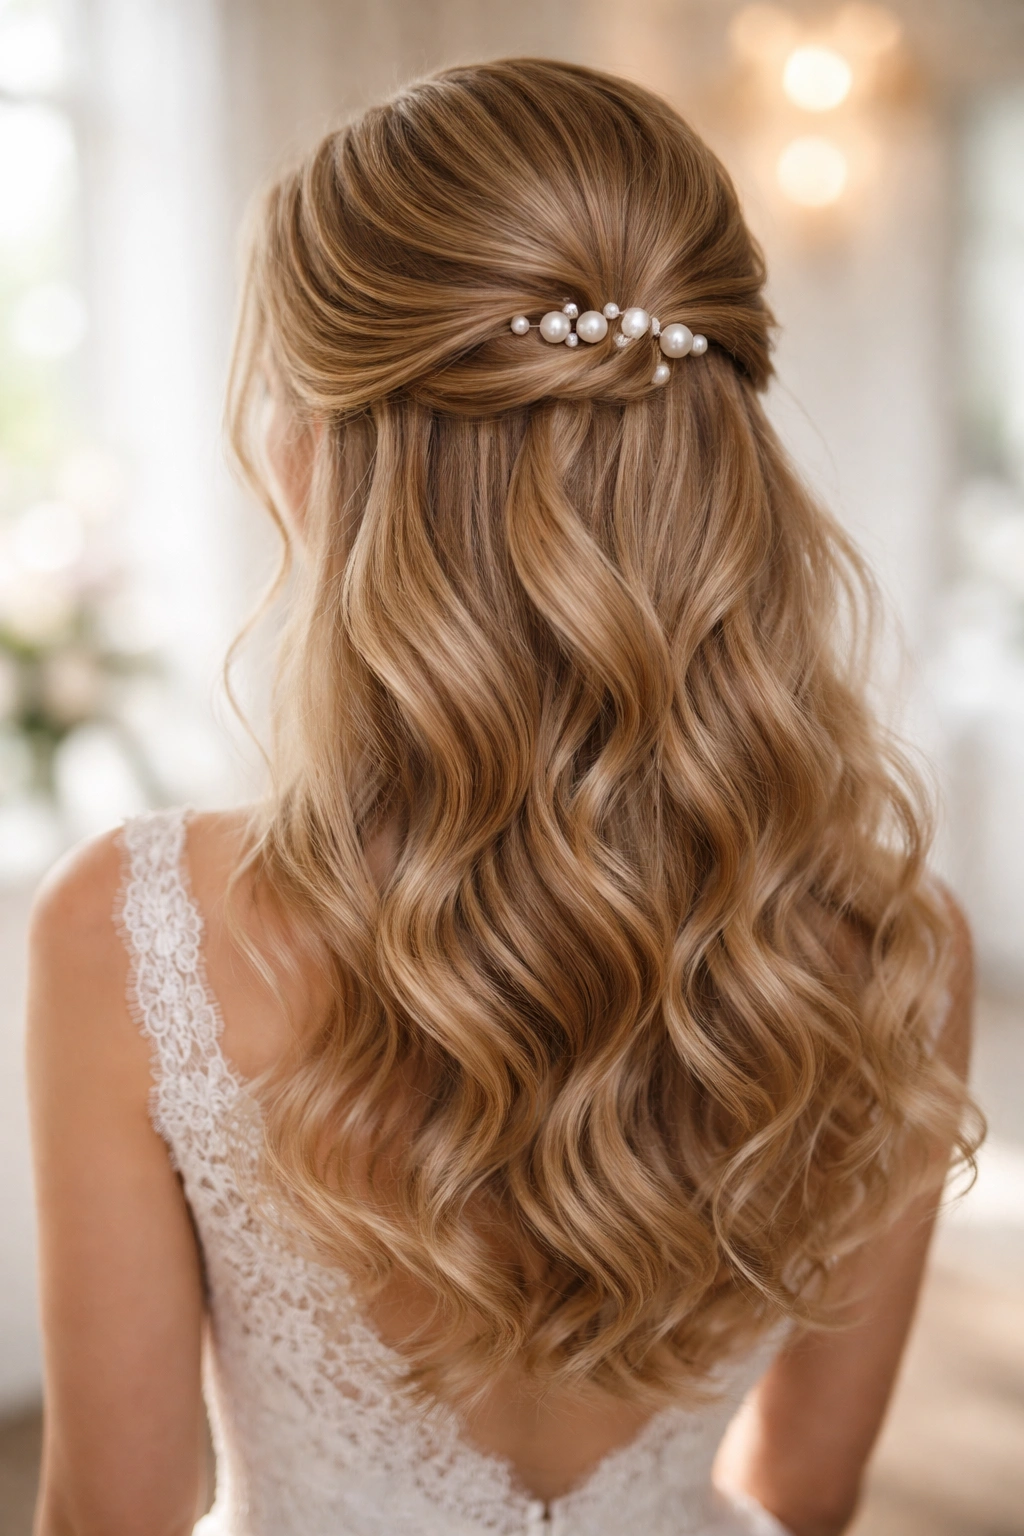
This classic beauty features loose, romantic curls throughout with the top half swept back and secured with pearl-adorned bobby pins or a small vintage comb. The curls are soft and touchable—think gentle waves rather than tight ringlets—which gives the whole look an ethereal quality that photographs beautifully in natural light. The pearl pins become both functional and decorative, catching light as you move.
Why It’s Endlessly Romantic
This style draws inspiration from 1950s and 1960s wedding photography, where soft curls and pearl accessories symbolized timeless elegance. The loose, flowing curls in the bottom section balance the structured top, creating visual interest and movement. Pearl pins are versatile enough to match any wedding dress, whether you’re wearing lace, silk, or something more modern.
Key Details to Perfect It
- Start with damp hair and apply a volumizing mousse or sea salt spray to the roots for texture and hold
- Create soft curls using a 1.5-inch curling iron, curling away from the face for a flattering frame
- Gently brush through the curls with a wide-tooth comb to soften and blend them into waves
- Section the top half at ear level and gently pull back, securing with pearl pins hidden underneath for a seamless look
- Leave 2-3 face-framing tendrils loose on each side for softness and romance
Pro tip: Set everything with a light-hold hairspray—you want movement, not stiffness. A heavy product will flatten those beautiful curls and make the style look dated rather than timeless.
2. Low Vintage Half-Up with Cascading Tendrils
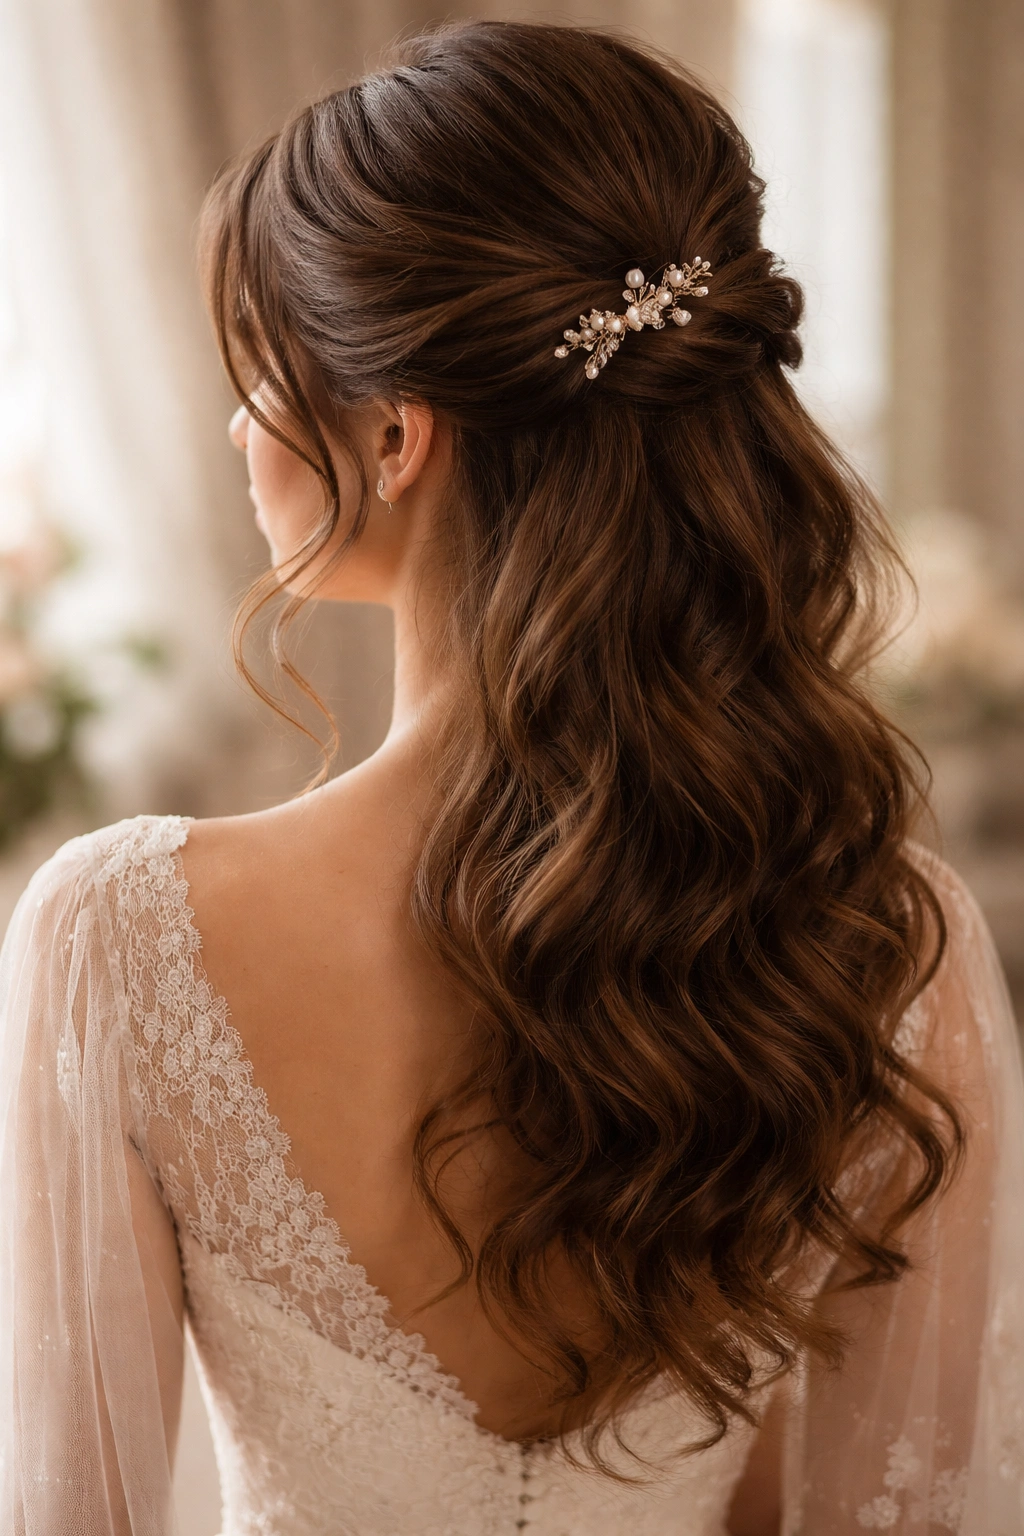
Position the half-up section quite low—roughly at the nape of the neck—for a look that’s both sophisticated and whimsical. The magic here is in the tendrils: soft, wispy pieces that frame your face and fall loosely down your back, creating a dreamy, almost Pre-Raphaelite aesthetic. This styling works particularly well with longer hair and pairs beautifully with romantic, flowing wedding gowns.
The Art of Controlled Romance
The low placement is distinctly vintage, harking back to Edwardian and Victorian bridal styles where hair was often gathered lower on the head to showcase neck and shoulders. The cascading tendrils aren’t accidental—they’re carefully created by curling individual pieces around the iron and leaving them loose. This creates a look that’s intentionally romantic rather than simply undone.
How to Build This Style
- Curl all your hair with a 1.25-inch curling iron for defined, romantic waves
- Identify which pieces you want as face-framing tendrils—typically 2-3 pieces on each side
- Gather the remaining hair at the nape of your neck, section it into three parts, and create a soft, loose braid or twist
- Secure the low section with bobby pins or a vintage clip positioned underneath for invisibility
- Gently pull the braid or twist apart slightly to create a softer, fuller texture
- Pin the tendrils in place with just a touch of lightweight hairspray so they still move naturally
Worth knowing: This style works best with hair that’s at least shoulder-length, ideally longer. The tendrils need enough length to create that graceful, flowing effect.
3. Sleek Twisted Half-Up with Art Deco Comb
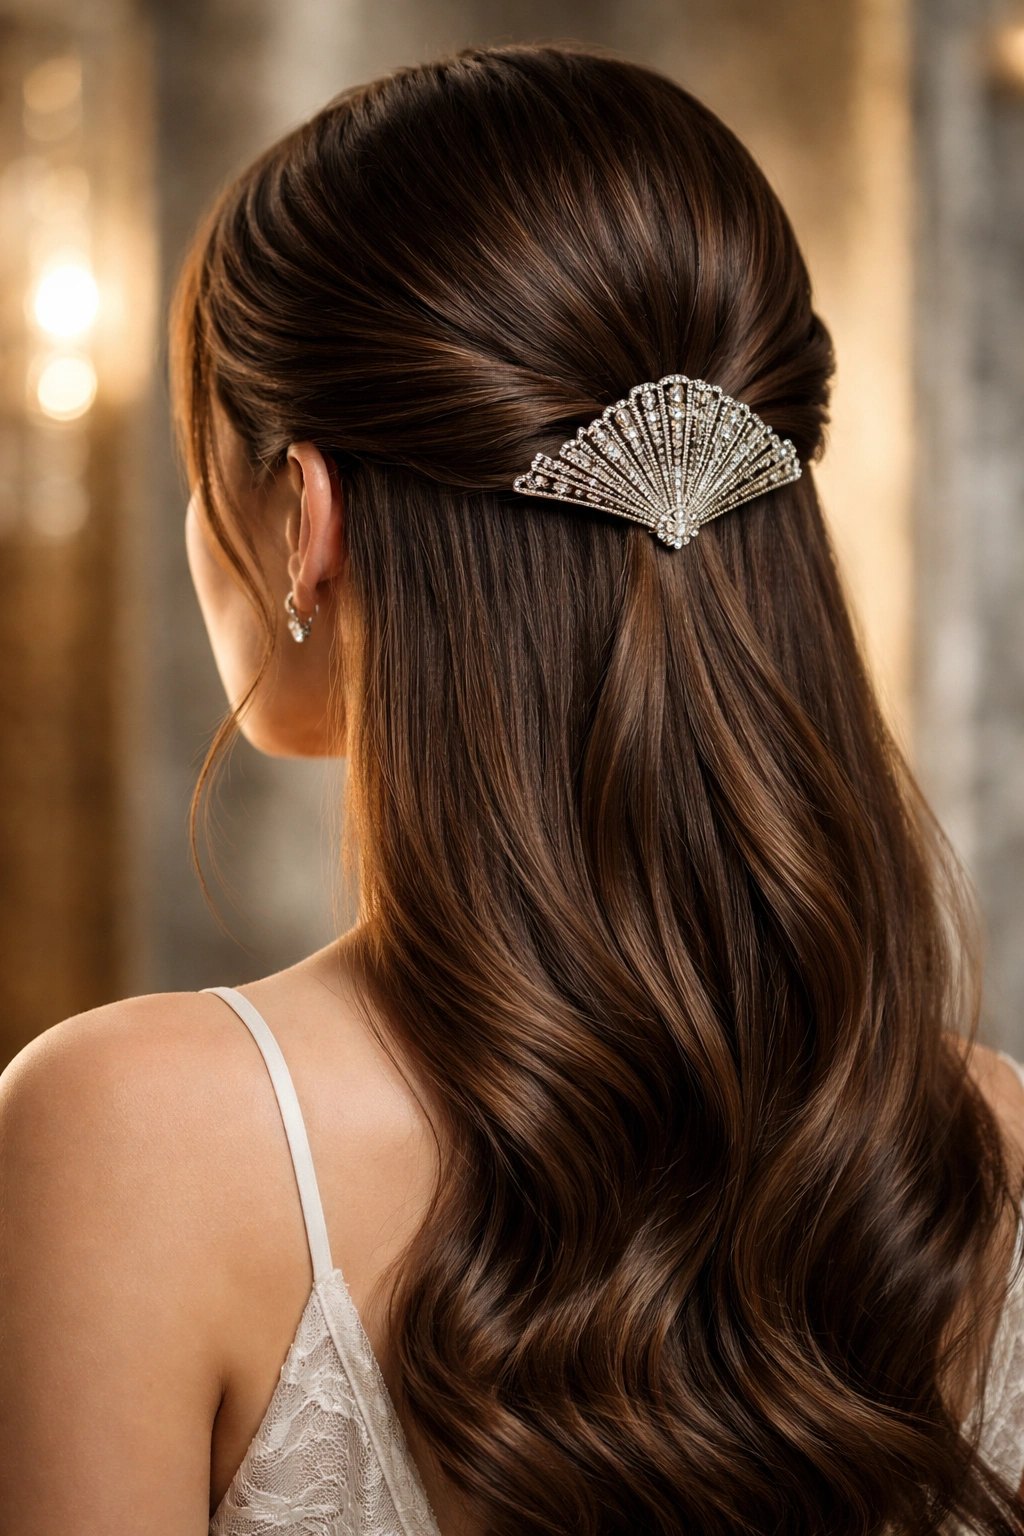
For a more modern take on vintage style, create a sleek, polished half-up by twisting sections of hair and securing them at the back with an ornate Art Deco comb or a minimalist geometric clip. This look is less about romantic softness and more about architectural elegance—perfect if your wedding aesthetic leans toward glamorous 1920s sophistication. The shine of sleek hair plays beautifully against vintage metallic accessories.
The 1920s Influence
The 1920s was all about geometric lines, architectural jewelry, and streamlined elegance. This hairstyle captures that era’s DNA by combining smooth, intentional lines with period-appropriate accessories. It’s a look that reads “bride” without being overly fussy, which appeals to modern sensibilities while honoring vintage aesthetics.
Building the Sleek Twisted Look
- Apply a smoothing serum or lightweight gel to damp hair to tame frizz and create shine
- Blow-dry hair straight with a paddle brush for maximum smoothness and polish
- Starting on one side, take a 2-inch section near the temple and twist it back toward the center
- Repeat on the opposite side, creating two matching twisted sections
- Bring both twists together at the back of your head and secure with bobby pins
- Slide an ornate Art Deco comb or geometric clip over the secured twists to hold them in place and add visual interest
- Tuck away any loose bobby pins so they’re completely hidden
Insider note: A bit of pomade on your fingertips helps you achieve that polished, high-shine finish that makes this look truly pop in photos.
4. Volumetric Half-Up with Vintage Waves
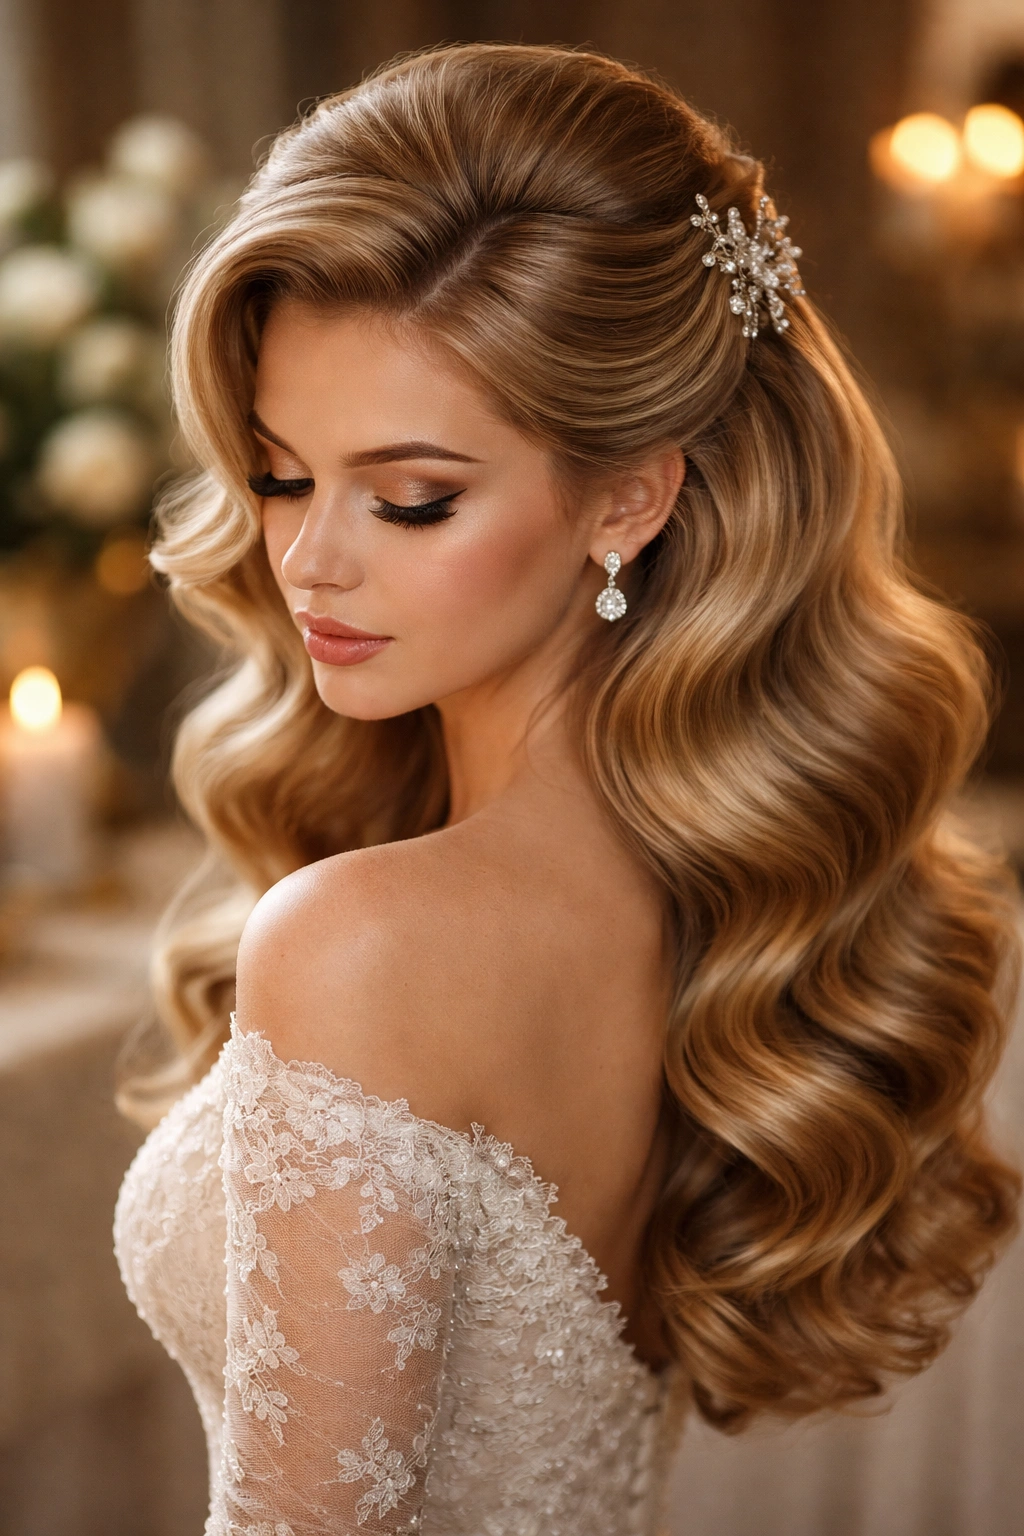
Build serious volume at the crown with strategic teasing and soft waves throughout for a look that’s unabashedly glamorous. This style draws from Old Hollywood golden-age aesthetics, where volume was a sign of luxury and sophistication. The half-up section sits high on the head, creating a flattering frame that adds height and presence—particularly stunning if you’re wearing a veil.
Creating Old Hollywood Glamour
This look requires embracing texture and fullness in a way that feels intentional and luxe rather than accidental. The combination of crown teasing (for height) and sculptural waves (for glamour) creates a hairstyle that’s both romantic and powerfully beautiful. It’s the kind of look that demands a dramatic wedding dress and photographs like a dream.
Step-by-Step to Achieve Maximum Volume
- Apply volumizing mousse to damp hair at the roots before blow-drying
- Blow-dry your hair with your head tipped forward, then flip it back for natural volume
- Create soft waves throughout using a 1.5-inch curling iron, holding each curl for a few seconds
- Gently brush through the waves with a paddle brush to soften and blend
- Use a fine-tooth comb or teasing brush to gently backcomb the crown area, creating height
- Smooth the teased section lightly with your brush so it looks polished, not messy
- Gather the top half of your hair at the highest point possible and secure with bobby pins hidden underneath
- Use a fine-tooth comb to gently smooth any flyaways on top
- Finish with flexible-hold hairspray to lock everything in place without crunching
Pro tip: The key to making teasing look intentional rather than messy is the smoothing step. You’re not creating a rat’s nest—you’re creating an illusion of fullness.
5. Romantic Half-Up with Baby’s Breath
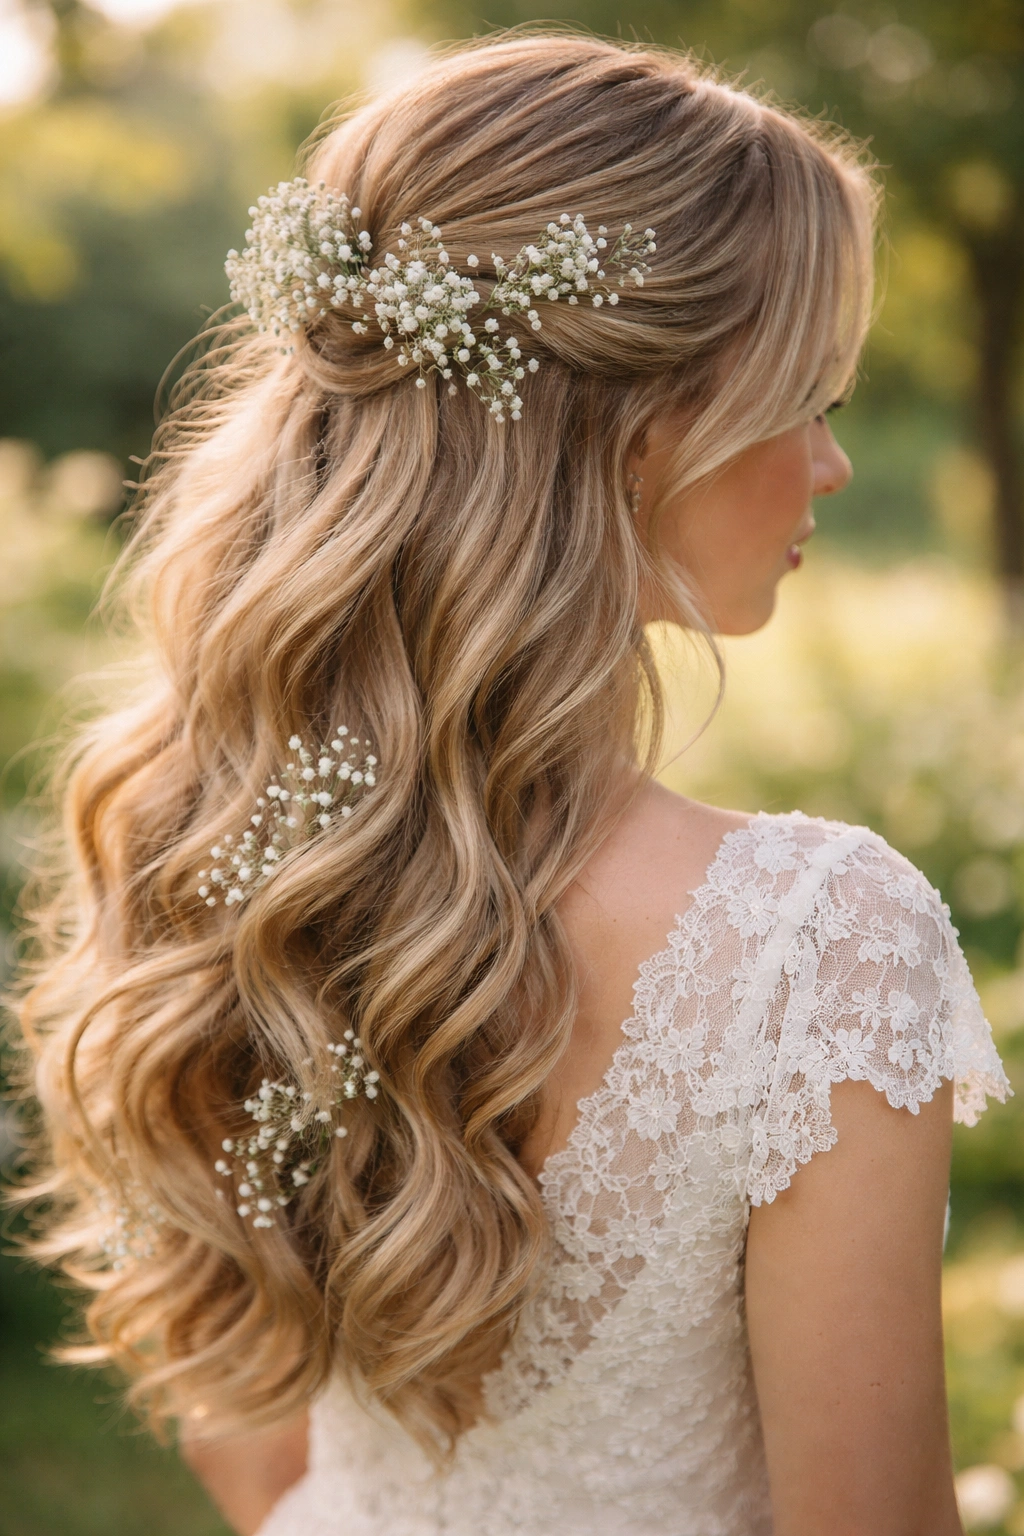
Incorporate delicate baby’s breath flowers directly into your hairstyle for a soft, garden-fresh romantic aesthetic. The flowers are woven throughout the half-up section and scattered down the back, creating a dreamy, cottagecore-adjacent look that feels both vintage and current. This works beautifully for outdoor or garden weddings and pairs especially well with softer, more ethereal wedding gowns.
The Timeless Appeal of Floral Details
Flowers in hair have been part of bridal traditions across cultures and centuries. Baby’s breath specifically became popularized in bridal styles during the Victorian era and has remained a symbol of wedding romance ever since. The delicate white flowers catch light beautifully in photographs and add a natural, organic element that feels less formal than metallic accessories.
Integrating Flowers Into Your Style
- Start with soft waves or curls throughout your hair—this gives flowers something to nestle into naturally
- Have your florist or hairstylist prepare small clusters of baby’s breath, each with a short stem wrapped in floral tape
- Section your hair for the half-up portion and begin securing bobby pins at your desired height
- Tuck baby’s breath stems underneath and between bobby pins so they’re supported and hidden
- Add a few additional flowers throughout the lower section, securing them with bobby pins angled to hide the mechanics
- Use hairspray to set everything in place, being careful not to overspray the flowers
- Do a final check to ensure no bobby pins or stems are visible—only the delicate white blooms should show
Worth knowing: Order flowers fresh the morning of your wedding and have your stylist work with them immediately for maximum freshness. Wilting flowers won’t photograph as beautifully.
6. Braided Half-Up with Vintage Hairnet
Create one or two soft braids in the top section and secure everything with a delicate vintage hairnet for an unexpectedly glamorous, distinctly retro look. Vintage hainnets—those netted accessories popular from the 1920s through 1950s—add instant sophistication and period authenticity. They work particularly well with more intricate hair preparations and make your braid work the visual centerpiece.
Why Hainnets Are Underrated Gems
Vintage hainnets represent an entire era of wedding styling. They were practical (keeping hair neat during ceremonies and receptions), beautiful (they came in ornate designs and metallic threads), and immediately recognizable as a specific period. Incorporating one into your bridal look is a nod to that heritage while creating a distinctive, elegant silhouette.
Constructing the Braided Half-Up with Hairnet
- Create soft waves throughout your hair first, which gives braids more texture and visual interest
- Section the top half of your hair at ear level and divide it into three parts
- Braid gently, loosening the braid slightly as you go to create a softer, fuller appearance
- Secure the braid with a small elastic (bobby pins hidden underneath work too)
- Position your vintage hairnet over the braided section—it should sit so the braid is visible through the net
- Secure the hairnet with bobby pins underneath, ensuring it sits smoothly against your head
- Arrange any loose tendrils so they frame your face gracefully
- If using a decorative hairnet with metal threading, make sure it catches light properly for photographs
Insider note: Hainnets come in various styles—some are delicate and barely visible, others are more ornamental and meant to be seen. Choose based on your dress style and personal taste.
7. Low Twisted Half-Up with Gilded Clips
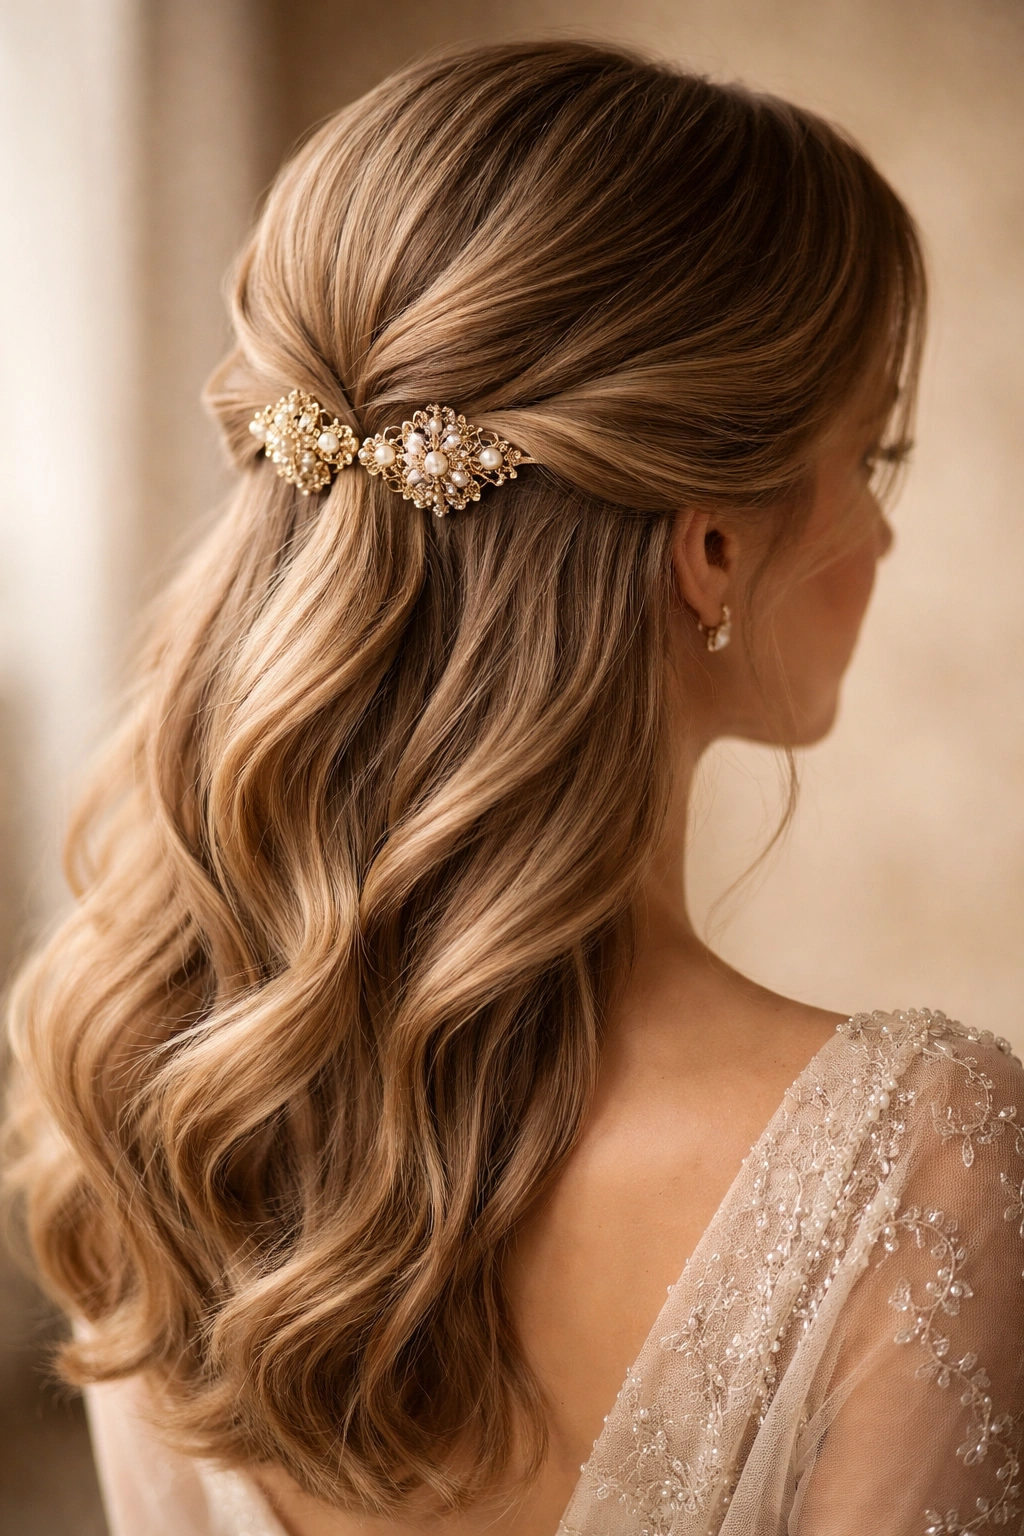
Create two soft twists from either side of your head that meet at the back and secure them with ornate gilded clips or vintage-style barrettes. This look is elegant without being overly complicated, and the golden metal adds warmth and luxury. It’s particularly flattering for people with face shapes that benefit from side-swept elements, and it photographs gorgeously from all angles.
The Luxury of Gilded Details
Gold accents in vintage styling evoke luxury, warmth, and timeless elegance. Gilded clips immediately elevate a hairstyle from simple to special, and they provide that essential touch of shine that catches light in photographs. This approach is more understated than some other vintage styles but no less romantic.
Executing the Twisted Half-Up
- Begin with soft waves or curls throughout for texture and movement
- Take a 2-inch section from the front on one side of your head, starting near the hairline
- Twist it gently all the way to the back of your head, maintaining an even tension
- Repeat on the opposite side, creating a mirror image twist
- When both twists meet at the back, secure them together with bobby pins
- Slide a gilded clip over the secured twists to anchor them in place and add visual interest
- Pull out any face-framing pieces so they’re loose and soft
- Use light hairspray to keep everything in place without flattening
Pro tip: The twists should feel intentional but not impossibly tight. You want them to look elegant, not like you’re pulling your face back. If you notice tension at your hairline, loosen the twist slightly.
8. Textured Half-Up with Velvet Ribbon
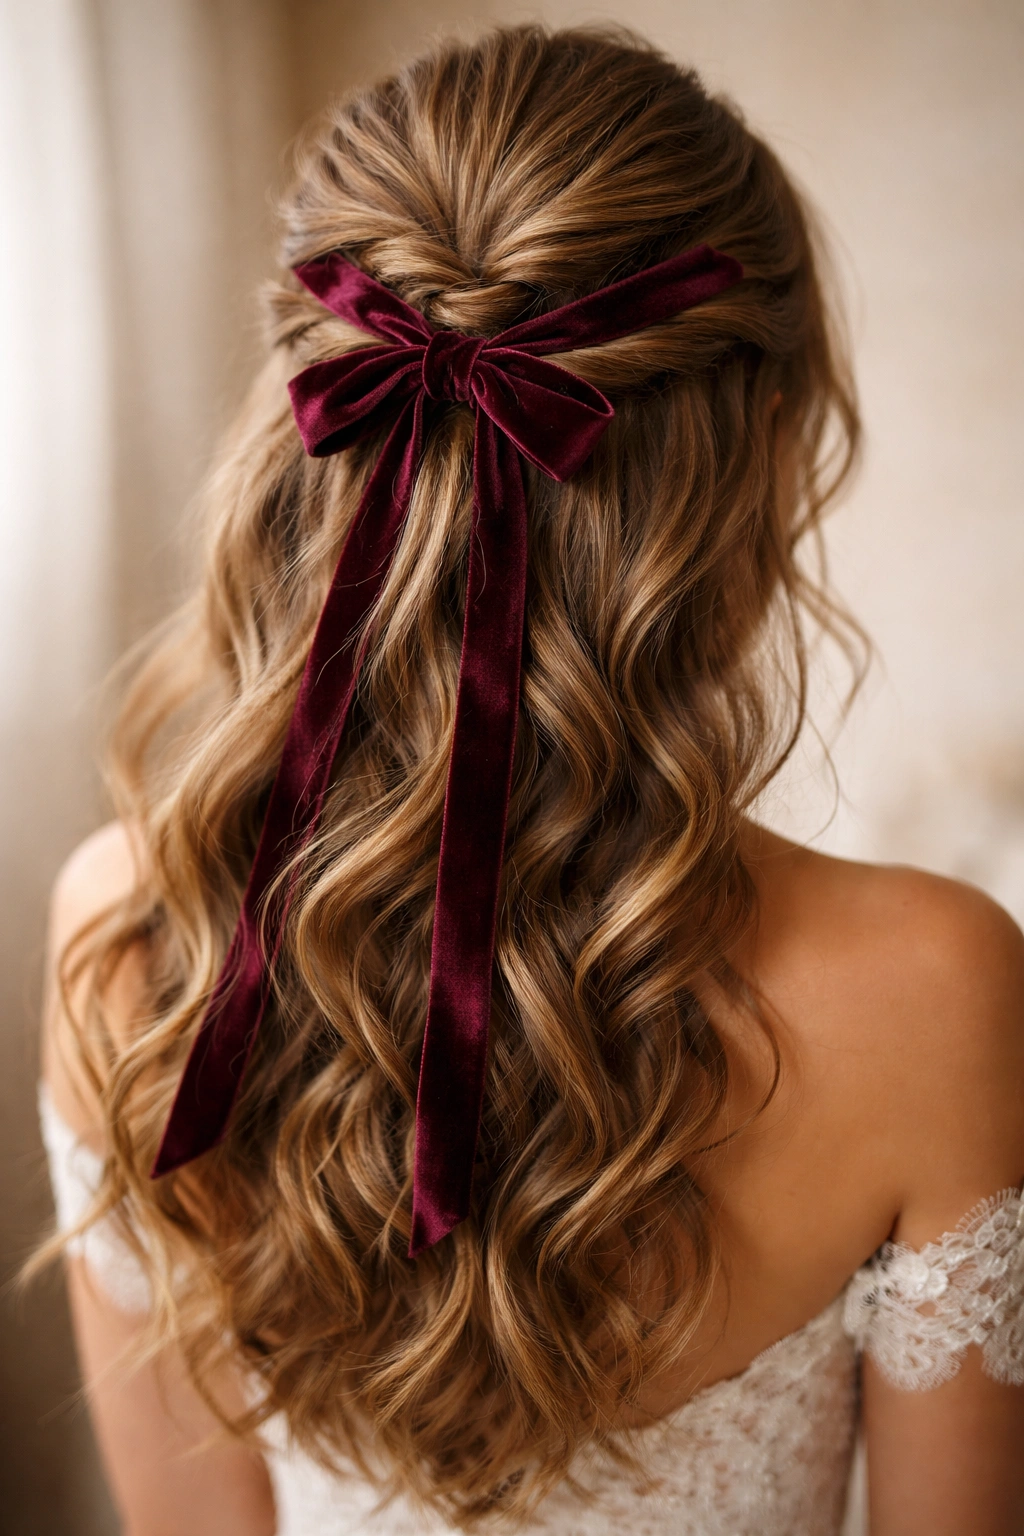
Weave a luxurious velvet ribbon through your half-up section for a touchable, textured look that feels simultaneously romantic and distinctly vintage. Velvet adds richness, depth, and visual interest compared to metallic accessories, and it works beautifully in photographs both in color and black-and-white. This approach also allows for color coordination—a ribbon that matches your dress, your bridal bouquet, or your overall color palette.
The Tactile Elegance of Velvet
Velvet ribbon became popular in Victorian and Edwardian hairstyling as a way to add luxury and visual interest. Unlike metallic accessories, which are inherently shiny and eye-catching, velvet ribbon creates a softer, more romantic aesthetic. It’s also practical—the ribbon helps secure your hairstyle while adding a decorative element that feels intentional and thoughtful.
Weaving Ribbon Into Your Half-Up
- Create soft curls or waves throughout your hair for a romantic base
- Gather the top half of your hair at your desired height and secure with bobby pins
- Choose a velvet ribbon in your preferred color—typically 1 to 1.5 inches wide works best
- Wrap the ribbon around the secured section, weaving it slightly through the hair for a more integrated look
- Tie it off at the back or sides with a bow, depending on your hair length and preference
- Adjust the bow so it looks balanced and intentional—a slightly off-center or side-positioned bow often feels more interesting than a perfectly centered one
- Tuck any ribbon tails strategically or let them cascade down your back for additional visual interest
- Use bobby pins to secure the ribbon in place so it doesn’t slip as you move throughout the day
Worth knowing: Wider ribbons (1.5 inches or more) create a bolder statement, while narrower ribbons (0.5 to 1 inch) feel more delicate. Choose based on your dress style and personal preference.
9. Deep Side-Swept Half-Up with Vintage Brooch
Sweep your hair deeply to one side, gather the top section, and secure it with an ornate vintage brooch for a look that’s absolutely show-stopping. This style is sophisticated, glamorous, and distinctly old-school elegant. The deep side sweep is particularly flattering for most face shapes and creates an asymmetrical, intentional look that photographs beautifully from the side.
The Drama of Asymmetrical Styling
Vintage asymmetrical styling, particularly the deep side-sweep, was popularized in the 1940s and 1950s when Old Hollywood glamour was at its peak. It’s a look that demands confidence and presence—not because it’s difficult to achieve, but because it’s so deliberately, unapologetically beautiful. Securing it with a vintage brooch elevates the look from simply swept hair to intentionally styled hair.
Creating the Side-Swept Drama
- Create soft waves throughout your hair using a 1.5-inch curling iron
- Brush through the waves with a paddle brush to blend them into soft, flowing waves
- Using a fine-tooth comb, sweep all of your hair to one side—create a deep side part on the opposite side
- Gather the swept section at about ear level on the side where most of your hair now sits
- Secure it with bobby pins, making sure they’re completely hidden underneath
- Position your vintage brooch over the secured section, pinning it through the hair and into the bobby pins beneath
- Leave some hair loose in front to frame your face, even on the swept side
- Use light hairspray to keep everything in place
Insider note: This style works best with hair that’s at least shoulder-length. The length allows the deep sweep to look graceful rather than tight or unbalanced.
10. Half-Up with Faux Hawk and Feather

Create an avant-garde vintage look by teasing the crown into height, creating a subtle faux hawk effect, and securing it with a decorative feather or feathered hairpiece. This style walks the line between Old Hollywood glamour and modern edge—it’s vintage-inspired but not costume-y, dramatic but still romantic. It’s perfect if you want to make a bold statement and have a fashion-forward wedding aesthetic.
Embracing Vintage Boldness
While most vintage half-ups lean toward soft and romantic, some eras—particularly the 1920s and 1970s—celebrated bold, architectural hair. The faux hawk represents this bolder side of vintage styling, combining the volume and height of roaring ’20s styles with the edginess of 1970s glamour. A feather detail adds back that romantic, ethereal element.
Building the Faux Hawk Effect
- Apply volumizing mousse to damp hair, focusing on the crown
- Blow-dry your hair with a round brush, creating lift and fullness at the crown
- Tease the crown area gently with a fine-tooth comb or teasing brush to build height
- Smooth the teased section so it looks polished rather than messy
- Take two small sections from either side of your head and pull them back, securing at the base of the crown with bobby pins
- The crown should appear elevated and distinctive without being a full mohawk—think subtle volume and height, not extreme
- Position a feathered accessory or single statement feather at the back, securing it with bobby pins
- Ensure all mechanics are hidden and only the polished, intentional result shows
Pro tip: Have your stylist tease and smooth rather than you attempting this at home. The balance between volume and polish is key to making it look sophisticated rather than costume-y.
11. Romantic Half-Up with Lace Veil Insert
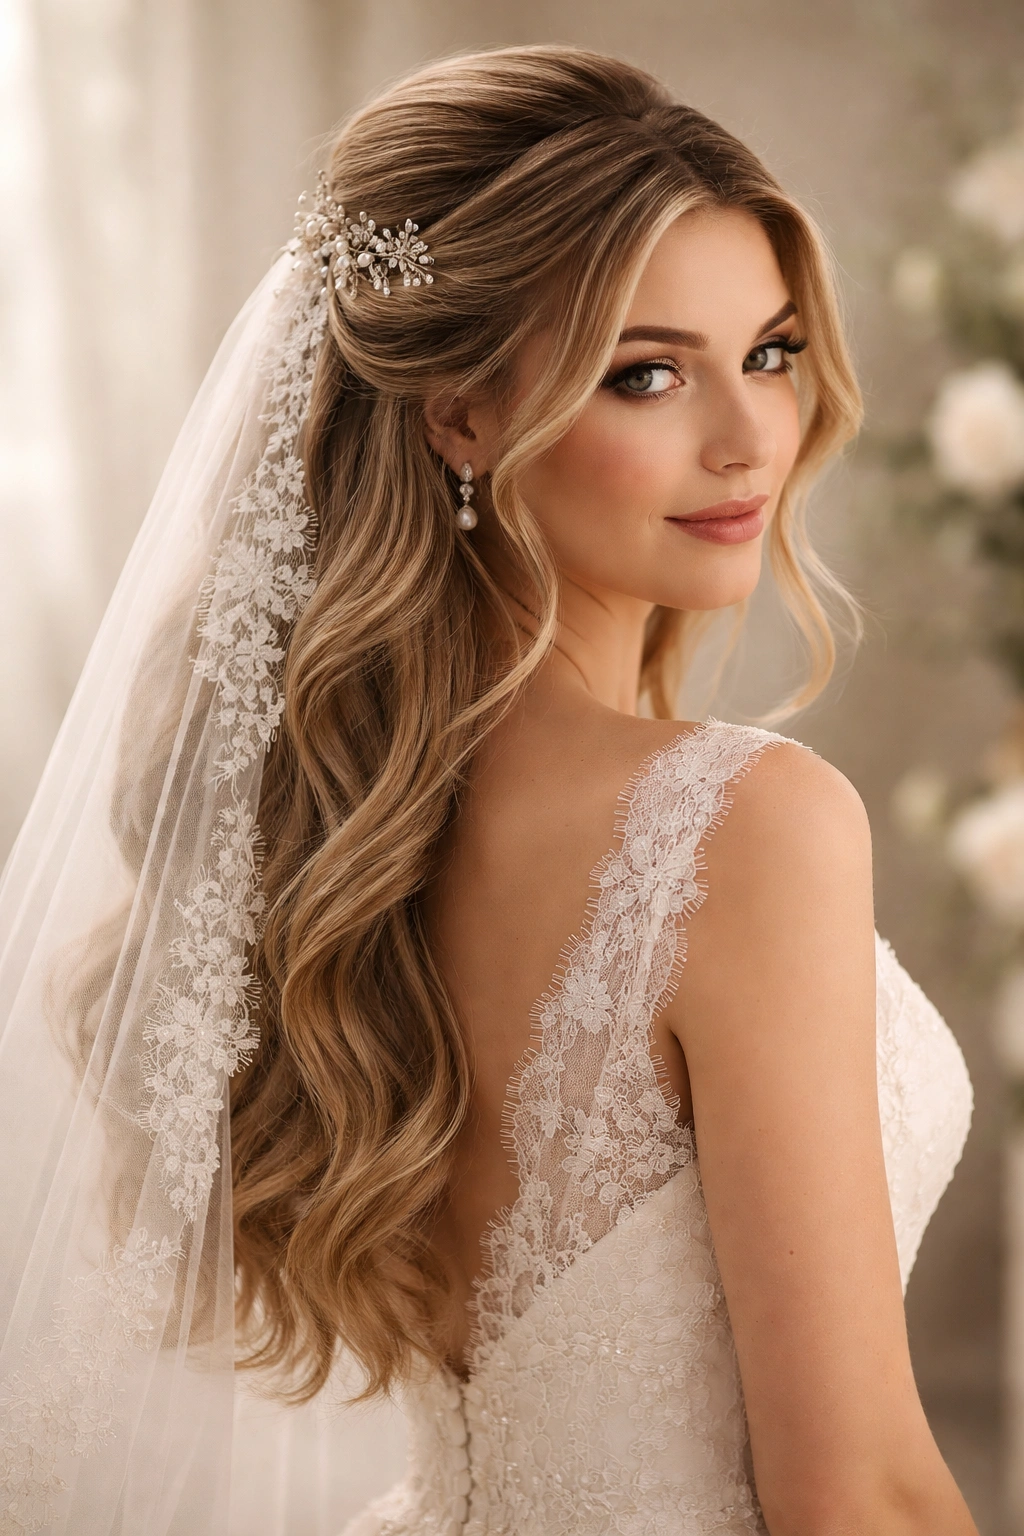
Create a delicate half-up style and incorporate a vintage lace veil directly into the hairstyle, so the lace is secured within the hair itself rather than attached to a comb. This creates an incredibly romantic, integrated look where the veil feels like part of your hairstyle rather than an accessory layered on top. It’s particularly stunning for brides who want that vintage, ethereal aesthetic.
The Integration of Veil and Hair
Historically, bridal veils were often woven directly into the hair or secured with flowers and decorative pins. This modern take on that tradition creates a unified, intentional look. The lace becomes a textural element rather than a separate accessory, creating depth and visual interest in photographs.
Integrating Lace Veil Into Your Half-Up
- Create soft waves throughout your hair—texture helps the veil integrate naturally
- Gather the top half of your hair at your desired height
- Have your veil prepared with small loops or attachment points (coordinate with your seamstress or stylist beforehand)
- Position the veil so it sits at the half-up point, with the lace distributed throughout the gathered section
- Secure the veil and hair together using bobby pins hidden underneath
- The lace should weave through your hair, with some pieces tucked in and others left to fall naturally
- Arrange face-framing pieces so they sit softly around your face
- Use light hairspray to hold everything in place without weighing down the delicate lace
Worth knowing: Coordinate with your dressmaker or veil seamstress well in advance to ensure your veil is prepared with attachment points that will work with your hairstylist’s approach.
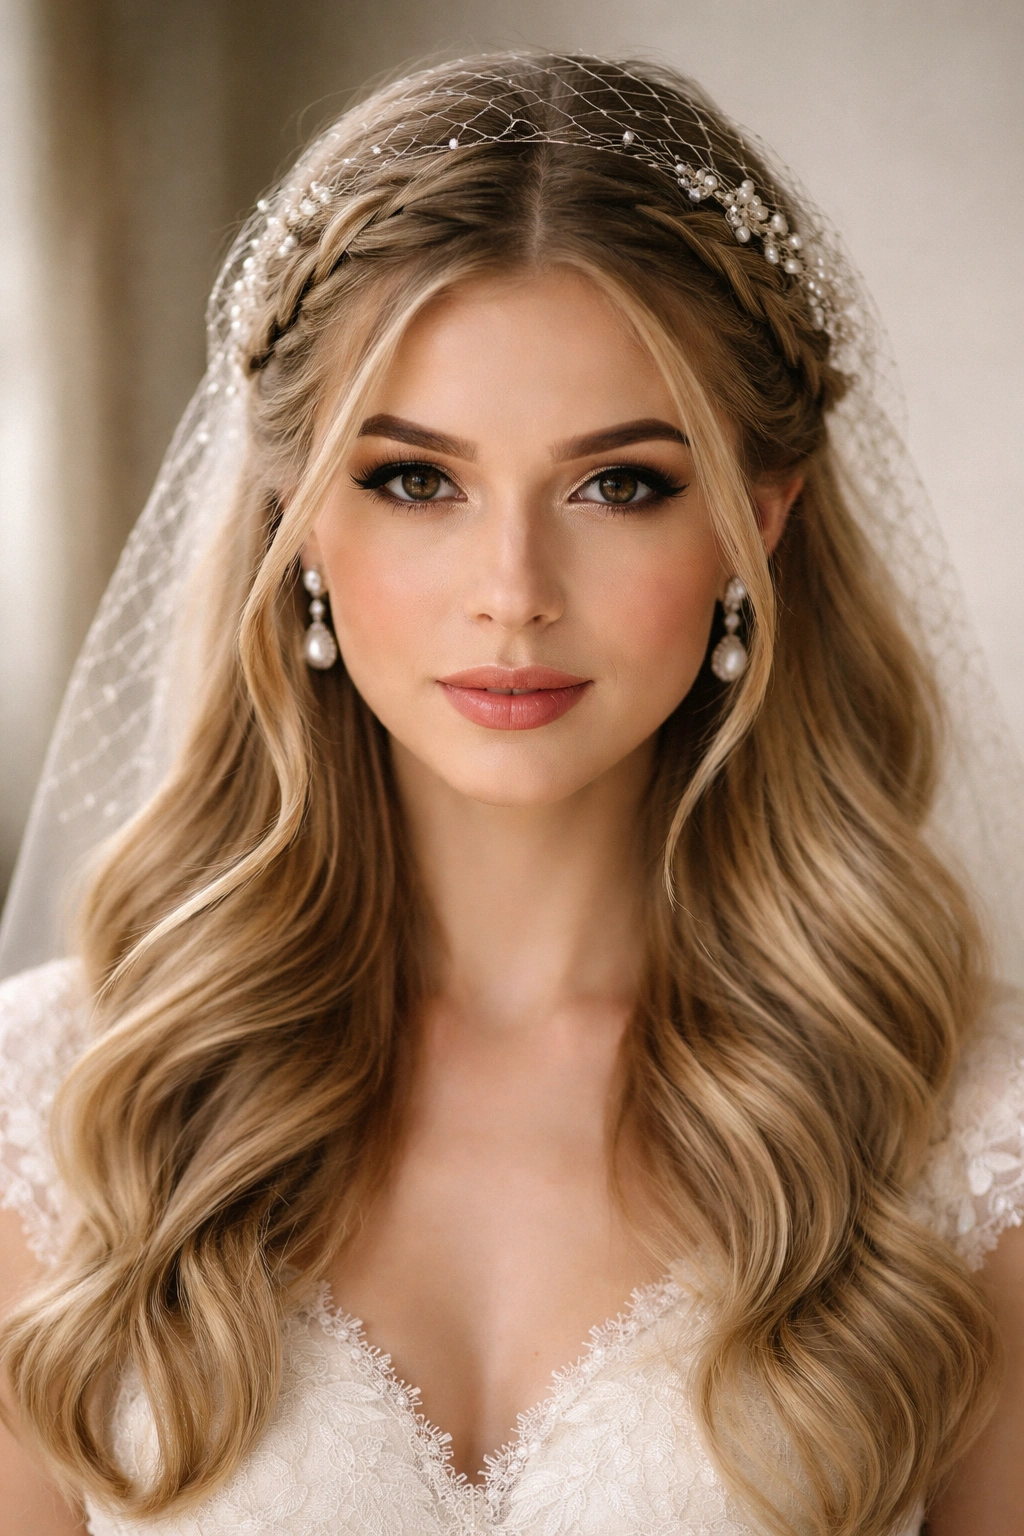
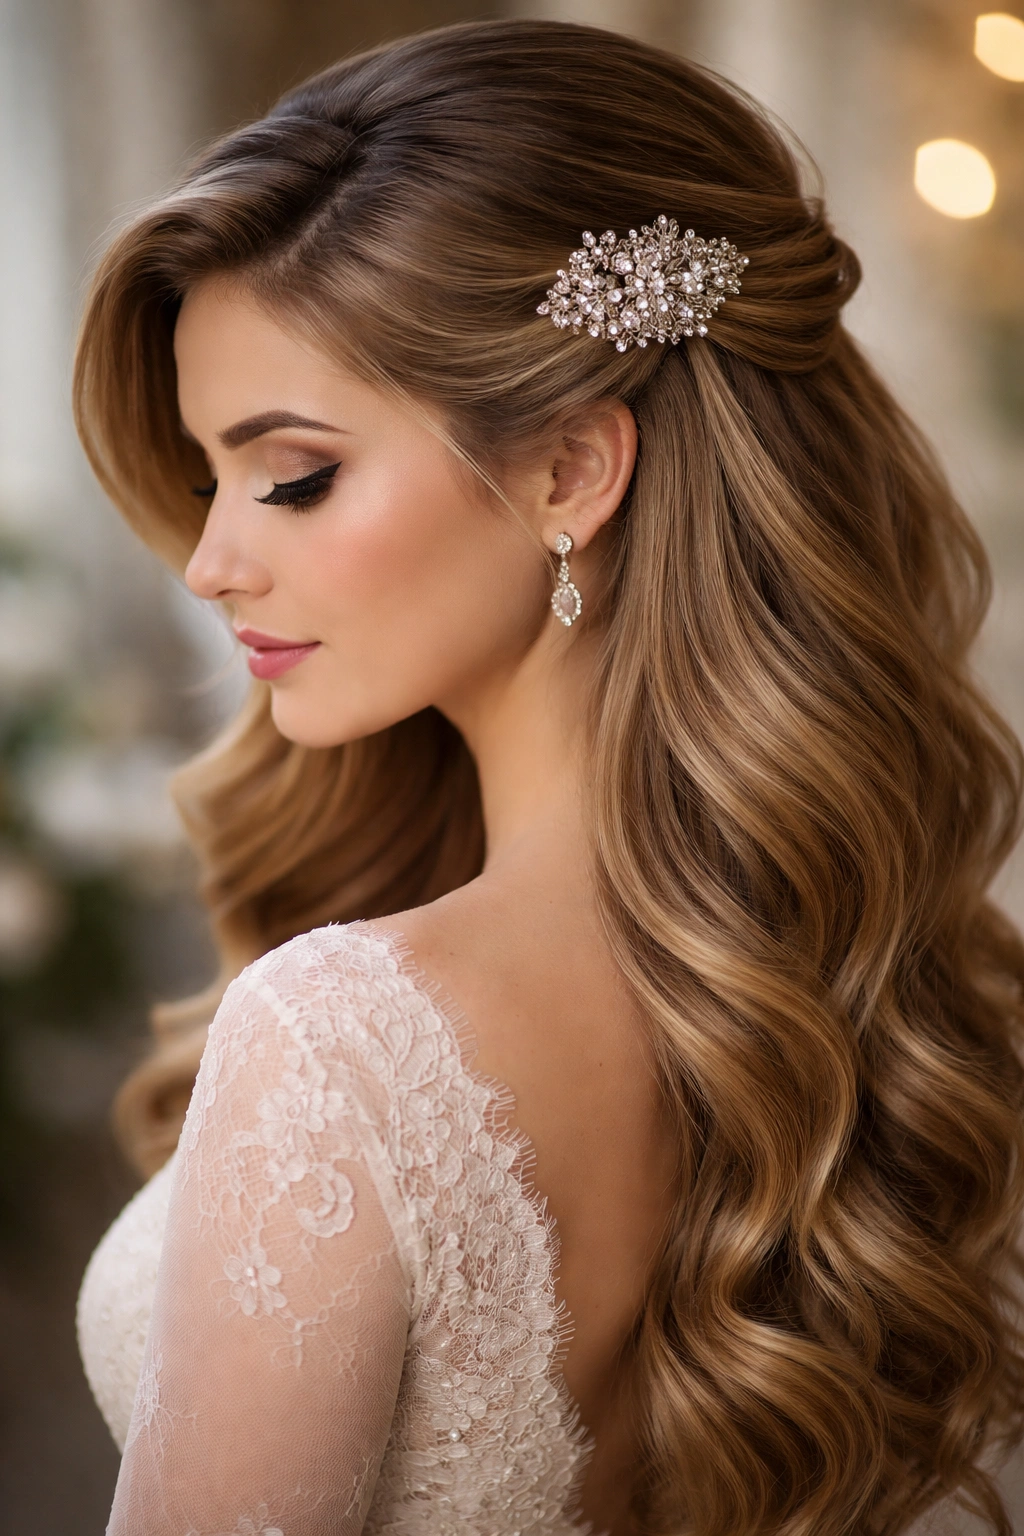
12. Soft Romantic Half-Up with Crystal Headpiece
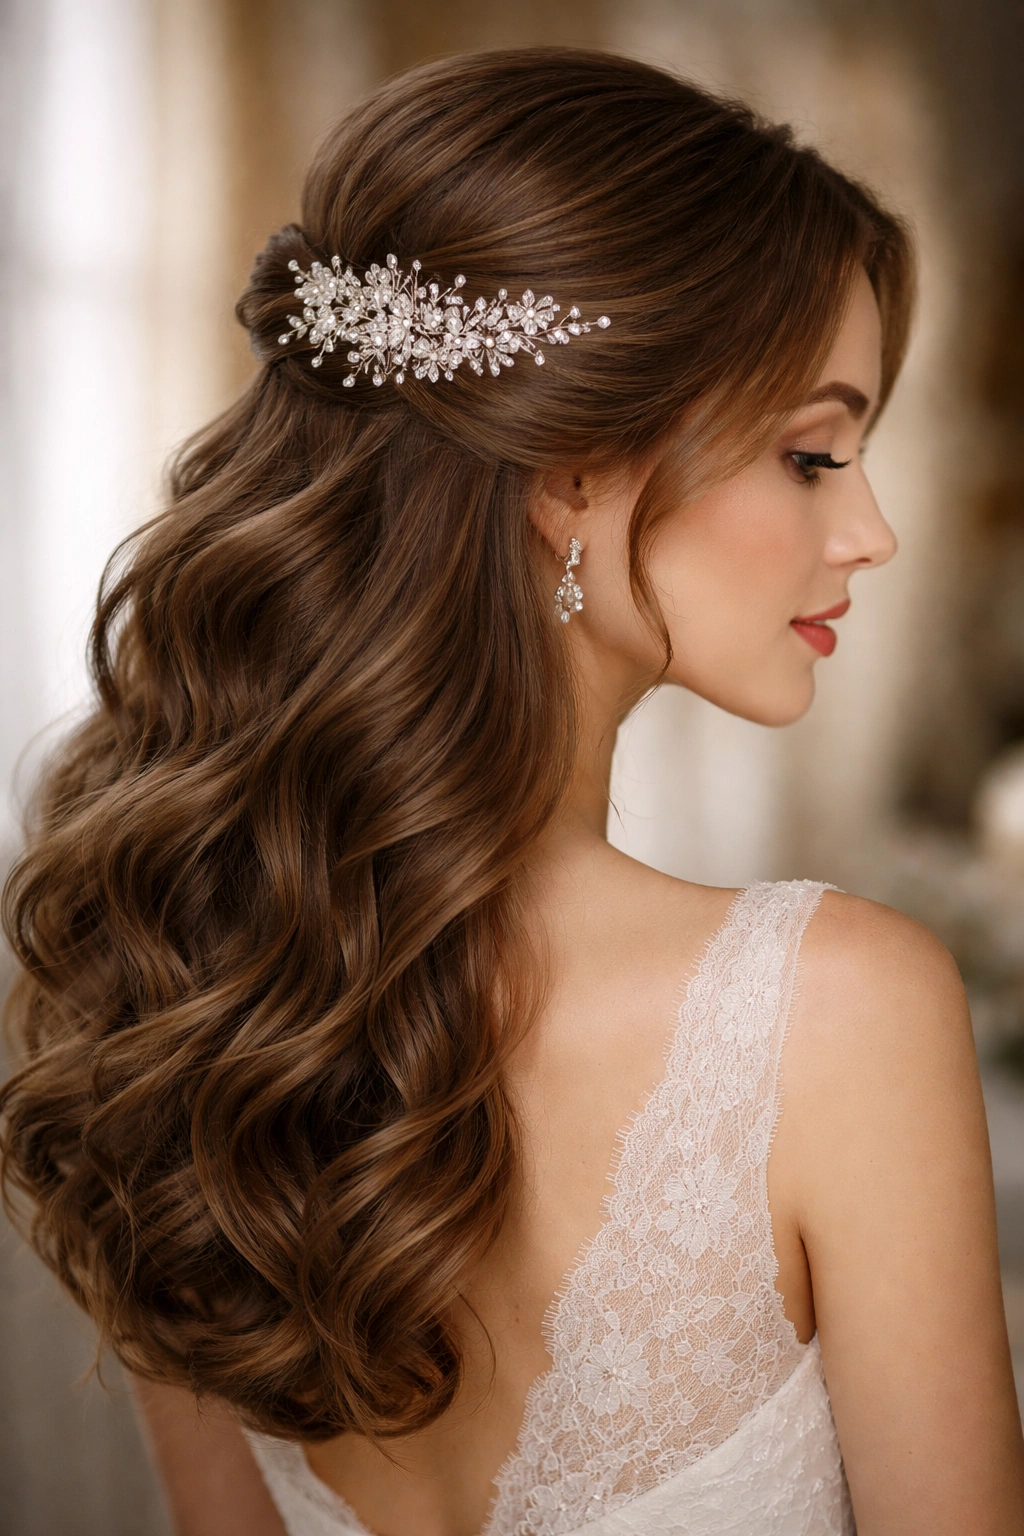
Create a simple, soft half-up with loose waves, then anchor it all with a delicate crystal headpiece that sits at the back of the gathered section. Crystal accessories catch light beautifully and work with virtually any wedding dress style. This approach is less about complex styling and more about choosing the right accessories to elevate a beautiful, simple half-up into something special and wedding-worthy.
Why Simple Can Be Most Powerful
Sometimes the most romantic look isn’t the most complicated. A soft, well-executed half-up with the right accessory can be more beautiful than an intricate style. The crystal headpiece draws the eye without competing with your face or your dress. It’s sophisticated, romantic, and timeless—the kind of look that will photograph beautifully and feel comfortable throughout a long celebration day.
Styling This Effortless-Looking Look
- Create soft waves throughout your hair with a 1.5-inch curling iron
- Gently brush through the waves with a wide-tooth comb to blend them into soft, flowing waves
- Gather the top half of your hair at a flattering height—typically higher rather than lower for a more romantic effect
- Secure with bobby pins hidden underneath
- Pull out a few face-framing pieces on either side so they fall softly around your face
- Position your crystal headpiece at the back of the gathered section, where it will sit securely but look ethereal
- Secure the headpiece with bobby pins threaded through the hairpiece’s attachment points
- Ensure everything feels secure (you don’t want shifting throughout the day)
- Use light hairspray for a soft hold that maintains movement
Insider note: The beauty of this style is that it looks effortless but is actually quite intentional. Every piece—every wave, every curl, every positioning—is deliberate, which is what makes it feel polished and special.
Final Thoughts
The perfect vintage half-up hairstyle for your wedding comes down to understanding your personal aesthetic, your hair type, and the overall vibe you want to create. Whether you’re drawn to the soft romanticism of baby’s breath and pearls, the glamorous drama of volumetric waves and gilded clips, or the bold sophistication of Art Deco geometry and side sweeps, there’s a vintage half-up style that captures exactly who you are as a bride.
These styles are timeless for a reason—they flatter most face shapes, work with various hair types and lengths, and photograph beautifully in all lighting conditions. The key is working with a skilled stylist who understands vintage aesthetics and can adapt these looks to your specific hair texture, face shape, and dress style. Consider booking a trial appointment well in advance so you can experiment, take photos, and feel completely confident on your wedding day.
Remember that your hairstyle, like everything else about your wedding, should make you feel beautiful and like yourself—just your most polished, special version. These vintage half-up looks provide the structure and inspiration to create that effect, whether you go with one of these styles exactly as described or use them as starting points for your own custom creation.