Wavy hair has this magical quality that naturally lends itself to braiding—your texture adds dimension and holds styles longer than you’d expect. The thing is, most braid tutorials assume you’re working with straight or curly hair, leaving wavy-haired folks wondering how to adapt the technique without flattening their natural texture or ending up with a frizzy mess. The good news is that braids actually look better on wavy hair because the waves fill in gaps, create instant texture, and make everything feel less tight and more effortlessly intentional.
What makes braiding wavy hair different is that you’re working with a texture that has natural movement and body already built in. You don’t need the same tension as you would with straight hair, and you definitely don’t need a million bobby pins. In fact, looser braids almost always work better—they preserve your waves, showcase your natural texture, and feel modern and undone rather than overly styled. Whether you’re looking for something you can wear to work, out to dinner, or just around the house on a lazy weekend, there’s a braid here that’ll work with your waves instead of against them.
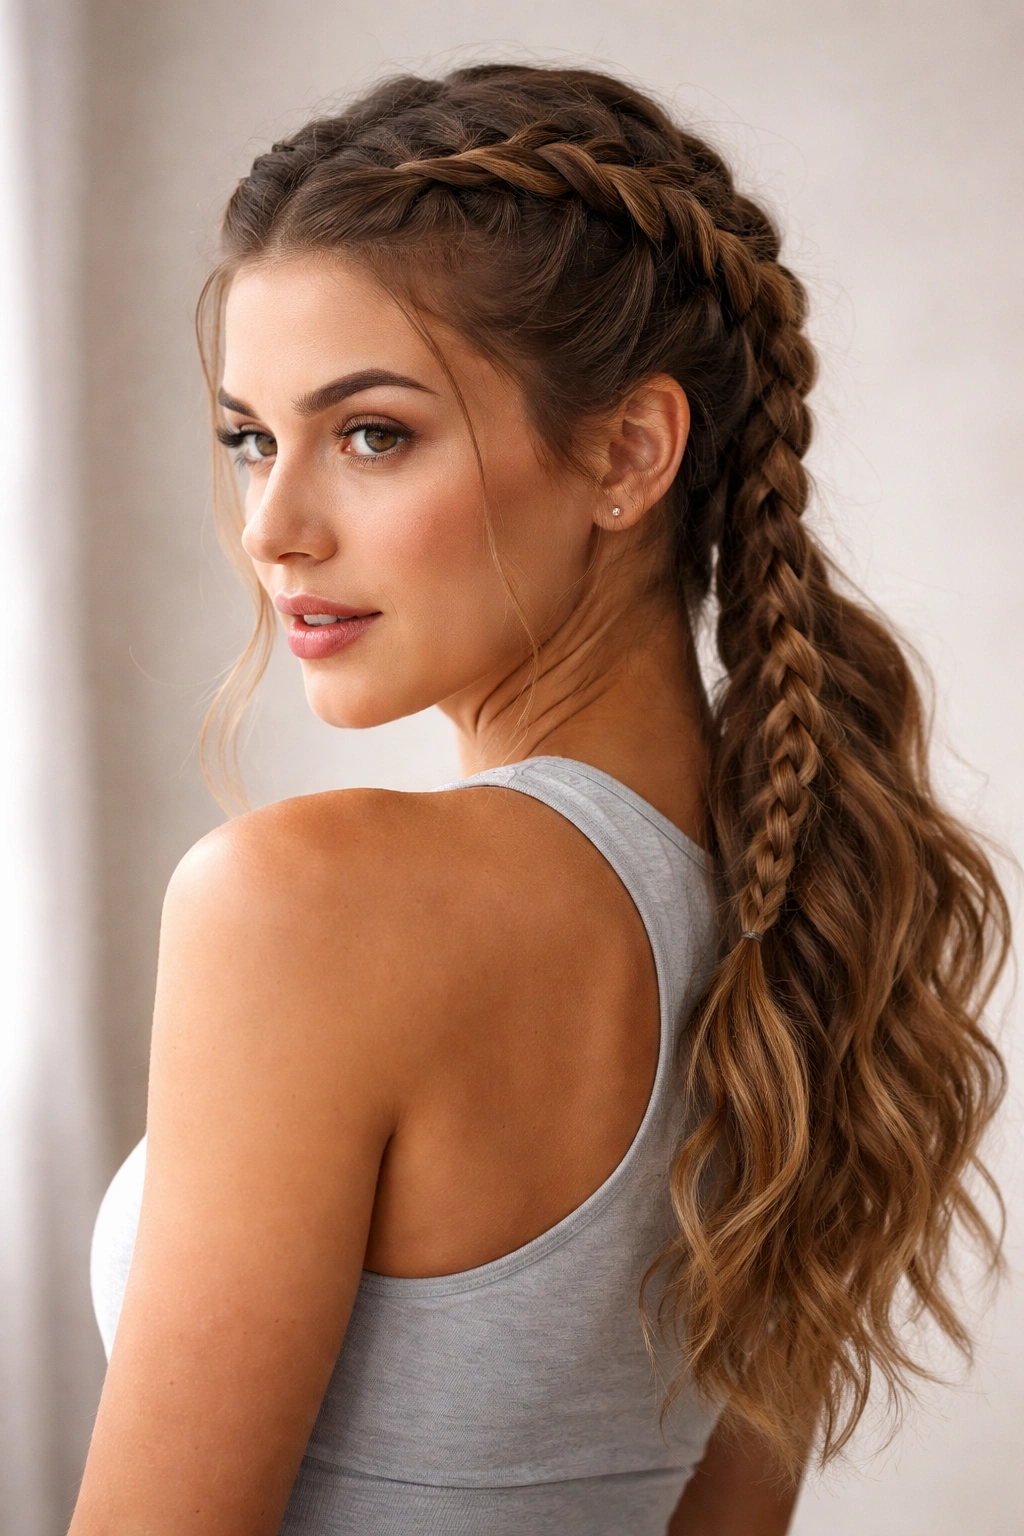
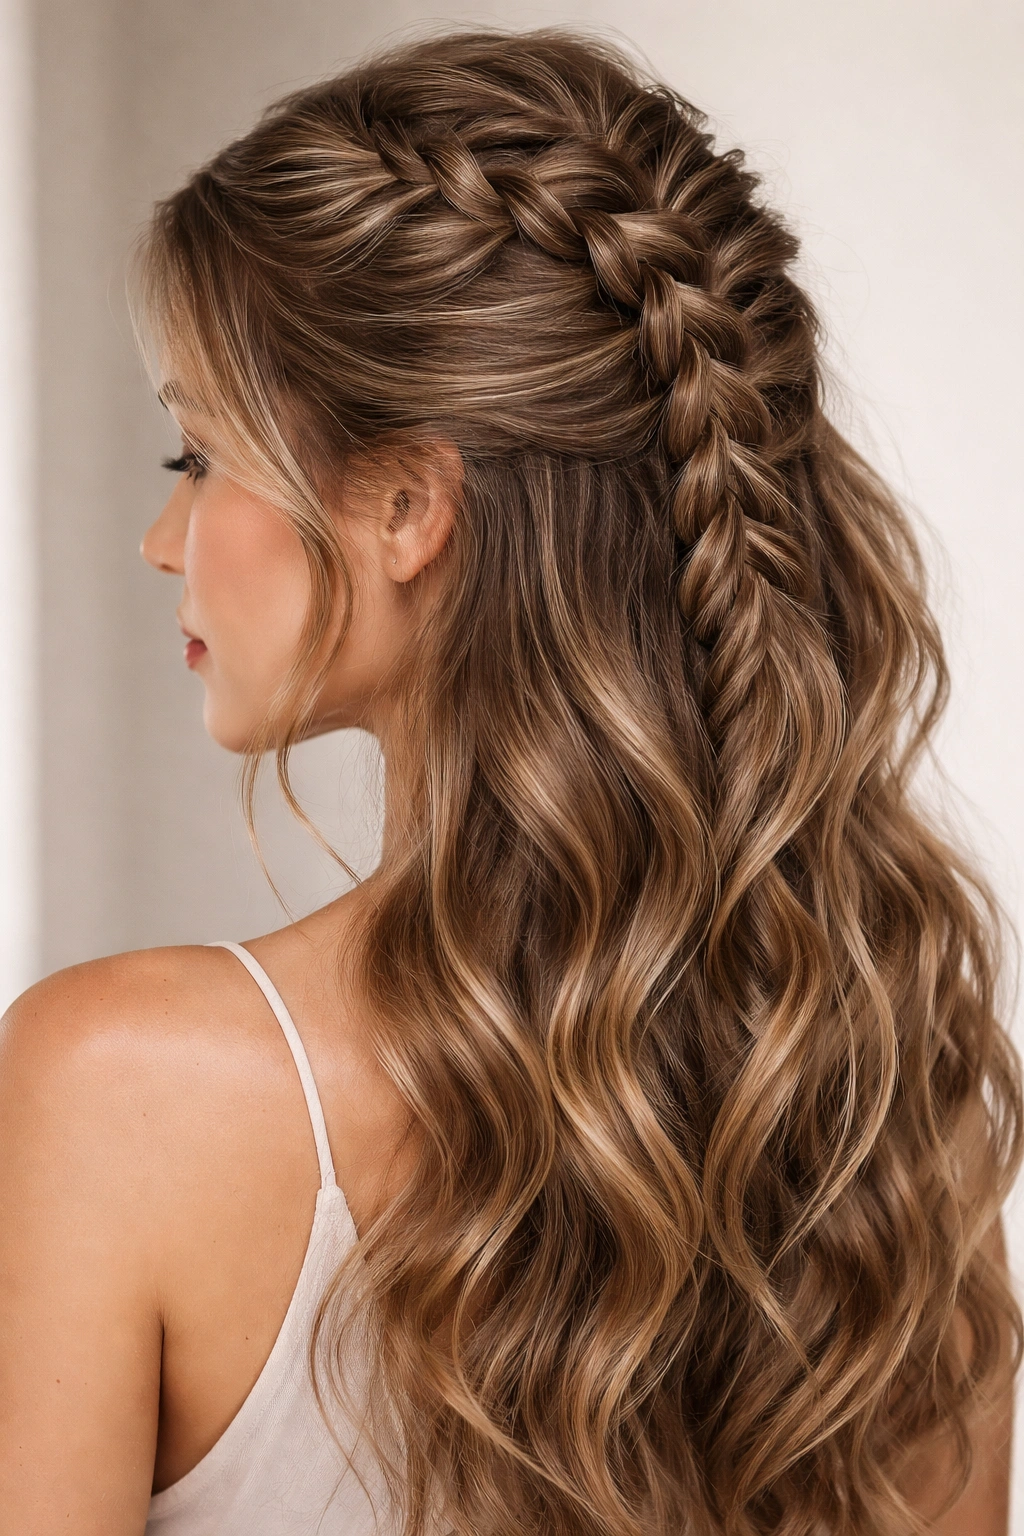
1. Textured Dutch Braid for Maximum Dimension
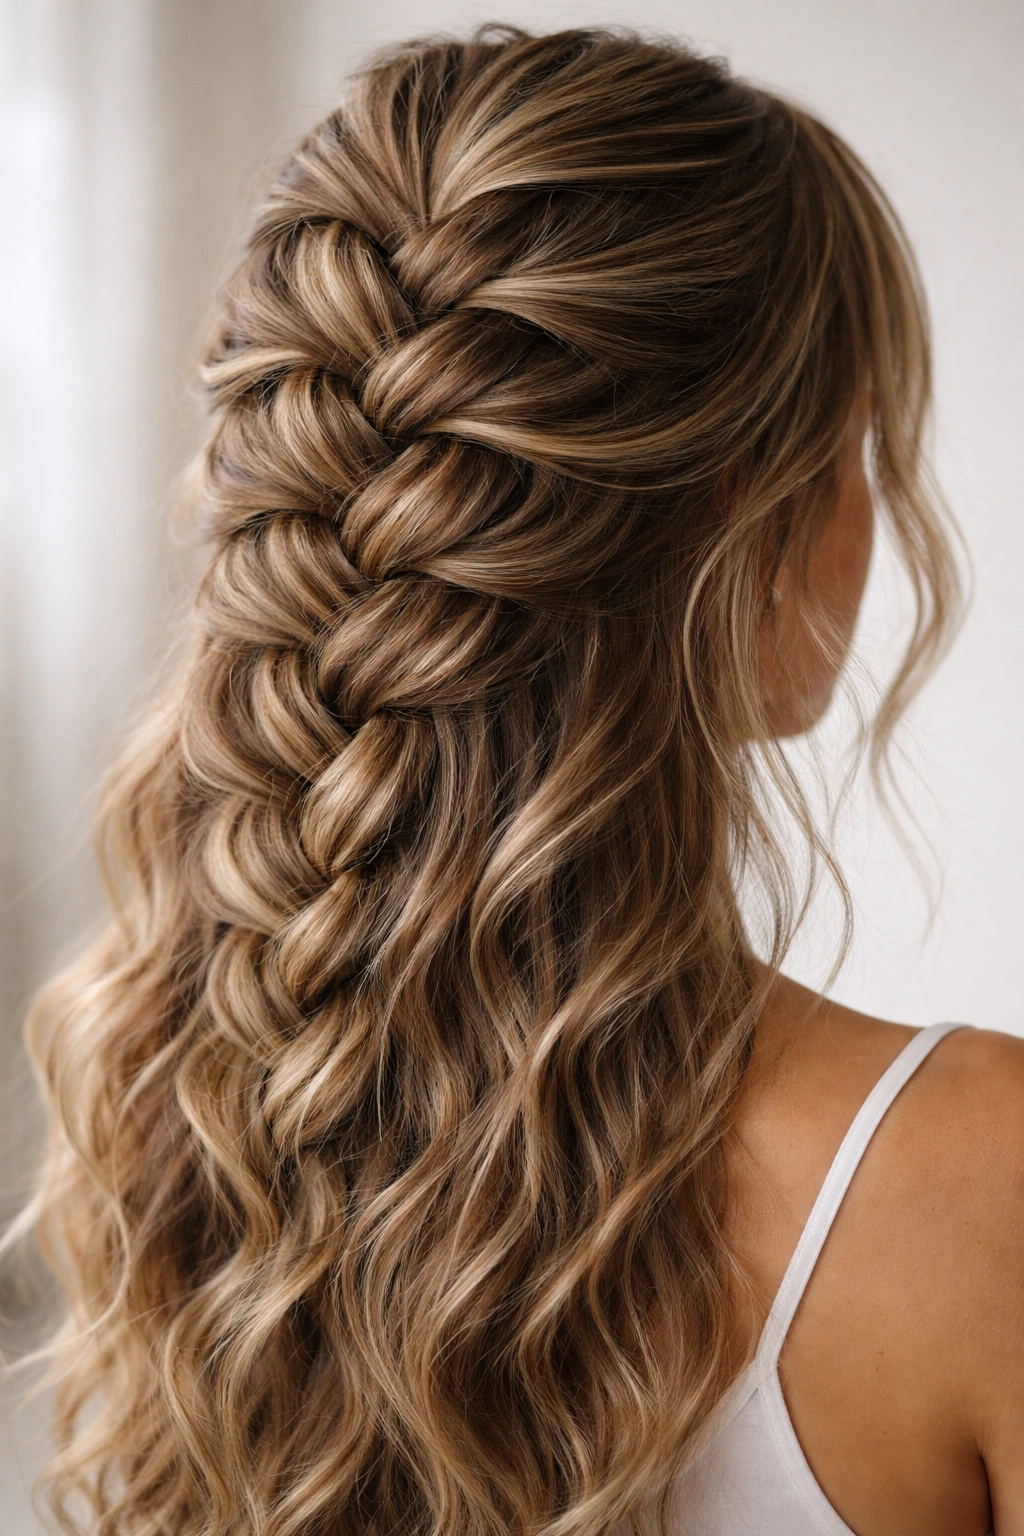
A Dutch braid is the inverted cousin of a French braid, where you braid under instead of over, creating that striking raised, almost 3D effect. For wavy hair, this is absolutely stunning because your waves catch the light differently at each layer of the braid, creating visual depth that straight-haired braiders spend serious effort trying to fake.
Why This Works for Wavy Hair
Dutch braids benefit enormously from pre-existing texture. Your waves mean the braid sections fill in naturally without looking thin or stringy. The underbraid technique creates pockets where your natural wave pattern shows through, making the braid look fuller and more intentional. Because Dutch braids sit raised on the scalp, they actually enhance your wave pattern rather than flattening it.
How to Create a Dutch Braid on Wavy Hair
Start at the crown with three sections of hair roughly equal in thickness. Cross the right section under the middle, then the left section under the new middle—this is the key difference from a French braid. Add small sections of new hair to each side strand as you work down, maintaining even tension without pulling tight. Loose is your friend here. Once you reach the nape of your neck, you can either continue down the length of your hair or secure it there.
The Wavy-Hair Advantage
After you finish the braid, gently pull the outer edges outward to loosen and expand it. This isn’t messy—it’s intentional texture enhancement. Your waves will peek through the expanded sections, creating that coveted lived-in, just-styled-myself aesthetic that actually requires way less effort than people think.
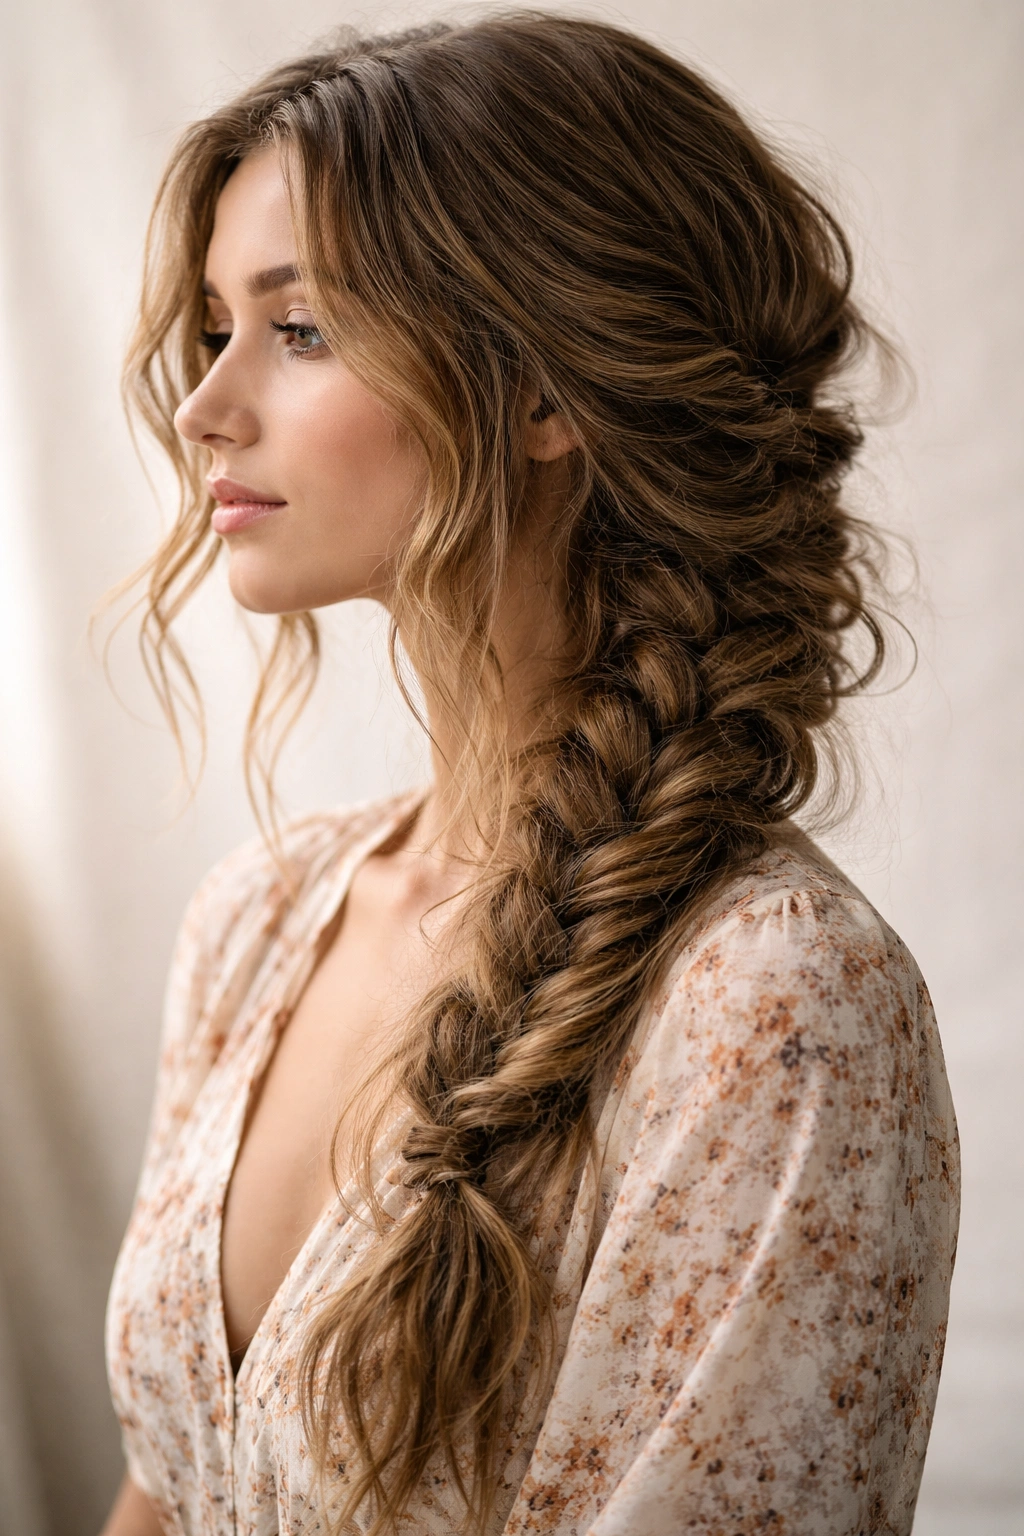
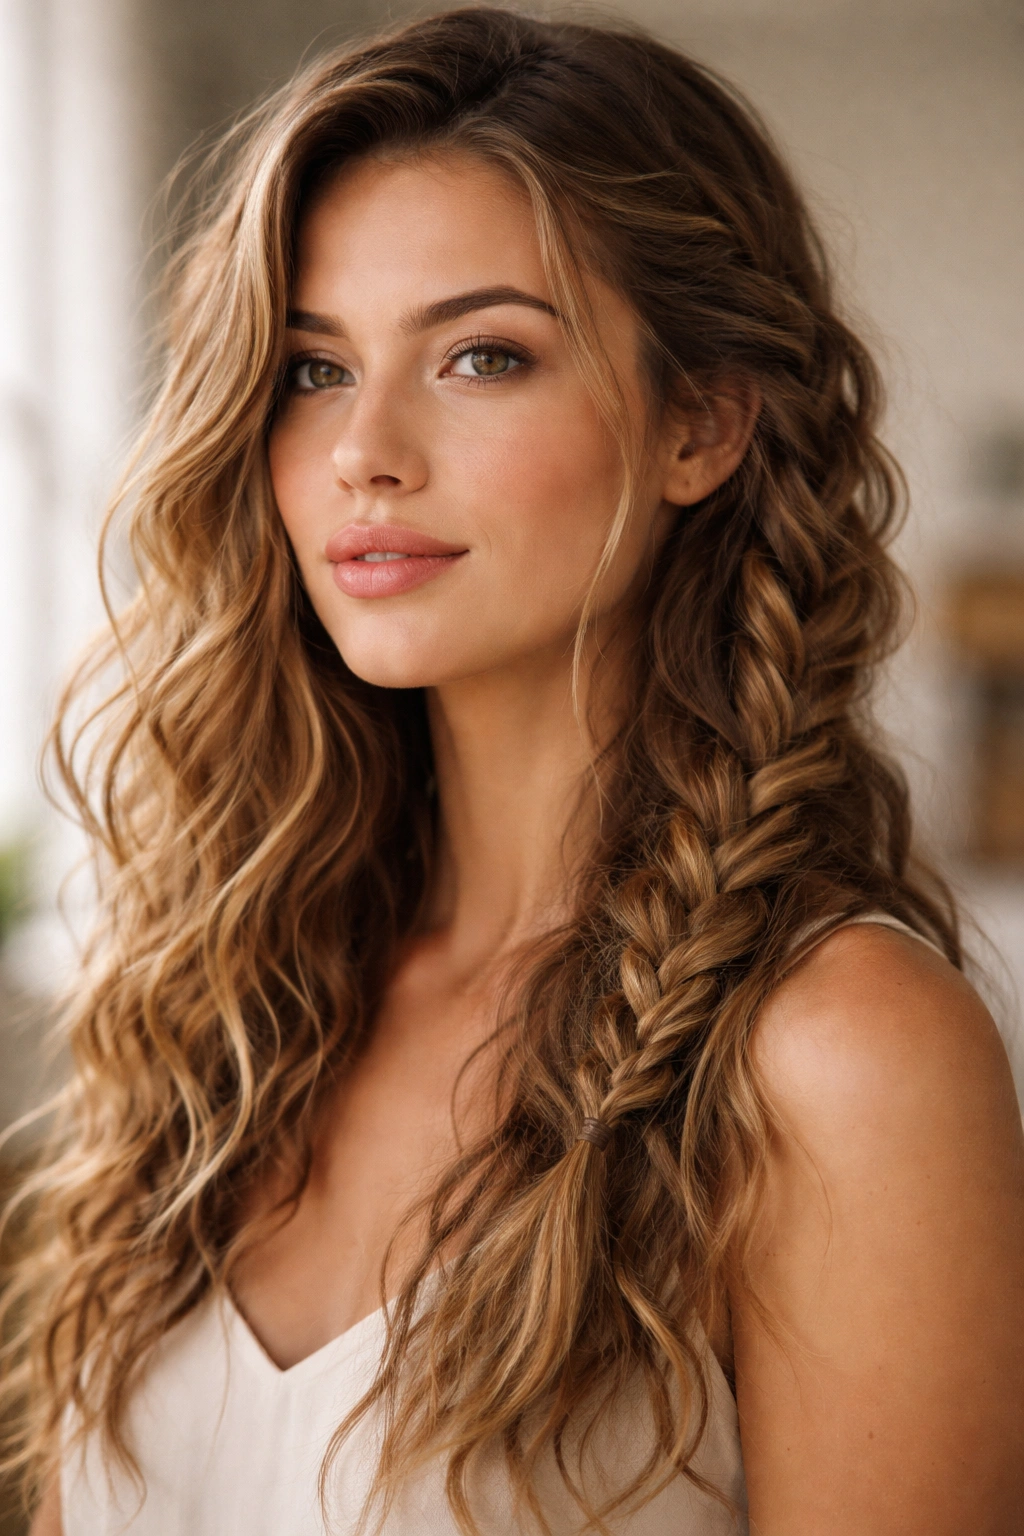
2. Wavy Fishtail Braid for Effortless Elegance
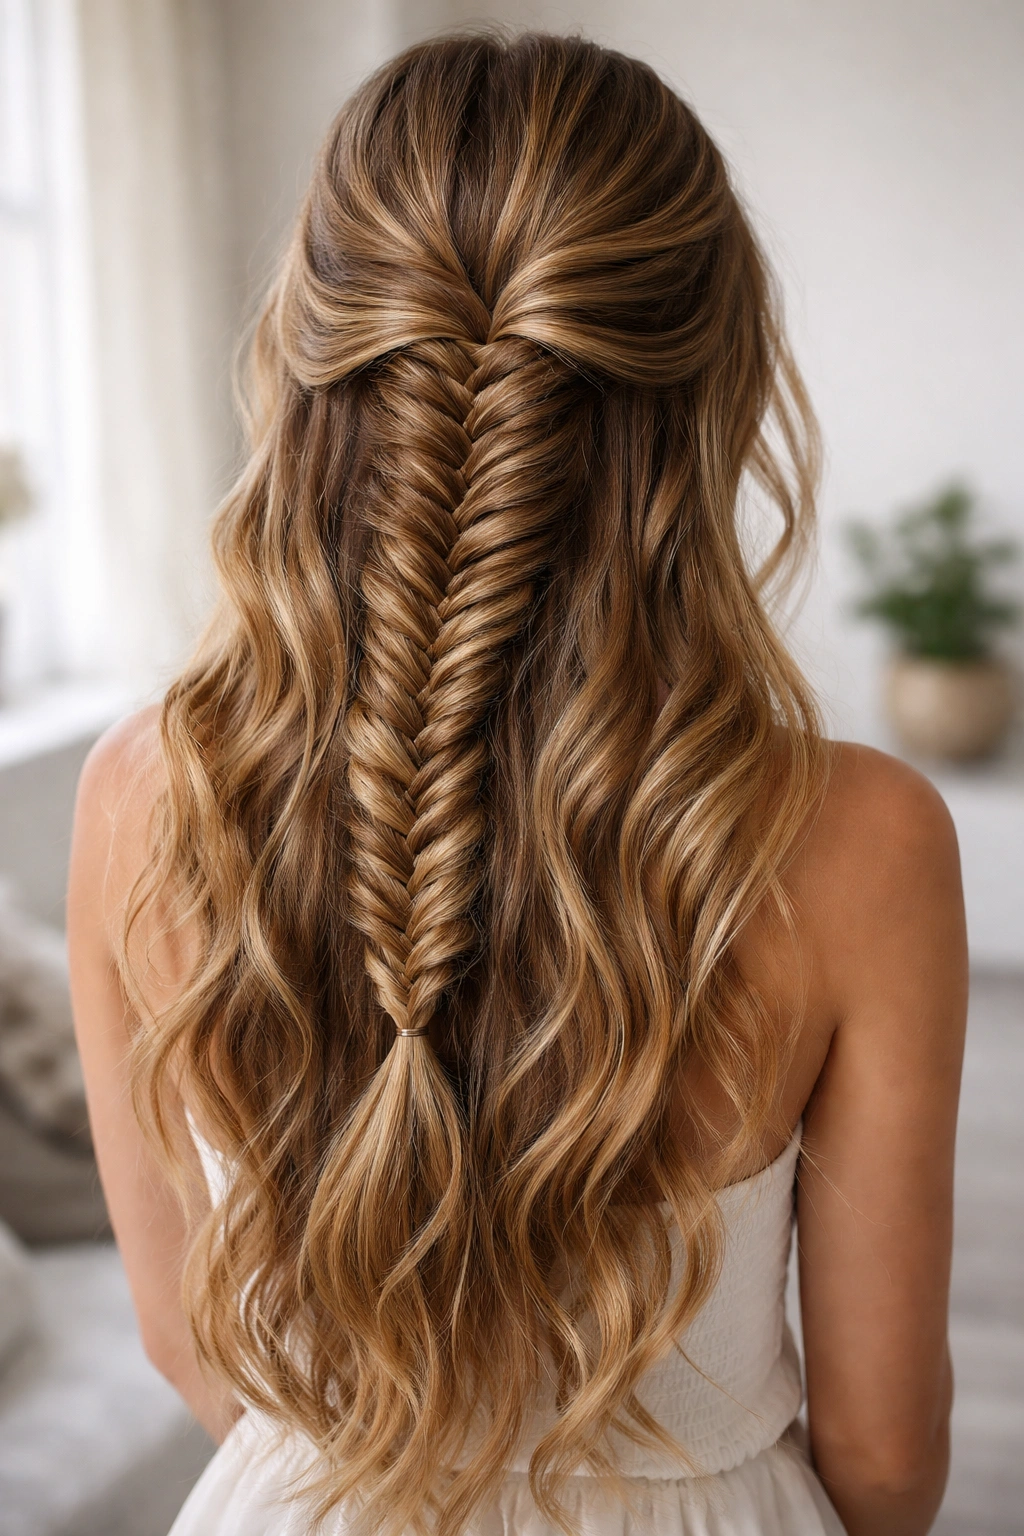
A fishtail braid uses only two sections instead of three, making it deceptively simple once you understand the pattern. You take a thin piece from the outside of one section, cross it over, and add it to the opposite section—creating an interlocking pattern that looks impossibly intricate.
Why It’s Ideal for Textured Hair
Fishtail braids disguise uneven texture beautifully because the interlocking sections naturally create visual interest and movement. Wavy hair fills in the gaps between sections, making the braid look fuller and more polished than it actually is. If your waves are slightly frizzy or undefined, a fishtail braid transforms that into part of the style rather than a problem.
Step-by-Step for Your Waves
Divide damp or dry hair into two equal sections at the nape of your neck. From the outer edge of the right section, pull a thin strand of hair and cross it over the top to add it to the left section. Repeat on the left side, pulling from the outer edge and adding to the right. The thinner your pulled strands, the more intricate your fishtail will look—but thicker strands work too if you prefer a looser, piecier style.
Styling Tip for Maximum Impact
Work the braid loosely from the start; don’t pull it tight and then try to loosen it. Fishtail braids already have an inherent delicate quality, and your waves enhance that. Once finished, you can gently tug sections outward to add volume and let your wave pattern show through.
3. Half-Up Twisted Braid for Subtle Sophistication
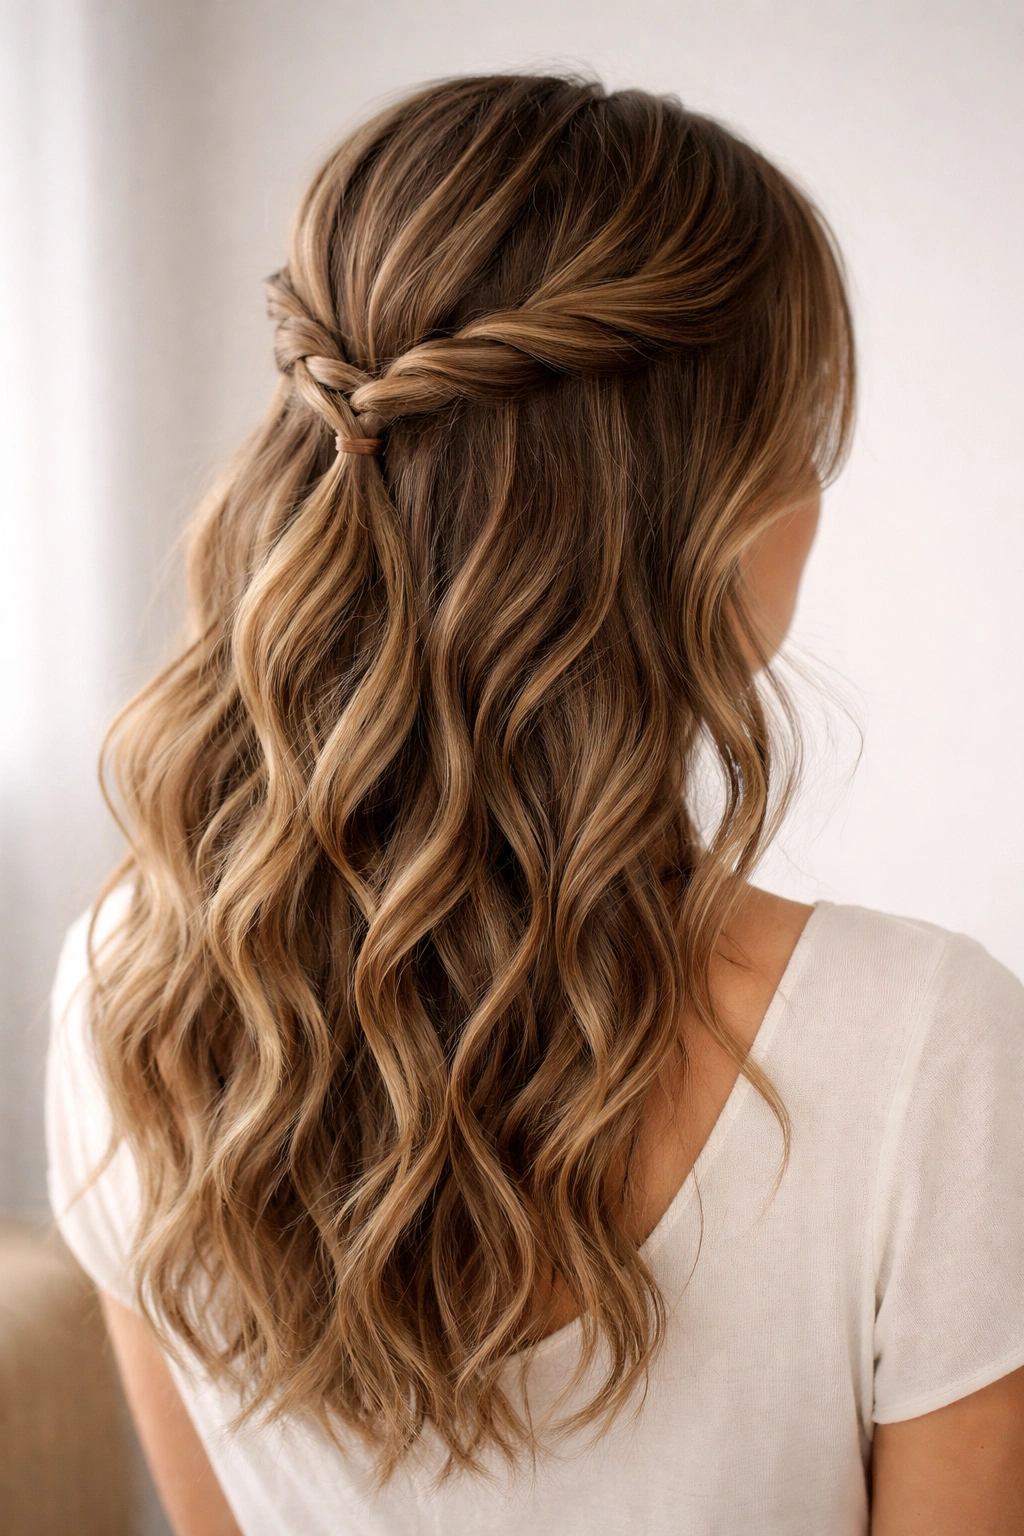
This style keeps hair partially down while pulling back just enough to frame your face, making it perfect for days when you want to be pulled-together but not fully styled. Instead of a traditional braid, you’re twisting sections of hair and combining them into one unified hold at the back of your head.
Why Twisted Styles Suit Wavy Texture
Twists are gentler on wavy hair than tight braids and create a completely different visual effect. As you twist, your natural waves add texture and prevent the twist from looking slick or severe. The resulting style reads as intentional and polished rather than too-done, which is exactly the vibe wavy hair excels at delivering.
How to Build a Twisted Half-Up
Take a section from one side of your head (roughly from temple to ear) and twist it loosely, incorporating small sections as you work toward the back of your head. Do the same from the other side. Once both twisted sections meet at the back, secure them together with a clear elastic or bobby pins. Leave the rest of your hair down—your waves will fall naturally and frame the twisted sections.
The Wave-Enhancing Detail
Because you’re not braiding tightly, this style actually encourages your waves to do their thing. The twisted sections act as a framework that shows off your natural texture while keeping hair off your face. This works beautifully on both second-day waves and freshly waved hair.
4. Side-Swept Romantic Braid for Date Night
A side-swept braid draped across one shoulder is genuinely one of the most flattering styles for wavy hair because it creates soft lines and movement. It’s the braid equivalent of effortlessly pretty, and wavy texture is your secret weapon for making it look natural rather than overly romantic or costume-y.
The Magic of Side-Swept on Waves
When a braid sits to the side, your waves have room to cascade around it and blend into it seamlessly. The braid becomes a detail within your overall wave pattern rather than the dominant style. This is why side-swept braids on wavy hair look so ethereal—the waves and braid are working together, not competing.
Creating a Side-Swept Braid
Start the braid at the base of one ear and work it down and slightly back, adding sections as you go. You’re not aiming for a tight, perfect line—a little looseness is actually the goal. As you braid, let hair fall slightly out of the sections before you add new hair; this creates irregular, piecier sections that meld beautifully with your waves.
Finishing Touch
Once you’ve braided as far as you want, secure with a small elastic and gently pull and loosen the braid to expand it. The texture from your waves will peek through and create this gorgeous, dimensional look that honestly reads like you’ve been styling your hair professionally for years.
5. Boxer Braids for Active Days and High Impact
Two Dutch braids running down either side of your head—also called reverse pigtail braids—are sporty, practical, and surprisingly chic when done on wavy hair. Instead of looking juvenile, boxer braids on textured hair read modern and intentional.
How Wavy Hair Transforms Boxer Braids
Straight-haired people often complain that boxer braids look too tight or severe. Not a problem with wavy hair. Your natural texture softens the whole look, prevents the braids from sitting too close to the scalp, and creates movement even when the braids themselves are secure. The waves act as natural fill that makes the braids look fuller and less harsh.
Technique for Even, Balanced Braids
Part your hair down the center from forehead to nape, creating two equal sections. Starting at the top of one section at the front hairline, begin a Dutch braid (remember: under, not over). Keep tension even as you work down—uneven tension creates braids that sit at different angles or look lopsided. Repeat on the other side with the same starting point and tension.
Making Them Work for Your Lifestyle
Boxer braids hold up incredibly well throughout the day, especially on wavy hair. Even if small pieces come loose, the waves fill in the gaps and it doesn’t look unfinished. They work for the gym, a casual day out, or even dressed up with a sleek top or blazer for a more intentional aesthetic.
6. Messy Rope Braid for Intentional Undone Texture
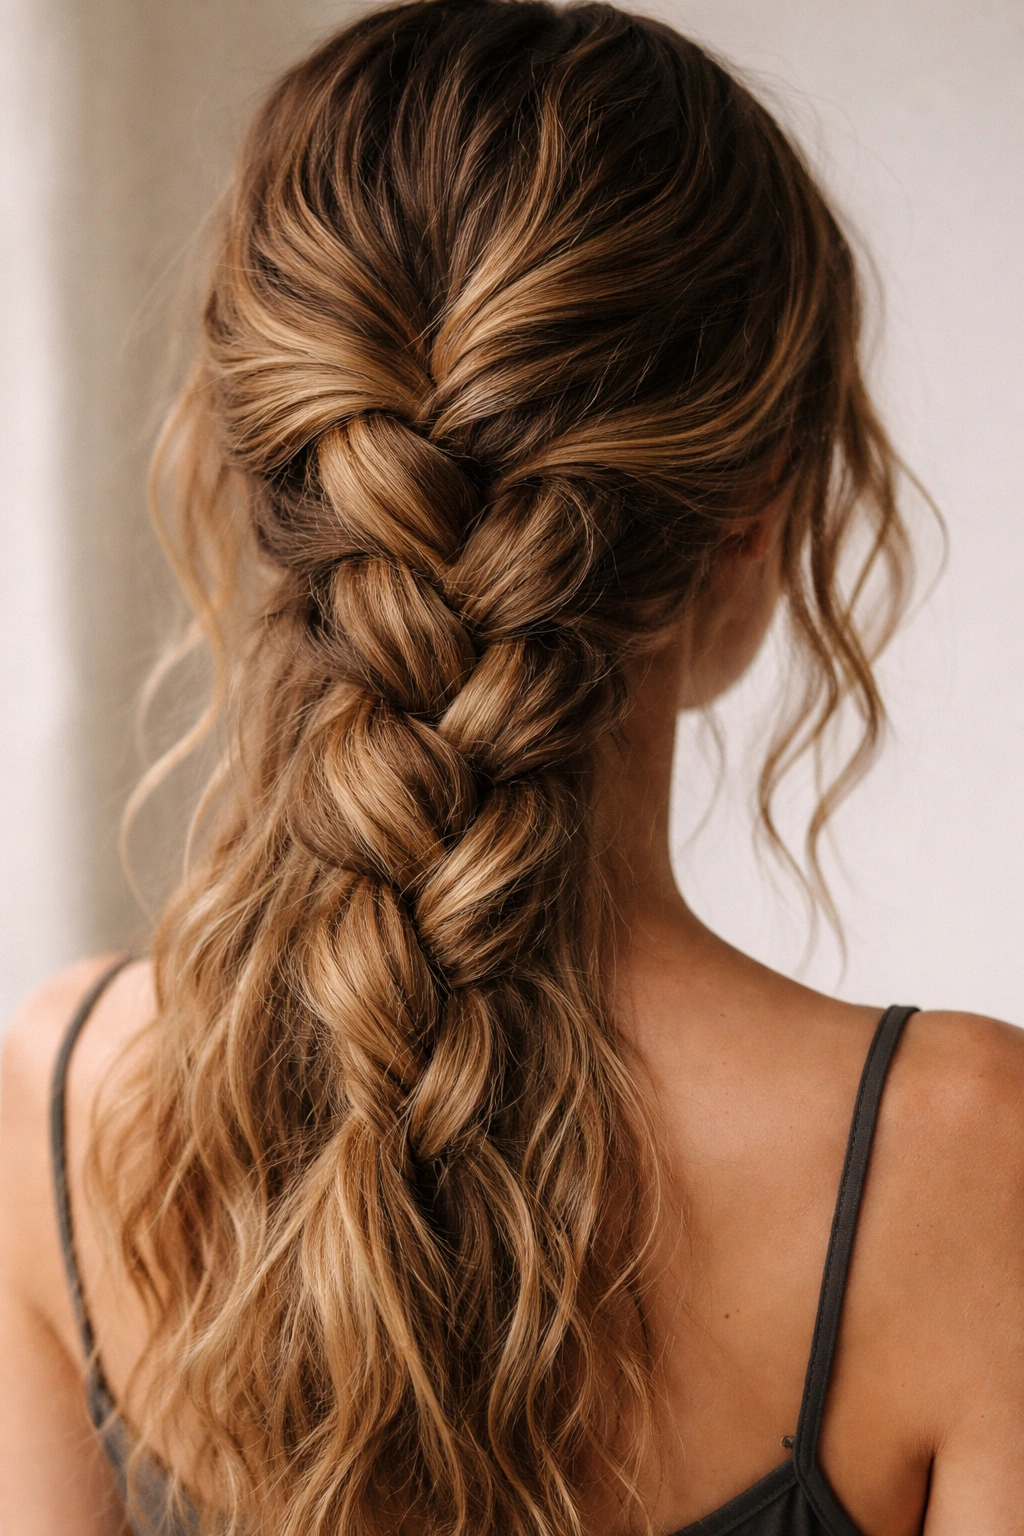
A rope braid uses only two sections that you twist around each other, creating a thick, chunky braid that reads way more textured and less polished than traditional braids. For wavy hair, this is genuinely perfect because “messy” and “textured” are basically the vibe you’re going for anyway.
Why Rope Braids Love Your Wave Pattern
Rope braids are inherently less neat than three-strand braids, which means they’re naturally suited to hair that has texture and movement. Your waves won’t be fighting against the braid structure; instead, they’ll be enhancing it. Small pieces slipping out? That’s not a mistake—that’s the style.
Building Your Rope Braid
Divide hair into two thick sections (much thicker than you would for a fishtail). Twist the right section clockwise, then twist the left section clockwise. Cross the right twisted section over the left, and repeat—keep twisting and crossing. Add small sections of new hair as you work down if you want, or keep it simple with just the two sections twisting around each other.
Embrace the Loose Texture
Once finished, gently pull sections outward to loosen and expand the braid. Your waves will do half the work for you, creating this gorgeous textured effect that looks styled but not fussy. Rope braids are genuinely one of the easiest “big impact” braids for wavy hair.
7. Crown Braid for Special Occasions and Everyday Elegance
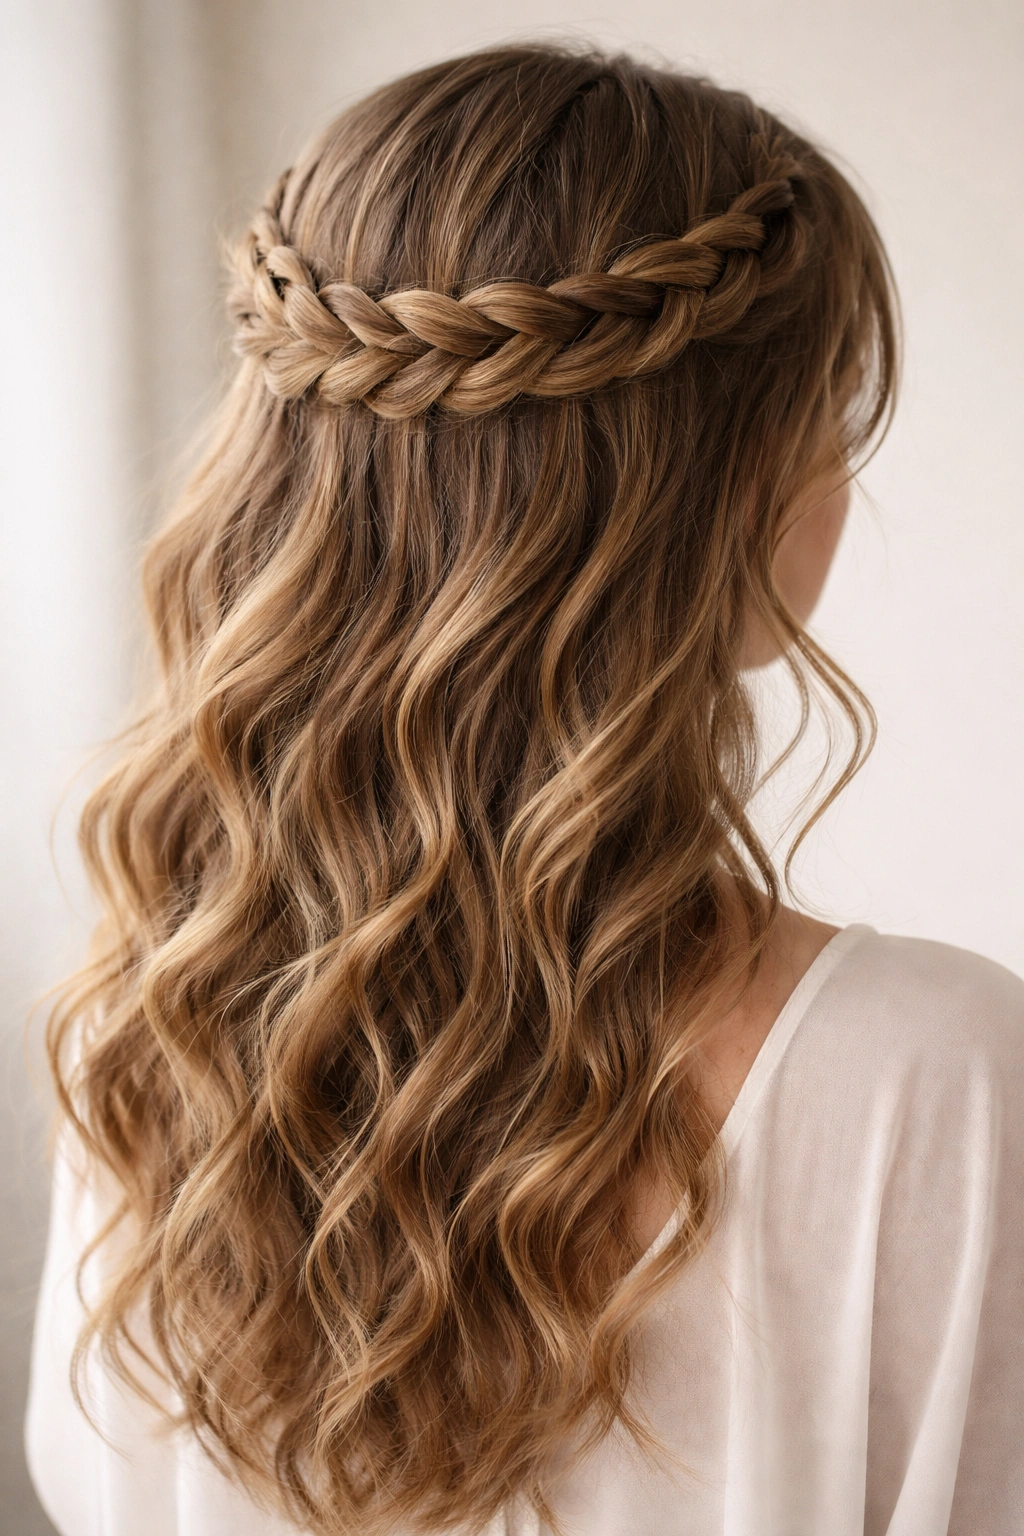
A crown braid wraps around the crown of your head, creating a halo effect that’s both romantic and practical. It’s formal enough for weddings and special events, but it also works beautifully as an everyday style that keeps hair off your face while showcasing your length.
The Crown Braid and Wavy Hair: A Perfect Match
Crown braids literally sit on top of your waves, following the natural contours of your head. Your waves fill in the interior of the braid, making it look fuller and more dimension-rich than it would on straight hair. The effect is almost like wearing a braided crown made of your own hair—genuinely stunning.
How to Create a Crown Braid
Start a Dutch braid (or French braid, if you prefer the raised effect) at one temple, working horizontally along the back of your head toward the opposite temple. Braid until you reach the other temple, then secure with bobby pins at that point. The braid should sit roughly along where a crown would sit—hence the name.
Styling Tips for Maximum Impact
Your waves are going to make this braid look ten times more romantic than it would on straight hair. If you want extra softness, gently loosen the braid by pulling sections outward before you secure it. The wave pattern will peek through, creating this ethereal, almost effortless-looking crown. Absolutely gorgeous for photos.
8. Bubble Braid with Waves for Playful Dimensionality
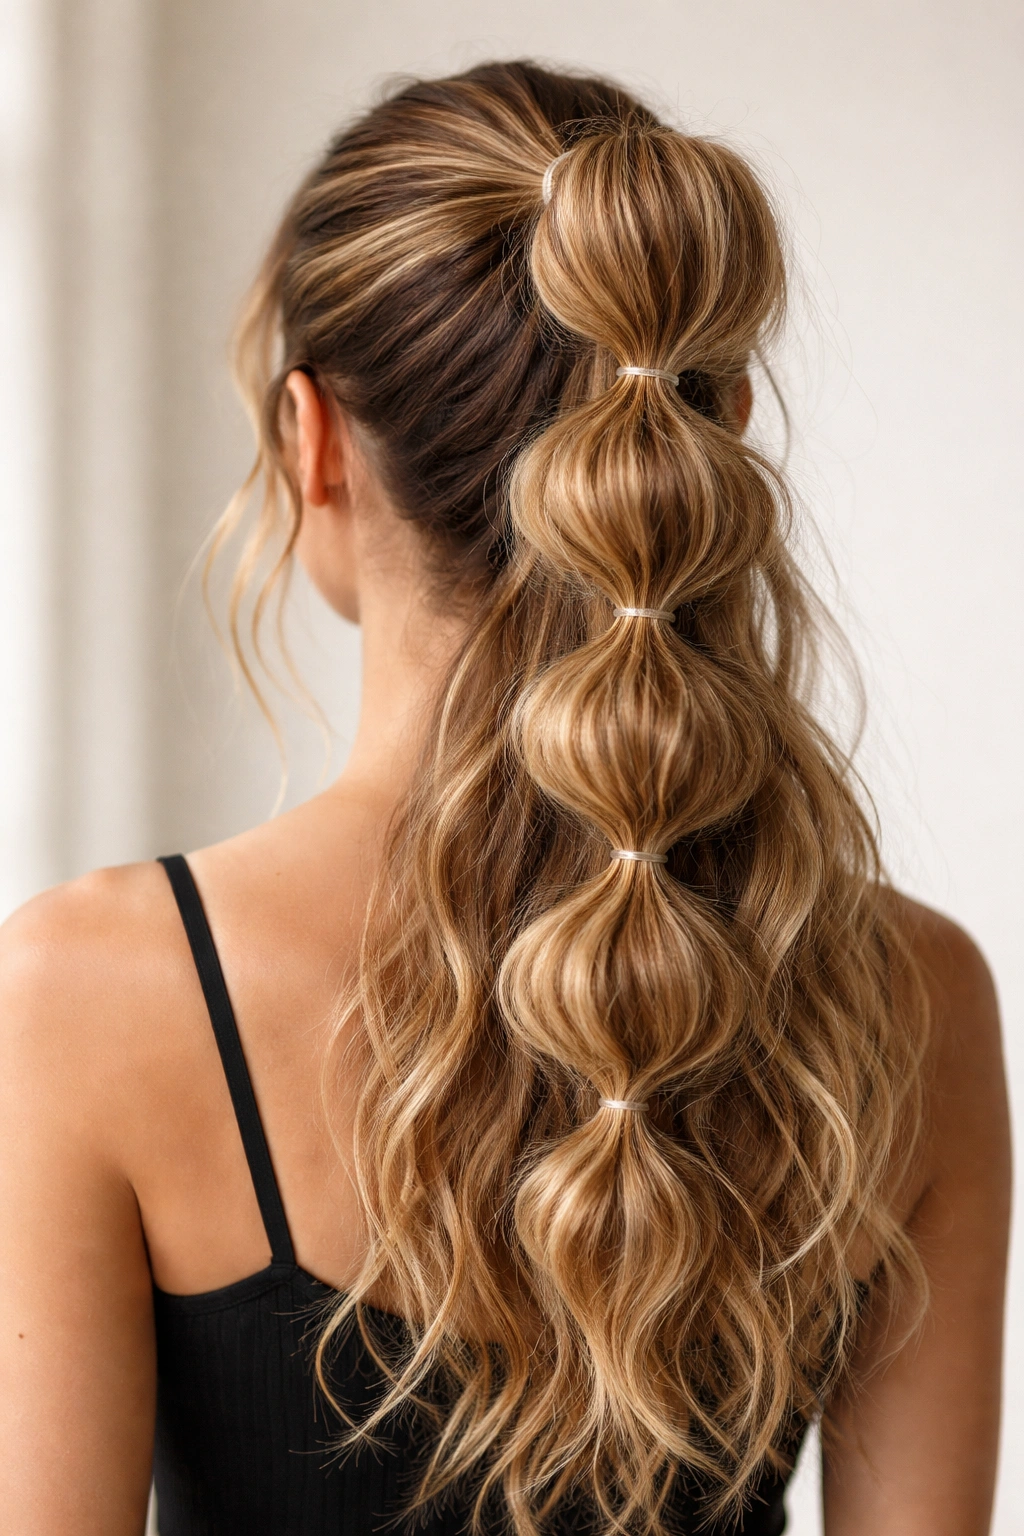
A bubble braid is less of a “braid” and more of a playful series of sectioned bubbles held together with elastics down the length of your ponytail. It’s fun, it’s textured, and it’s genuinely one of the easiest styles to execute on wavy hair because your texture does most of the heavy lifting.
Why Bubble Braids Shine on Textured Hair
The sections between elastics don’t need to be perfectly sleek because wavy texture is already interesting. Your waves fill in the spaces and create additional visual interest that straight-haired people have to work harder to achieve. The bubble effect is more pronounced and dimensional on wavy hair.
Creating Bubble Sections
Gather hair into a high ponytail and secure with an elastic. About an inch below the elastic, add another elastic to create your first “bubble.” Gently pull and tease the hair between the two elastics to create fullness and volume. Repeat this process down the length of the ponytail, spacing the bubbles either evenly or in varying sizes depending on the effect you want.
The Wavy Hair Texture Factor
Your waves mean that even if the bubbles aren’t perfectly uniform, they’ll still look intentional. The texture creates variation that reads as deliberate rather than messy. This is one of those styles where wavy hair’s natural imperfection actually becomes an asset.
9. Reverse French Braid for Subtle Sophistication
A reverse French braid (sometimes called a reverse braid or upside-down braid) works the opposite way from a standard French braid—you’re working underneath rather than over. It creates that beautiful raised effect and sits more prominently on the scalp, making it perfect for displaying texture.
How Wavy Hair Interacts with a Reverse Braid
Because the braid sits on top of your head rather than recessing into it, your wave pattern is displayed beautifully. The outer edges of the braid show off your texture, and the raised structure prevents the style from looking flat or one-dimensional. This is genuinely one of the best braid choices if showing off your wave pattern is part of your goal.
Executing a Reverse Braid
Start at the nape of your neck or the crown, depending on where you want the braid to begin. Take three sections and cross the right section under the middle, then the left under the new middle. As you work, add small sections of new hair to the outer sections. Work the braid upward toward the crown if you started at the nape, or downward toward the nape if you started at the crown.
The Textured Finish
Once complete, gently loosen the braid by pulling the outer edges outward. Your waves will fill in the expanded sections, creating this intricate, multi-dimensional look that honestly reads like you’ve been braiding for years. The raised structure means your wave pattern is literally showcased by the style.
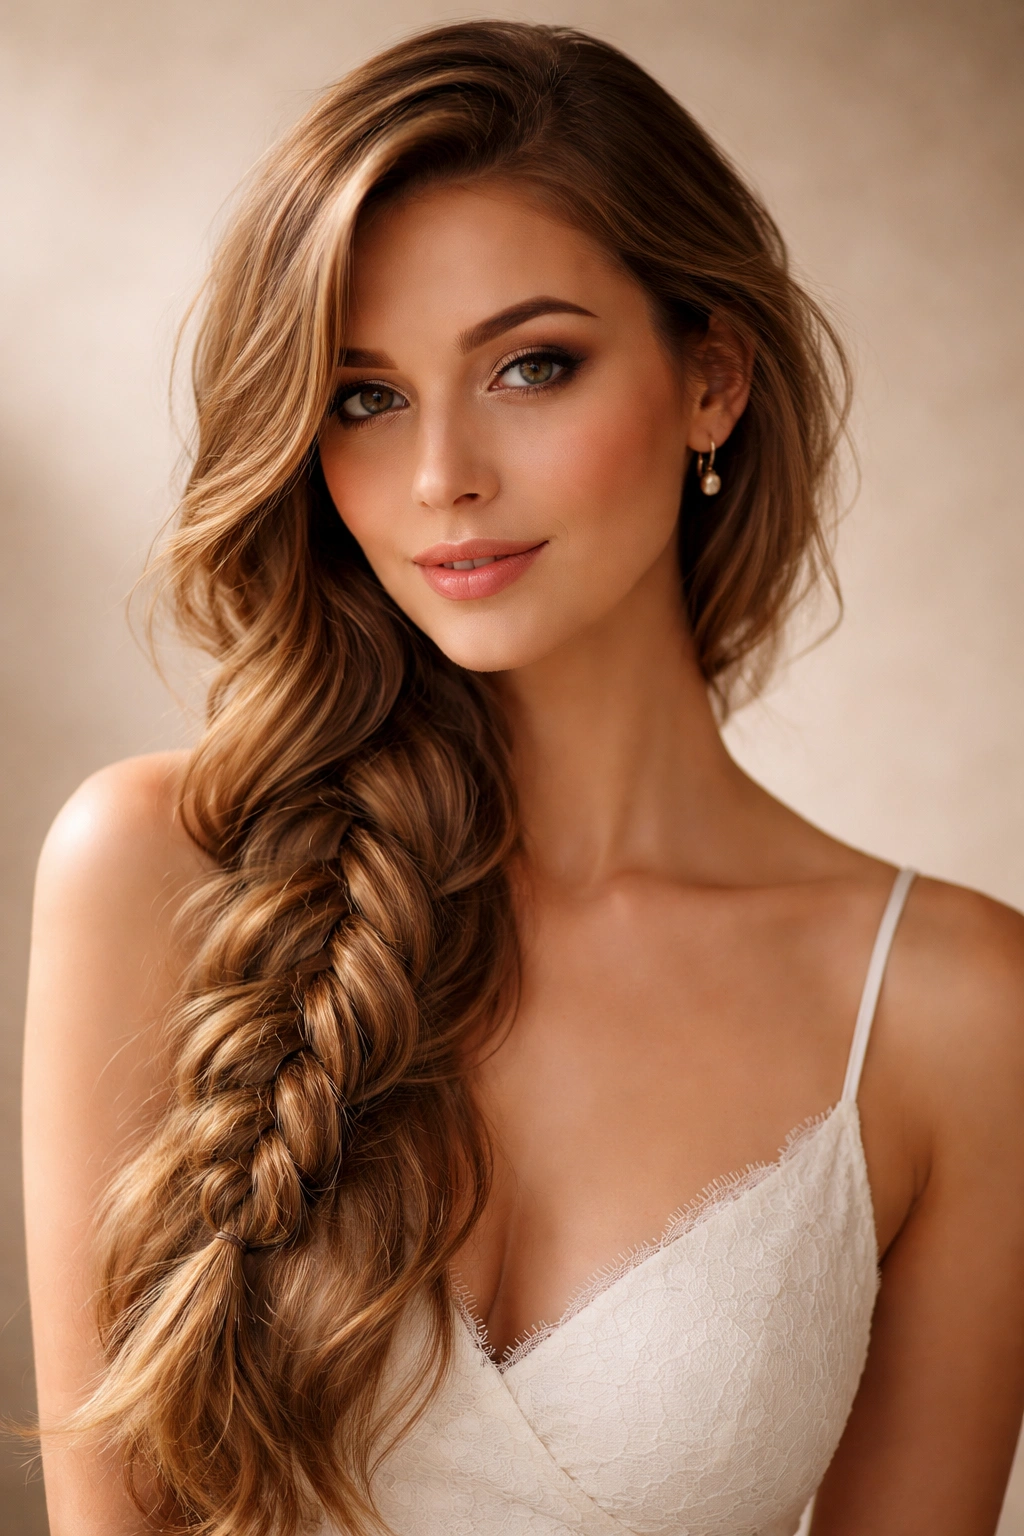
10. Loose Bohemian Braid for Laid-Back Confidence
A bohemian braid is intentionally loose, textured, and piecey—basically everything wavy hair naturally gravitates toward. It’s the anti-tight-braid, and it’s genuinely perfect for anyone who loves their natural wave pattern but wants to style it in a way that feels intentional rather than just “my hair is down.”
Why Bohemian Braids Were Made for Wavy Hair
This braid style’s entire philosophy is “imperfect texture is beautiful,” which is exactly what wavy hair is about. You’re not fighting your natural pattern; you’re celebrating it by incorporating it into the style. Pieces falling out isn’t a problem—it’s part of the aesthetic.
Creating a Bohemian Braid
Work slightly loose sections right from the start, incorporating small pieces as you braid down one side of your head or the center. Don’t aim for neatness; aim for a relaxed, gently textured strand. Once you reach the end, secure with an elastic and then gently pull sections outward to expand and loosen the braid significantly.
The Styling Mindset
With bohemian braids, you’re not trying to look neat or pristine. You’re trying to look like you woke up with intentional waves and casually gathered them into something pretty without thinking too hard about it. Your natural wavy texture is the whole point. This style genuinely rewards the loose, relaxed approach.
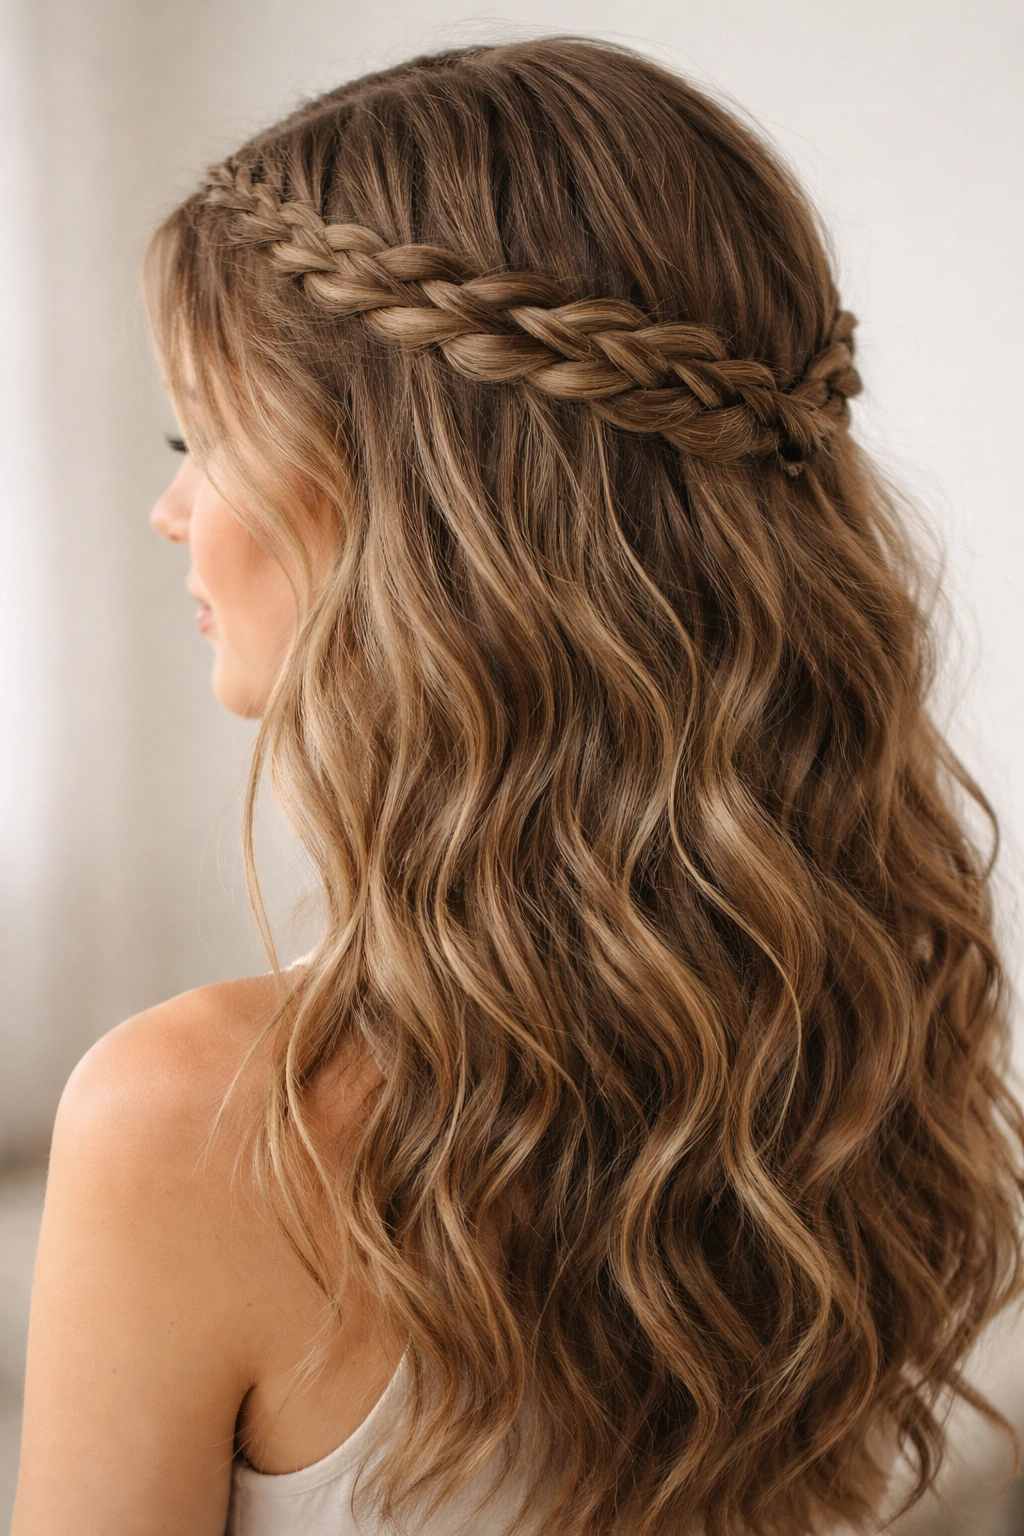
11. Waterfall Braid for Cascading Waves and Romance
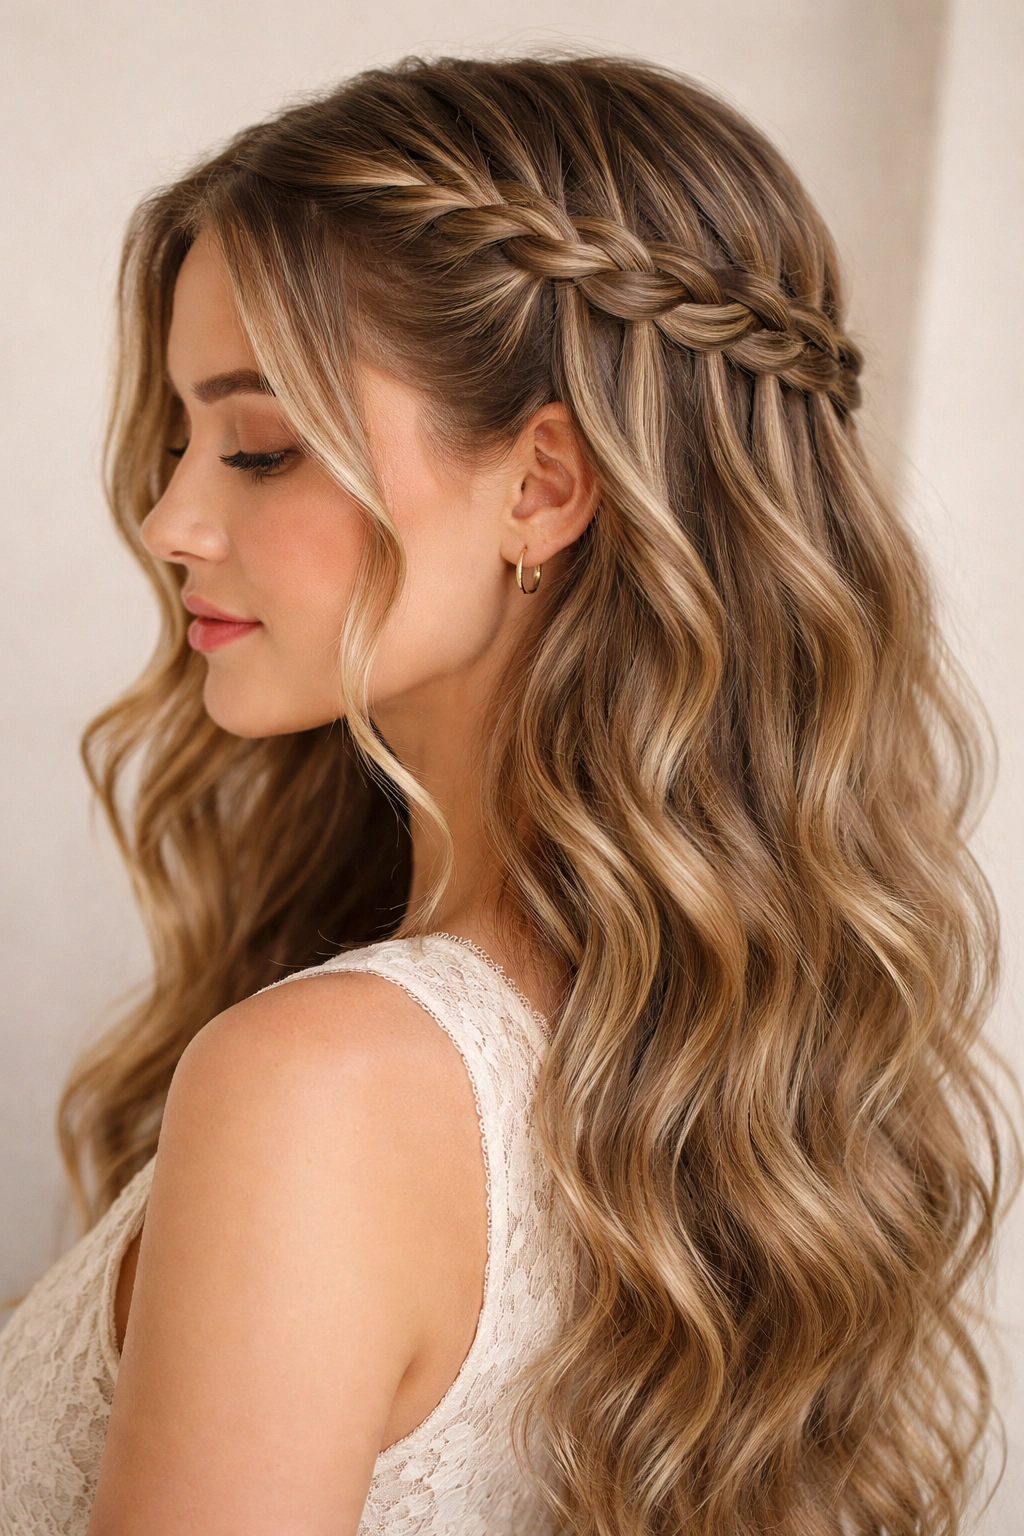
A waterfall braid is a French braid variation where you release sections of hair as you braid, creating the effect of water cascading down the side of your head. It’s delicate, feminine, and absolutely stunning on wavy hair because your waves literally complete the waterfall effect.
How Waves Complete the Waterfall Aesthetic
The whole point of a waterfall braid is creating cascading texture. Wavy hair does this organically. As you release sections, they fall in soft waves rather than straight pieces, creating this ethereal, romantic effect that reads like intentional styling rather than a section escaping the braid. Your wave pattern is basically the visual payoff of the entire style.
Building a Waterfall Braid
Start a French braid at the temple, working diagonally toward the back of your head. As you add sections, instead of incorporating the bottom section back into the braid, release it to cascade down. Pick up a new piece of hair from above to incorporate into the braid instead. This creates horizontal lines of released hair that fall in waves.
Making It Work with Your Texture
The beauty of a waterfall braid on wavy hair is that the released sections naturally fall in soft waves without any additional styling. You don’t need to curl them or wave them separately—your natural texture handles it. The braid becomes this delicate detail while the waves are the show-stealing element.
12. Double Lace Braids for Statement-Making Definition
Double lace braids (also called double crown braids) are two braids that work their way around the perimeter of your head, creating an intricate, almost crown-like pattern. The “lace” effect comes from the delicate appearance when braids are done loosely, with small sections incorporated.
The Power of Double Lace on Textured Hair
Two braids working in tandem create more visual interest than one, and when you work with small sections (creating that “lace” effect), your wavy texture shows through beautifully between the braided sections. The style looks intricate without being overwhelming, and your waves enhance the delicate quality.
How to Create Double Lace Braids
Create a deep side part and start a loose French braid from one temple, working along the back toward the opposite side. Use small sections and keep the braid loose so gaps show your wave pattern. Secure at the opposite temple. Repeat on the other side, creating a second braid that mirrors the first. The two braids create a frame around your face and the back of your head.
The Double-Effect Payoff
Working two braids simultaneously means you’re creating visual balance and symmetry that really showcases your wave pattern. The loose, lace-like sections between the braids highlight your texture, while the braids themselves keep everything pulled back in an intentional way. This is one of those styles that looks more complicated than it actually is.
Final Thoughts
Braiding wavy hair isn’t about fighting your natural texture or trying to achieve the same effect as straight-haired stylists do. It’s about working with your waves, using them as the foundation that makes braids look fuller, more textured, and honestly more interesting than they would on any other hair type. Your waves are doing half the styling work for you—the braid is just the framework that shows them off.
The common thread running through all of these styles is looseness and intentional texture. Tight, perfect braids often look out of place on wavy hair because they fight against your natural pattern. Loose, slightly textured braids feel like a natural extension of who you are and how your hair naturally behaves. Once you lean into that philosophy instead of against it, you’ll find that braiding your wavy hair becomes genuinely enjoyable rather than frustrating.
Start with whichever of these feels most appealing to your lifestyle and hair routine. If you’re always on the go, boxer braids or rope braids are your answer. If you love soft, romantic vibes, side-swept or waterfall braids will become your go-to. If you want to showcase maximum texture and dimension, Dutch or reverse braids will deliver. Your wavy hair is already doing the heavy lifting—these styles just give it structure and intention. That’s genuinely the secret that most hair tutorials never mention.