Wavy hair has this wonderful natural texture that’s honestly perfect for updos — it holds styles beautifully without needing as much product or effort as straighter hair types. The thing is, a lot of updo tutorials are designed for pin-straight or curly hair, which means you end up watching someone do something that just doesn’t translate to your waves. You need updos that actually work with your texture, not against it, and that don’t require an hour of prep or styling products that leave your hair feeling crunchy.
If you’ve got long wavy hair and you’re tired of wearing it down, or you need something quick for work but still want to look put-together, these eleven updos are game-changers. Each one is designed to showcase your natural waves rather than fight them, and most of them take fewer than ten minutes once you get the technique down. You’ll find everything here — from romantic braided styles to practical everyday buns to elegant options for when you want to dress things up. The best part? Many of these actually look better slightly undone and a little textured, which is exactly what wavy hair does naturally.
1. The Twisted Crown Bun
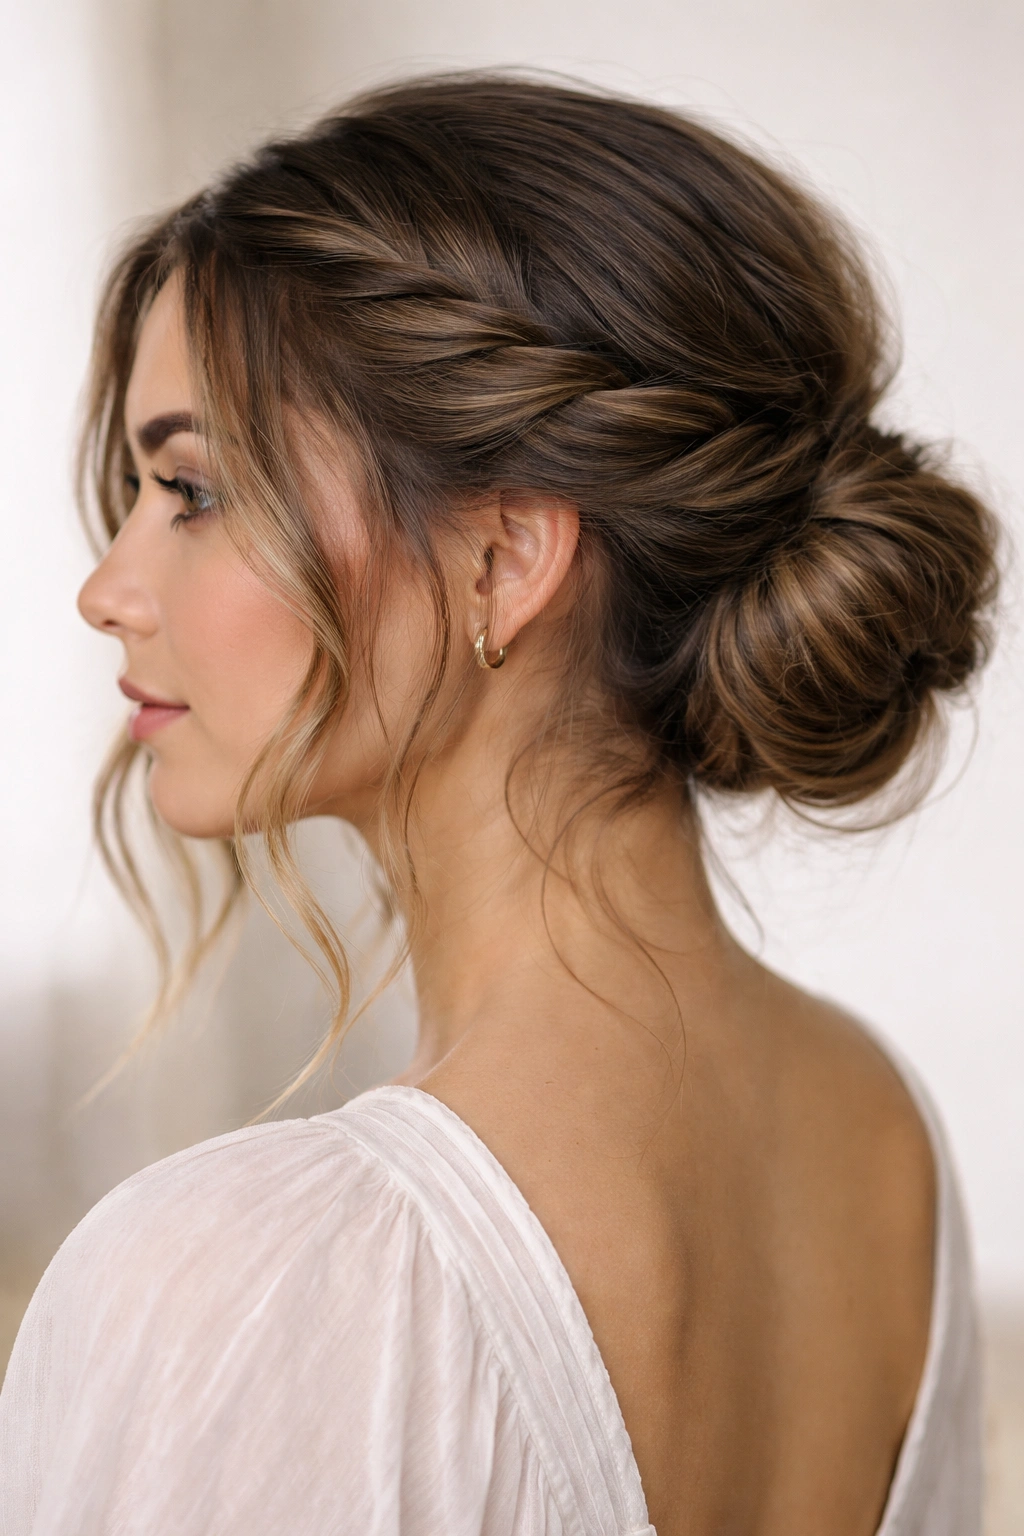
This style works beautifully on wavy hair because it uses twists instead of braids, which means your waves stay visible and add to the overall texture and movement. The twisted crown frames your face while the bun sits low at the back, creating an effortless look that somehow feels both casual and polished at the same time.
Why It’s Perfect for Wavy Hair
Twists are more forgiving than braids when you’re working with waves — your texture won’t look patchy or uneven in the twisted sections the way it sometimes does in braids. The wavy pieces frame your face naturally, and the low bun allows the bulk of your waves to maintain their shape. This style works whether your waves are loose or more defined, making it incredibly versatile.
How to Create the Twisted Crown Bun
- Start with hair that’s been air-dried or gently dried with a diffuser to maintain your natural wave pattern
- Take a small section from one side of your head (about an inch wide) at temple height
- Twist that section loosely toward the back of your head, allowing waves to stay visibly textured within the twist
- Secure with bobby pins as you go, tucking and wrapping the twist along your crown
- Repeat on the opposite side, creating a symmetrical crown effect
- Gather the remaining hair into a low ponytail at the nape of your neck
- Twist the ponytail loosely and wrap it around itself to form a bun
- Secure with bobby pins and gently pull pieces loose for texture
Pro tip: Don’t twist too tightly — wavy hair looks best when there’s some dimension and visible texture in the twists. Tight twists can actually flatten your waves and make the style look less interesting.
2. The Loose Fishtail Updo
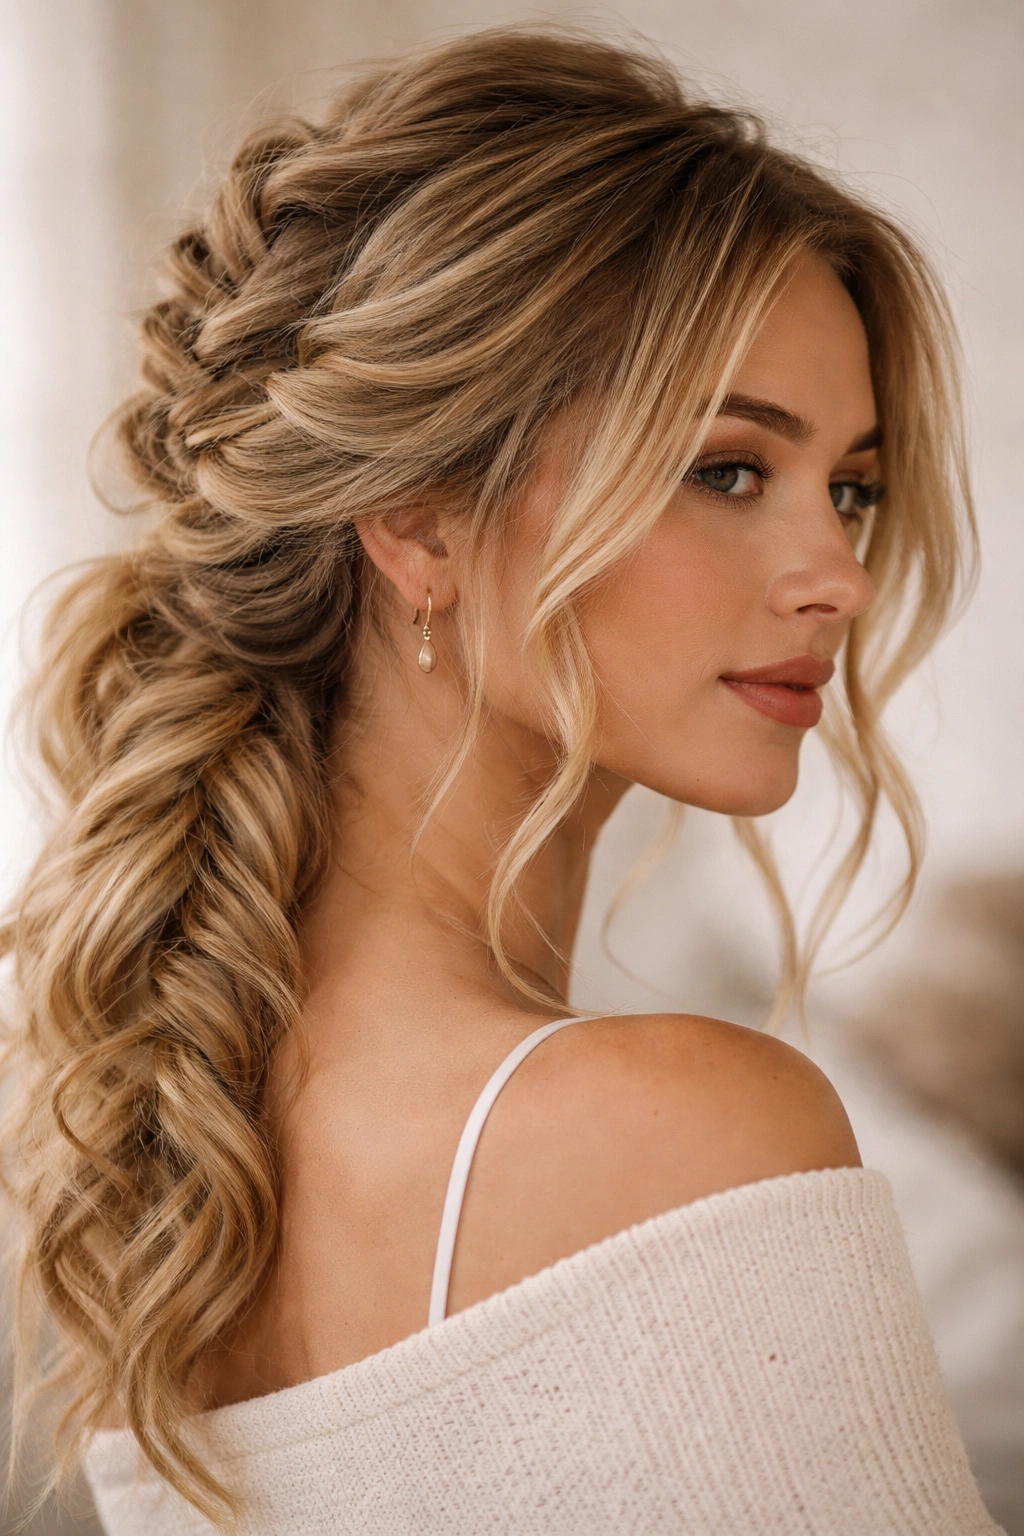
A fishtail braid has this inherent texture that looks absolutely stunning with wavy hair, especially when you deliberately make it loose and undone. This updo takes a traditional fishtail braid and transforms it into something romantic and modern by keeping it intentionally relaxed and letting pieces fall softly around your face.
Why Fishtails Work Better Than Traditional Braids
The weaving pattern of a fishtail braid actually complements waves better than a regular three-strand braid because there’s more space and movement built into the structure. When you loosen a fishtail braid, those waves peek through the braid in a way that looks intentional and beautiful. The braid naturally appears more textured because of how the strands layer.
Step-by-Step Loose Fishtail Updo
- Gather your hair into a low side ponytail — not centered at the nape, but pulled to one side about two inches from center
- Divide the ponytail into two sections
- Take a thin piece from the outside of the right section and cross it over to the left section
- Take a thin piece from the outside of the left section and cross it to the right (this is the fishtail pattern)
- Continue until you’ve braided about two-thirds of the ponytail length
- Pause and gently pull the edges of the braid to loosen it and add dimension
- Continue braiding the remaining length, then pull and loosen again
- Wrap the braid around itself to form a low bun at the back of your head
- Secure with bobby pins, leaving a few wispy pieces loose around your face
Worth knowing: Start your fishtail lower than you think you need to — as you wrap it into a bun, it naturally climbs higher on your head.
3. The Braided Wrap-Around
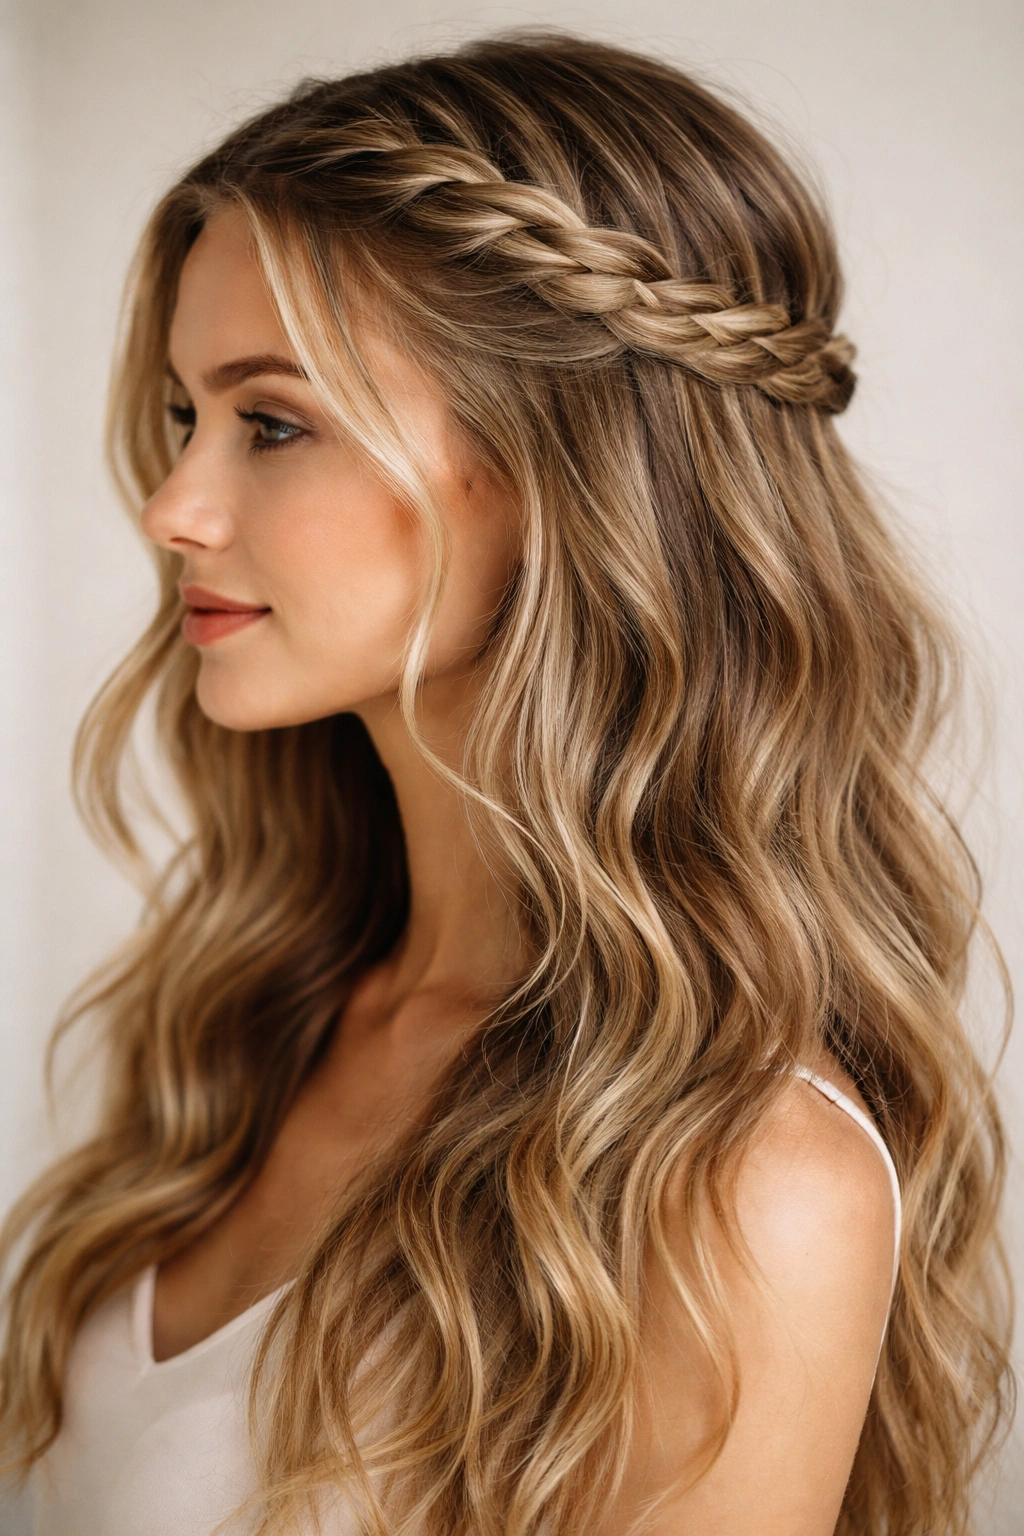
This style literally wraps a single Dutch braid around your head like a crown, with the rest of your hair left down in loose waves. It’s the perfect option when you want your hair off your face and neck without committing to a full updo, and it looks significantly more interesting than a simple headband or hair clip.
What Makes This Style Different
Instead of gathering all your hair up, you’re anchoring just enough of it with a braid to create structure, while the bulk of your wavy hair stays down and free. This hybrid approach is ideal for wavy hair because you get the styling benefit without flattening all your texture. The braid naturally sits on top of your waves, creating dimension and visual interest.
Creating the Wrap-Around Braid
- Start with a Dutch braid (reverse three-strand braid) at one temple, beginning about two inches back from your hairline
- Braid along the side of your head, gradually incorporating more hair as you move toward the back
- Continue the braid to the opposite temple, creating an arc across the back of your head
- Finish the braid and secure the end with a small elastic
- Tuck the braided end behind your ear on the opposite side and secure with bobby pins
- Let all the remaining hair cascade down in your natural waves
- Gently pull the braid slightly to loosen it and add texture
Insider note: If your braid feels too tight, run a bobby pin or comb under the braid edges and gently pull outward to create a softer, more dimensional look that complements your waves.
4. The Half-Up Twisted Knot
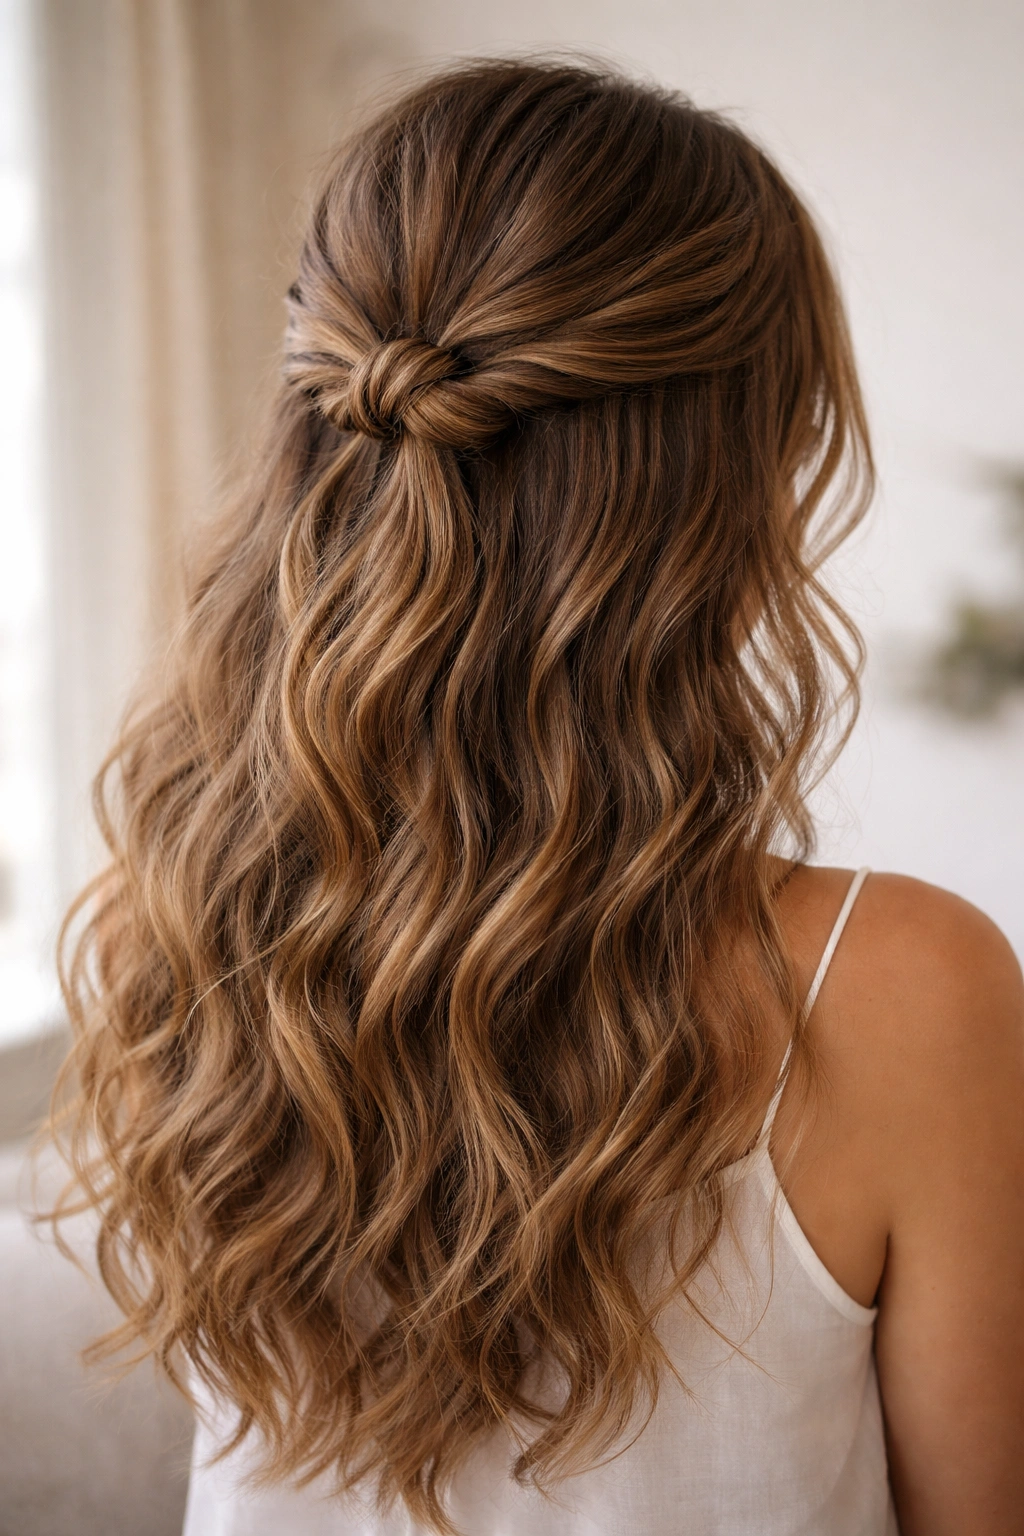
This is one of the quickest updos you can do with long wavy hair, and it looks intentionally casual in the best possible way. You’re creating a knotted shape with the top section of your hair while leaving the bottom half down — perfect for when you want your hair mostly out of the way but don’t want a full updo.
Why Knots Beat Twists and Braids for Speed
A twisted knot is literally just two twisted sections tied together, which means there’s almost no learning curve and no risk of an uneven braid. The knot naturally sits higher on your head than a traditional bun, which works beautifully with long wavy hair because it keeps the weight at your crown rather than bunching everything at the nape of your neck.
How to Tie the Half-Up Twisted Knot
- Section off the top quarter of your hair from ear to ear across the crown
- Divide this section into two equal pieces
- Twist the right section loosely, going from crown toward the back
- Twist the left section loosely in the same direction
- Bring the two twists together at the back center of your head
- Tie them together in a knot — treat them like you’re tying the end of two ropes
- Secure the knot with bobby pins at the base
- Gently pull apart the knot and twists to loosen and add texture
- Let the bottom half of your hair fall in waves below the knot
Quick fact: This style works best when you don’t wet your hair before doing it — slightly damp or air-dried waves hold the knot better than soaking wet hair.
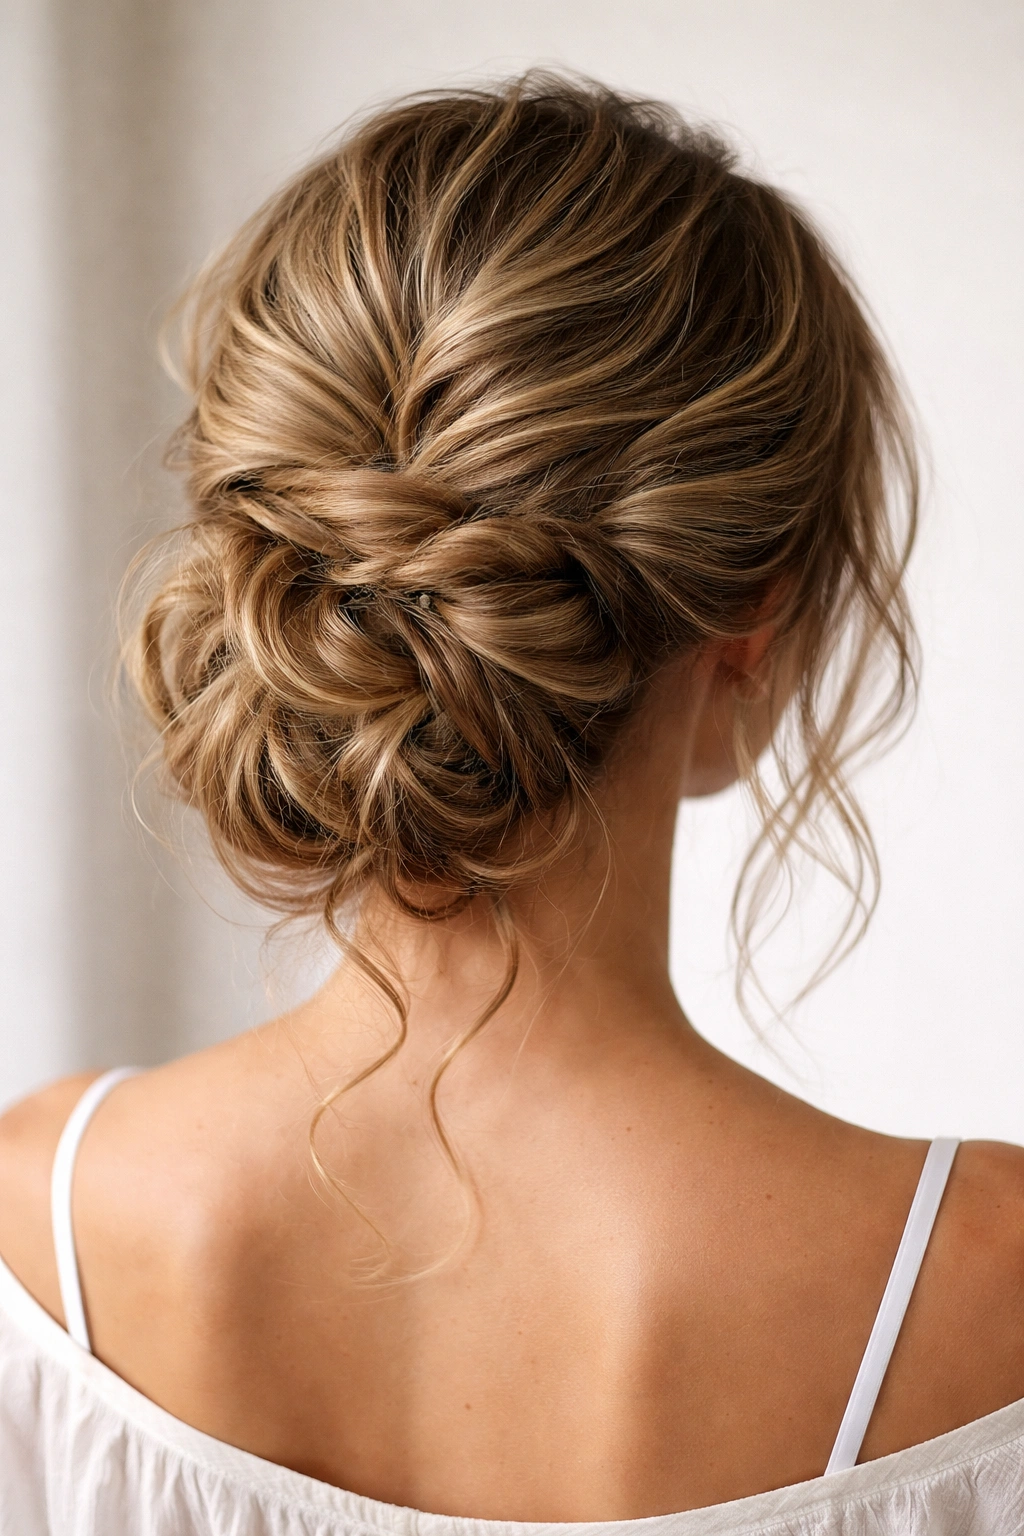
5. The Low Messy Bun with Face-Framing Waves
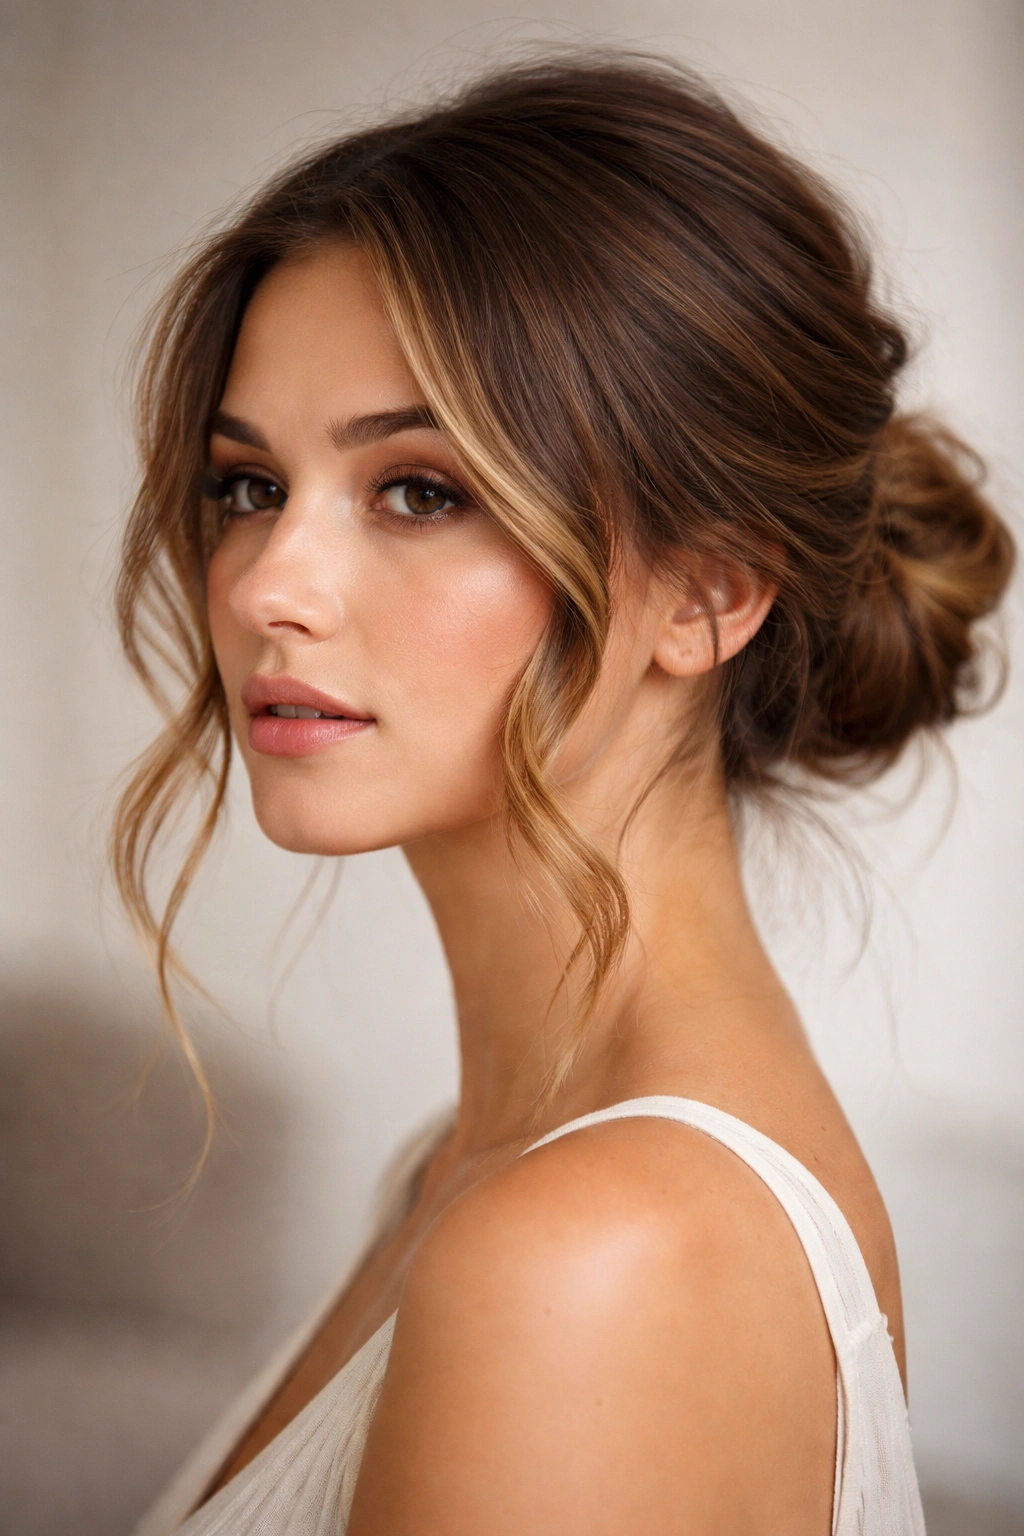
This is the classic “I just threw my hair up” bun, except with wavy hair, when you do it intentionally, it looks polished and editorial rather than actually messy. The key is gathering your hair low enough that your face-framing waves stay visibly textured, and being deliberate about which pieces you leave loose around your face.
Why Messy Buns Actually Suit Wavy Hair Best
Straight hair often looks genuinely unkempt in a loose bun because there’s no natural texture to create intentional volume. With wavy hair, that same loose approach looks purposefully relaxed and beautiful because your texture provides visual interest. The waves around your face read as intentional styling rather than pieces you forgot to gather up.
Building the Low Messy Bun
- Start with hair that’s been dried for several hours so there’s some texture and hold built in
- Flip your head upside down and gather hair into a low ponytail at the nape of your neck
- Flip back upright and create the ponytail while your head is upright — this flipped gather creates natural volume
- Twist the ponytail loosely or create a loose braid with it
- Wrap it around itself to form a bun and secure with bobby pins
- Leave several pieces completely loose around your face and temples
- Pull and tease the bun gently so pieces stick out rather than staying smooth and tight
- Use bobby pins to anchor the bun but let the overall shape stay relaxed and organic
Pro tip: Spray the finished bun lightly with texture spray (not hairspray) before loosening it — this helps pieces stay where you position them rather than gravity pulling everything straight down.
6. The Double Twisted Bun
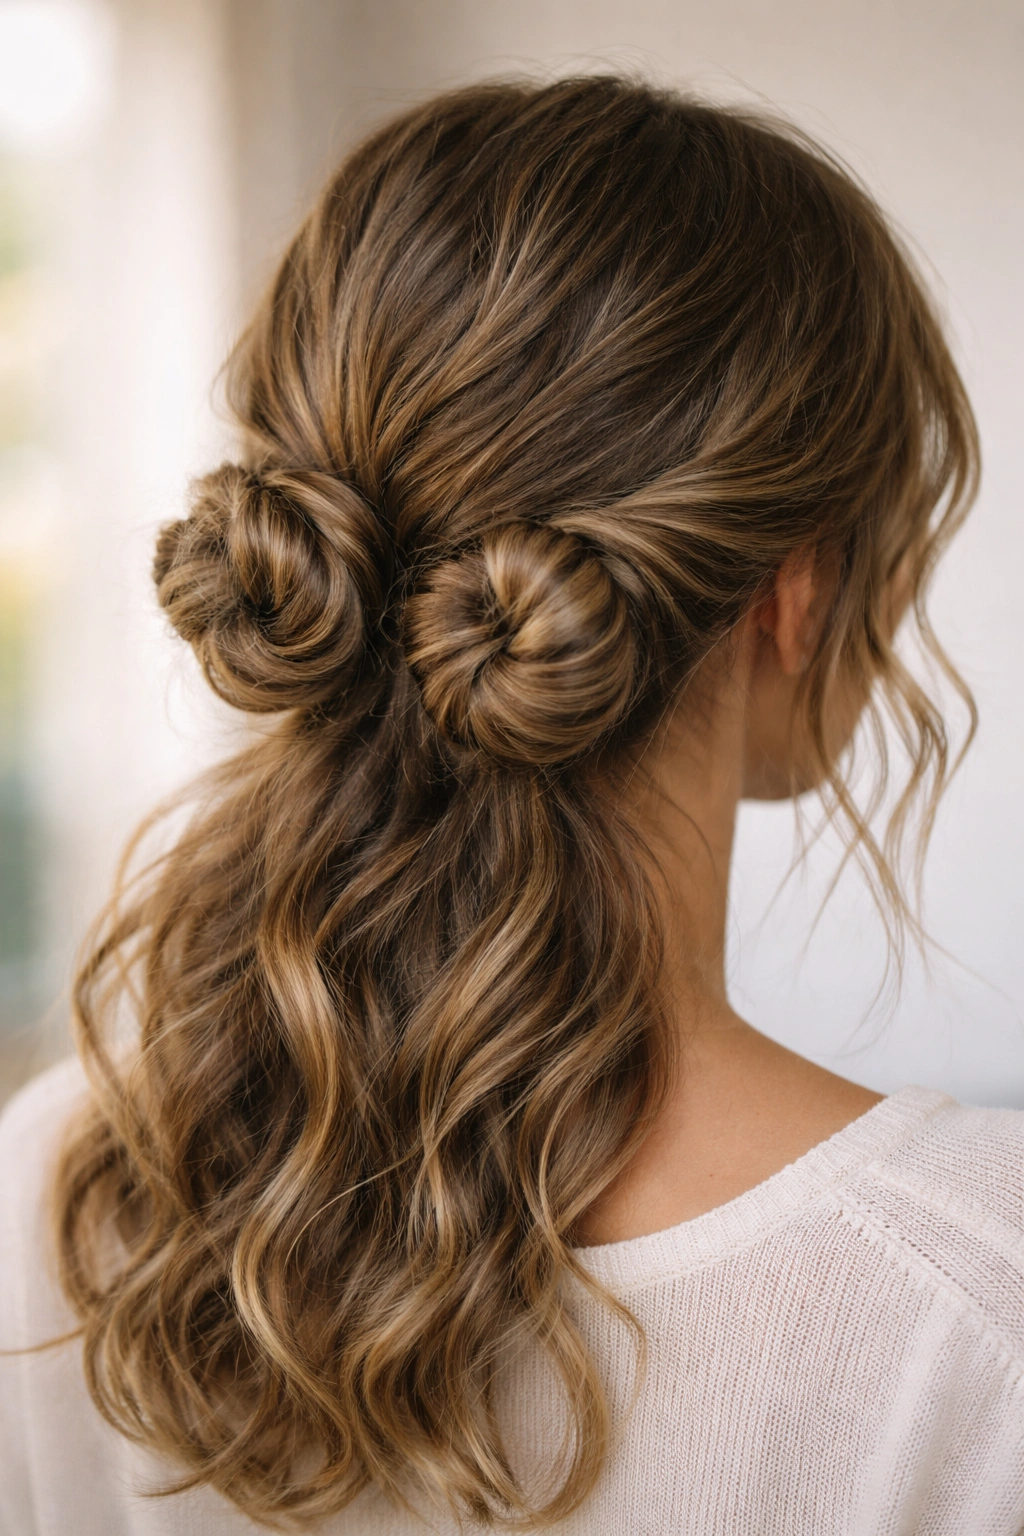
Instead of one bun, you’re creating two smaller twisted buns positioned on either side of the back of your head. This style has a playful, modern feel while still being appropriate for work or any situation where you need your hair fully contained. It’s also easier to execute than it sounds, and the symmetry actually makes it look more polished than a single bun.
The Visual Impact of Two Buns
Two buns create more surface area and visual interest than one large bun, which means your wavy texture shows more prominently. The twin-bun style frames the back of your head nicely and actually photographs better than a single centered bun. Because each bun is smaller, they’re easier to keep neat while still allowing some loose, textured waves to show.
Creating the Double Twisted Bun
- Divide your hair down the center back of your head with a part
- Create two separate low ponytails — one on each side of the nape of your neck
- Take the right ponytail and twist it loosely from base to end
- Wrap the twist around itself to form a small bun and secure with bobby pins
- Repeat on the left side, twisting and wrapping to match the right side
- Loosen both buns by gently pulling the twisted sections outward
- Even out the size and position of both buns so they look symmetrical
- Leave a few small pieces loose around your face if desired
Worth knowing: The key to making two buns look intentional rather than accidental is placing them at the exact same height and making them roughly the same size. Take a moment to adjust before finalizing with pins.
7. The Rope Braid Updo
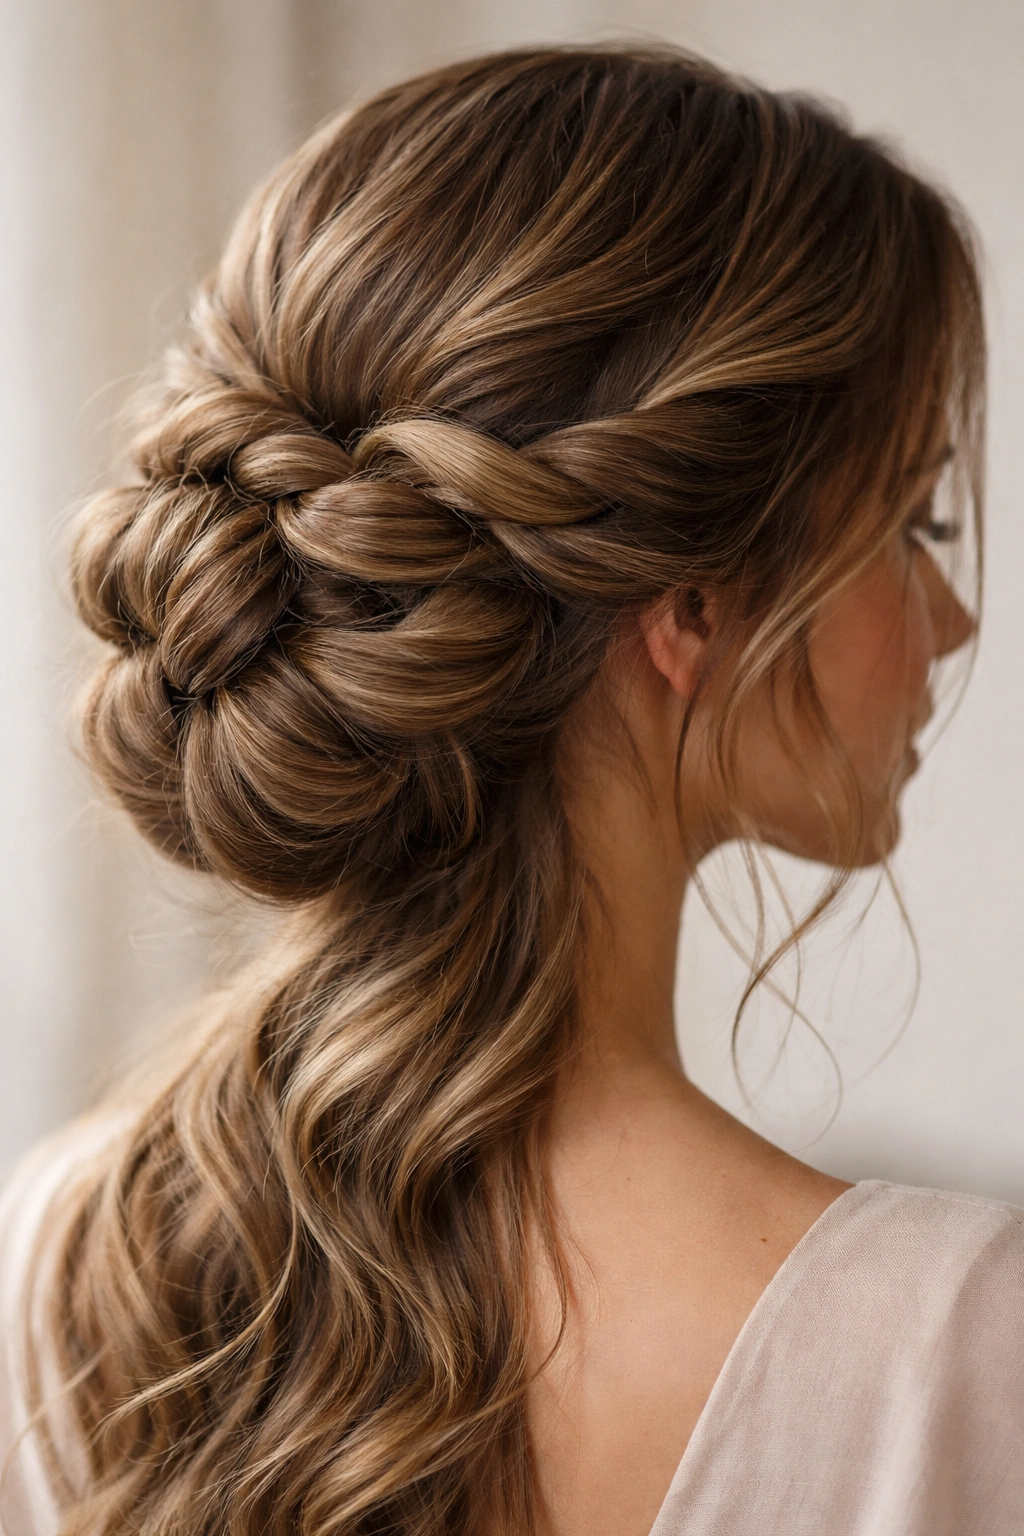
A rope braid is created by twisting two sections of hair together instead of weaving three, which creates a completely different texture than a traditional braid. With wavy hair, rope braids look absolutely stunning because your waves show through the twisted sections, creating natural variation in the braid pattern that looks more interesting and less uniform than standard braids.
Why Rope Braids Are Underrated
Rope braids require less precision than traditional three-strand braids, which means there’s less room for error and less frustration if your technique isn’t perfect. They create a thicker, chunkier braid that actually photographs beautifully and looks more intentional. Because of the twisting action, rope braids hold better in wavy hair than looser braiding styles.
How to Rope Braid Your Long Wavy Hair
- Gather your hair into a high ponytail or section off the hair you want to braid
- Divide the section into two equal pieces
- Twist the right section clockwise, going from root to end
- Twist the left section clockwise in the same direction
- Wrap the right twist around the left twist going counterclockwise (this creates the rope effect)
- Continue alternating and wrapping until you’ve braided all the way to the ends
- Secure the end with a small elastic
- Pull and loosen the braid by gently pushing up on the twisted sections
- Either wear this as a side braid down your back, or wrap it into a bun at your nape
Insider note: Twist each section tightly before wrapping them together — this creates a rope braid that stays intact rather than loosening as the day goes on.
8. The Sleek Low Ponytail with Waves
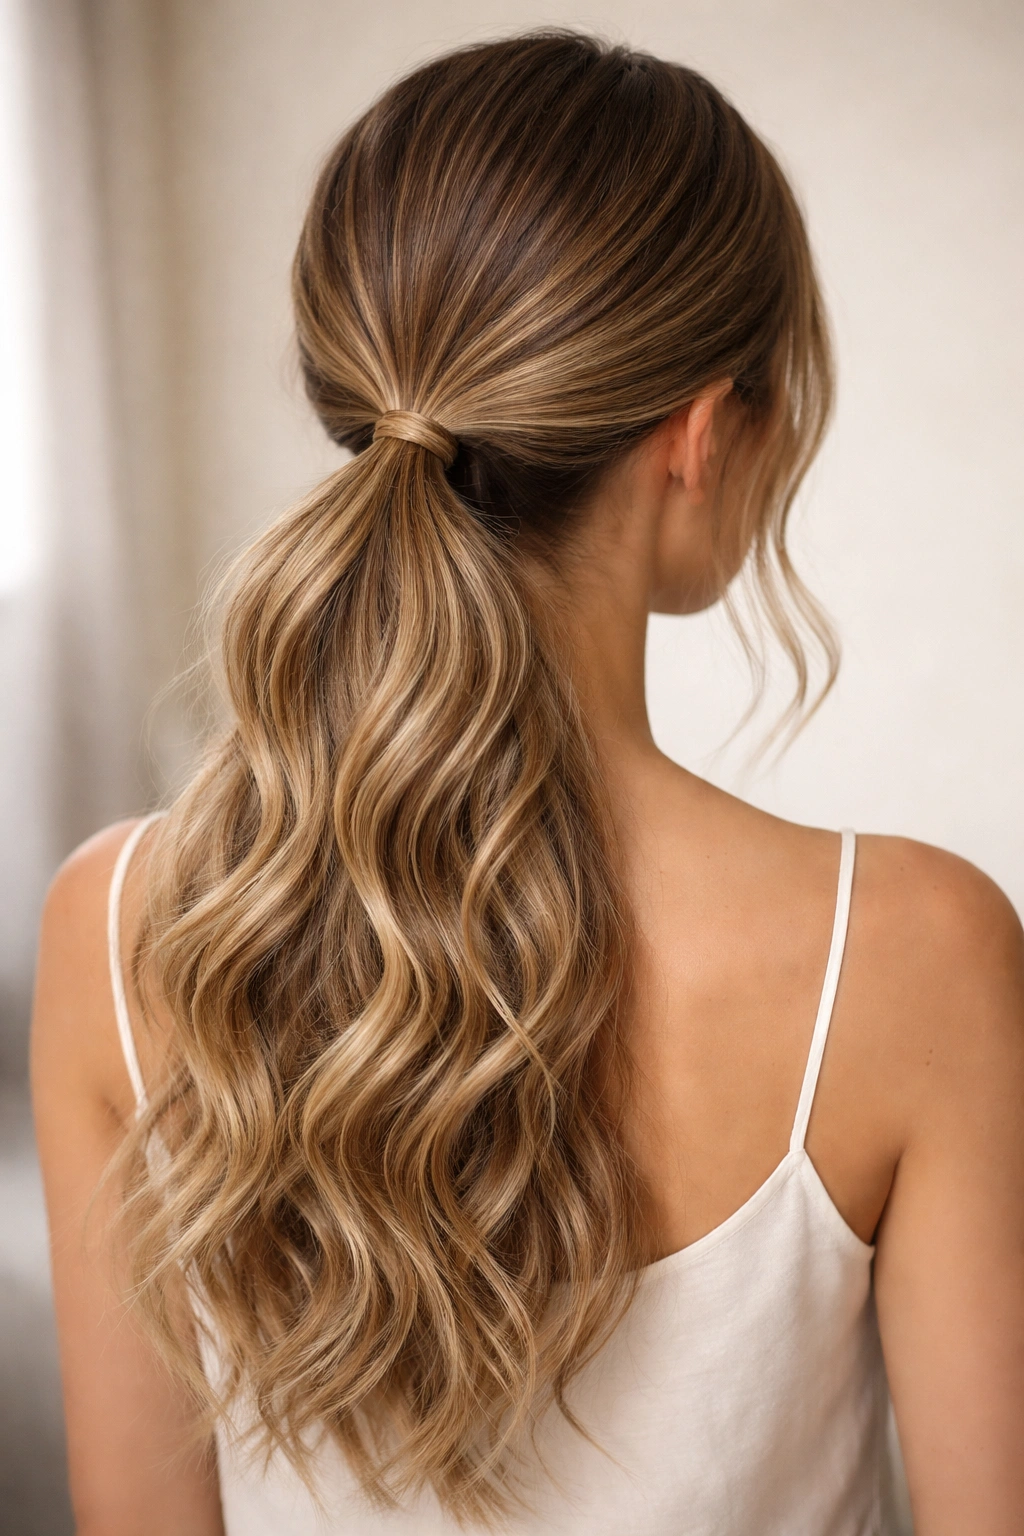
This isn’t technically an updo since your hair is down, but it’s the perfect option when you need your hair secured and off your face, but you want maximum waves and movement visible. The key is smoothing the ponytail base while keeping all the length below completely textured and wavy — you get the best of both styling worlds.
Why Smooth + Textured Works Better Than All One
When your entire long wavy hair is down and fully textured, it can feel overwhelming or take up a lot of visual space. Gathering a sleek, smooth section at the back creates structure and intentionality while letting your waves shine. This approach is actually more flattering for most face shapes than wearing all your hair completely down.
Building the Sleek Low Ponytail
- Apply a smoothing cream or light serum to the crown and back of your head
- Brush the top section of your hair smoothly back, starting at the crown
- Gather a low ponytail at the nape of your neck, about two inches below where you’d naturally gather a regular ponytail
- Use a fine-tooth comb to smooth any flyaways on the gathered section
- Secure with a strong elastic that matches your hair color
- Leave all the hair below the elastic completely down in your natural waves
- You can smooth the ponytail base once more with a light serum for polish
- Leave a few small pieces loose around your face for softness
Pro tip: This style works beautifully when you pair it with a decorative hair clip, scarf, or metallic hair cuff positioned over the elastic — it elevates the look instantly and draws attention to the styling detail rather than a plain elastic band.
9. The Textured High Bun
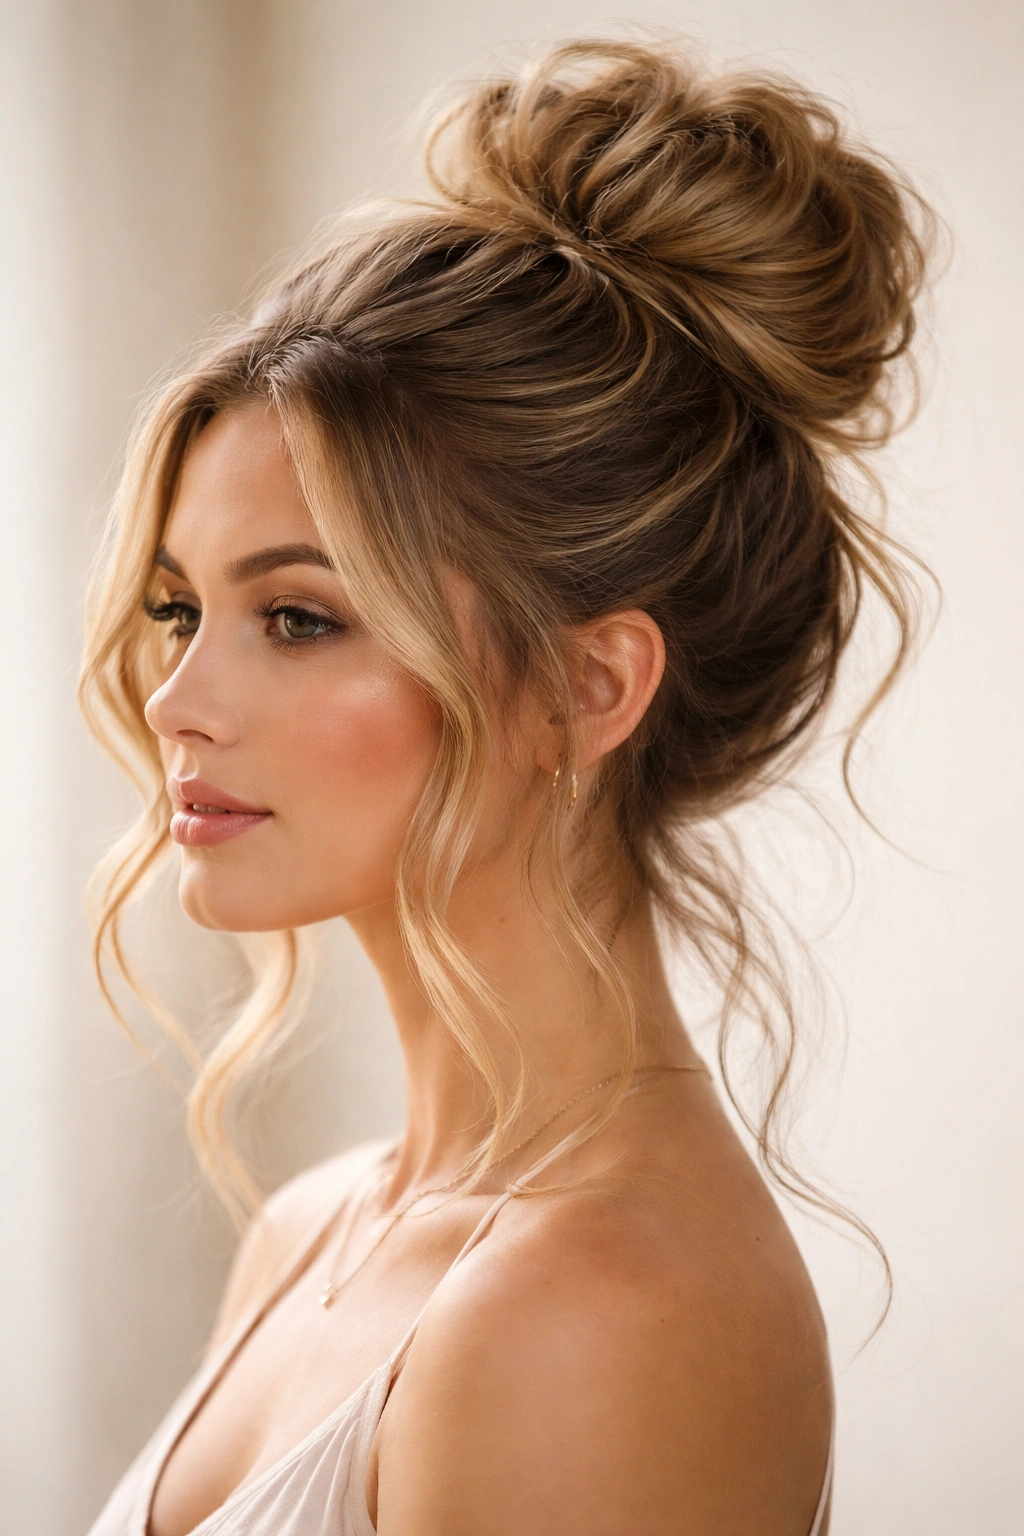
A high bun sits at the crown of your head rather than at the nape, which creates an entirely different proportions and look than a low bun. With wavy hair, a high bun can look surprisingly chic when you keep it textured and slightly loose — it balances well with the length of long hair and doesn’t create too much weight at the back of your neck.
High vs. Low Bun Positioning for Wavy Hair
A high bun naturally showcases your face better than a low bun because it sits above your shoulders, which photographs beautifully and feels lighter on your head. For long wavy hair, a high bun prevents the weight from pulling too much at your nape, which can make that area uncomfortable after a few hours. The positioning also allows more of your wavy length to move and flow below the bun.
Creating a Textured High Bun
- Flip your head upside down and gather your hair at the crown level
- Flip back upright while holding that section in place at the crown
- Secure into a ponytail at the crown — you should have a substantial length of hair hanging down below this ponytail
- Twist the ponytail loosely or braid it
- Wrap the twisted or braided section around the base of the ponytail to form a bun at your crown
- Secure with bobby pins, allowing the bun to sit slightly off-center for a more natural look
- Pull the bun gently to loosen it and add texture
- Let the rest of your hair cascade down below in waves
Quick fact: High buns work best when you start with slightly damp or dry-textured hair — wet hair won’t hold the height you need at the crown.
10. The Dutch Braid Crown
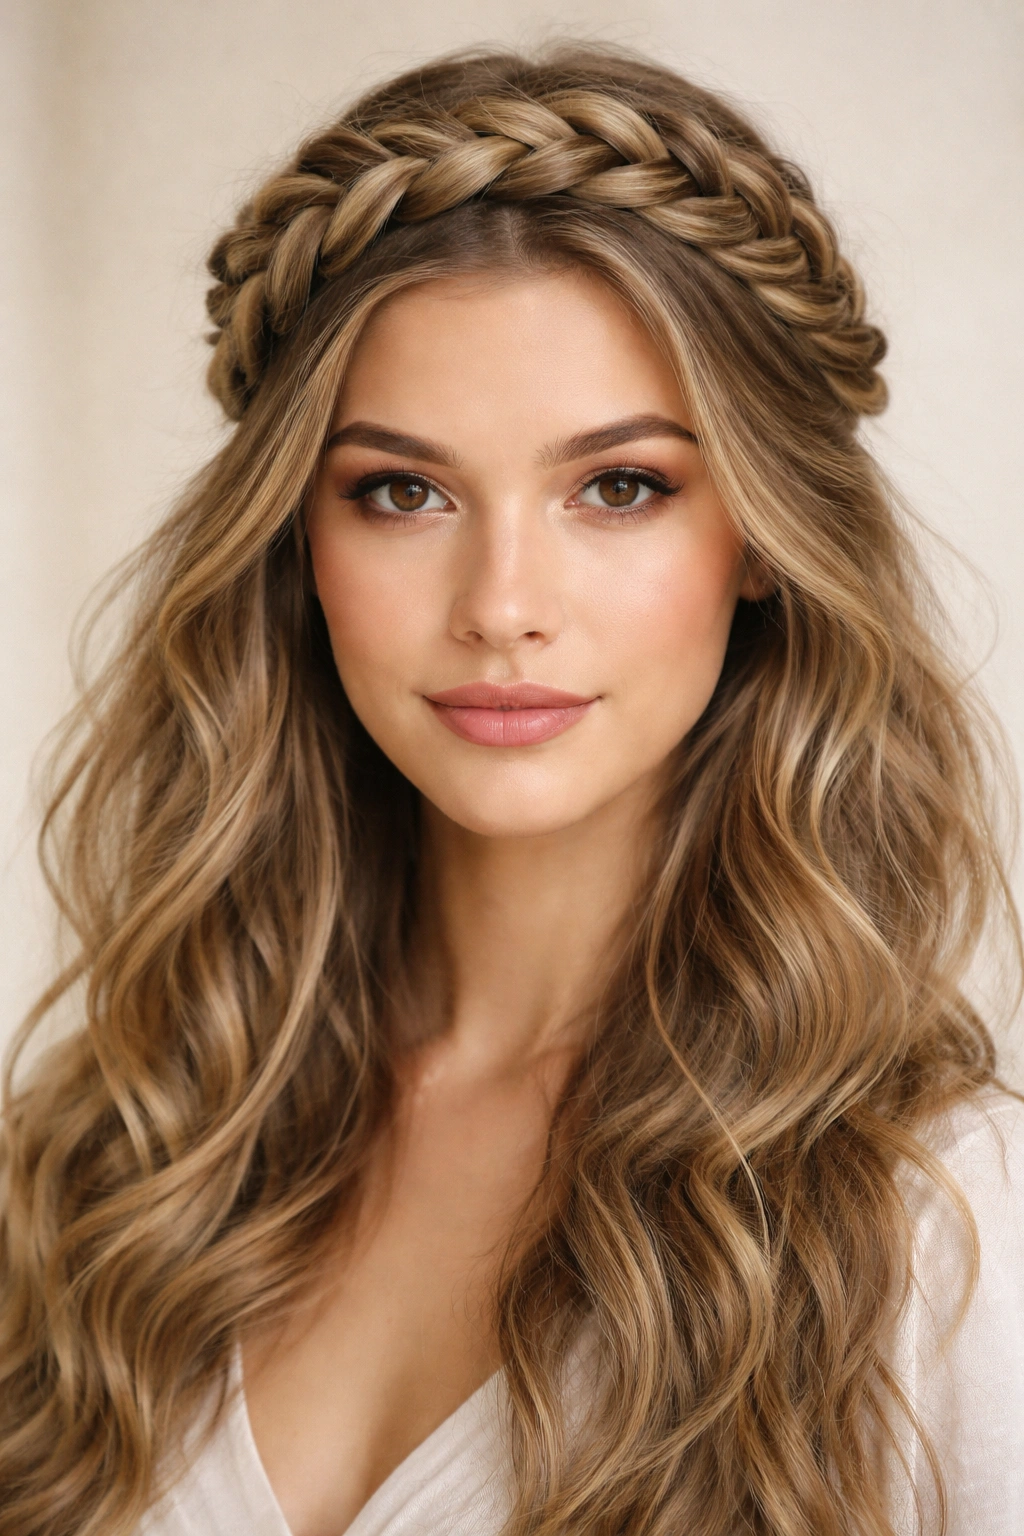
This style is similar to the braided wrap-around, but instead of wrapping around the back, you’re creating a thick Dutch braid that starts at one side, travels over the crown, and finishes on the opposite side. It’s more formal and polished than the wrap-around style, making it perfect for occasions when you want something elegant but still effortlessly textured.
What Makes a Dutch Braid Crown Special
A Dutch braid (reverse braid) sits on top of your hair rather than weaving into it, which means you can see the three-strand pattern clearly and it looks more sculptural. The crown placement is naturally flattering for most face shapes, and the braid’s height prevents it from getting lost in the length of long hair. With wavy hair, the texture shows beautifully inside and around the braid.
Executing the Dutch Braid Crown
- Start a Dutch braid at one temple, beginning about an inch back from your hairline
- Instead of braiding straight down, angle the braid toward the back and across the crown
- As you braid, tilt your head slightly to access the crown area comfortably
- Continue the braid to the opposite temple, creating a diagonal or slightly curved path
- Finish the braid and secure with a small elastic
- Tuck the braided end behind the opposite ear and secure with bobby pins
- Gently pull the braid to loosen it and add dimension
- Leave the bulk of your hair down and wavy below the braid
Insider note: Practice this braid on days when your hair has some texture already — it’s much easier to Dutch braid wavy hair than completely smooth hair because the waves give you grip and prevent the braid from slipping as you work.
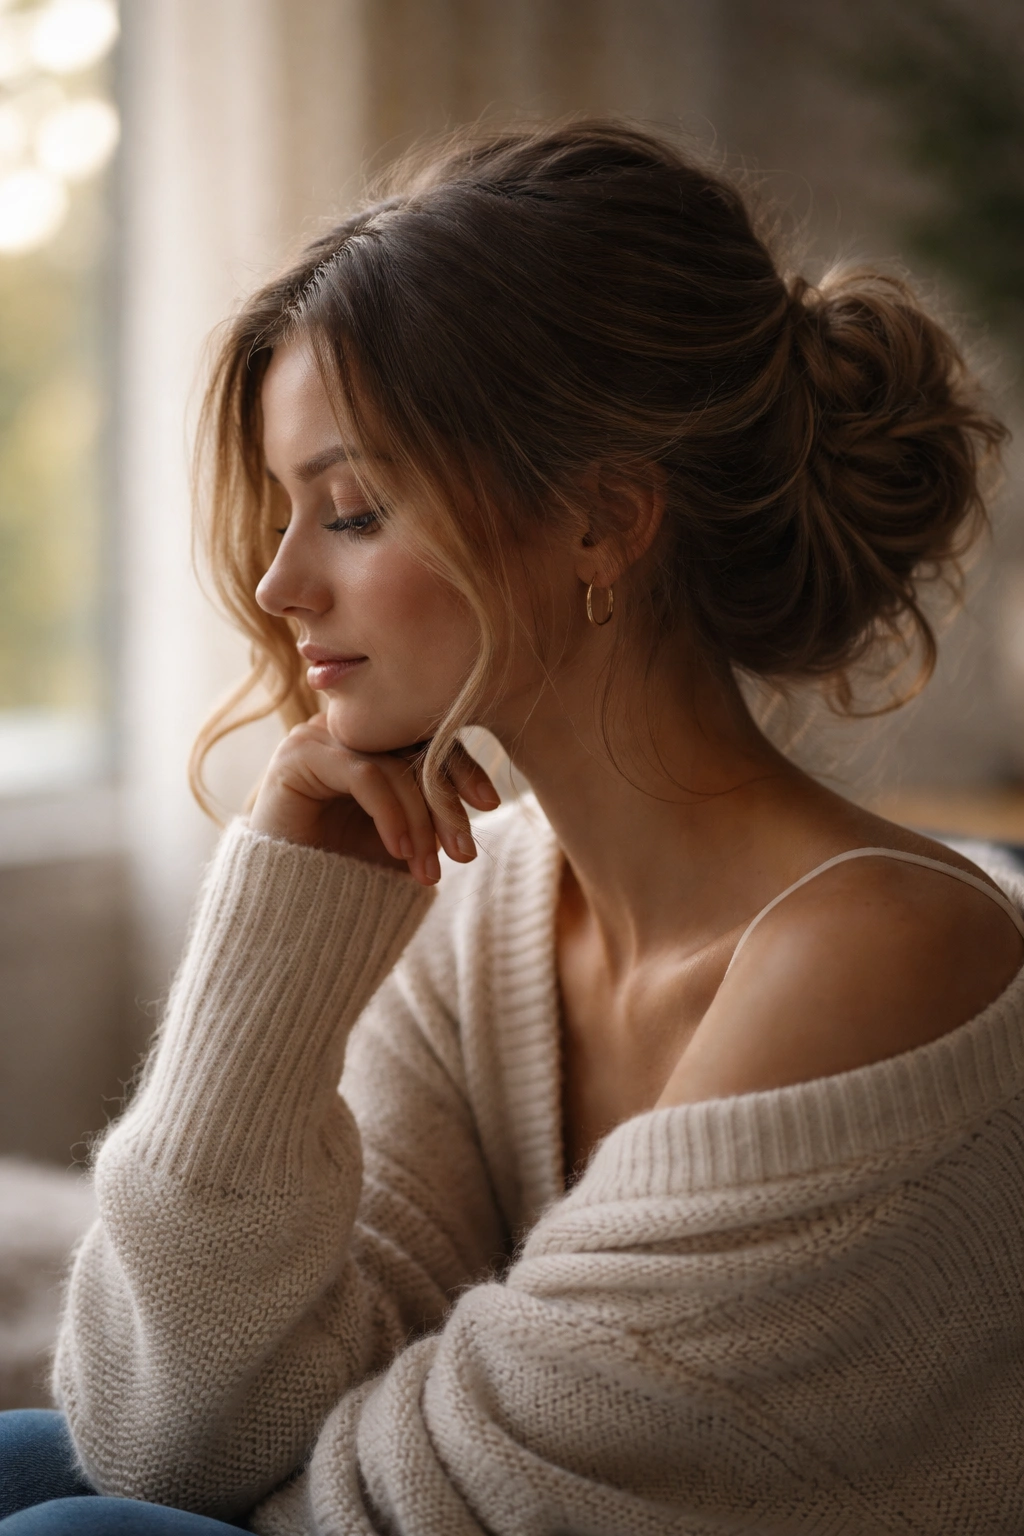
11. The Soft Pinned Waves Updo
This final style is technically an updo, but it’s created by pinning sections of your already-wavy hair into place rather than braiding or twisting. Think of it as sculpting your natural waves into an updo shape — you’re using bobby pins to anchor pieces while letting the wave pattern remain completely visible and beautiful. This style requires zero special techniques and works on all wave patterns.
The Advantage of Pinning Over Braiding
When you pin your waves instead of braiding them, every single part of your hair stays textured and visible. There’s no flattening from twisting or weaving, which means your wave pattern shows more dramatically. This approach is also incredibly flexible — you can rearrange it as many times as you want throughout the day without recreating an entire braid.
How to Create the Soft Pinned Waves Updo
- Start with air-dried or diffuser-dried wavy hair
- Flip your head upside down and gather all your hair toward the back of your head
- Flip back upright and position the gathered hair at the nape of your neck
- Loosely twist or coil the gathered section and begin pinning it in place with bobby pins
- Don’t aim for a tight, compact bun — allow the pinned section to stay loose and organic in shape
- Leave several face-framing pieces completely unpinned and loose around your face
- Pin additional small sections from the sides toward the back, creating a soft shape rather than a structured style
- Step back and look at the overall shape — you want it to look intentionally relaxed, not accidentally messy
- Use a light texture spray to help everything stay in place without making it feel crunchy
Pro tip: The difference between this looking polished and looking unkempt is the face-framing pieces — always leave at least two substantial pieces loose on either side of your face. This immediately signals that the updo is intentional styling rather than hair you forgot to finish.
Final Thoughts
Long wavy hair gives you so much freedom when it comes to updos because your texture does a lot of the visual work for you. You don’t need complicated braids or tons of products — you just need a technique that works with your waves instead of fighting them. Most of these styles come together in less than ten minutes once you’ve tried them once or twice, and they actually look better slightly undone and textured than they do perfectly polished.
The best part about having wavy hair is that your updos naturally have dimension and movement that straight hair has to create through careful styling. That same texture that sometimes feels hard to manage when you want smoothness is actually your secret weapon when you’re going for an updo. Pick one or two of these styles to practice, and you’ll find yourself with a reliable go-to that works for work days, casual outings, and anywhere you need your hair up but want to keep that effortless, textured vibe.