Whether you’re running a 5K, hitting the gym, or playing competitive sports, a ponytail that stays put is non-negotiable. There’s nothing worse than stopping mid-workout to adjust your hair or having strands escape every two minutes. The right technique combined with proper products and the right style choice can mean the difference between a hairstyle that holds strong and one that gradually falls apart as you move.
The key isn’t just grabbing your hair and wrapping it with an elastic. Real hold comes from technique—how tightly you gather your hair, where you secure it on your head, what products you use beforehand, and which securing methods actually withstand movement and sweat. Some styles are engineered specifically to resist gravity and moisture, making them infinitely more reliable than standard ponytails when you need your hair completely out of the way.
What makes a sporty ponytail different from a casual one? Tension, anchor points, and reinforcement. The best styles for athletic activity use multiple securing methods, position the hair base where physics works in your favor (usually higher on the head), and often incorporate braiding or twisting techniques that naturally tighten as they’re created. You’ll also want to know which styles work best for your hair type, texture, and length—because the technique that keeps poker-straight hair locked down might not work as well for curly or fine hair.
Here are 10 proven sporty ponytail styles that genuinely stay in place during intense movement and sweat, with the exact techniques to execute each one.
1. The Double-Secured Tight Ponytail
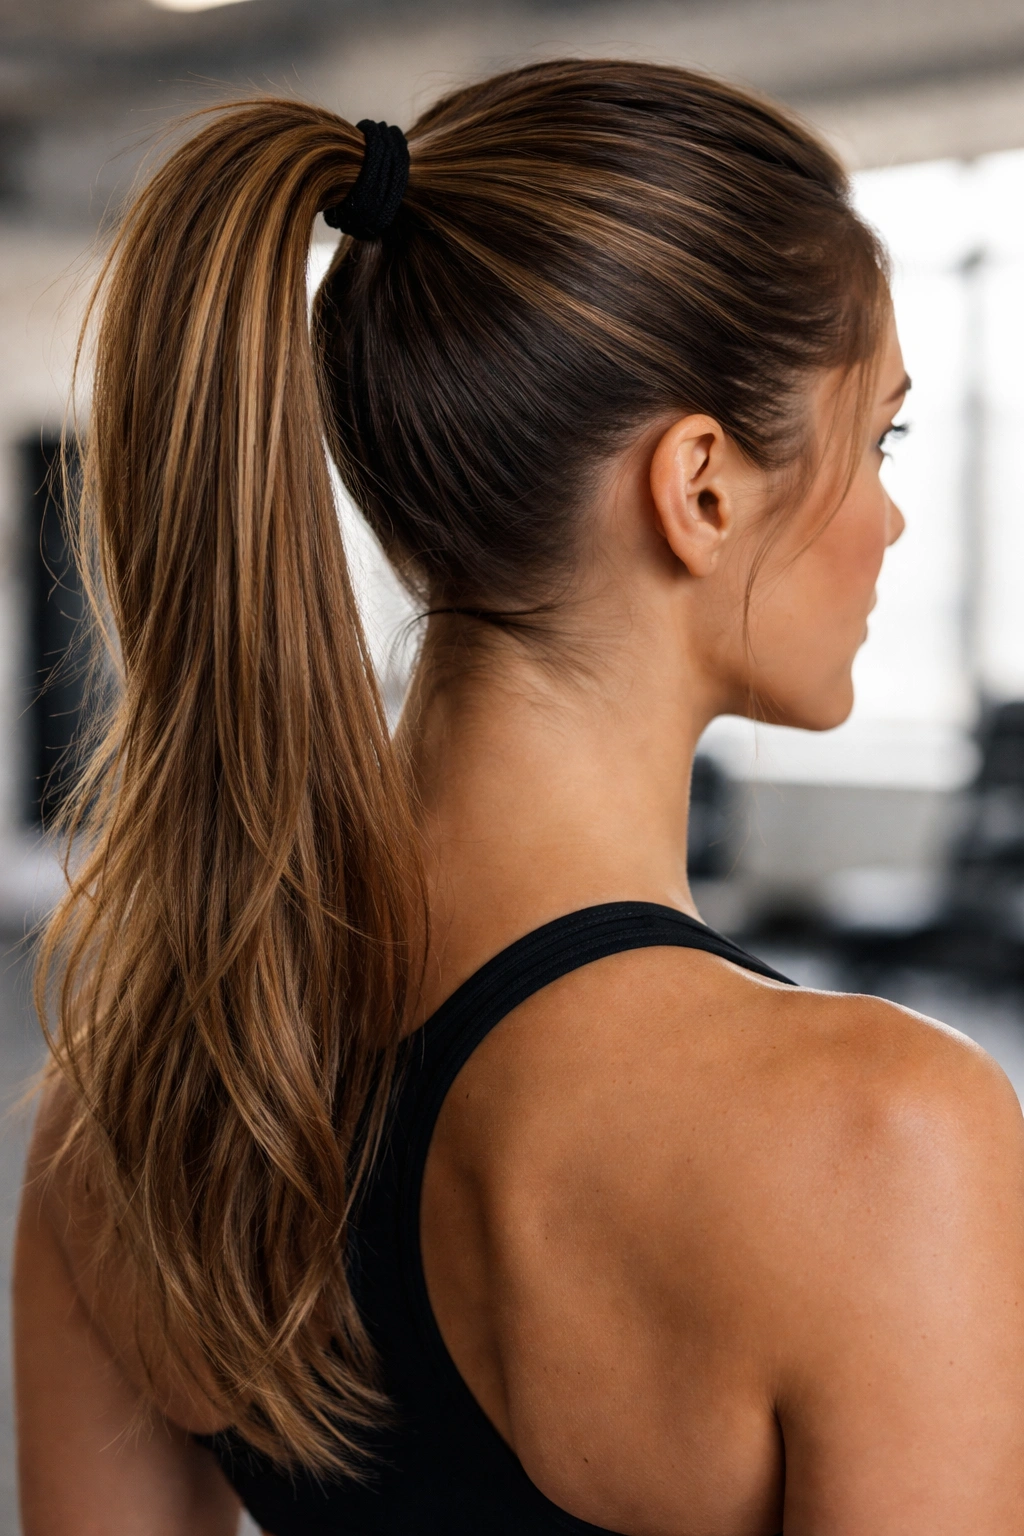
This is the workhorse of athletic hairstyles—a standard ponytail reinforced with a second elastic secured slightly below the first one. The double-elastic approach creates an anchor point that prevents the ponytail from slipping downward, which is the most common failure point for regular ponytails during high-impact activity.
Why This Style Holds Through Intense Movement
The mechanics are simple but effective: the first elastic gathers all your hair tightly at your chosen height (usually higher on the head for sports), and the second elastic positioned 1 to 2 inches below locks everything in place. This prevents the common problem where hair gradually slides down your scalp as you move and sweat, which happens because a single elastic doesn’t have enough friction against the hair and scalp to resist downward pressure.
Step-by-Step Technique for Maximum Hold
- Start with dry hair or hair that’s been lightly misted with a texturizing spray to increase grip. Wet hair and freshly-shampooed hair slip out of elastics far too easily, even when you think it’s secure.
- Brush your hair straight back from your forehead, pulling it up and back at a 45-degree angle toward where you want your ponytail base (usually at the crown or slightly behind). The higher you position the base, the better the physics work in your favor against gravity.
- Use a sturdy elastic (not a thin or fragile one) and wrap it around your gathered hair 2-3 times. This creates significant friction and prevents sliding. One wrap is never enough.
- Immediately secure a second elastic about 1.5 inches directly below the first one, wrapping it around the same gathered hair 2-3 times as well.
- Smooth the hair between your two elastics with a fine-tooth comb or brush, creating an even, polished section. This isn’t just for appearance—smoothing actually tightens the grip by aligning all the hair fibers in the same direction.
Pro Tips for Rock-Solid Hold
- Use clear elastics or matching-color elastics if you want a polished look, or fun colored elastics if you’re going for a sporty vibe. Elastics come in various thicknesses—thicker ones grip better than thin ones, but they can cause more breakage if not applied carefully.
- Apply a lightweight hairspray or texturizing spray to your hair before securing. This dramatically increases grip and prevents slipping without making your hair feel wet or heavy.
- If you have very slippery hair (fine, straight, or freshly washed), consider a second technique: before securing your ponytail, twist the gathered hair section two or three times, then secure with the elastic while the twist is in place. This creates natural friction within the hair itself.
- Expect the ponytail to feel tight. If it feels loose or comfortable, it’s not tight enough for athletic activity. True sports-ready hold requires significant tension.
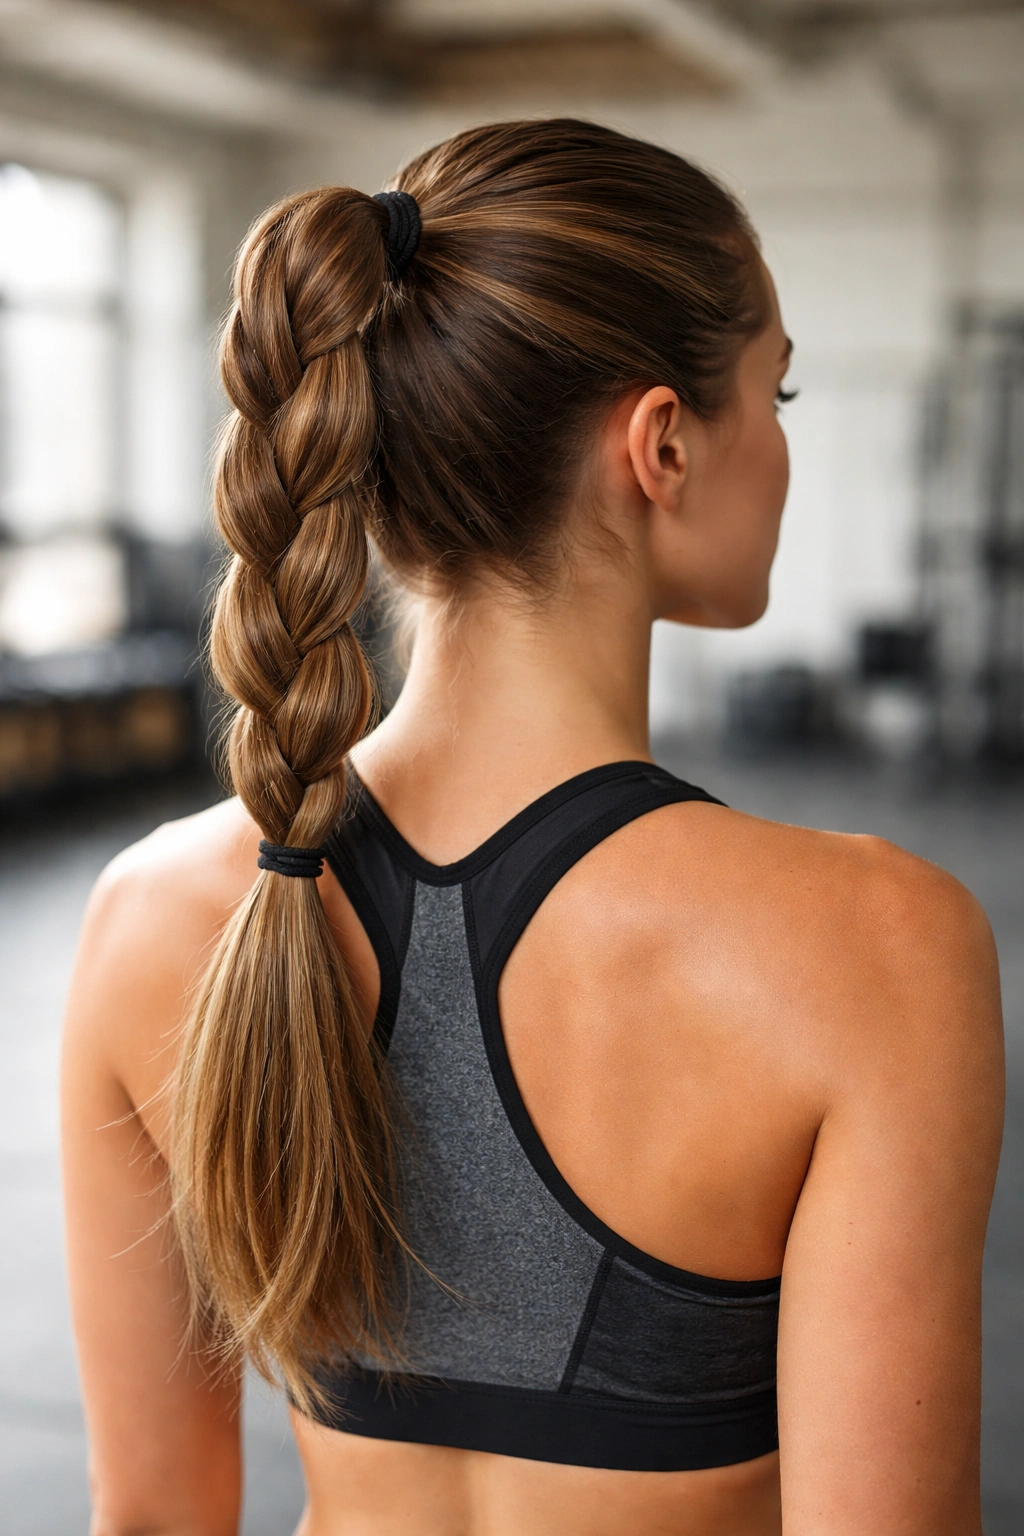
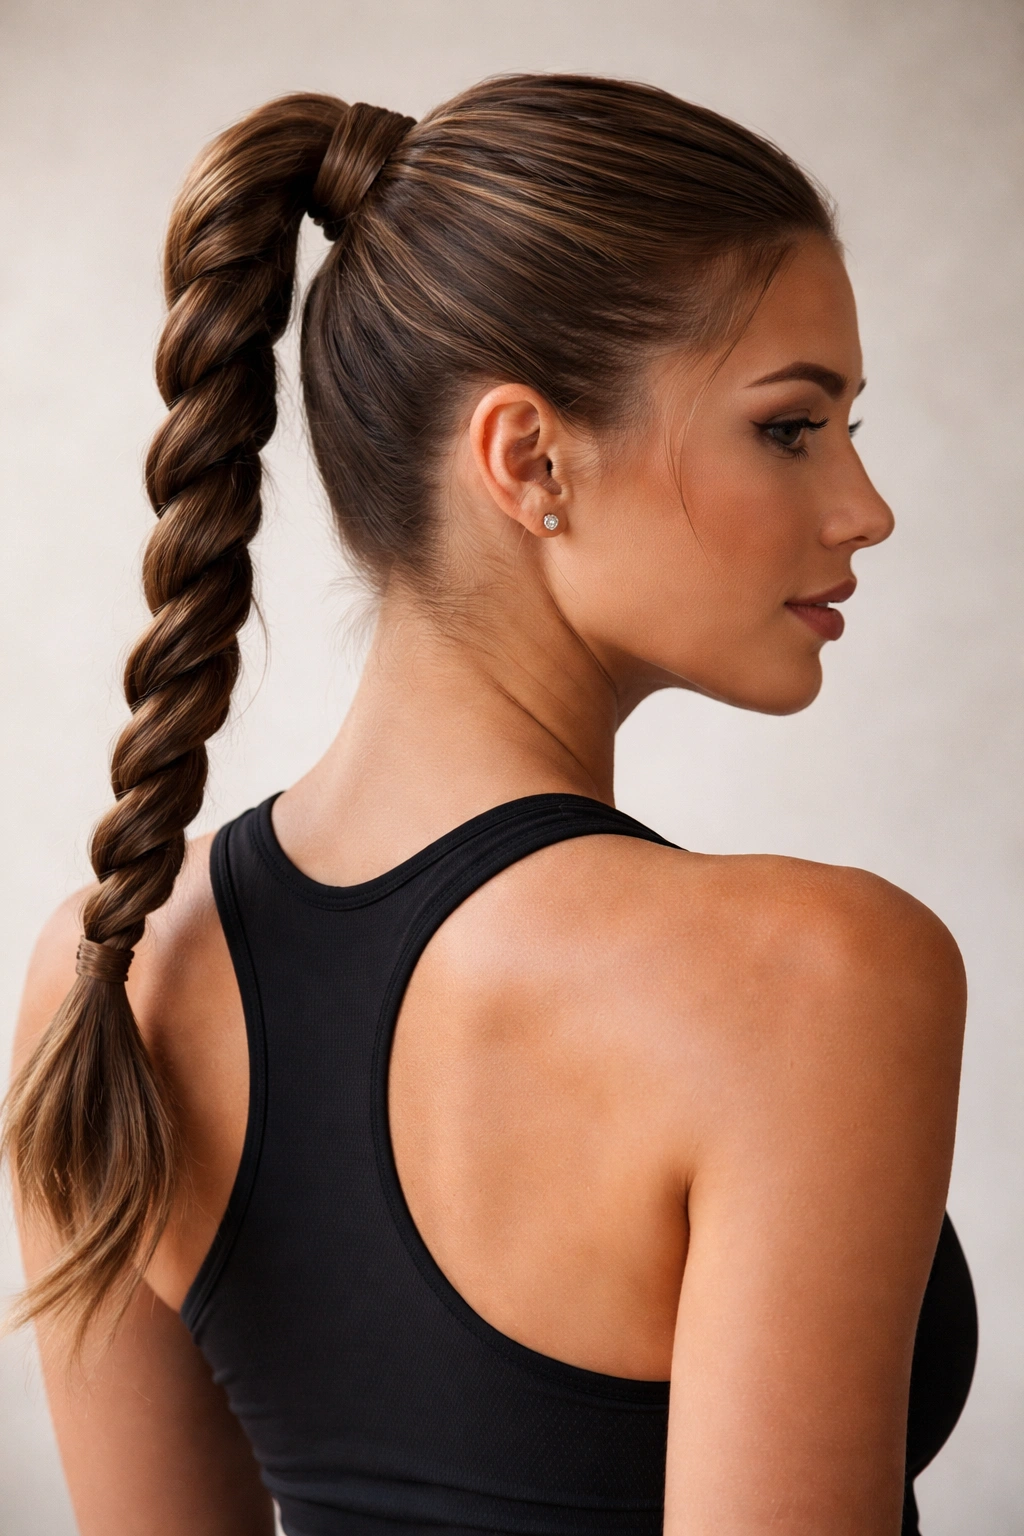
2. The Braided Wraparound Ponytail
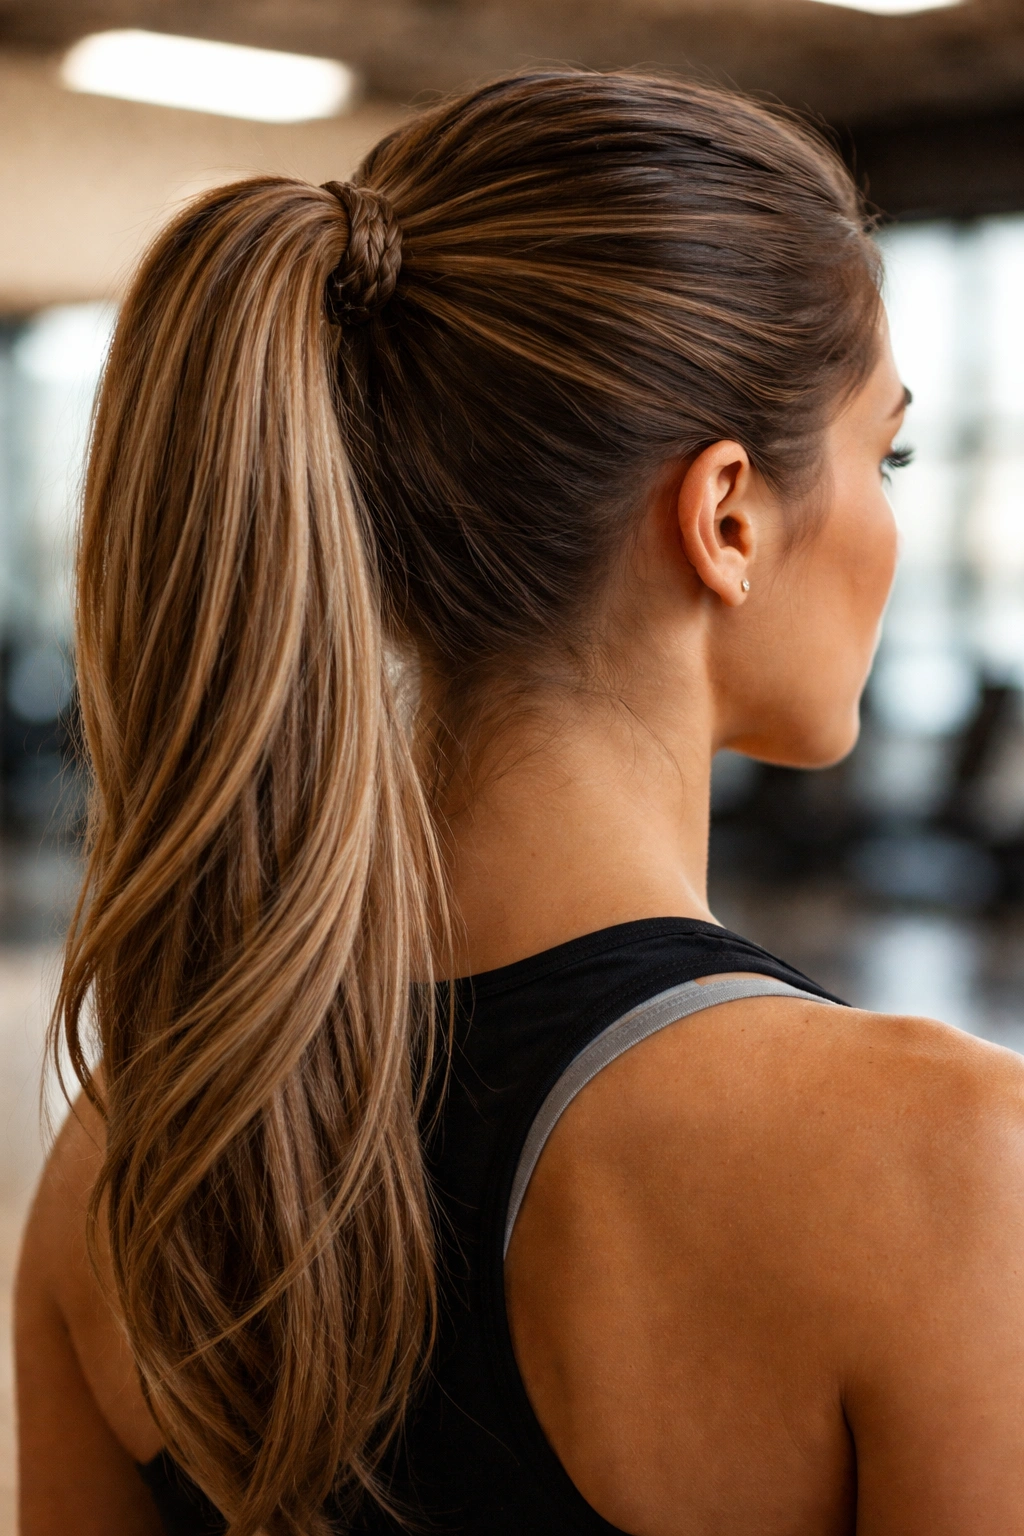
This style combines a braided element with a ponytail, creating additional grip and texture that prevents slipping. A small braid wrapped around the base of your ponytail acts like a natural clamp, holding everything in place even during high-impact exercise.
How the Braid Creates Unshakeable Hold
The braiding technique itself creates friction and tightness that a smooth elastic alone cannot achieve. When you braid even a small section of hair and wrap it around your ponytail base, you’re creating layers of hair that interlock, making it nearly impossible for the ponytail to slip downward. The braid also distributes pressure across multiple hair strands rather than concentrating it in one spot, which reduces breakage while increasing hold.
The Complete Technique
- Create a standard tight ponytail using the double-elastic method from the style above. Make sure this base ponytail is solid and secure before moving forward.
- Take a small section of hair from one side of your ponytail—about the thickness of a pencil—and divide it into three equal strands.
- Braid this small section tightly, working the braid downward through the hair. The braid should start at the elastic and wrap around the base of your ponytail, coming back around to where you started.
- Secure the braid’s end underneath the elastic using bobby pins, tucking the end completely out of sight. Use 2-3 bobby pins, pushing them in different directions for security.
- Smooth any flyaways around the braided section using hairspray or a smoothing serum.
Customization for Your Hair Type
- Fine or thin hair: Use a single-strand “braid” (which is actually just a twisted section of hair) instead of a three-strand braid. Twist a small section tightly and wrap it around the base. This creates hold without requiring thick sections of hair.
- Thick or curly hair: Braid slightly thicker sections—about the width of a marker—for more visible and dramatic hold. The texture of curly or thick hair naturally grips better, so you can create a bolder braided element.
- Medium hair with layers: The braid works beautifully as-is. Your layers will naturally tuck into the braid, adding texture and hold.
The Real-World Advantage
This style looks intentional and sporty rather than utilitarian. You’re not just pulling your hair back—you’re creating a finished, athletic-looking hairstyle that also happens to have superior hold.
3. The Twisted Double Ponytail
Two separate ponytails twisted together create a style that’s nearly impossible to pull out of place. This variation is less common than a single ponytail, but it’s one of the most secure options available, especially for long hair.
Why Two Ponytails Outperform One
When you create two ponytails instead of one and then twist them together, you’re distributing your hair’s weight across two anchor points rather than one. This reduces the downward force on any single elastic, and the twisting motion creates natural friction that holds everything in place. Think of it like how a rope doesn’t slip if you twist it—the twisting creates mechanical grip.
Execution for Maximum Security
- Part your hair down the middle from your forehead to the back of your head. This doesn’t need to be perfectly straight, but the two sections should be relatively even.
- Create a high, tight ponytail on the left side of your head at the crown area. Use a sturdy elastic and wrap it 2-3 times.
- Create a second ponytail of the same height on the right side of your head, directly opposite the first. Match the tightness of the first ponytail.
- Take the left ponytail and twist it in one direction (let’s say clockwise). Keep the twist tight and even as you work downward.
- Simultaneously, take the right ponytail and twist it in the same direction (clockwise) at the same pace. Ideally, the two twists will spiral around each other naturally.
- Wrap a third elastic around where the two twisted ponytails intertwine, about 2 inches below where they begin to twist. This locks the twist in place.
- Optional: wrap a small braided section (using the technique from style #2) around this bottom elastic for additional reinforcement.
Who Should Use This Style
This style works best for people with shoulder-length hair or longer. If your hair is very short, you won’t have enough length to twist effectively. It’s also ideal for people who engage in activities with lots of lateral movement (tennis, basketball, soccer) because the two-anchor design resists forces from multiple directions.
4. The Inverted Dutch Braid into Ponytail

An inverted (reverse) Dutch braid that incorporates hair as you go, finished with a ponytail, creates a style with extraordinary hold. The braiding technique locks hair in place progressively, and the braid serves as an anchor point for the final ponytail.
The Science of Braid-Based Hold
A Dutch braid (where you braid underneath rather than over) creates tight interlocking of hair fibers from the scalp all the way down. When you finish this braid and transition into a ponytail, the braid acts as a foundation that prevents the ponytail from moving. The braid’s tension carries through to the ponytail base, creating unified hold from scalp to ends.
Step-by-Step Instructions
- Start with hair that has slight texture (either from a texturizing spray or from being second-day hair). Completely smooth, freshly-washed hair is too slippery for secure braiding.
- Begin the Dutch braid at your forehead, taking a small section of hair from the center of your hairline. This starting point matters—beginning closer to the top of your head means the braid will be positioned higher and will anchor your eventual ponytail more securely.
- As you Dutch braid, incorporate hair from both sides of your head, gradually widening the braid as you move backward. The braid should progress straight back toward the crown, not at an angle.
- When you reach the back of your head (usually about the crown area), you’ll have incorporated most of your hair into the braid. Stop braiding at this point and secure the braid with a small elastic.
- Gather all the remaining loose hair below the braid plus all the loose ends from the braid itself, and secure everything into a ponytail using a sturdy elastic. This gathered section becomes your final ponytail.
- The braid now serves as an anchor, and the ponytail hangs from this secured foundation.
Troubleshooting Common Issues
- The braid feels loose: You’re not incorporating enough tension as you braid. Dutch braids require deliberate tightness—pull each new section of hair firmly as you add it to the braid.
- The ponytail at the bottom slips: Make sure you’re using at least two wraps of your elastic around the gathered hair, not just one.
- Flyaways around the braid: Use a smoothing serum or hairspray around the braided section, and consider using bobby pins to tuck any wispy strands back into the braid itself.
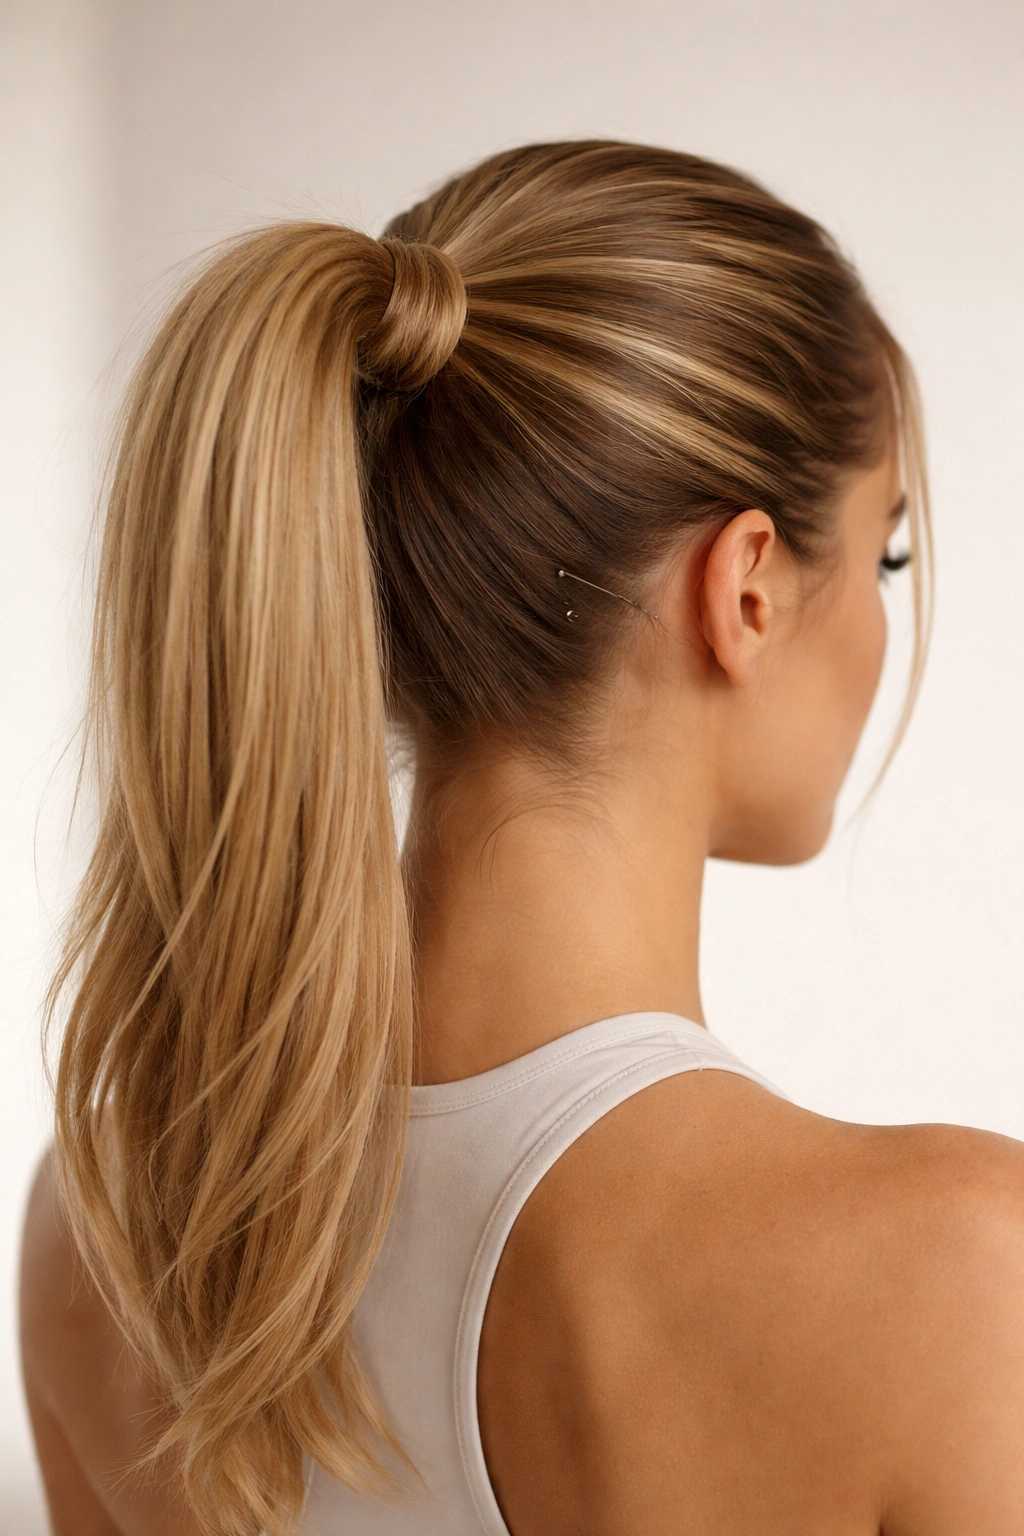
5. The High Crown Ponytail with Booster Pin
A high ponytail secured at the crown using specialized booster pins (or bobby pins arranged strategically) creates a style that’s nearly impossible to dislodge. This technique uses physics and multiple anchor points to lock your hair in place against your scalp.
How Booster Pins Increase Hold
Booster pins (X-shaped pins designed specifically to increase ponytail grip) work by creating friction between the pin and your hair, and between the pin and your scalp. By placing these pins strategically around your ponytail base, you’re essentially pinning your hair to your head at multiple points, not just holding it with a single elastic. This distributes pressure evenly and prevents any movement.
The Technique That Works
- Gather your hair into a high ponytail at the crown, securing it with a standard elastic wrapped 2-3 times. This first elastic is your foundation.
- Take a booster pin (or two crossed bobby pins if you don’t have booster pins) and insert it horizontally through the hair at the base of your ponytail, at a 90-degree angle to where your hair exits the elastic. Push the pin deep into the base until it’s flush against your scalp.
- Add a second pin on the opposite side of your ponytail base, again pushing it in at a 90-degree angle and deep into the base. These two pins should be directly across from each other.
- If you want maximum hold (for very intense activity), add a third pin at the back of the ponytail base. Three pins creates a triangular anchor that’s incredibly secure.
- Cover the elastic and pins with a small section of hair from the ponytail itself, smoothing it over to hide all the hardware. This looks polished and keeps the pins from catching on things.
Material Matters
- Use actual booster pins if you can find them (they’re sold in beauty supply stores and online). They’re designed specifically for this purpose and grip better than regular bobby pins.
- If using bobby pins, always use metal ones, not plastic. Metal has better friction. Use sturdy, thick bobby pins, not delicate thin ones.
- Dark bobby pins are less visible if your hair is dark; blonde or clear bobby pins work better for lighter hair. However, if you’re covering the pins with hair, the color doesn’t matter as much.
6. The Sectioned Braid Ponytail
This style divides your hair into sections before braiding, creating multiple anchor points and a texture that naturally resists slipping. It’s more visually interesting than a simple ponytail while being even more secure.
Why Multiple Sections Create Superior Hold
When you divide your ponytail into 3-4 sections and braid each section individually, you’re creating multiple twisted elements that interlock. Each braided section grips the others, and together they create a unified structure that’s far more resistant to movement than a smooth ponytail. Additionally, the braided sections create visual interest, so the extra security comes with an attractive design element.
How to Execute This Style
- Create your base ponytail using the double-elastic method (as described in style #1), positioned high on your head. This ponytail must be very tight and secure.
- Divide your ponytail into three equal sections vertically. Imagine drawing three lines through your ponytail from elastic to ends—this is how you’ll divide it.
- Take the first section and create a two-strand twist (not a full braid, just a twist). Twist this section tightly and secure the end with a small elastic, bobby pin, or by tucking it under the main ponytail elastic.
- Repeat with the second and third sections, twisting each one tightly and securing the end.
- Now you have three twisted sections hanging from your ponytail base. These twisted sections will hold each other in place due to the natural friction between them, and they’ll resist any pulling or movement because of their structural integrity.
- Optional: take thin sections from between the twisted strands and do a small braid or wrap around all three, binding them together even more securely.
Best for Which Hair Types
- Thick hair: This style looks dramatic and holds beautifully. Your hair has enough volume that the sections are clearly visible and structurally sound.
- Fine hair: Use only two sections instead of three. Three sections might look too thin and wispy. Two thicker sections will be more visually balanced and hold better.
- Curly hair: This style is absolutely ideal for curls. The natural texture of curly hair works with the twisting technique to create incredible hold.
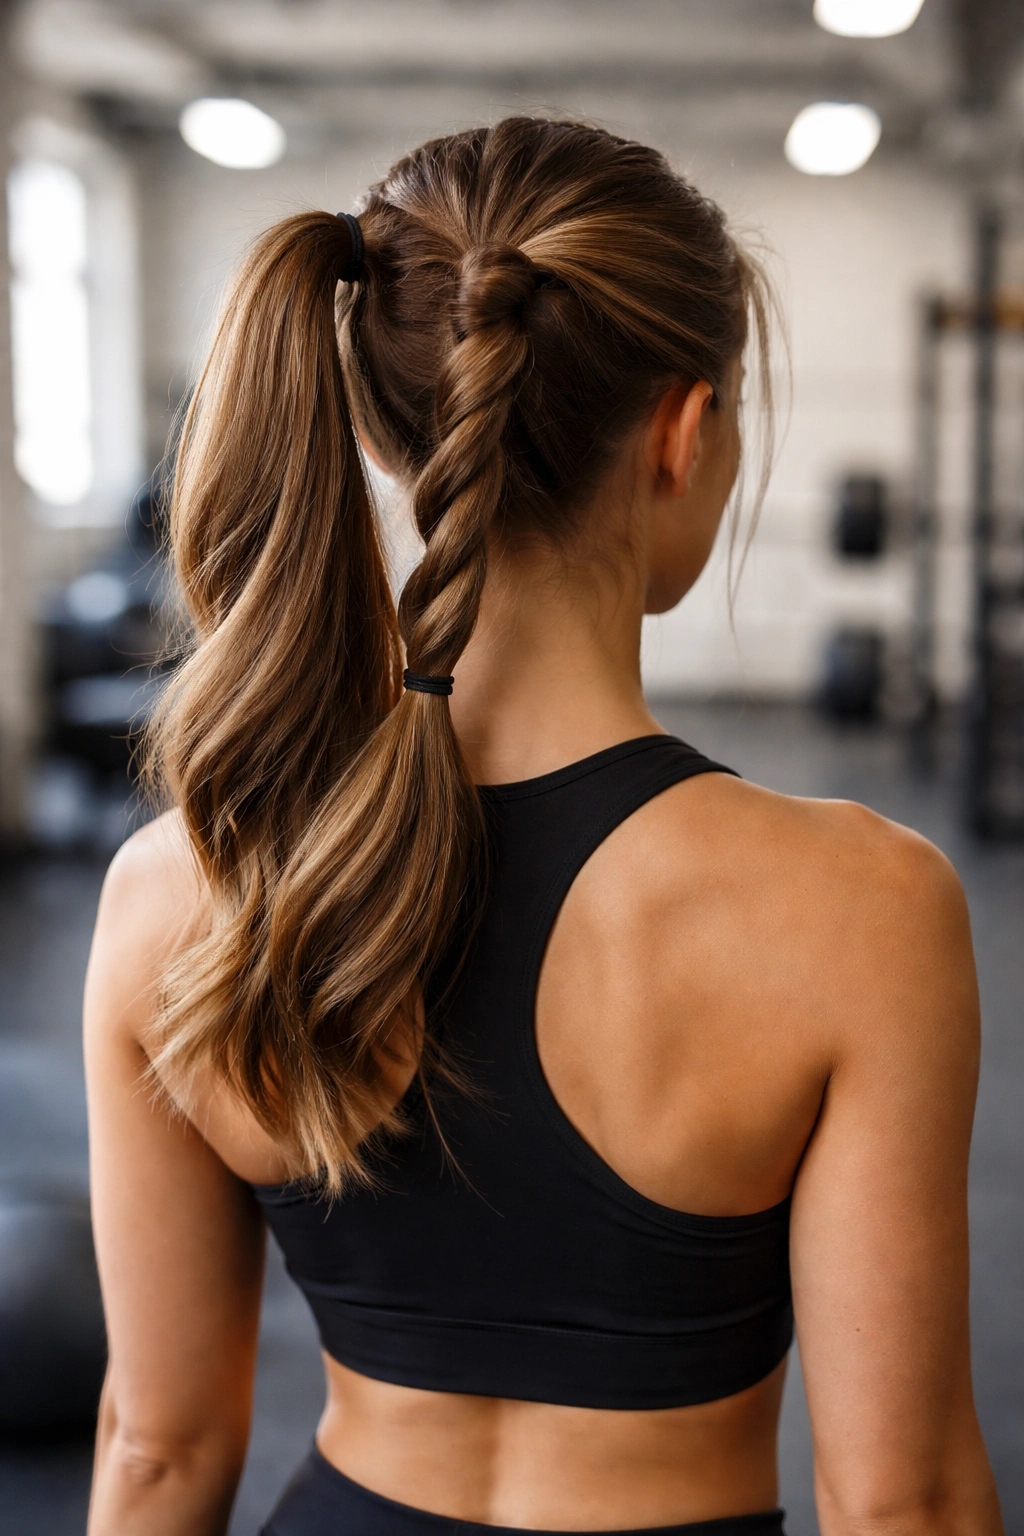
7. The Rope Braid Ponytail
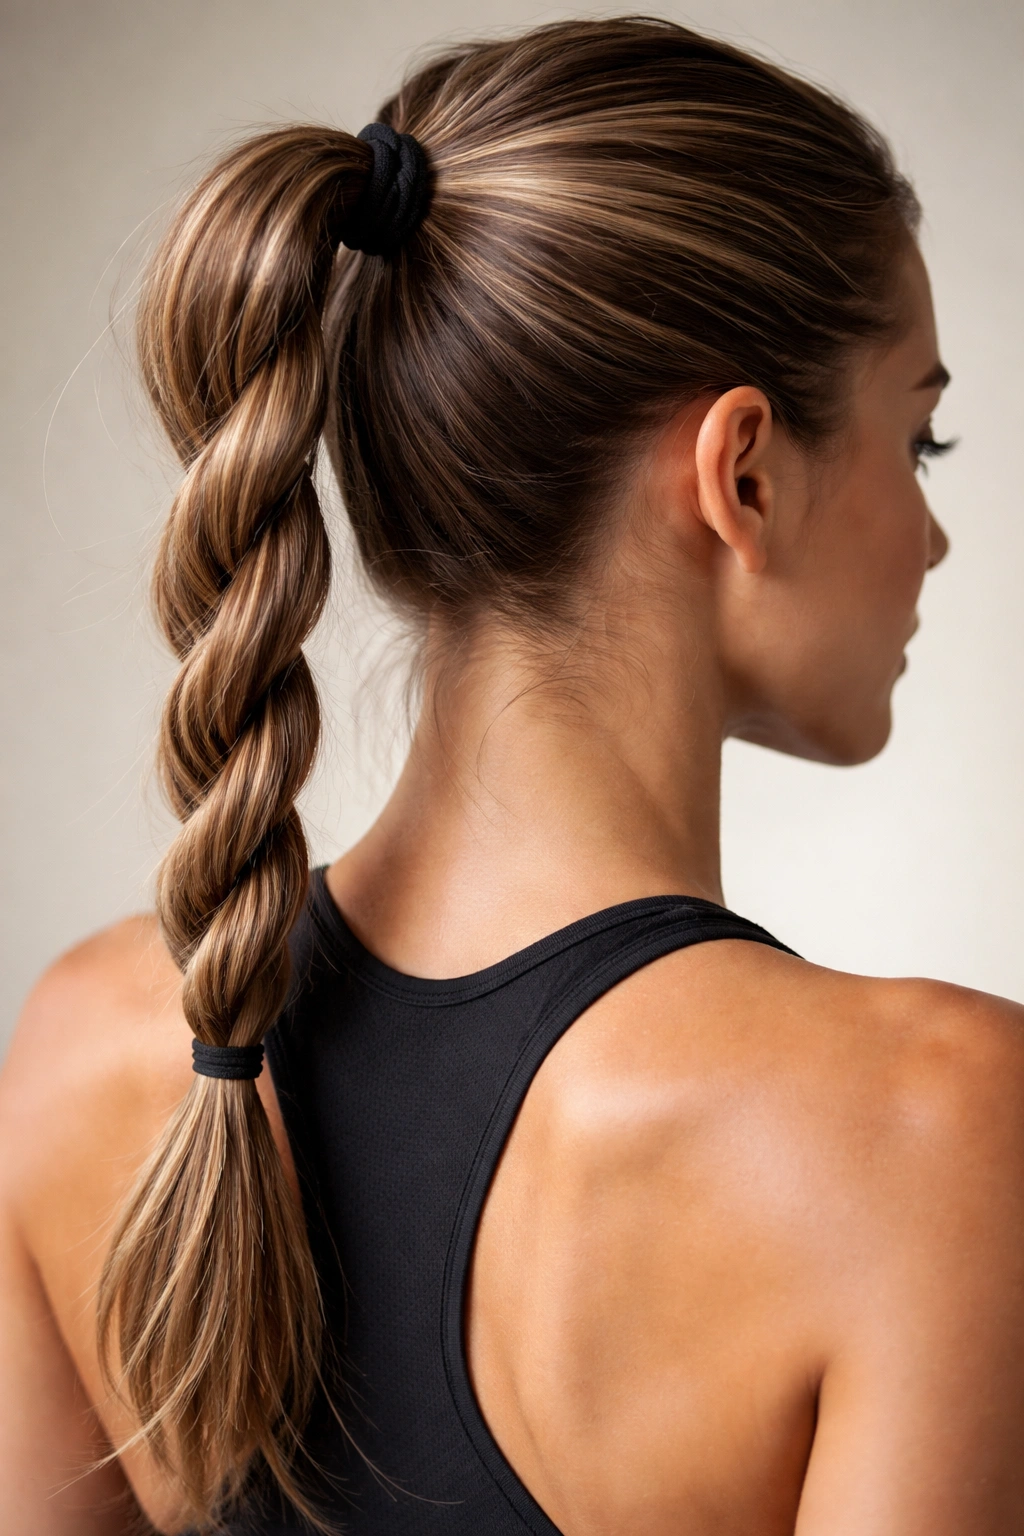
A rope braid is a two-strand twist that looks like a braid but is far faster to create. When incorporated into a ponytail style, it adds texture and security without the time investment of a full three-strand braid.
The Speed and Security Advantage
A rope braid takes about 30 seconds to create compared to several minutes for a traditional braid, making it ideal for athletes who need to get ready quickly. Despite being faster, the rope braid creates surprisingly strong hold because the twisting motion creates significant friction and locks hair together. It looks intentional and sporty, not hastily thrown together.
Creating the Rope Braid Ponytail
- Gather your hair into a high ponytail as described in previous styles, securing it with a sturdy elastic wrapped 2-3 times.
- Divide your ponytail into two equal sections. The sections should be even, or your rope braid will look lopsided.
- Twist the first section around itself in one direction (clockwise), keeping the twist tight as you work downward.
- Simultaneously, twist the second section in the same direction at the same pace, maintaining equal tightness.
- Wrap the first twisted section around the second twisted section, spiraling them together down the length of your ponytail. As you do this, the two twists should naturally interlock, creating a rope effect.
- Secure the end with a small elastic, bobby pin, or by tucking it back into the main ponytail elastic.
- The finished rope braid looks textured and complex, but it’s incredibly simple to execute once you get the technique down.
Practice Makes Perfect
The first time you create a rope braid, it might feel awkward and take several minutes. This is completely normal. By the fifth or sixth time, most people can create a rope braid in under a minute. The key is keeping the two sections even and maintaining consistent twist tension in both sections simultaneously.
8. The Four-Part Holder Ponytail
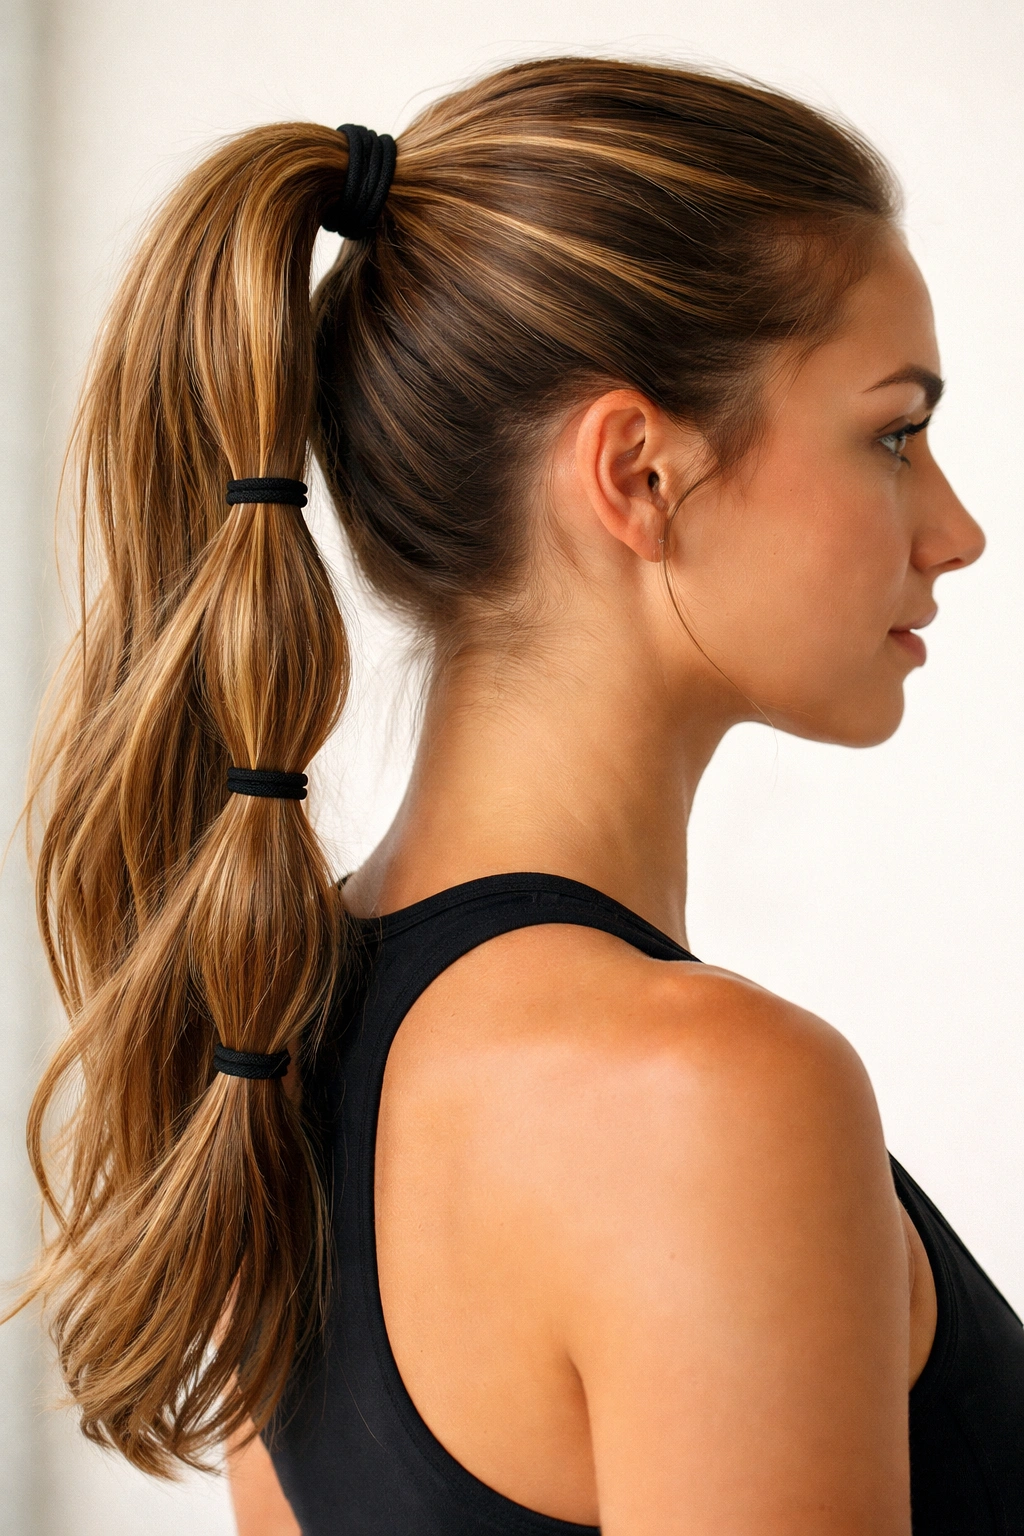
This advanced technique uses four separate holder points (elastics or bobby pins) positioned at different heights along your ponytail, creating a structure that’s essentially impossible to dislodge. It’s overkill for casual activities but ideal for serious athletes or intense movement.
The Physics of Multiple Anchor Points
Rather than relying on a single point of failure (one or two elastics at the base), this style creates four anchor points distributed along the length of your ponytail. Even if one elastic slipped (which is unlikely), the other three would hold your hair in place. This redundancy is why competitive athletes and people engaged in high-impact sports often use this technique.
The Four-Point Technique
- Create your base ponytail at the crown using a sturdy elastic wrapped 2-3 times. This is point number one.
- About 3-4 inches down from the first elastic, wrap a second elastic around your ponytail. This second elastic should be snug but doesn’t need to be quite as tight as the first.
- About 3-4 inches down from the second elastic, add a third elastic. Again, snug but not painfully tight.
- About 3-4 inches down from the third elastic, add a fourth and final elastic near the ends of your hair.
- Now your entire ponytail is segmented into four sections, each held by its own elastic. This creates a structure that resists movement at every level.
- Optional: For even more hold, add a bobby pin or booster pin at each elastic point, pressing it through the hair and into your scalp (for the first and second elastics) or through the ponytail base (for the third and fourth).
When This Style Makes Sense
Use this technique if you’re doing activities with significant bouncing or impact (running, jumping, plyometrics) or if you have very long, heavy hair that tends to move even with standard securing methods. For casual gym sessions, this is probably overkill, but for competitive athletics or activities where hair movement could affect performance, it’s worth the extra steps.
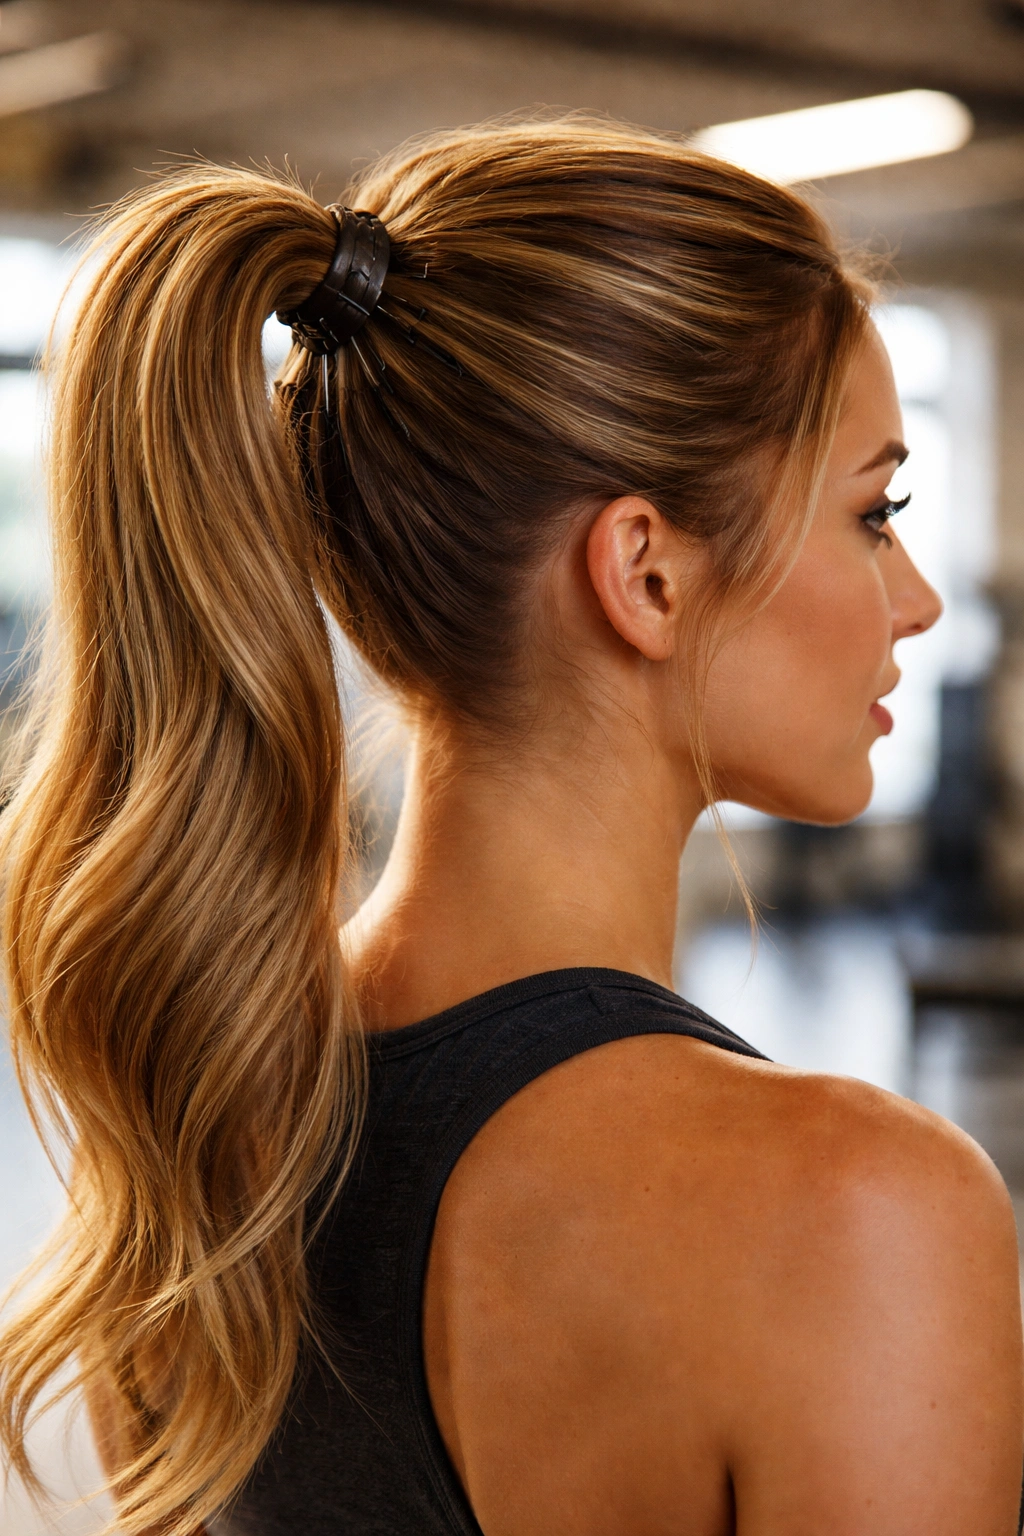
9. The Hidden Tie Ponytail with Extra Grip
This style uses the hidden tie method (where you wrap a thin section of hair around your elastic) combined with bobby pins and additional products to create a ponytail with multiple layers of security. It looks sleek and polished while being extraordinarily secure.
Creating Invisible, Maximum-Grip Anchoring
The hidden tie technique gives your ponytail a finished, intentional appearance while the bobby pins and product provide the actual hold. By combining these elements, you get both style and substance—your ponytail doesn’t just stay in place, it looks good while doing so.
Step-by-Step Execution
- Create a high, tight ponytail using a clear elastic or an elastic that matches your hair color, wrapped 2-3 times. Apply a texturizing spray first to increase grip.
- Take a thin vertical section of hair from the back of your ponytail (use a comb or the end of a rattail comb to isolate it cleanly).
- Wrap this section tightly around the elastic at the base of your ponytail, covering the elastic completely. This should wrap around the entire circumference of your ponytail base, hiding the elastic.
- Secure the end of this wrapping section with a bobby pin, tucking it underneath the main ponytail so it’s hidden. Use 2-3 pins for security.
- Apply a light hairspray to the wrapped section and to the entire ponytail base.
- For extra security, add a booster pin or bobby pin through the base of your ponytail perpendicular to the elastic, as described in style #5.
The Finishing Touch
The hidden tie method is what transforms a functional athletic ponytail into a style that looks intentional. Because the elastic is hidden, the ponytail appears to be held by the wrapped hair section itself, giving it a polished, professional appearance—perfect if you’re doing fitness activities where you want to look put-together.
10. The Spiral Ponytail with Lock Wrap
This final style combines spiral twisting with a reinforcing wrap at the base, creating a ponytail that looks dynamic and textured while being incredibly secure. It’s visually interesting enough to wear for style, not just function.
Understanding the Spiral Technique
A spiral ponytail is created by starting at the base and twisting your ponytail around itself, creating a coil effect. This twisting creates friction and structural stability. The “lock wrap” is an additional element twisted around the base, which acts as a clamp. Together, these elements create a ponytail that won’t budge.
Creating the Spiral Ponytail with Lock Wrap
- Create your base ponytail at the crown using the double-elastic method, ensuring it’s extremely tight. This foundation is critical.
- Starting at the elastic, twist your entire ponytail in one direction (clockwise), keeping the twist as tight as possible as you work downward. This creates the spiral effect and builds friction throughout the entire ponytail.
- Once your entire ponytail is twisted, coil it upward toward the base, creating a spiral shape. Use bobby pins to secure this coil to your scalp, inserting pins at the top and sides of the coil.
- Take a thin section of hair from the outer edge of the spiral and wrap it around the base where the spiral begins, creating a “lock” that holds the entire coiled structure in place.
- Secure the end of this lock wrap with bobby pins, hiding them underneath.
- Smooth any flyaways using hairspray, and you’re done. You now have a high, sculptural, impossibly secure ponytail.
Occasion and Activity Suitability
This style is perfect for activities where you want to stand out (group fitness classes, sports you’re competing in) while having complete security. It takes longer to create than a simple ponytail—probably 5-7 minutes once you’re practiced—but the result is striking and holds through nearly any movement.
Final Thoughts
The best sporty ponytail for you depends on your hair type, the specific activity you’re doing, how much time you’re willing to spend creating it, and your personal style preference. The simplest options—the double-secured tight ponytail and the high crown ponytail with booster pins—deliver exceptional hold with minimal effort. If you have time and want a more visually interesting style, the braided variations offer both security and style.
The common thread connecting all of these styles is tension and multiple anchor points. Athletic hold isn’t just about an elastic being tight; it’s about distributing your hair’s weight across multiple secure points so no single point bears all the pressure. Start with whichever style appeals to you, practice it a few times until you can execute it smoothly, and you’ll have a reliable hairstyle for any physical activity.
Pay attention to what actually works for your hair and your head shape—everyone’s hair is different, and a style that works perfectly for your friend might need minor tweaks to work best for you. Don’t be afraid to mix and match elements from different styles. Combine the double elastic approach from style #1 with the booster pins from style #5, or use the braid wrap technique from style #2 with the rope braid from style #7. The point is creating a system that keeps your hair secure so you can focus on your activity, not on adjusting your ponytail every five minutes.