Being a bridesmaid is thrilling—you’re standing beside someone you love on one of their most important days. But there’s one element that can make or break your bridesmaid look: your hair. If you’ve got short hair and love the texture and movement of waves, you’re in for a treat. Short wavy hairstyles for bridesmaids offer the perfect balance of elegance, practicality, and modern style. They photograph beautifully in formal settings, stay manageable throughout a long celebration, and give you the sophistication you need without requiring hours in the styling chair.
The magic of short wavy hairstyles lies in their versatility. Waves add dimension and personality to shorter lengths in ways that straight styles simply can’t match. Whether you’re working with a pixie cut, a bob, or anything in between, texture transforms your hair from simple to stunning. For weddings specifically, waves are forgiving—they hide any flyaways that emerge during the day, they hold up beautifully through dancing and photos, and they work with nearly every bridesmaid dress color and style imaginable.
What makes a short wavy style work as a bridesmaid look rather than just an everyday hairstyle is intention. The right cut, the right styling products, and the right finishing touches turn casual waves into something wedding-worthy. You want waves that feel intentional and polished, not like you just rolled out of bed. This distinction matters when you’re standing in formal family photos or walking down the aisle. The good news? All of that is entirely achievable, even if you’re not a professional stylist.
Let’s explore ten specific short wavy hairstyles that are absolutely perfect for bridesmaids—styles that work with professional photography, coordinate beautifully with formal wear, and keep you feeling confident all day long.
1. Textured Pixie with Tousled Waves
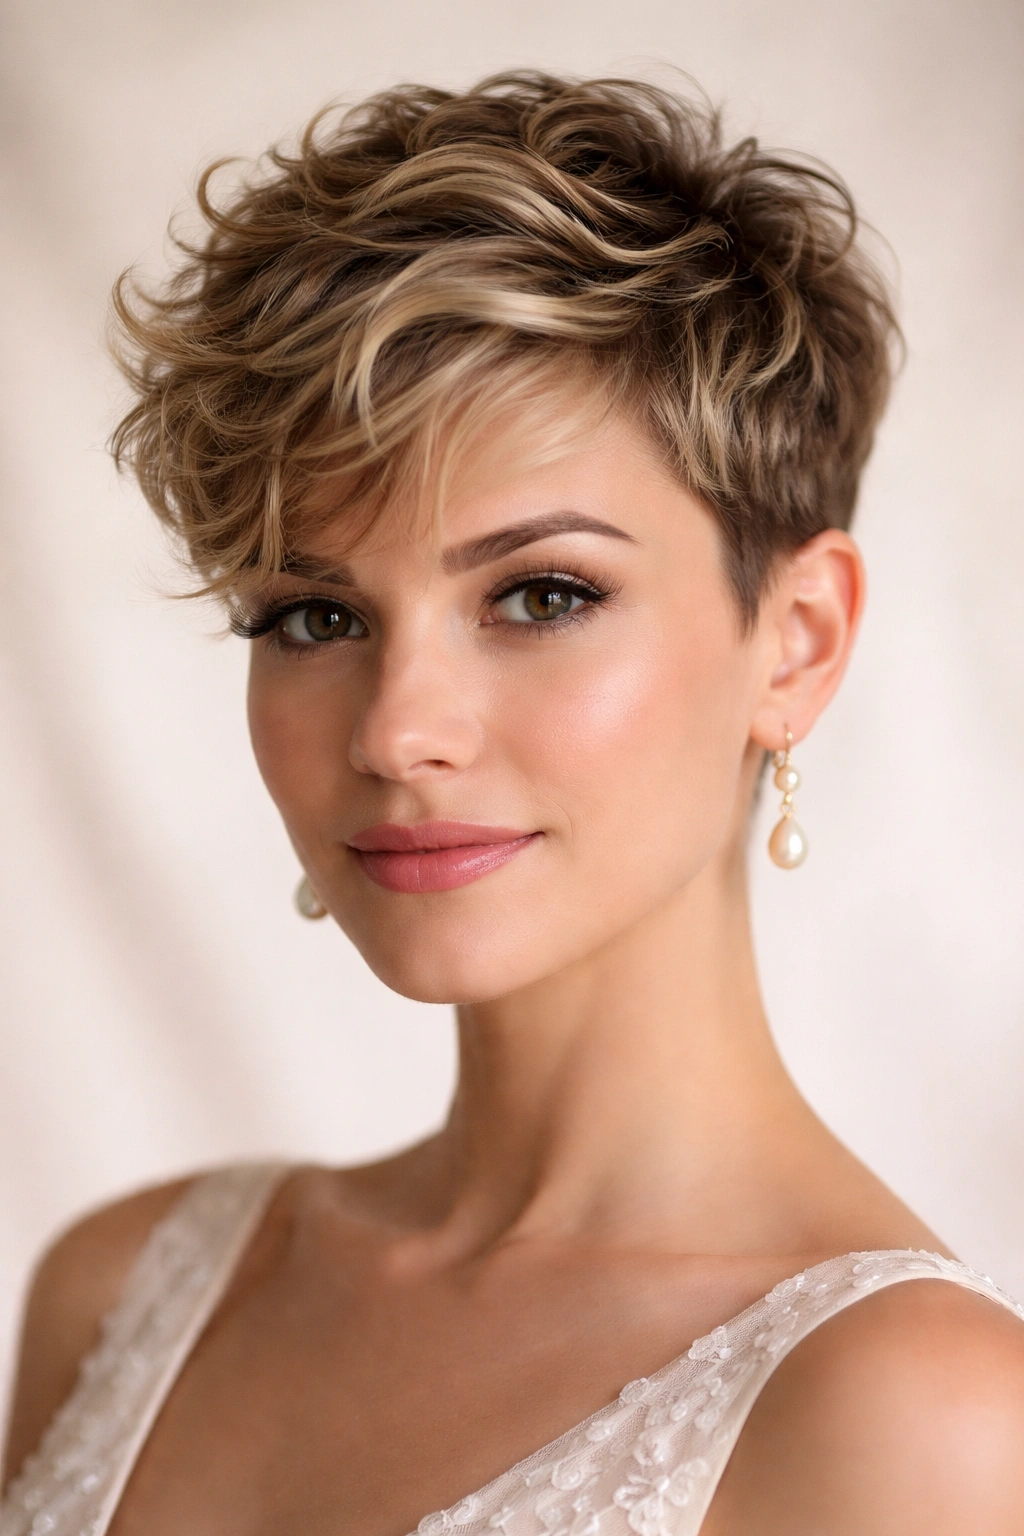
A textured pixie cut brings an undeniably chic energy to any wedding party. This style keeps the cut very short on the sides and back—typically an inch to an inch and a half—while leaving the top longer, usually two to three inches. The length on top is where the magic happens. Those extra inches allow enough hair to create genuine waves and texture rather than just a close-cropped look.
Why This Works for Bridesmaids
A textured pixie reads as intentional and fashion-forward without being too trendy or casual. The short length means zero maintenance during the reception—no pinning, no checking your hair in the mirror every twenty minutes. You can move freely, dance without worry, and still look polished in formal photographs. The waves on top catch the light beautifully, adding visual interest and depth that a blunt pixie simply cannot achieve.
How to Style and Maintain It
- Use a lightweight texturizing paste or matte pomade, working it through damp hair with your fingers for a piecy, sculptural look
- Blow-dry with a diffuser attachment to encourage natural wave formation in the shorter layers
- Finish with a light hairspray—the goal is waves that move, not waves that are frozen in place
- Have your stylist cut in longer pieces around your face to frame your features and soften the overall look
- Consider a partial highlight or lowlight through the top layers to emphasize the texture and dimension
Pro tip: Schedule your cut at least two weeks before the wedding so it’s not too short and has time to settle. Your hair will have the perfect length for creating defined waves by wedding day.
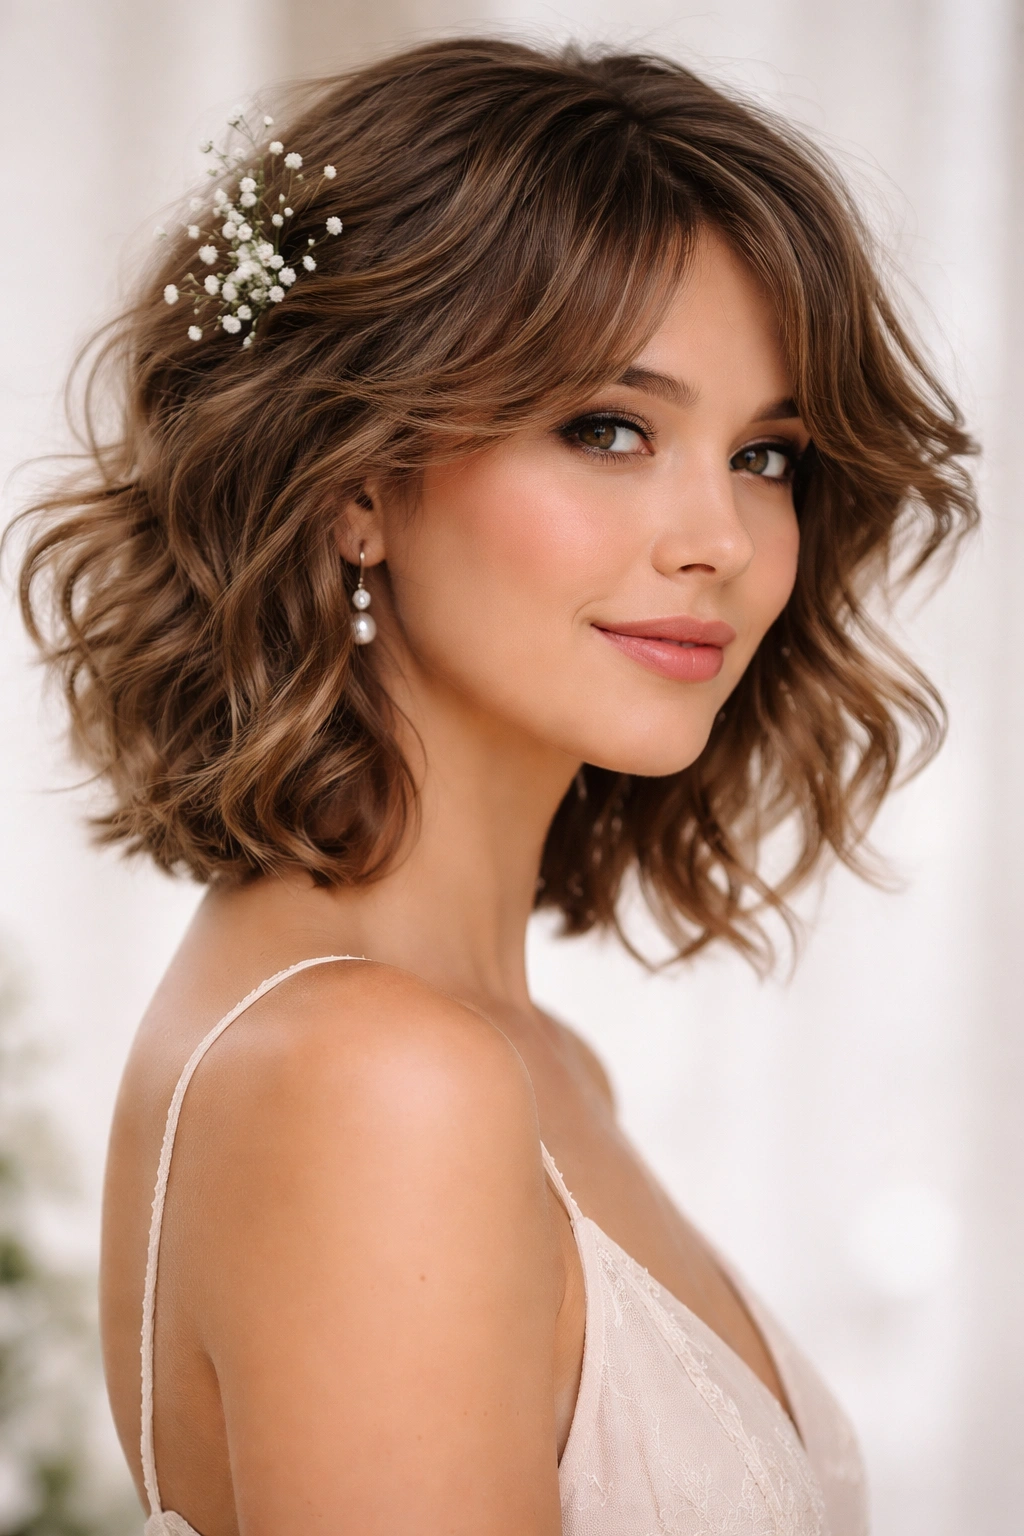
2. Layered Bob with Soft Waves
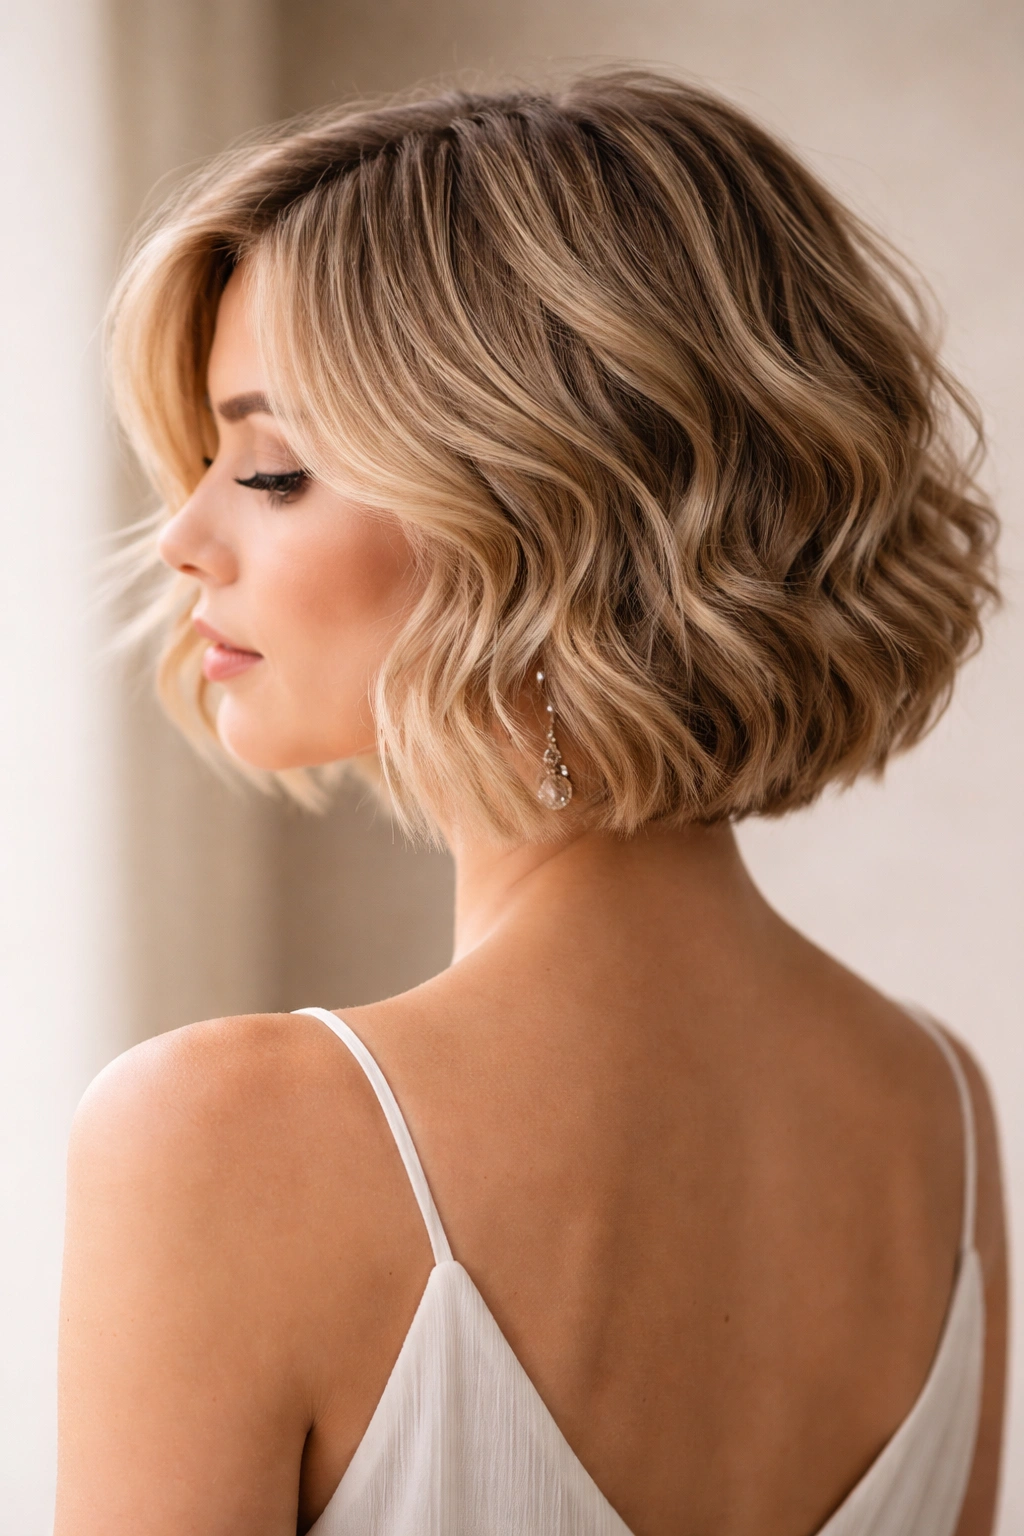
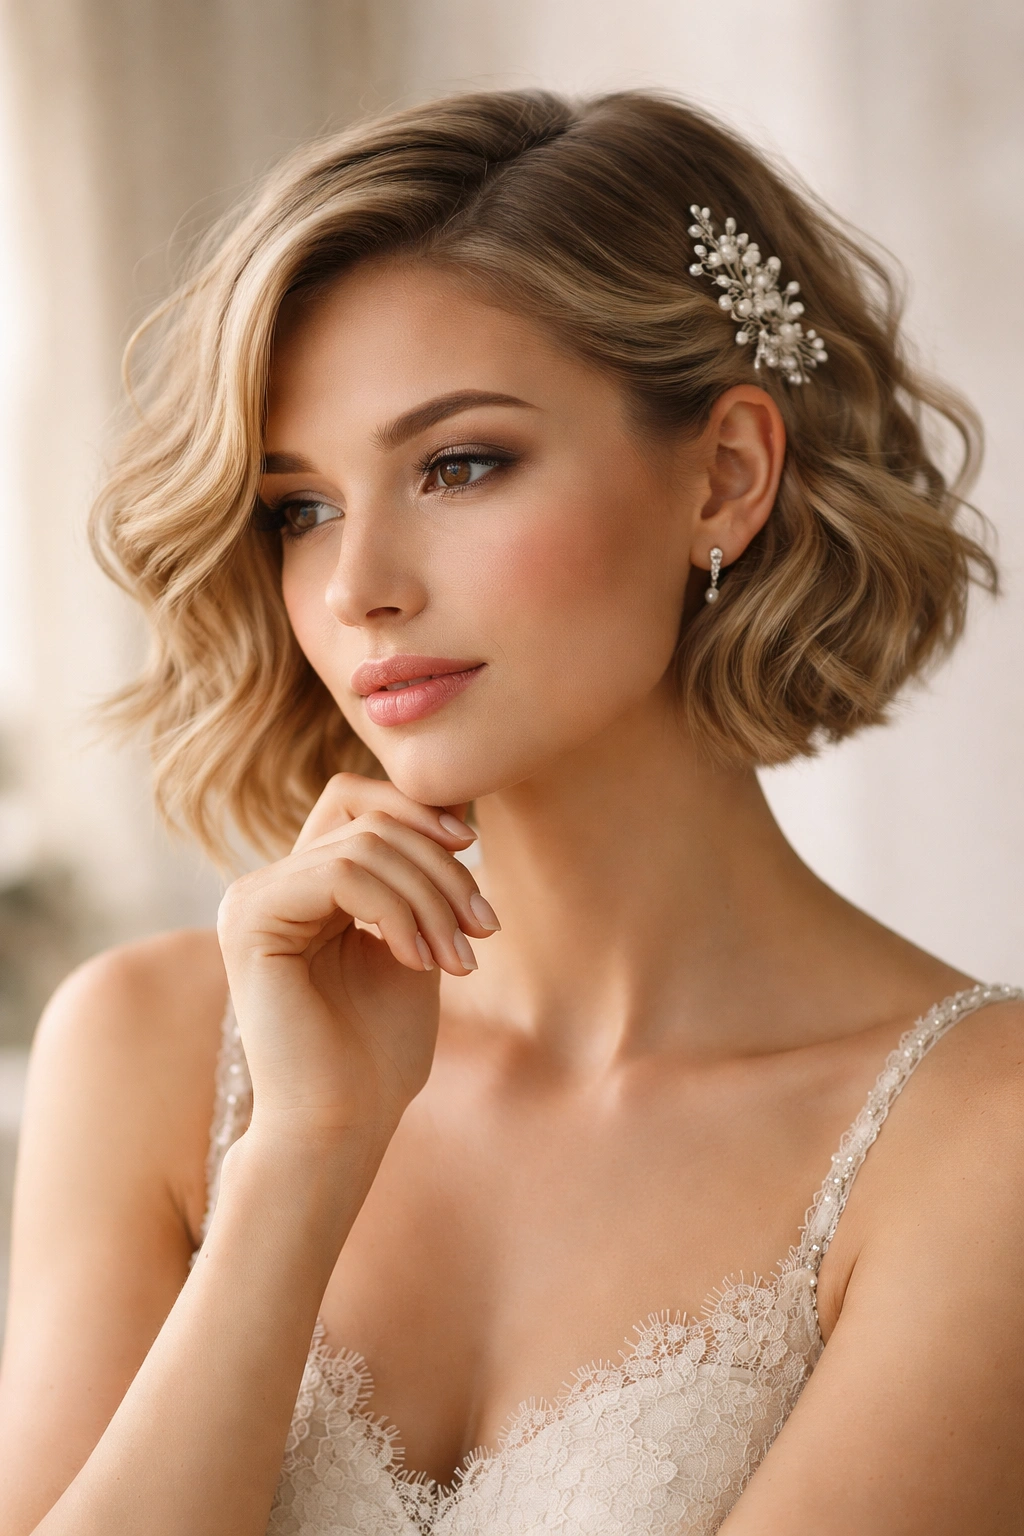
The layered bob remains one of the most universally flattering short hairstyles available, and when you add soft waves to the mix, it becomes absolutely wedding-appropriate. This cut sits just below your ears or chin, with strategic layers throughout that create movement and texture. Unlike a blunt bob, which can look severe, a layered bob feels approachable, modern, and undeniably romantic.
Why This Works for Bridesmaids
Waves in a layered bob make the style feel intentional without looking overdone. The layers naturally catch waves and hold them longer than a blunt cut would, so your style stays intact through the entire wedding day. A layered bob also has an inherent softness that photographs beautifully—it’s the kind of style that looks elegant in candid shots and stunning in formal portraits. It pairs flawlessly with every bridesmaid dress neckline imaginable.
How to Style and Maintain It
- Ask your stylist for layers that are shorter near your face and longer in the back for a flattering face-frame
- Blow-dry with waves while damp, using a medium barrel round brush or a curling iron to create soft S-curves
- Apply a wave cream or lightweight mousse before blow-drying to help waves hold longer
- Use a texturizing spray after styling to add grip and prevent slippage throughout the day
- Consider asking for a side-swept piece that can be tucked behind your ear for a polished look
Worth knowing: A layered bob is incredibly versatile for styling options—you can wear it down and wavy as described, half-up with a delicate clip, or even slicked back with a smooth finish, depending on your dress style and the overall wedding aesthetic.
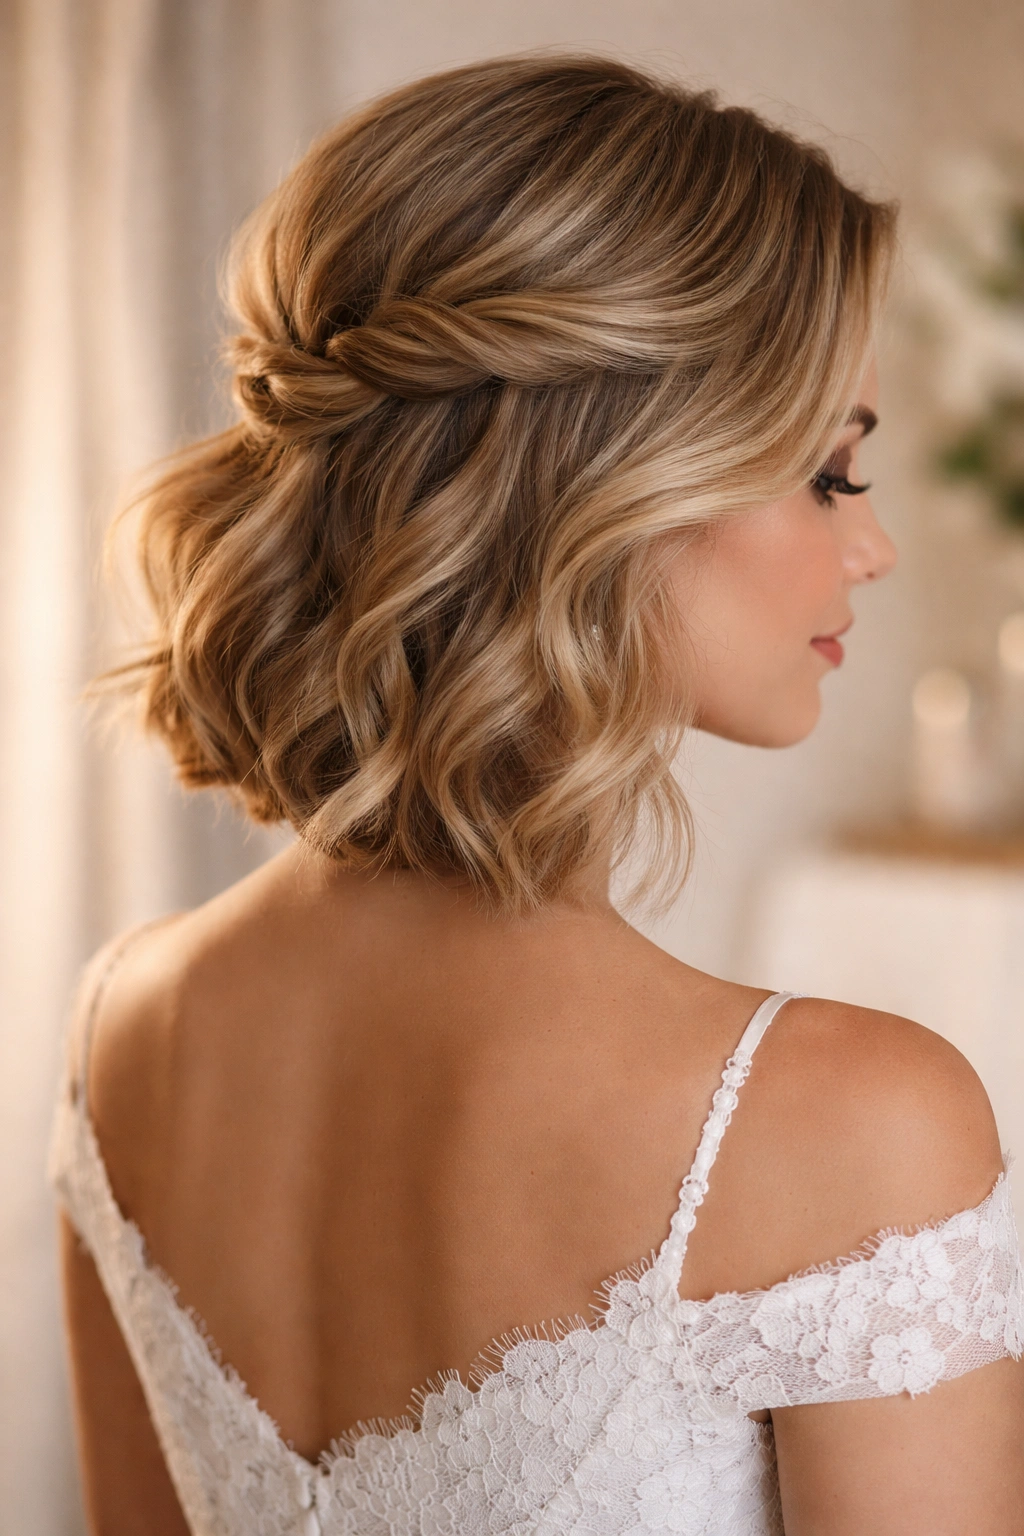
3. Half-Up Half-Down Wavy Style
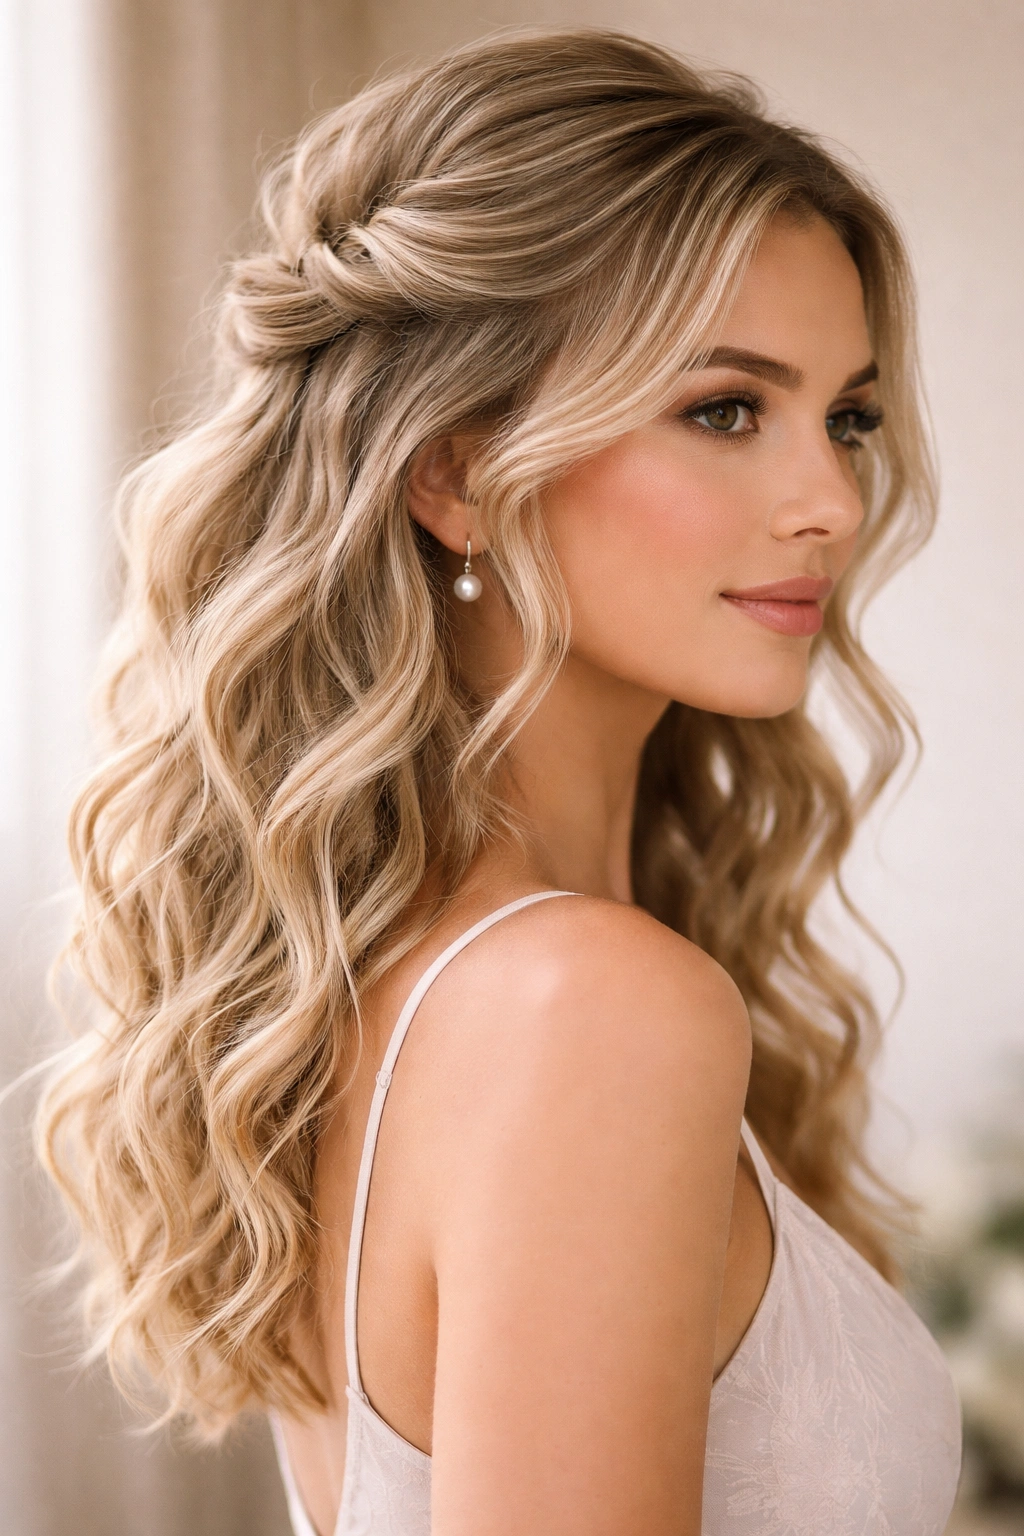
Half-up, half-down styling has earned its place as a bridesmaid favorite for good reason. This approach takes short hair and creates the appearance of more length and dimension than you actually have, while keeping hair off your shoulders and out of your face during the ceremony. The key to making this work with short hair is strategic sectioning and creating substantial waves in both the up and down portions.
Why This Works for Bridesmaids
This style offers the best of both worlds—the polished, purposeful look of an updo combined with the softness and movement of down waves. For bridesmaids, this means you get a style that’s formal enough for ceremony photographs yet comfortable enough for hours of celebrating. The half-up styling also keeps your neck and shoulders visible, which is crucial if you’re wearing a strapless or off-shoulder bridesmaid dress.
How to Style and Maintain It
- Create deep waves throughout your entire head of hair before sectioning anything up
- Section the top half of your hair—roughly from the temples back—and secure it with an elastic, leaving the lower half loose and wavy
- For a more polished look, take the secured section and twist it gently before securing, or create a small braid before tying it back
- Smooth the top section slightly with a comb to look intentional rather than just pulled back
- Leave two to three thin pieces in front of your ears loose and wavy to frame your face
- Secure with bobby pins that match your hair color and finish with light hairspray
Insider note: The more defined your waves are before you pin anything up, the more impressive the overall style will look. Dedicate time to creating genuine waves first, then handle the half-up aspect.
4. Sleek Waves with Side-Swept Bangs
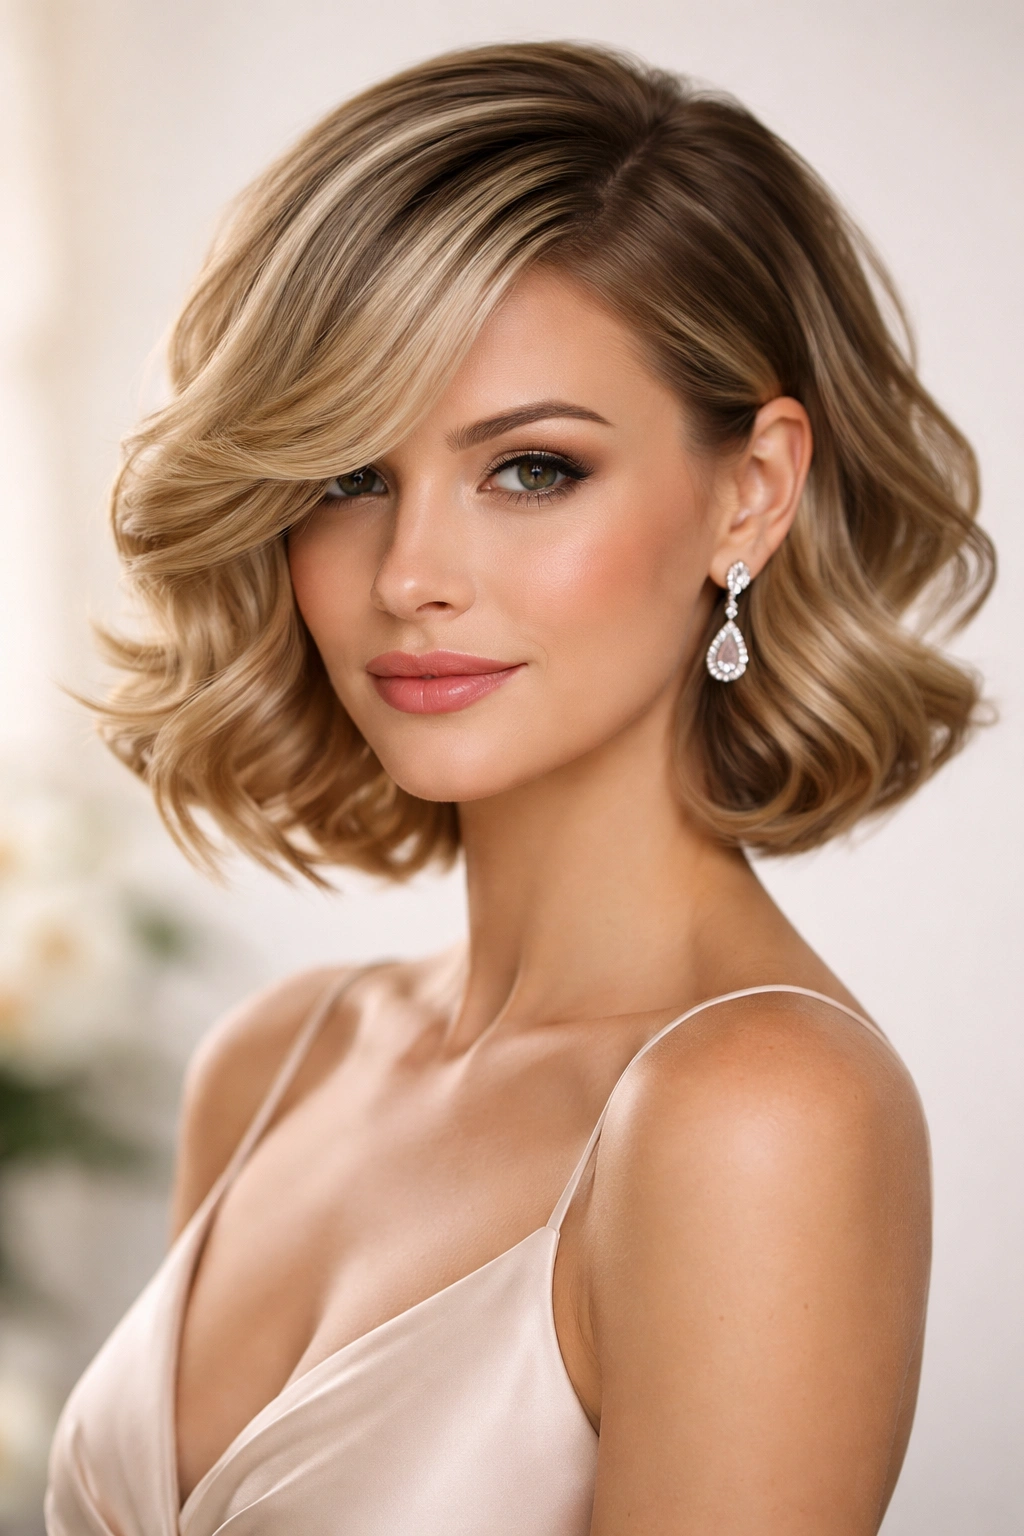
This style pairs sophisticated, defined waves with a side-swept bang that adds polish and visual interest without requiring extensive styling maintenance. The waves are tighter and more deliberate than tousled texture—think classic Hollywood waves rather than beachy waves. The side-swept bangs create an elegant line and give you something to do with your front pieces besides tuck them behind your ears.
Why This Works for Bridesmaids
Sleek waves feel exceptionally formal and intentional, making them perfect for wedding day photography. They’re also one of the most stable wave styles—they hold beautifully for hours without needing touchups. The side-swept bangs add an extra layer of sophistication and help frame your face in ways that photograph exceptionally well. This style works particularly well if you have finer hair texture that struggles to hold loose waves—the deliberate, defined approach actually works in your favor.
How to Style and Maintain It
- Ask your stylist to cut subtle bangs or longer pieces at the front that can be swept to one side
- Create waves using a curling iron with a small to medium barrel, wrapping sections around the barrel and holding for a few seconds
- For maximum hold, alternate the direction you wrap the iron—this creates waves that weave together rather than curl in one direction
- Once all sections are curled, let them cool for several minutes before gently running your fingers through for a softer wave pattern
- Use a side part and sweep the bangs across your face, securing with bobby pins on the opposite side if needed
- Finish with a flexible hold hairspray that moves with your hair but keeps everything in place
Quick facts about this style:
- Works exceptionally well on straight, wavy, and even curly hair types
- Holds beautifully for eight to ten hours without touch-ups
- Photographs with incredible dimension and depth in formal settings
- Pairs beautifully with elegant jewelry and updos accessories like clips or combs
- Can be adapted from very formal (tighter, more defined waves) to slightly looser depending on your preference
5. Braided Crown with Wavy Texture
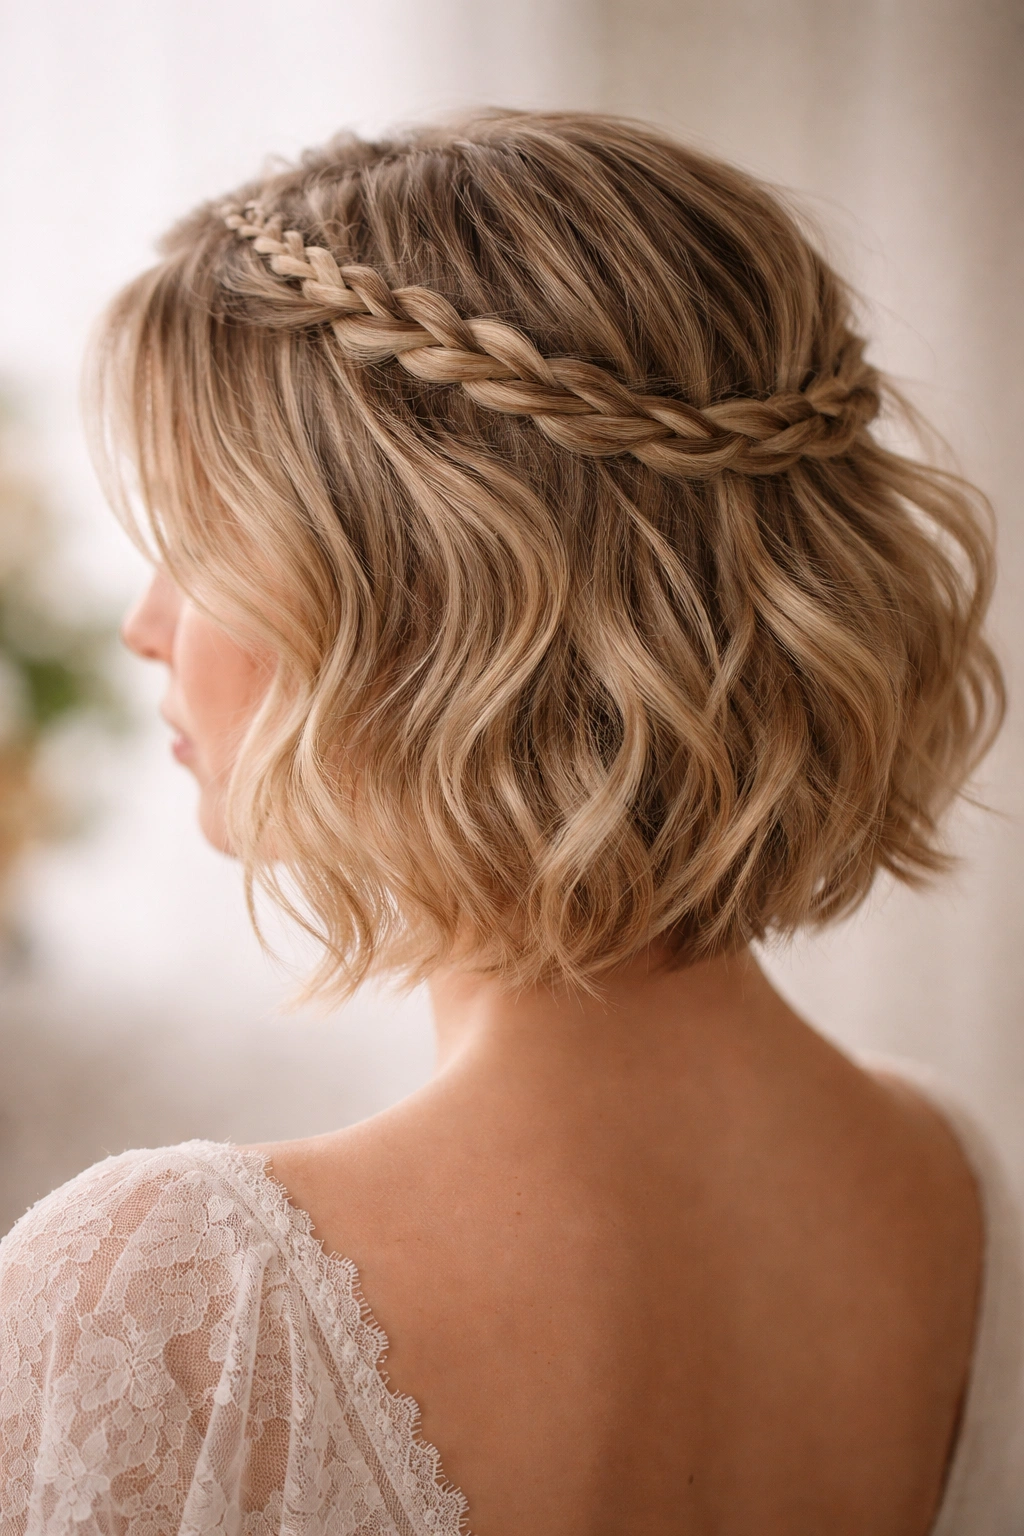
A braided crown weaves texture and interest into your style while keeping hair somewhat controlled and intentional. This approach involves taking a thin braid from one side of your head, wrapping it around the crown area, and securing it while leaving the rest of your hair down and wavy. It’s the kind of style that looks effortless but actually requires a bit of planning and technique.
Why This Works for Bridesmaids
A braided crown adds an ethereal, romantic quality that’s perfect for wedding celebrations. It’s elevated beyond just a casual braid because the surrounding hair is textured and waves, and the braid itself becomes a design element rather than a functional hair-holding device. This style keeps some hair off your face and neck while maintaining softness and movement. It’s particularly beautiful for outdoor weddings or garden ceremonies where you want to feel romantic and ethereal.
How to Style and Maintain It
- Blow-dry your hair with waves throughout before starting to braid—the braided portion needs textured hair to grip and look intentional
- Take a thin section of hair from one temple and braid it loosely, creating a three-strand braid that’s slightly loose rather than tight
- Wrap the braid around the back of your head, tucking the end and securing it with bobby pins that match your hair color
- Let the wavy portions of your hair fall loosely around your shoulders and down your back
- Use a light texturizing spray on your waves to give them grip and help them hold through the evening
- Finish with a flexible hairspray that doesn’t make hair feel stiff or crunchy
Pro tip: Practice this braid at least twice before the wedding day. It looks simple but requires you to work on the back of your head, which takes some practice if you’re not used to braiding your own hair.
6. Angled Lob with Choppy Waves
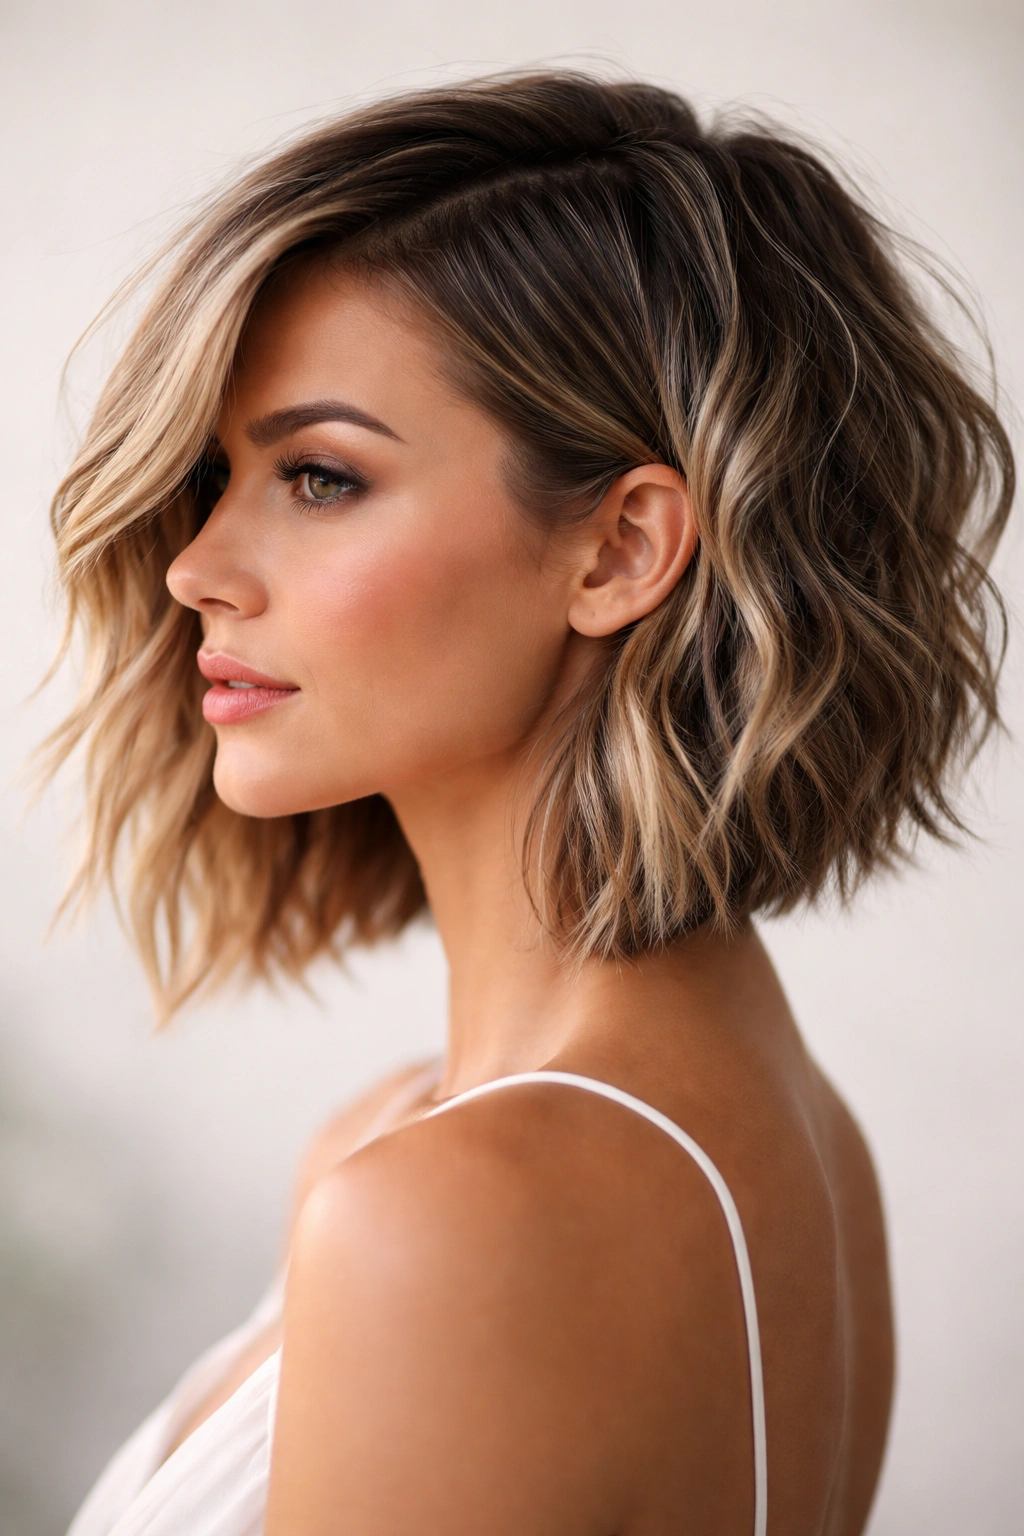
An angled lob—that magical length between a bob and longer hair, typically sitting between your chin and your shoulders—becomes dramatic and fashion-forward when cut with choppy layers and finished with intentional waves. The angles in the cut mean that waves don’t sit in neat rows; instead, they stack and layer, creating incredible texture and movement even on shorter hair.
Why This Works for Bridesmaids
The angled lob with choppy waves strikes a perfect balance between “I made an effort” and “I still look like myself, just elevated.” The choppy layers hold waves beautifully, meaning your style stays intact throughout the ceremony and reception. The angles create visual interest that reads beautifully in photographs—it’s not a single shape but rather a collection of flowing, textured lines. This is an excellent choice if you want to look sophisticated without feeling overly done or uncomfortable.
How to Style and Maintain It
- Have your stylist cut with sharp, choppy layers that are shorter on one side, creating an obvious angle
- Blow-dry with a round brush or flat iron, waving sections as you go for an intentional, textured look
- Use a volumizing product at the roots if you have finer hair—the choppy layers will show more volume when you’ve got something to work with
- Work a texturizing cream through damp hair before blow-drying for enhanced grip and wave longevity
- Style waves so they flip away from your face, creating an open, polished look
- Finish with dry shampoo or texturizing spray to add grip and prevent any slippage during the day
Quick facts about this style:
- Works beautifully on oval, round, and heart-shaped faces because the angles can be customized to your proportions
- Holds waves for longer than blunt bobs because of the layered texture
- Photographs with impressive dimension and movement
- Takes fifteen to twenty minutes to style but looks incredibly intentional and put-together
7. Curled Shag Cut with Movement
A shag cut—yes, they’re back, and they’re better than ever—brings an edgy, textured vibe that works beautifully for bridesmaids who want something memorable and distinctive. The modern shag features shorter layers throughout with slightly longer pieces, creating a feathered, flowing movement. When you add deliberate curls and waves to a shag, you get a style that’s undeniably eye-catching while remaining romantic and wedding-appropriate.
Why This Works for Bridesmaids
A shag cut is inherently textured, which means waves and curls become part of the design rather than something fighting against the cut shape. This style celebrates movement and texture in ways that feel intentional and fashion-forward. It’s perfect for bridesmaids who have natural wave or curl patterns and want to lean into them rather than fight them. The layers also mean the style moves beautifully when you walk, dance, or turn your head—it’s incredibly photogenic in motion.
How to Style and Maintain It
- Ask your stylist for a modern shag with defined layers throughout and slightly longer pieces at the bottom
- Work styling product through damp hair—a curl cream or wave cream works beautifully for this texture
- Create curls and waves using a medium barrel curling iron, wrapping sections loosely for more relaxed waves or more tightly for defined curls
- Once all sections are curled, gently finger-comb through your hair to break up the curls into softer waves
- Use a finishing spray that provides light hold without crunchiness—you want movement, not stiffness
- Consider adding a tiny amount of shine serum to the ends for a polished final touch
Worth knowing: Shag cuts require more styling than some other short styles, but they’re worth it for the incredible texture and movement. Make sure you’re comfortable with a few extra minutes of styling time on wedding day.
8. Twisted Side Knot with Cascading Waves
This style combines an elegant twisted detail on one side of your head with loose, cascading waves that fall freely. The twisted knot isn’t an updo in the traditional sense—it’s more like a sculptural element that adds visual interest while leaving most of your hair down. It’s sophisticated without being fussy, and it keeps a bit of hair off your face without requiring an actual updo.
Why This Works for Bridesmaids
The twisted side knot feels polished and intentional, which is exactly what you need for bridesmaid photos. The cascading waves balance the structured knot, creating a look that’s neither too casual nor too formal—it’s perfectly in between. This style also offers practical benefits: a bit of hair is secured away from your face, but you still have the movement and flow of down waves. It’s the kind of detail that catches the eye in photographs without looking overdone.
How to Style and Maintain It
- Create loose, relaxed waves throughout your entire head before starting to style the twist
- Take a section of hair from one temple and twist it, working toward the back of your head
- Once you’ve twisted it as far back as feels natural, wrap it into a small, loose knot and secure with bobby pins
- Leave the rest of your hair completely down and wavy—the knot should feel like one design element rather than the focal point
- Make sure at least one inch of your face in front of the knot shows—you don’t want the twist starting too far back
- Use flexible hairspray that allows waves to move rather than freezing them in place
Pro tip: Practice the twist direction you prefer ahead of time. Some people find twisting toward their face easier, while others prefer twisting away. Find what works for you before wedding day.
9. Voluminous Beach Waves with Undercut
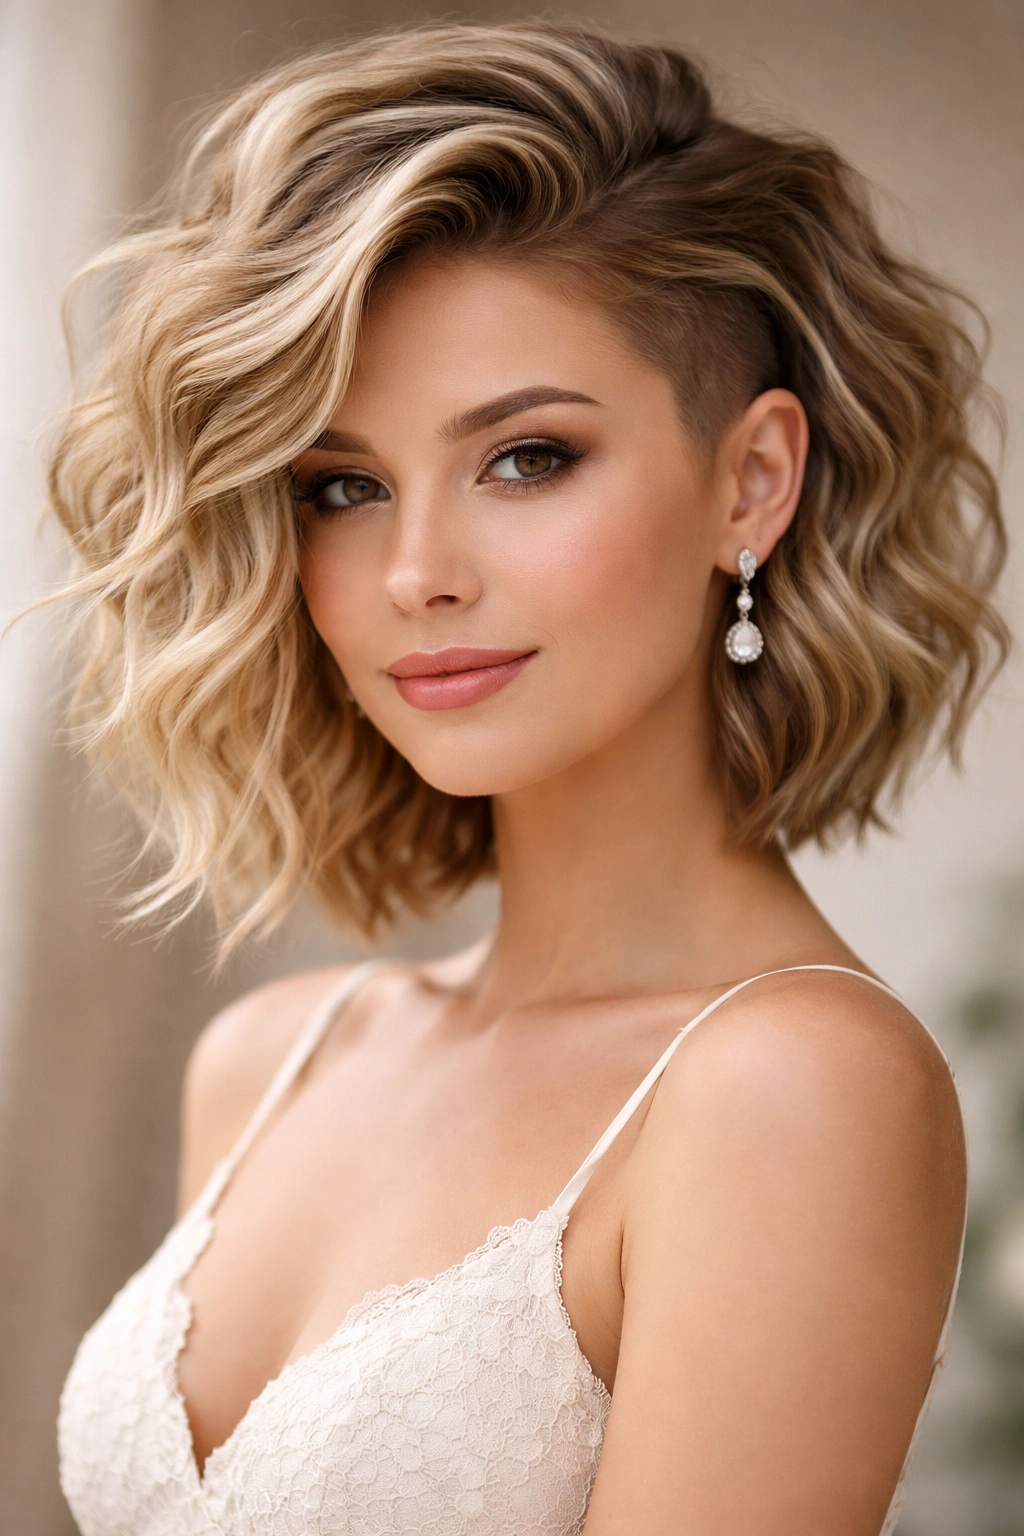
If you love the laid-back vibe of beach waves but need something wedding-appropriate, voluminous beach waves with a subtle undercut deliver exactly that. The undercut—shorter hair underneath with longer hair on top—creates dimension and makes waves look even more textured. From the front, you see gorgeous waves; from the side, you see the architectural structure that makes them possible.
Why This Works for Bridesmaids
Beach waves feel youthful and carefree while still maintaining sophistication when they’re styled with intentionality and volume. The undercut adds an edgy element that makes the style feel modern and distinctive without being unprofessional. This style is fantastic if you have fine or flat hair because the undercut structure prevents hair from looking thin, and the volume on top creates the impression of more hair than you actually have.
How to Style and Maintain It
- Ask your stylist for longer layers on top with a subtle undercut underneath—the top layer should be two to three inches longer than the undercut
- Create waves using a large barrel curling iron or a wand, working through damp, product-treated hair
- Use a volumizing mousse or texturizing spray at the roots to enhance natural volume
- Blow-dry with a round brush, flipping your hair side to side for maximum body and texture
- Once waves are set, gently tousle them with your fingers to create that effortlessly undone look
- Finish with dry shampoo or sea salt spray to enhance texture and grip
Quick facts about this style:
- Works beautifully on straight, wavy, and curly hair types
- Creates the illusion of more hair and more volume than you actually have
- Holds waves for ten to twelve hours without major touch-ups
- Photographs with impressive texture and dimension
- Can be styled more formal or more casual depending on how much you tousle the waves
10. Finger Waves with Vintage Glamour
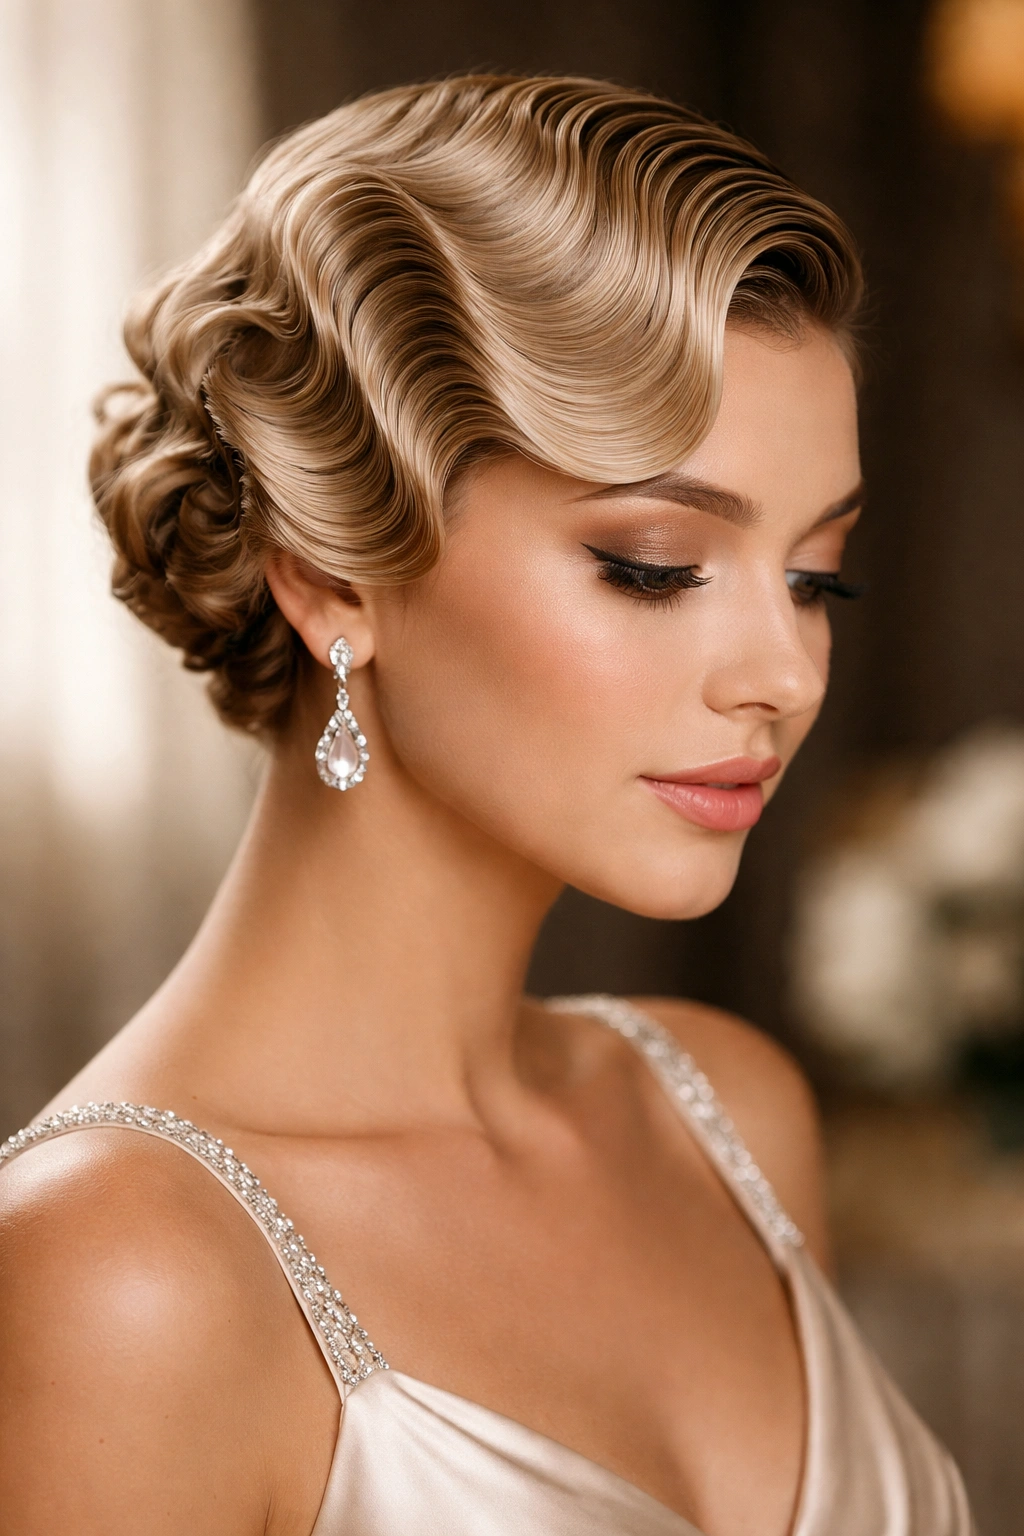
Finger waves are a classic styling technique that creates beautifully defined, sculptural waves that drape across your head with undeniable elegance. Unlike modern waves that are often loose and textured, finger waves are precise and intentional—each wave has a clear shape and definition. When done well, finger waves read as incredibly formal and sophisticated, making them perfect for wedding celebrations.
Why This Works for Bridesmaids
Finger waves feel timelessly elegant and photograph exceptionally well in formal settings. The defined shapes catch light beautifully, creating visual interest and dimension. This style is particularly stunning if you’re wearing a vintage-inspired or classic bridesmaid dress, as finger waves complement that aesthetic perfectly. They also hold for an incredibly long time—once set, they typically maintain their shape for ten to twelve hours without needing any touch-ups.
How to Style and Maintain It
- Start with damp hair and apply a setting lotion or wave-setting product that provides genuine hold
- Using a fine-tooth comb, create the shape of your first wave by combing your hair in one direction, creating a ridge
- Use bobby pins positioned horizontally along the ridge to hold the wave in place while it sets
- Continue creating waves across your entire head, making sure each wave is clearly defined
- For maximum hold, let the pinned waves set under a warm blow dryer for fifteen to twenty minutes
- Once set, carefully remove the bobby pins and gently brush through with a soft brush to blend the waves slightly
- Finish with a strong-hold hairspray that will keep waves in place for hours
Worth knowing: Finger waves require more technical skill than some other styles, so definitely have a professional stylist create them unless you have significant experience. The payoff is absolutely worth it—this is the kind of style that people remember.
Final Thoughts
Choosing a short wavy bridesmaid hairstyle doesn’t mean settling for something less formal or less memorable than longer styles. Short hair with intentional waves offers sophistication, practicality, and personality in equal measure. The ten styles covered here represent genuine diversity—from edgy pixies to classic finger waves, from romantic braided crowns to modern shags—ensuring that no matter your hair texture, face shape, or personal style, there’s a short wavy bridesmaid look that will feel authentically like you while looking undeniably wedding-ready.
The key to any successful bridesmaid hairstyle is collaboration. Have a detailed consultation with your stylist before wedding day, show photos of styles you love, and discuss your hair’s natural texture and what it responds to. Book your appointment with enough time that if you need adjustments, you can schedule a follow-up. Most importantly, choose a style that makes you feel confident and comfortable—that confidence shows in every photograph and contributes to the joy and ease you bring to the whole celebration.
Your role as a bridesmaid is to support and celebrate, and the right hairstyle should support you by looking beautiful without requiring constant attention. These short wavy styles do exactly that, leaving you free to focus on what really matters: standing beside your friend on one of the most important days of her life.