Cornrows have been a cornerstone of Black beauty and cultural expression for generations, and freehand cornrows represent the pinnacle of this artistry. Unlike braids created with predetermined patterns or tools, freehand cornrows are sculpted directly from the hair with pure skill and intuition, allowing for personalized designs that reflect individual style and creativity. The beauty of freehand work lies in its flexibility—the braider adapts to hair texture, head shape, and the client’s specific vision in real time, creating truly one-of-a-kind styles that can’t be exactly replicated twice.
What makes freehand cornrows different from their template-based counterparts is the immediate relationship between braider and client. Every curve, width adjustment, and directional shift happens organically as the braider reads the hair and responds to what they see and feel. This requires serious technical skill—understanding tension, sectioning, and the geometry of the scalp—but it’s this mastery that transforms cornrows from a protective style into wearable art. For Black women seeking styles that honor cultural heritage while expressing personal identity, freehand cornrows offer infinite possibilities.
The styles that follow aren’t just pretty designs; they’re practical, protective, and deeply customizable. Whether you’re drawn to bold graphic designs, subtle flowing patterns, or something that blends multiple techniques, there’s a freehand cornrow style that speaks to your aesthetic. The key is working with a skilled braider who understands your hair, listens to your vision, and has the confidence to bring creativity to life.
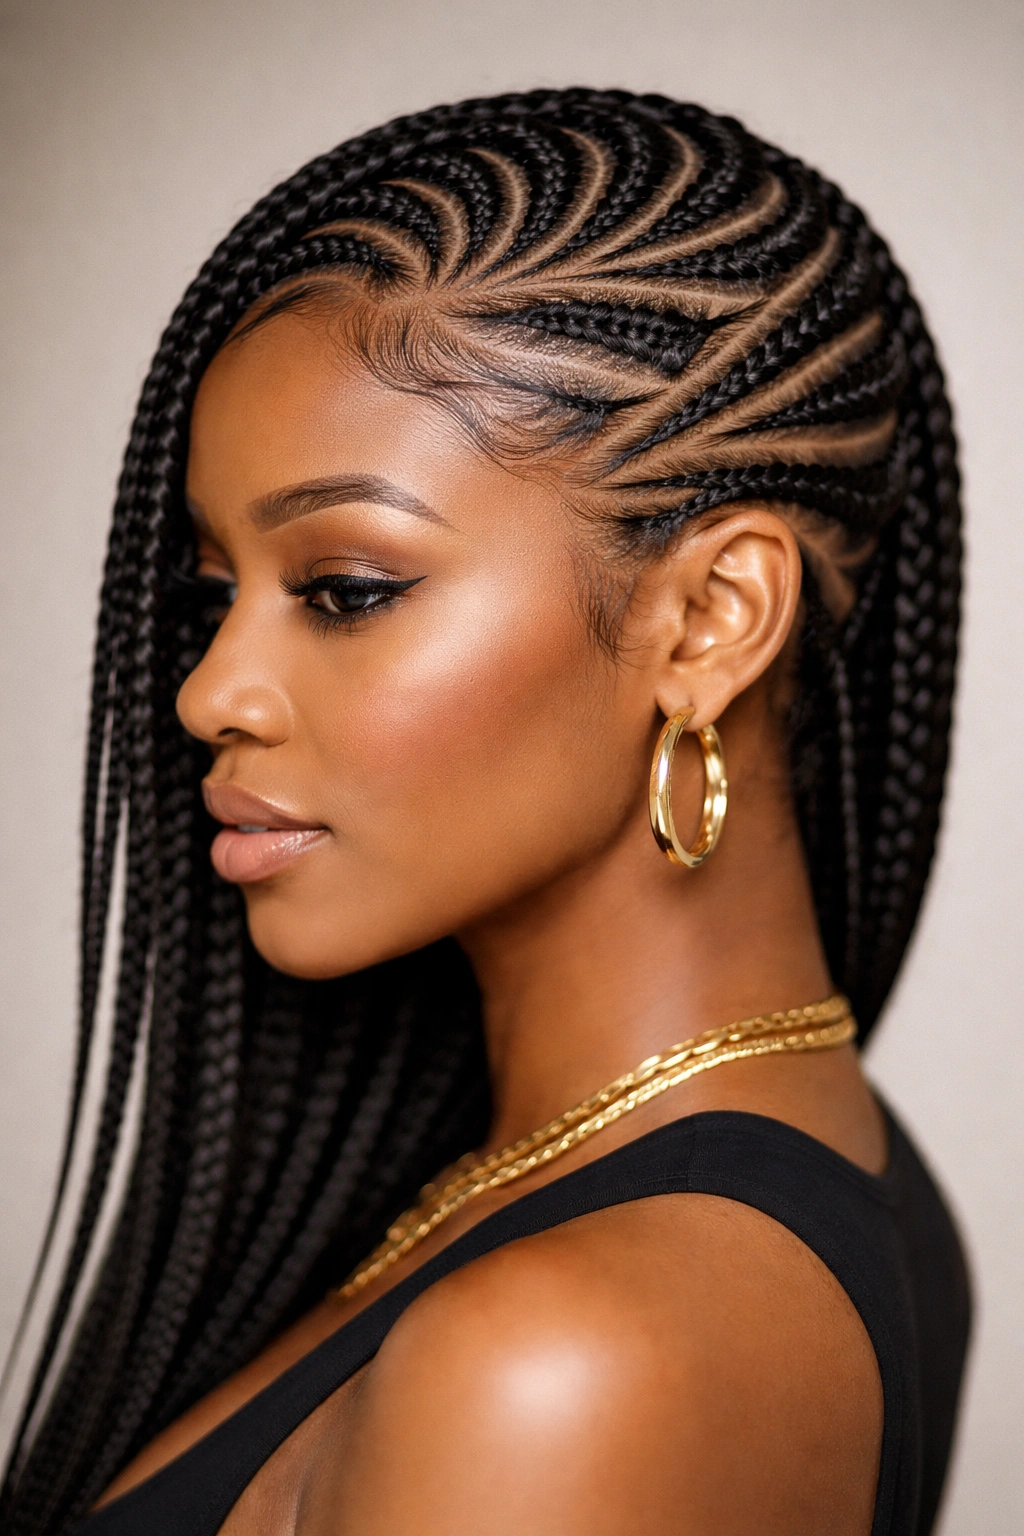
1. The Curved Goddess Crown
This style takes the classic idea of a crown and reimagines it with flowing curves that follow the natural contours of your head. Rather than rigid, uniform lines, curved goddess crowns feature serpentine cornrows that spiral gently from one temple, curve up and over the crown, and flow down to the opposite temple, creating an effect that looks like you’re wearing an elegant crown made of your own hair. The beauty of this freehand approach is that the braider customizes the curve to match your specific head shape—what looks perfect on one person might need adjustment for another.
Why It’s So Versatile and Flattering
Curved cornrows work beautifully on all face shapes because the braider can adjust the starting point and the arc of the curves to complement your features. The curves draw the eye upward and follow the natural lines of your bone structure, creating a visually harmonizing effect. If you have a longer face, the braider might start the curves slightly higher on the temples; if you have a rounder face, they might soften the trajectory of the curves to elongate rather than emphasize width. This adaptability is what makes freehand work so superior to rigid, pre-planned designs.
How to Customize This Style for Your Hair and Face
- Request the braider to create curves that echo your natural cheekbones and brow line
- Specify how many cornrows you want in the crown section (three to five is common, but you can go bolder with more)
- Ask whether you want the remaining hair loose, in a high pony, or woven into the design
- Consider the thickness of each cornrow—thicker rows show the curves more dramatically, while thinner rows create a more delicate effect
- Discuss whether you want the back section to flow straight down or curve inward toward a center point
Pro tip: Ask your braider to create a slightly tighter tension on the crown rows themselves—this makes the curves hold their shape longer and prevents them from flattening as the style settles.
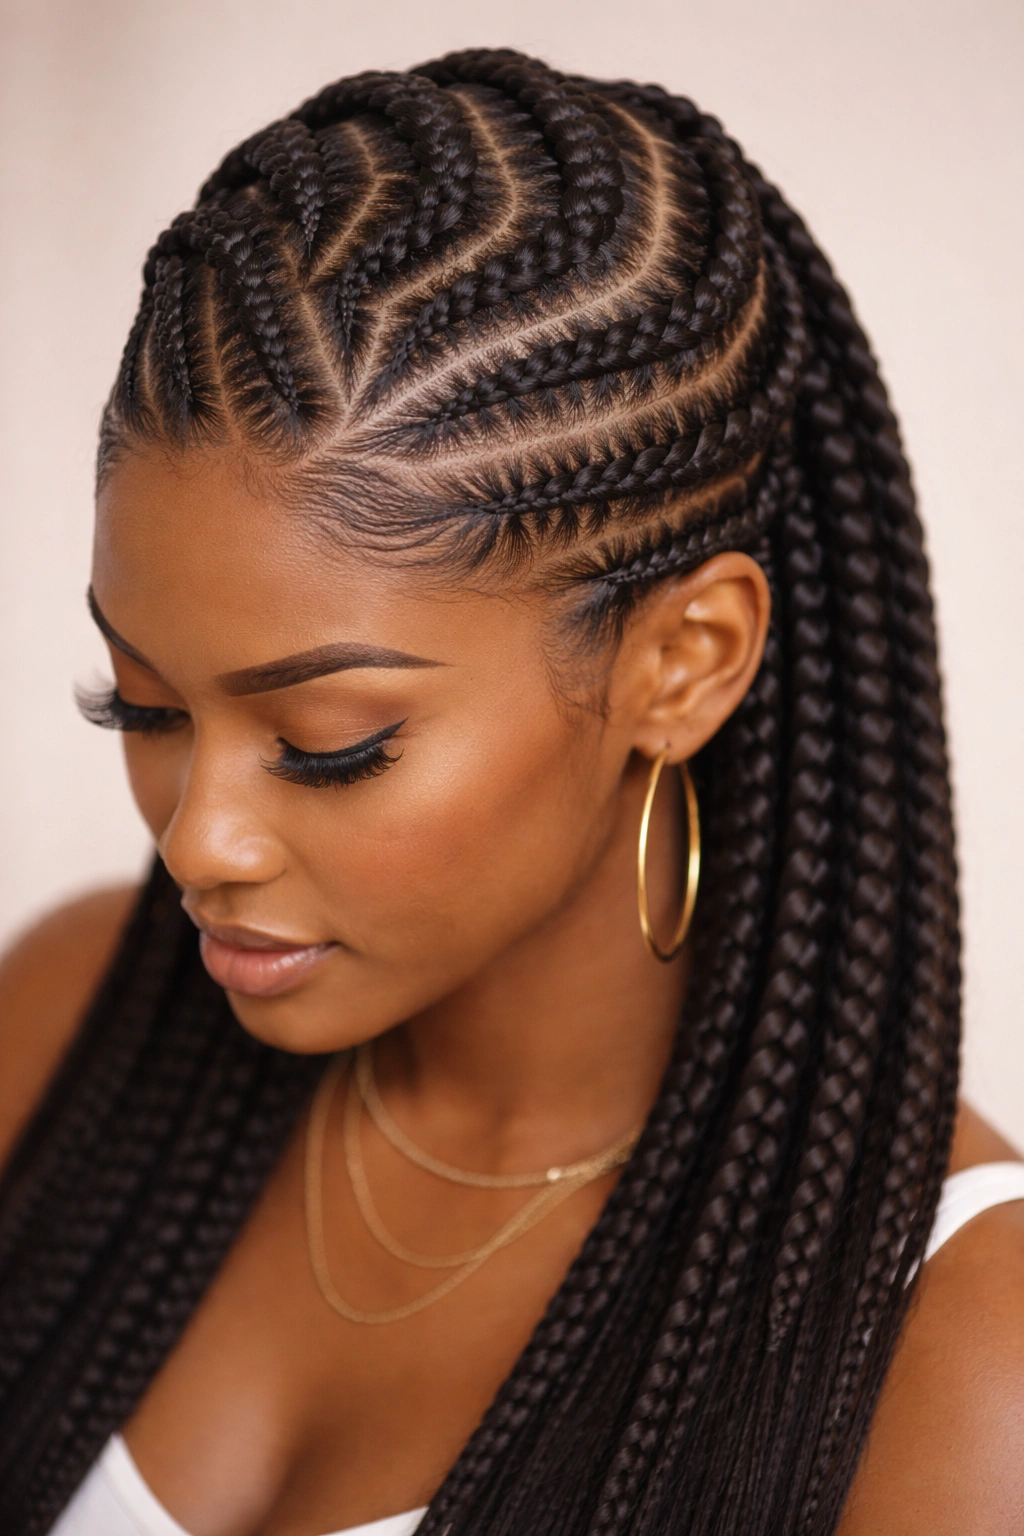
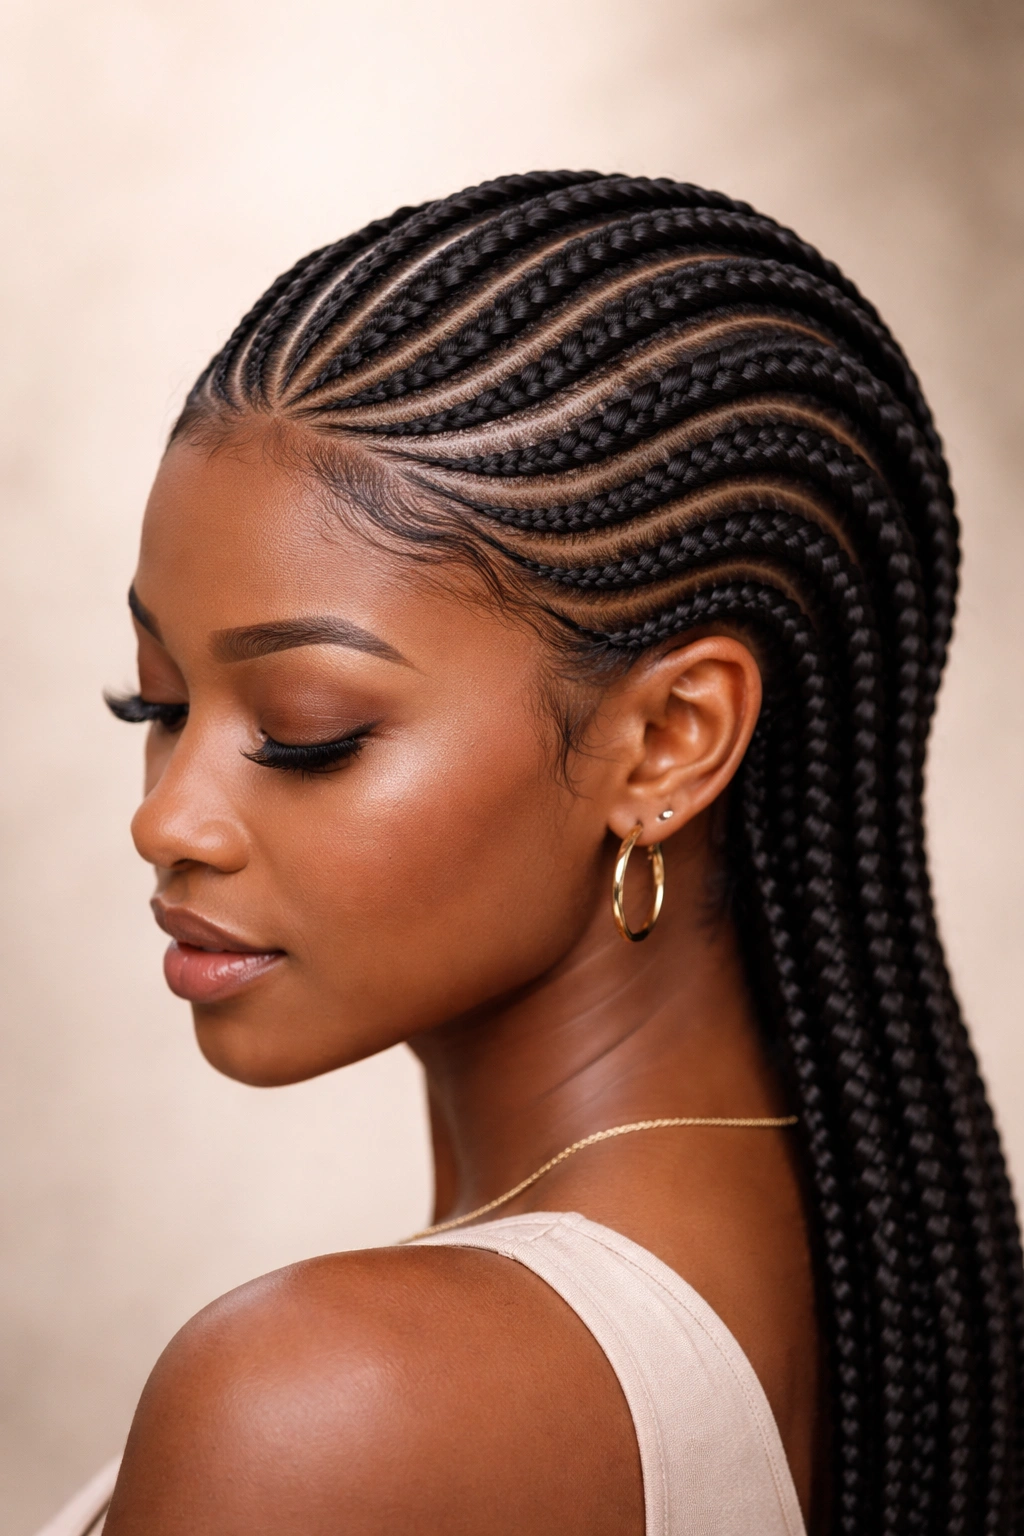
2. The Geometric Side Sweep
This design features bold, angular cornrows that sweep dramatically from the center part toward one side of the head, creating sharp geometric lines and negative space that looks almost architectural. Unlike curved styles, geometric side sweeps embrace angles and clean intersections, giving you a modern, statement-making look that photographs beautifully and catches light in interesting ways. The freehand element here is crucial because the braider must calculate angles in real time, adjusting for your head shape and hair density to make the geometric pattern actually work on a three-dimensional surface.
The Math Behind the Visual Impact
Geometric patterns rely on contrast between positive (braided) space and negative (unbraided) space. A skilled freehand braider understands how to create sections that are mathematically proportional without looking sterile or overdone. The angles typically start narrow (closer together) near the part and gradually widen as they sweep backward, which creates an optical illusion of movement and prevents the design from feeling too rigid. This graduated spacing is something you can’t plan from a flat image—it requires someone who understands three-dimensional spatial relationships.
Tips for Making Geometric Patterns Work on Your Head Shape
- Bring reference photos of geometric designs you love, but expect the braider to adapt them to your specific head
- Discuss where you want the “point” of the geometry to land (your temple, your cheekbone, behind your ear)
- Decide on the width of each cornrow—thinner rows create a finer geometric line, while thicker rows make the pattern bolder and easier to see
- Ask whether you want all rows going the same direction or some contrasting directions for added complexity
- Consider the edge-braiding: geometric designs often look sharper with clean, tight edges
Pro tip: This style makes a bigger visual impact if you add a thin colored hair extension (like gold or silver) to one or two of the cornrows in the geometric pattern—it highlights the design without overwhelming it.
3. The Zigzag Feed-In
Feed-in cornrows incorporate hair extensions into the braid from the very first section, making them last longer and giving them a fuller, more polished appearance. The zigzag variation adds a dynamic element by having the cornrows move back and forth diagonally across the head rather than following a straight path. This freehand style requires real precision because the braider must maintain consistent tension while continuously angling the braid left, then right, creating a rhythmic visual pattern that’s both eye-catching and deeply skillful.
Why Feed-In Changes the Game for Longevity
When hair extensions are woven in from the start of the braid, each individual cornrow becomes more robust and resistant to frizz and unraveling. The extensions also add weight and structure, which helps the style hold its shape through sleeping, exercise, and daily movement. From a freehand braiding perspective, feed-in work requires the braider to manage three elements simultaneously: the natural hair, the extension hair, and the emerging pattern. It’s more complex than braiding without extensions, which is why asking for feed-in braids is a sign you’re looking for longevity and polish.
How Zigzag Patterns Actually Work Geometrically
- A true zigzag hits alternating points across the head—the left side of the head, then the center, then the right side
- The spacing between direction changes is critical: too tight and it looks chaotic, too loose and the zigzag pattern doesn’t read clearly
- The braider typically maps out the spacing visually before starting, but adjusts in real time based on hair density and head shape
- Most flattering zigzags have 3-5 clear “peaks” from one side of the head to the other
- The tension needs to be consistent throughout; any loosening or tightening will make the zigzag look unintentional
Pro tip: Zigzag braids photograph best with some volume underneath—ask your braider not to braid all the way to the scalp if you want the pattern to appear more three-dimensional in photos.
4. The Multi-Directional Cornrow Grid
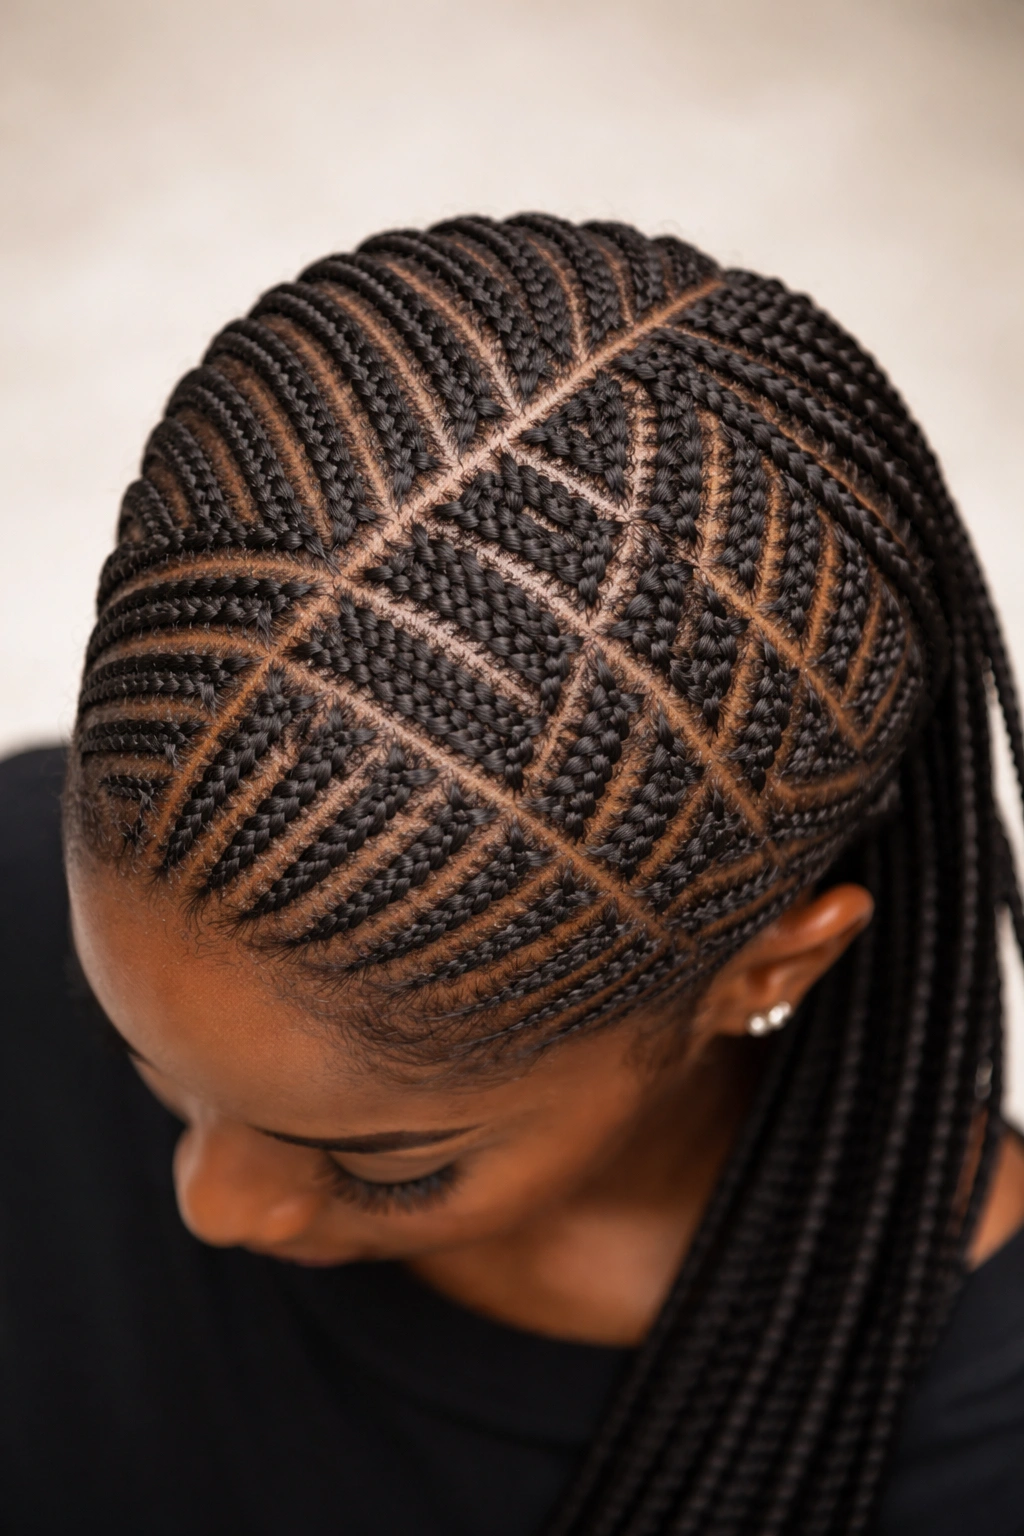
Rather than following a uniform pattern, this style uses multiple directional changes to create a grid-like, almost quilted appearance across the entire head. Some cornrows move backward, others move forward, some curve, and others travel diagonally, creating a complex composition that looks utterly original and requires serious freehand skill to execute. The payoff is a style that’s visually stunning from every angle and demonstrates the braider’s technical mastery—this isn’t something you can accomplish from a template.
Reading Your Head Shape to Plan Multi-Directional Designs
A skilled freehand braider will assess your head shape and hair density before beginning and use that information to decide where directional changes make sense. On a more rounded head, directional changes might be more frequent (to break up visual bulk), while on an oblong head, they might be more strategic and placed at key points. The back of the head often accommodates more directional variation because there’s more surface area and the style is less likely to flatten during sleep. The sides and front require more careful planning because these areas show wear more quickly.
Planning Your Multi-Directional Design
- Ask your braider whether they recommend a symmetrical or asymmetrical pattern (symmetry is classic, asymmetry is more artistic)
- Discuss whether you want the front/face-frame area to be intricate (for visual interest close to your face) or simpler
- Specify how many “sections” you want the grid divided into—four sections (quadrants) feels balanced, six creates more movement
- Ask about tension transitions: when cornrows change direction, the transition should be smooth and intentional, not sloppy
- Clarify whether you want colored extensions integrated into any of the grid sections to add another layer of visual complexity
Pro tip: Multi-directional designs benefit from slightly looser, thicker cornrows because thin, tight rows can look too busy and visually overwhelming when they’re changing direction constantly.
5. The Goddess Twist-In Locs
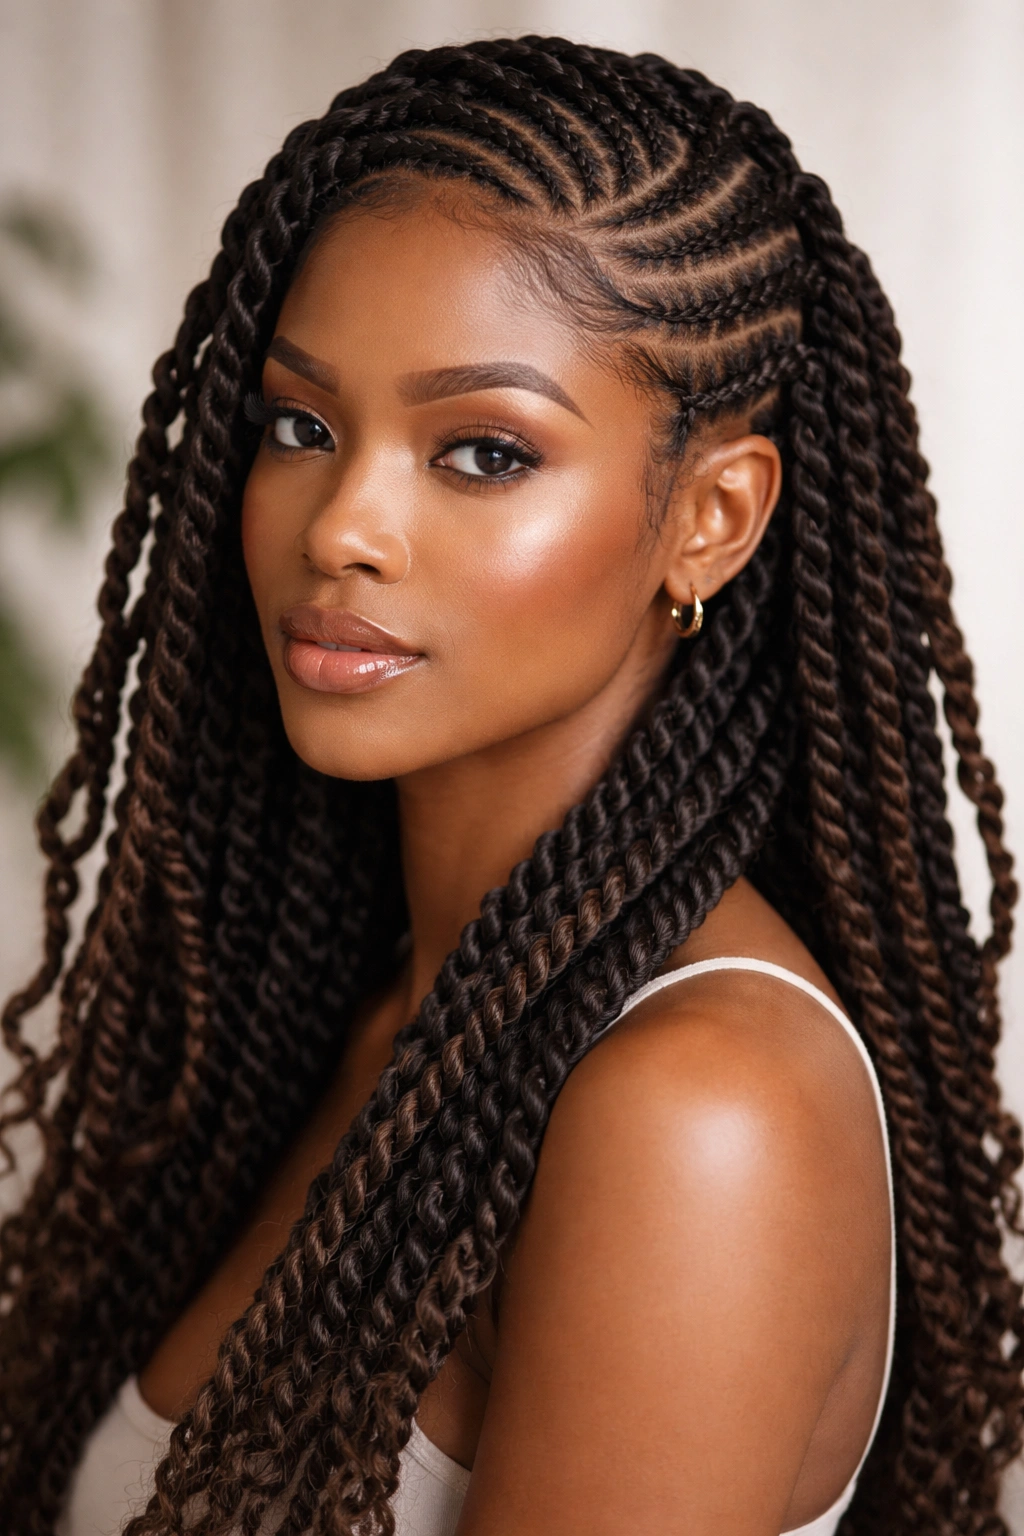
This style combines traditional cornrows with twisted sections, creating a hybrid that feels modern and romantic. Rather than pure three-strand braiding throughout, the braider incorporates rope twists—two-strand twists where the hair is twisted rather than braided—alongside traditional cornrows. Freehand, the braider decides in real time which sections will be braided and which will be twisted, creating a dynamic interplay of textures. This style works beautifully on people who love the protective benefits of cornrows but want something that feels less structured and more flowing.
The Difference Between Braiding and Twisting in One Style
Braids compress the hair tightly because three strands are interlocking, while twists are looser and more airy because only two strands are wrapping around each other. This difference creates visual and tactile variety—braided sections appear defined and graphic, while twisted sections appear softer and more blended with loose hair. From a durability standpoint, twists don’t last quite as long as braids (they’re slightly more prone to frizz), but many people consider the aesthetic worth the tradeoff. The real artistry here is knowing where to transition between braid and twist for maximum visual interest.
Creating Balance Between Cornrows and Twists
- Ask your braider to use cornrows to frame your face (they’re more defined and polished-looking)
- Request that twists comprise the majority of the back and crown (looser, more romantic)
- Discuss whether you want them to alternate in a predictable pattern or place twists and braids more intuitively
- Specify the size you want twists to be—thicker twists look chunkier and more dramatic, thinner twists appear more delicate
- Ask whether you want the loose hair at the ends twisted, left straight, or curled for different styling versatility
Pro tip: This style works beautifully with subtle colored extensions in the twisted sections—the looser twist texture makes the color appear more blended and natural-looking than if it were in a tighter cornrow.
6. The Infinity Loop Design
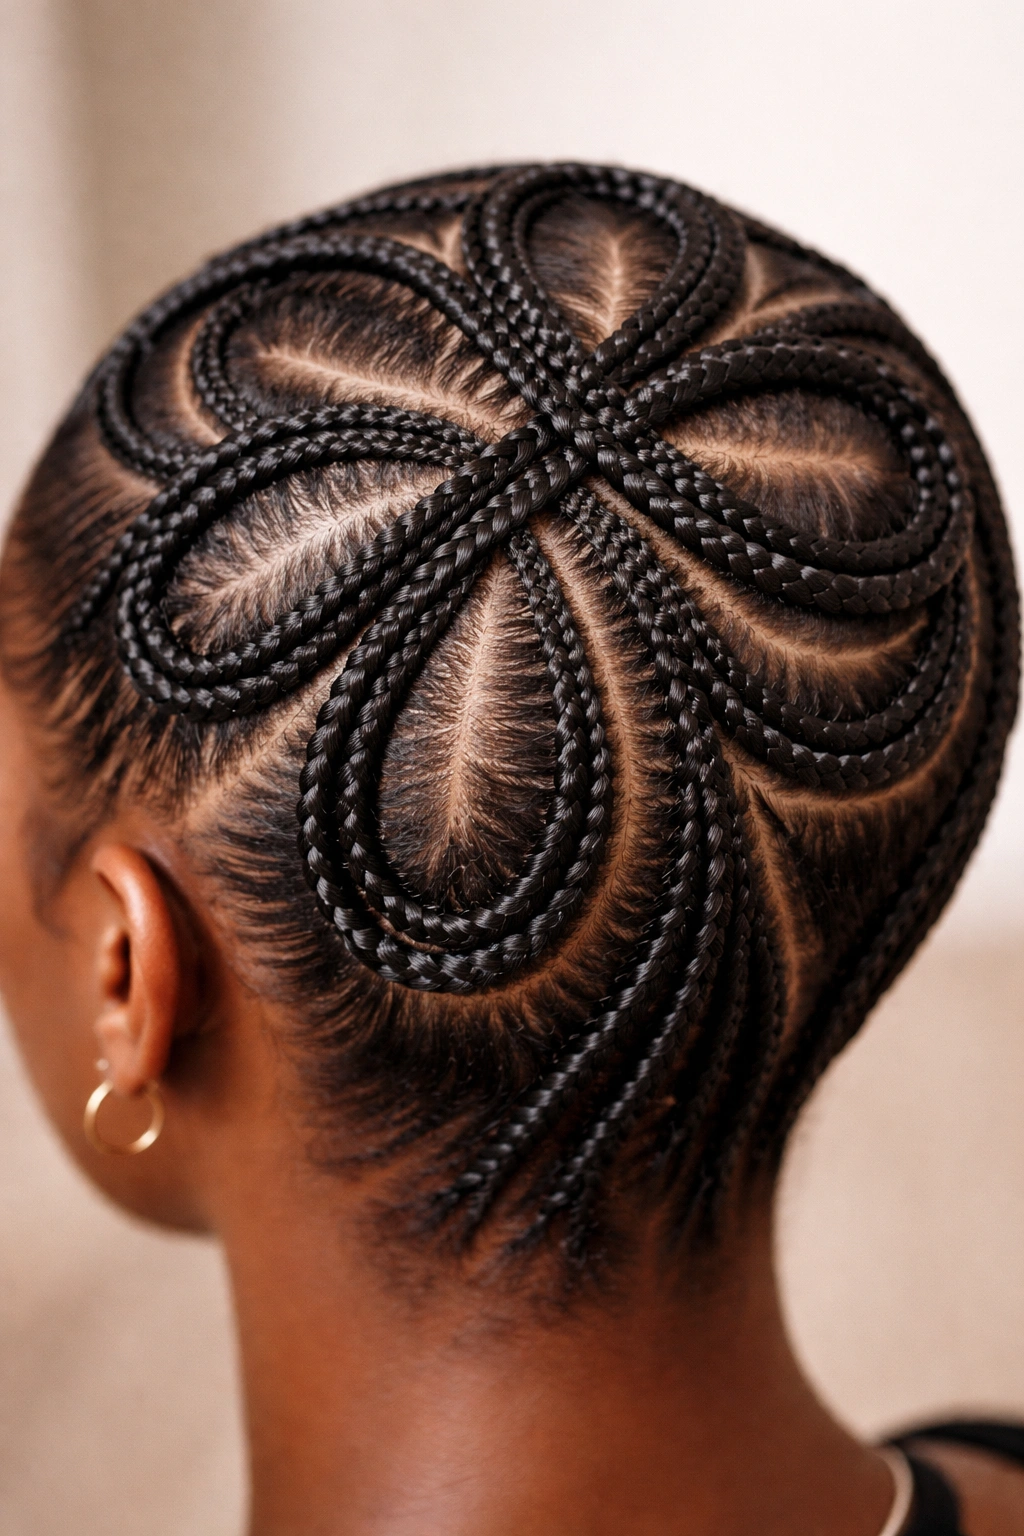
This advanced freehand style features cornrows that loop and curve in ways that create visual movement, almost like infinity symbols flowing across your scalp. Rather than following a simple A-to-B path, each cornrow is designed to curve around itself, create visual loops, and intersect with other rows to form a complex, interconnected pattern. This requires serious spatial reasoning from the braider—they’re essentially creating a three-dimensional puzzle on your head in real time, without the ability to erase or restart.
Why Infinity Designs Are the Gold Standard of Freehand Work
Infinity loops and similar complex patterns can’t be achieved with a pre-planned template because they require constant, micro-adjustments based on hair texture, head shape, and how the pattern is actually developing. A braider might start with an intention, realize halfway through that the hair’s natural texture or the client’s head shape requires a slight modification, and seamlessly adapt. This ability to problem-solve and improvise in real time is what separates master-level freehand braiding from basic cornrow work. The final result looks effortless, but it’s the product of years of technical skill.
What Makes Infinity Patterns Work Visually
- The loops typically flow in a consistent direction (usually backward and downward) to create an intentional sense of movement
- Each loop needs enough space to be visually readable—too cramped and the pattern becomes a confusing tangle
- The size of each loop should be proportional to your head size—larger loops on larger heads, smaller on smaller heads
- Tension is absolutely critical: any loosening in the middle of a loop will make the entire pattern look like a mistake rather than intentional design
- The best infinity designs incorporate some asymmetry (one side slightly different from the other) to look organic rather than mechanical
Pro tip: Ask your braider to slightly vary the thickness of cornrows in an infinity pattern—using one thicker “main” row and several thinner accent rows creates depth and makes the pattern more visually interesting.
7. The Center-Part Crown with Undercut Sides
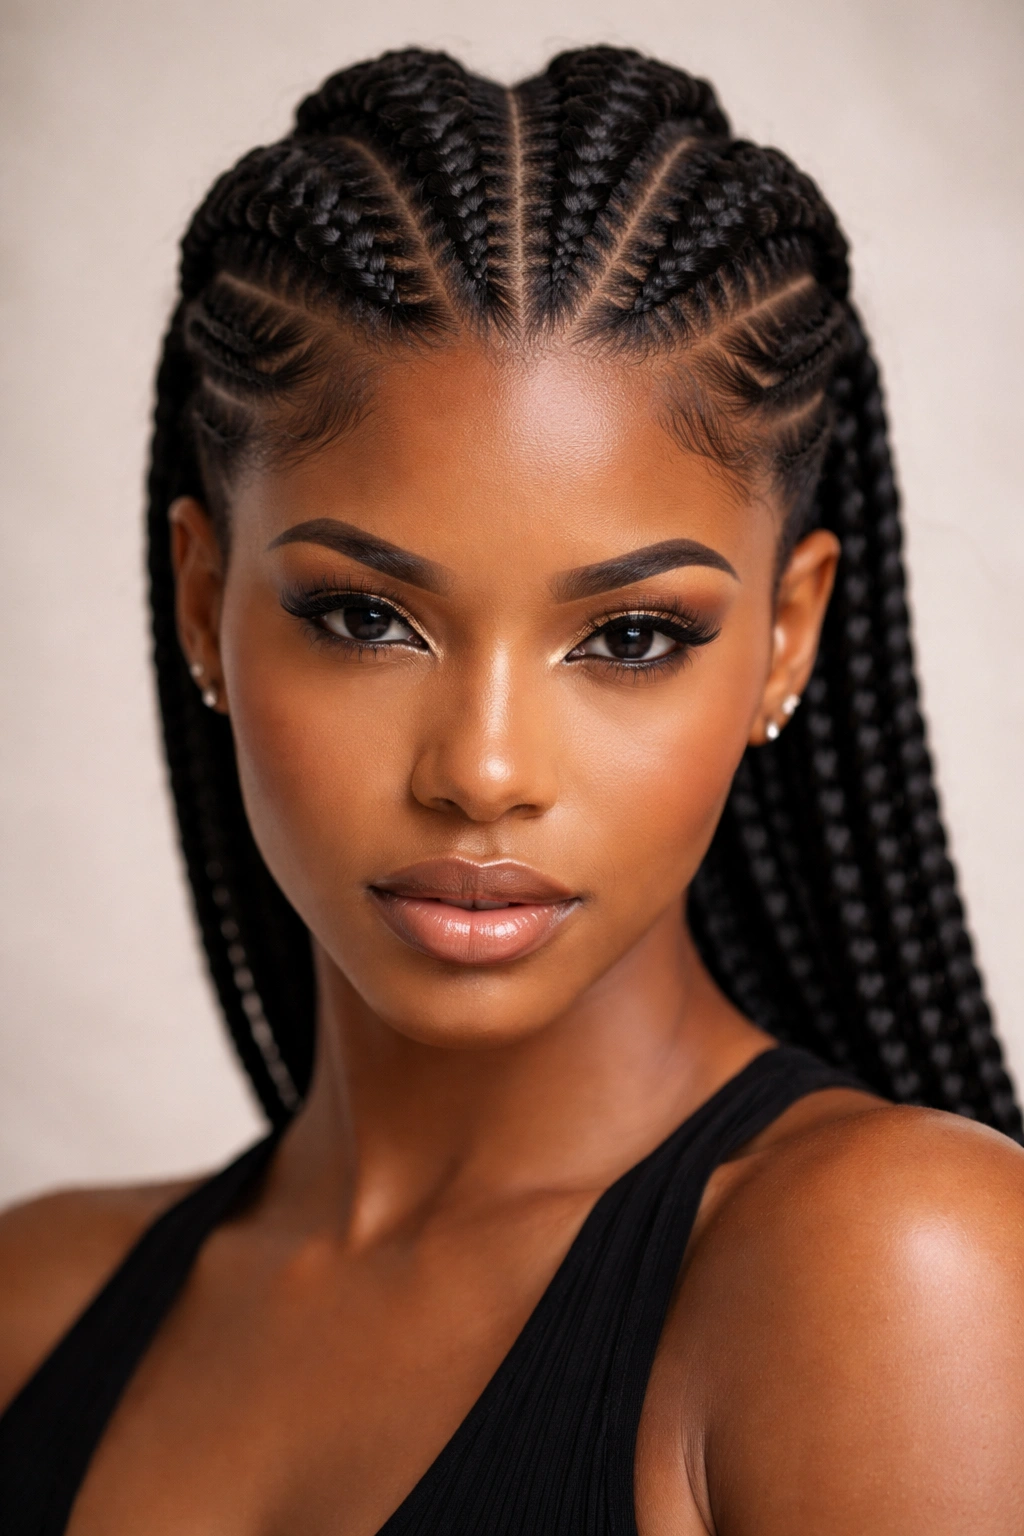
This striking design features chunky, well-defined cornrows running down the center of your head (from forehead to nape) while the sides are braided much more tightly or left relatively unbraided, creating strong contrast and visual drama. The freehand element is in how the braider manages the transition from the bold center design to the understated sides—it should feel intentional, not like an accident. This style makes a powerful statement and works beautifully as a foundation for updos, buns, or worn down with the back section loose.
The Psychology of Center-Part Designs
A strong center part is naturally commanding and draws attention straight up the middle of your face, which is flattering on most face shapes because it emphasizes the vertical line of your features. The bold cornrows down the center create a frame that draws the eye upward. By keeping the sides less visually busy, you’re essentially drawing a visual spotlight to your face, cheekbones, and eyes. From a protective-styling standpoint, the tighter side braids help protect the more delicate hair around your temples and ears, while the looser center section shows more versatility.
Executing This Style for Maximum Impact
- Discuss with your braider how thick you want the center cornrows—typically two to four chunky braids create the right balance of drama
- Specify the width of the “center section”: should it be narrow and defined, or wider and more generous?
- Ask whether you want the side sections braided tight, braided loose, or left as loose waves
- Clarify how you plan to style the back—this might influence how the braider sets up the center rows
- Request that your braider create sharp, clean definition between the center and side sections
Pro tip: This style pairs beautifully with a bold side-part switch—you can flip your part line to the opposite side occasionally, which changes the entire visual effect of the design and gives you two different looks from one style.
8. The Waterfall Cascade
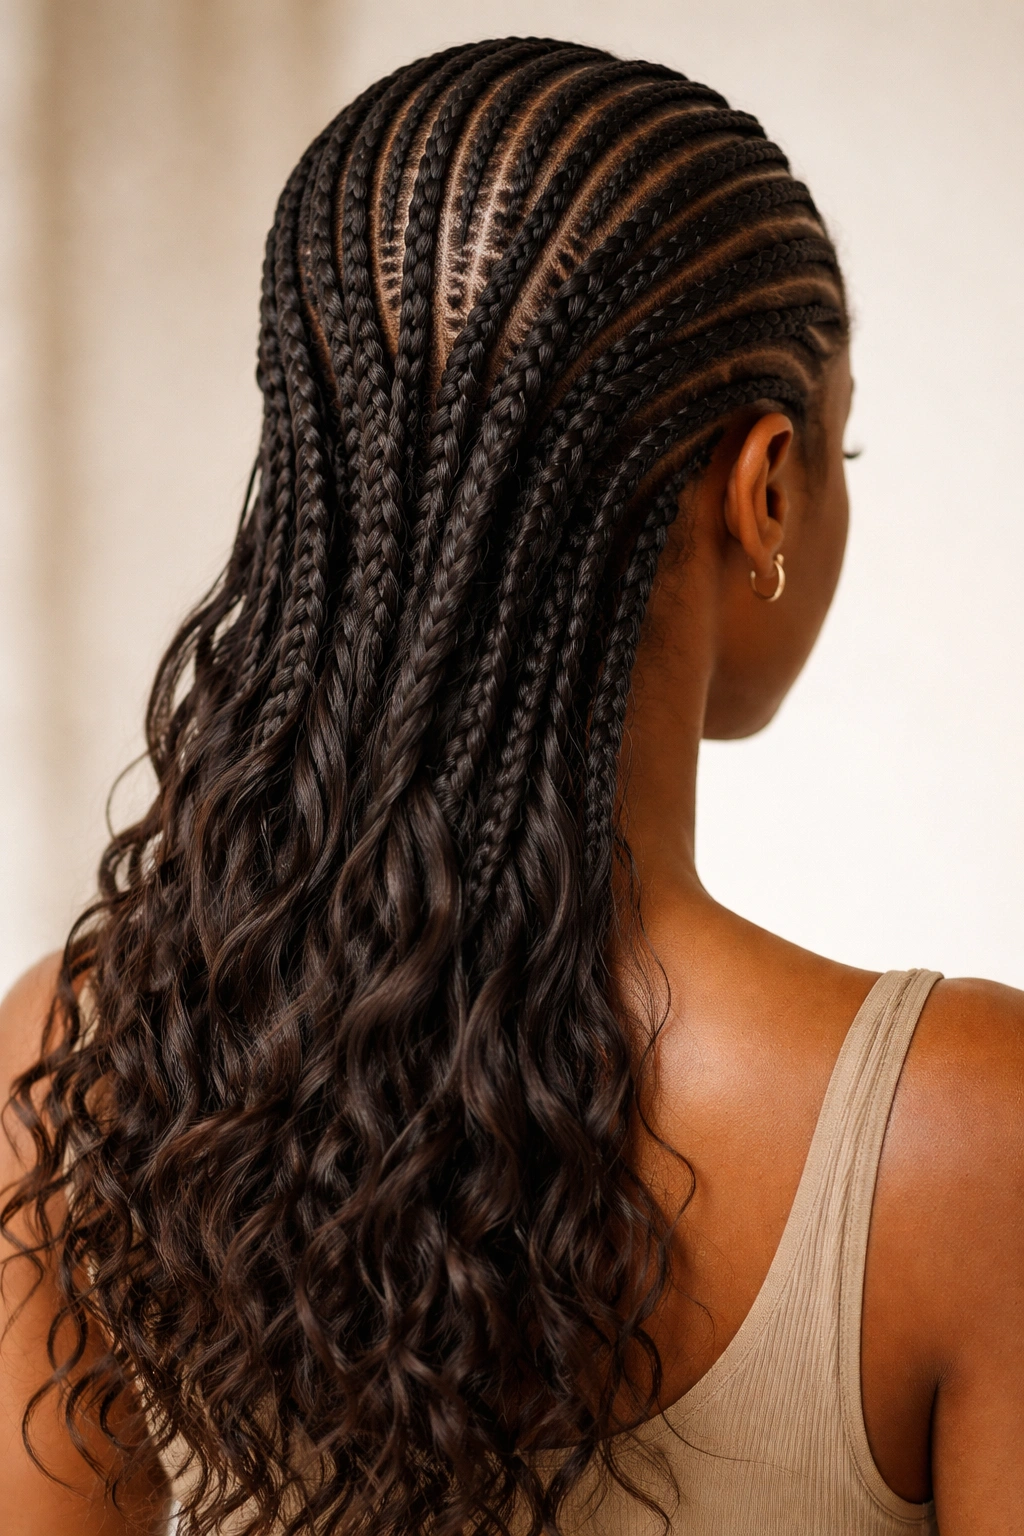
Imagine cornrows that begin at the top of your head and gradually flow downward, picking up loose hair as they travel like a waterfall moving downstream. The waterfall cascade style features braids that start relatively full at the crown and taper or transition as they move down the back, incorporating or releasing sections of hair to create the effect of water flowing. This is purely freehand work because the braider must continuously assess how much hair to incorporate at each stage, managing tension and section size in real time.
How Waterfall Braids Differ from Traditional Cornrows
Traditional cornrows stay the same width throughout their entire length and incorporate the same amount of hair from start to finish. Waterfall braids are dynamic—they get progressively thinner, wider, or incorporate different amounts of hair as they travel down the head. This requires the braider to constantly adjust their technique, manage varying amounts of tension, and make decisions about pacing and proportion on the fly. The result feels organic and fluid, like the hair is actually flowing rather than being mechanically braided.
Creating a Believable Waterfall Effect
- The braids should originate at the crown (the highest point) to actually look like they’re cascading downward
- Discuss the direction of the cascade—should it flow straight down, diagonally toward one side, or in multiple directions?
- Specify how many “streams” you want in your waterfall (three to five is typical) and whether they should stay separate or merge
- Ask your braider how they’ll manage the transition where braided sections meet loose hair—it should look intentional and blended
- Clarify the final destination: do you want the braids to release all their hair by mid-back, or continue to the very ends?
Pro tip: Waterfall braids photograph incredibly well and show up beautifully in videos because the sense of movement and flow is visually compelling—if you’re looking for a style for photos or special occasions, this one’s a showstopper.
9. The Asymmetrical Side Composition
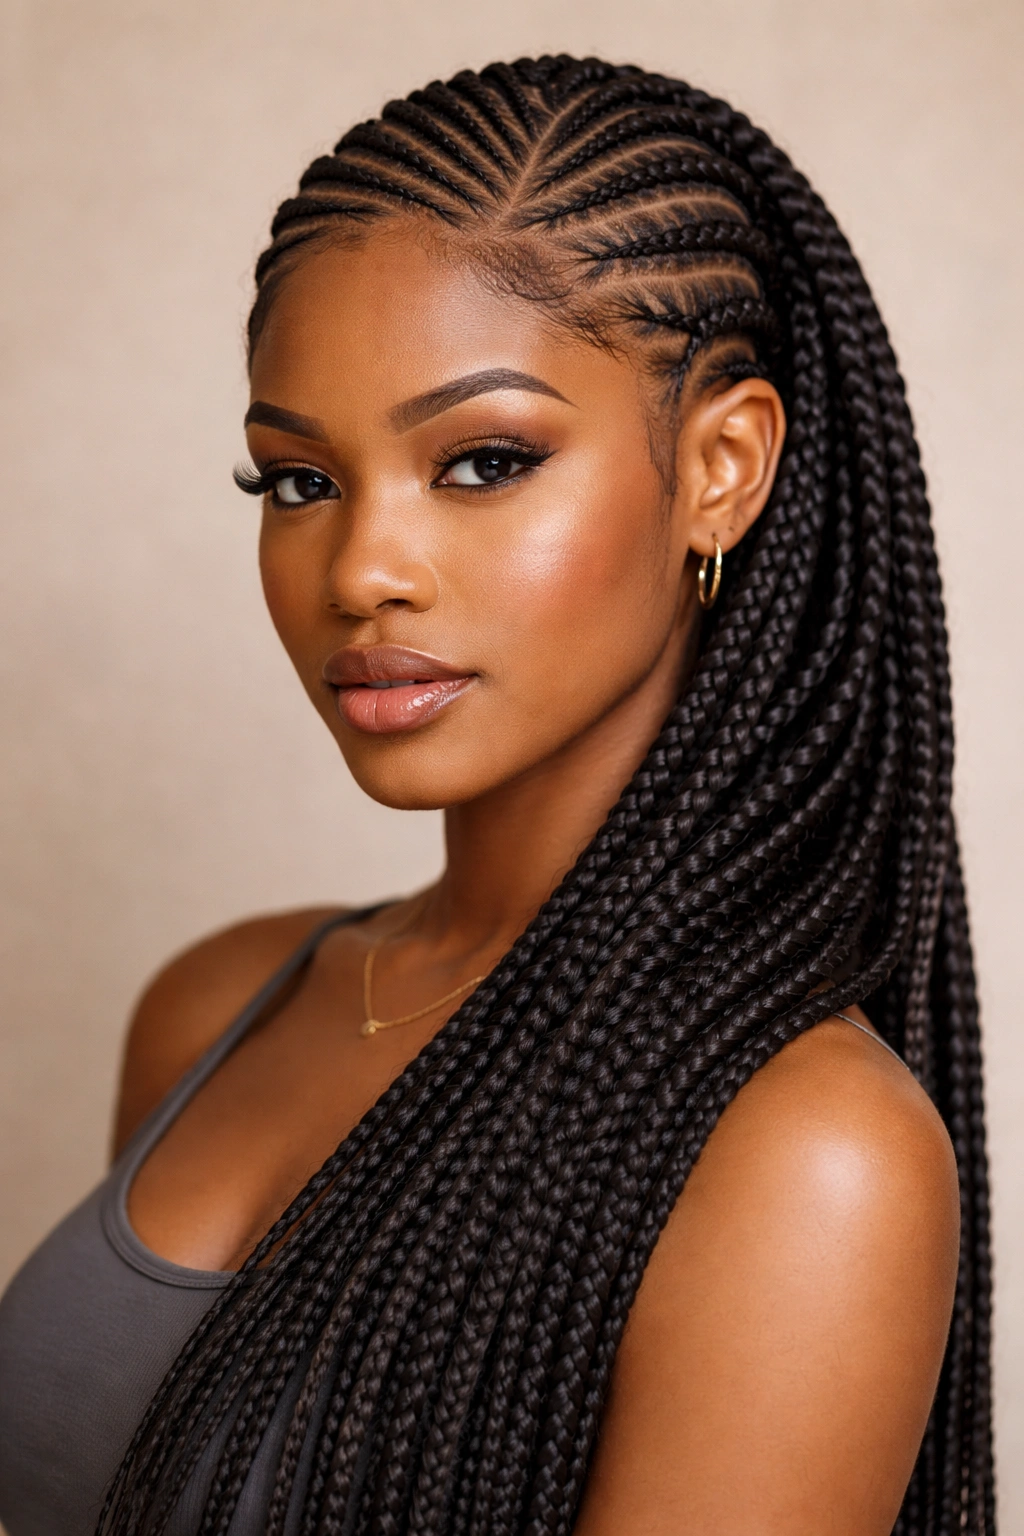
Unlike symmetrical styles, this design embraces asymmetry—the left and right sides of your head feature completely different cornrow patterns and compositions. One side might be simple and minimal while the other is complex and dramatic, or one might feature thick braids while the other features thin ones. This freehand approach requires serious confidence from the braider because there’s no safety net of symmetry—the entire design has to be intentional and beautifully balanced even though it’s not matching on both sides.
Why Asymmetrical Designs Feel Fashion-Forward
Asymmetry reads as more artistic and intentional than symmetry, which can sometimes feel predictable or safe. When you see an asymmetrical cornrow design executed well, your brain registers it as a design choice, not an accident. This style is perfect for people who love fashion, who want to stand out, and who appreciate that the braider understands visual balance well enough to make mismatched elements work cohesively. Asymmetrical designs also feel less “costume-y” than some perfectly symmetrical patterns—they’re more wearable for everyday styling.
Planning an Asymmetrical Design That Actually Works
- Bring reference photos of designs on both sides that appeal to you (they don’t have to be from the same style)
- Work with your braider to discuss the overall balance—even though the sides are different, should they feel visually balanced or deliberately unbalanced?
- Decide where the most complex pattern should be (most people find complexity on one side more striking than chaos on both)
- Discuss whether you want a clean center part, an off-center part, or a curved part line that echoes the asymmetrical design
- Ask your braider to explain their vision before they start—a truly skilled braider should be able to articulate why the asymmetry works compositionally
Pro tip: Asymmetrical designs feel less jarring if you add a unifying element to both sides—like the same width cornrows, the same thickness, or the same colored extensions—that ties the two sides together visually even though the patterns are different.
10. The Sculptural Spiral Crown
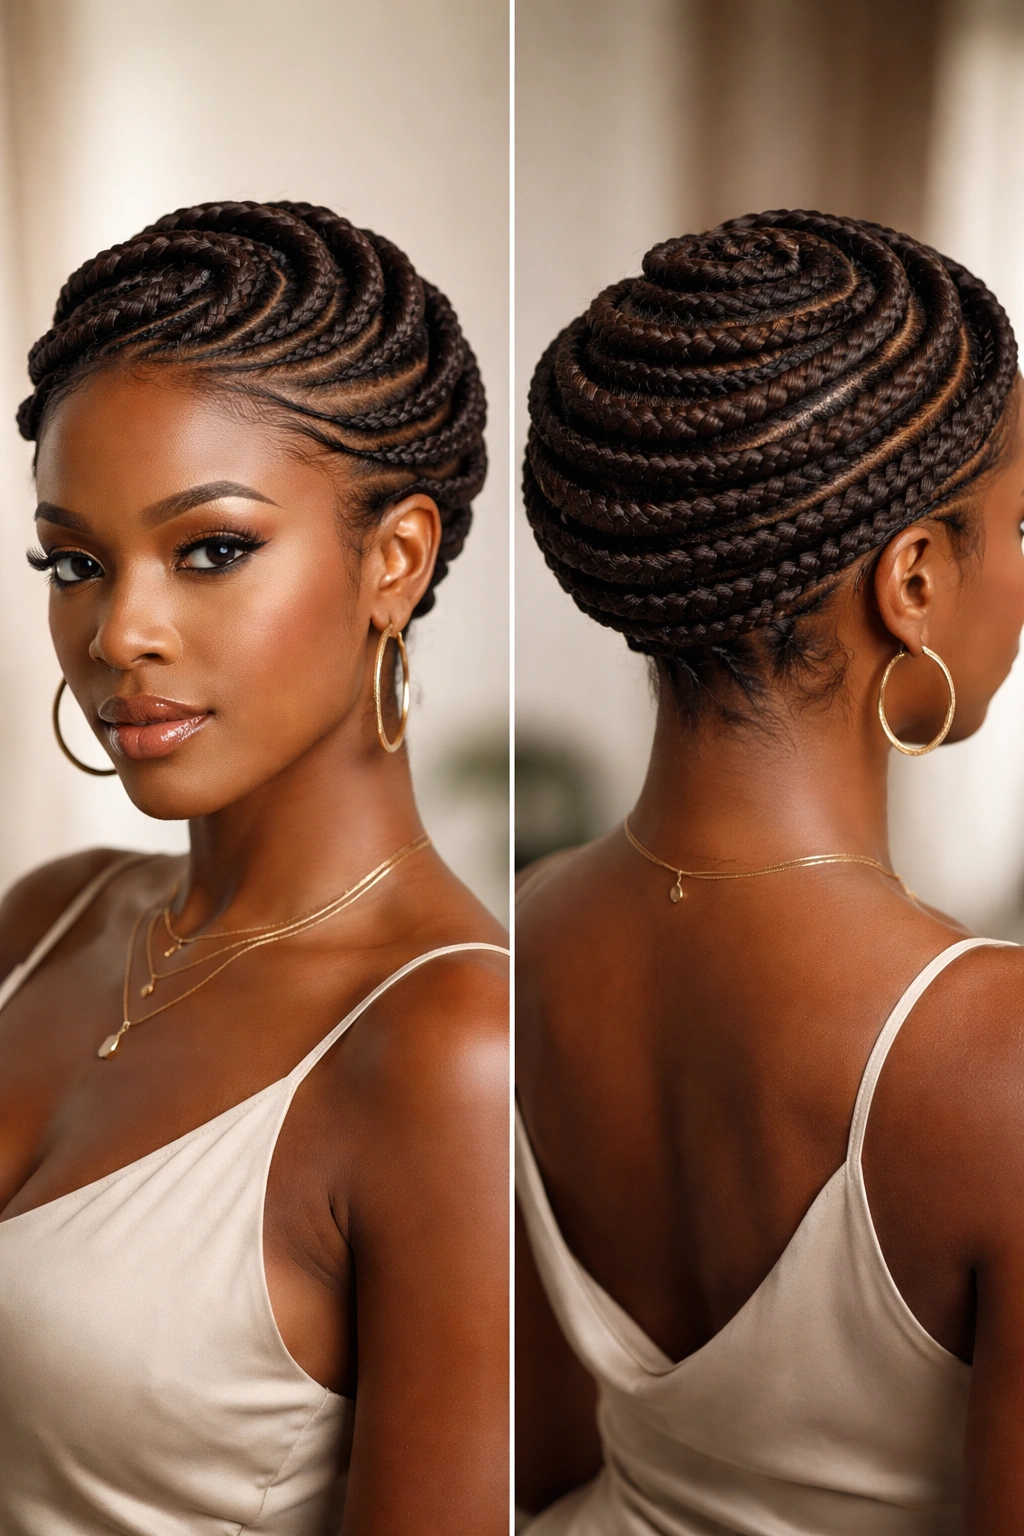
This advanced freehand style features cornrows that spiral around your head in a three-dimensional effect, almost like a tornado or whirlwind frozen in place. Rather than moving in straight lines or simple curves, the braids are designed to wrap around the head in concentric patterns, creating visual depth and drama. This requires the braider to understand how patterns appear different depending on viewing angle and head position—a spiral that looks perfect from the front might look completely different from the side, so true freehand mastery means making it work from every single angle.
The Technical Challenge of Three-Dimensional Spiral Work
Spiral patterns on a round, three-dimensional surface are significantly more complex than flat spiral designs. The braider must account for how the pattern will appear as your head turns, how it will look in the mirror versus in photos, and how it will settle as you move throughout your day. The tension needs to be perfectly consistent around the spiral so the whole pattern doesn’t appear to wobble or shift. One common challenge is that spirals can start to feel chaotic if there are too many of them—the best spiral crowns typically feature three to five clear spiral paths that feel intentional rather than random.
Designing a Spiral Crown That Holds Up
- Decide whether you want the spirals to move clockwise, counterclockwise, or alternate directions
- Specify the starting point: do spirals begin at the crown and work downward, or begin at one temple and travel across?
- Discuss the “pitch” of the spiral—how quickly do the spirals wrap around? Tight spirals feel dramatic, looser spirals feel more gentle
- Ask your braider whether they’ll incorporate the same width braids throughout or vary the width as the spiral progresses
- Clarify whether you want the entire head spiraled or just the crown/top portion with loose or differently-styled hair below
Pro tip: Spiral cornrows hold their shape longer if your braider uses a slightly tighter tension than you might normally request, and if you sleep on a silk or satin pillowcase (which reduces friction and prevents the spiral from unwinding or flattening).
Final Thoughts
Freehand cornrows represent the intersection of technical mastery, cultural artistry, and personal expression. What separates these ten styles from generic cornrow designs isn’t just how they look—it’s the skill, intuition, and real-time problem-solving that goes into creating them. When you work with a braider who truly understands freehand work, you’re not just getting a hairstyle; you’re investing in wearable art that’s been customized to your specific head, hair texture, and vision.
The key to a stunning freehand cornrow experience is finding a braider you trust and communicating clearly about your goals while also giving them space to use their expertise. Your braider should be able to explain their vision, answer questions about longevity and maintenance, and adapt their original plan if your hair or head shape requires adjustment. This collaborative process is what makes freehand work so superior to template-based designs—you end up with something that’s uniquely yours.
Before your appointment, invest time in gathering inspiration—save reference photos, articulate what you love about them, and be honest about your lifestyle and how much time you’re willing to spend maintaining your style. The best freehand cornrow styles are ones you’ll actually enjoy wearing, so choose designs that genuinely speak to your aesthetic rather than ones that just photograph well. Whether you go bold and geometric, intricate and dimensional, or sculptural and artistic, freehand cornrows are a celebration of skill, culture, and the beauty of Black hair at its finest.