Coily hair has a magical quality — it springs back, holds texture, and looks effortlessly voluminous without much coaxing. But when you’re rushed and need to go from shower to door in minutes, it’s easy to default to the same tired bun or slip into a protective style by habit. The truth is, some of your best coily looks don’t need an hour of braiding, blow-drying, or complicated sectioning. In fact, the most striking styles for coily hair often come together fastest because your hair’s natural texture does most of the heavy lifting for you.
The key is knowing which styles work with your coils rather than against them, and which techniques create maximum impact in minimum time. We’re talking about looks that let your curl pattern shine, that hold without collapsing by noon, and that feel intentional rather than like you threw your hair up in a panic. Many of these styles can be prepped in under five minutes if your coils are already refreshed or moisturized, which makes them perfect for mornings when sleep is winning.
What makes a style viable in ten minutes or less? It has to skip the heat styling, work with your natural curl diameter, and rely on strategic sectioning or twisting rather than intricate braiding. The best quick coily hairstyles are the ones that look more finished than they actually are — they use visual tricks like gathering, layering, or contrasting textures to create depth and intentionality without fussy technical skill.
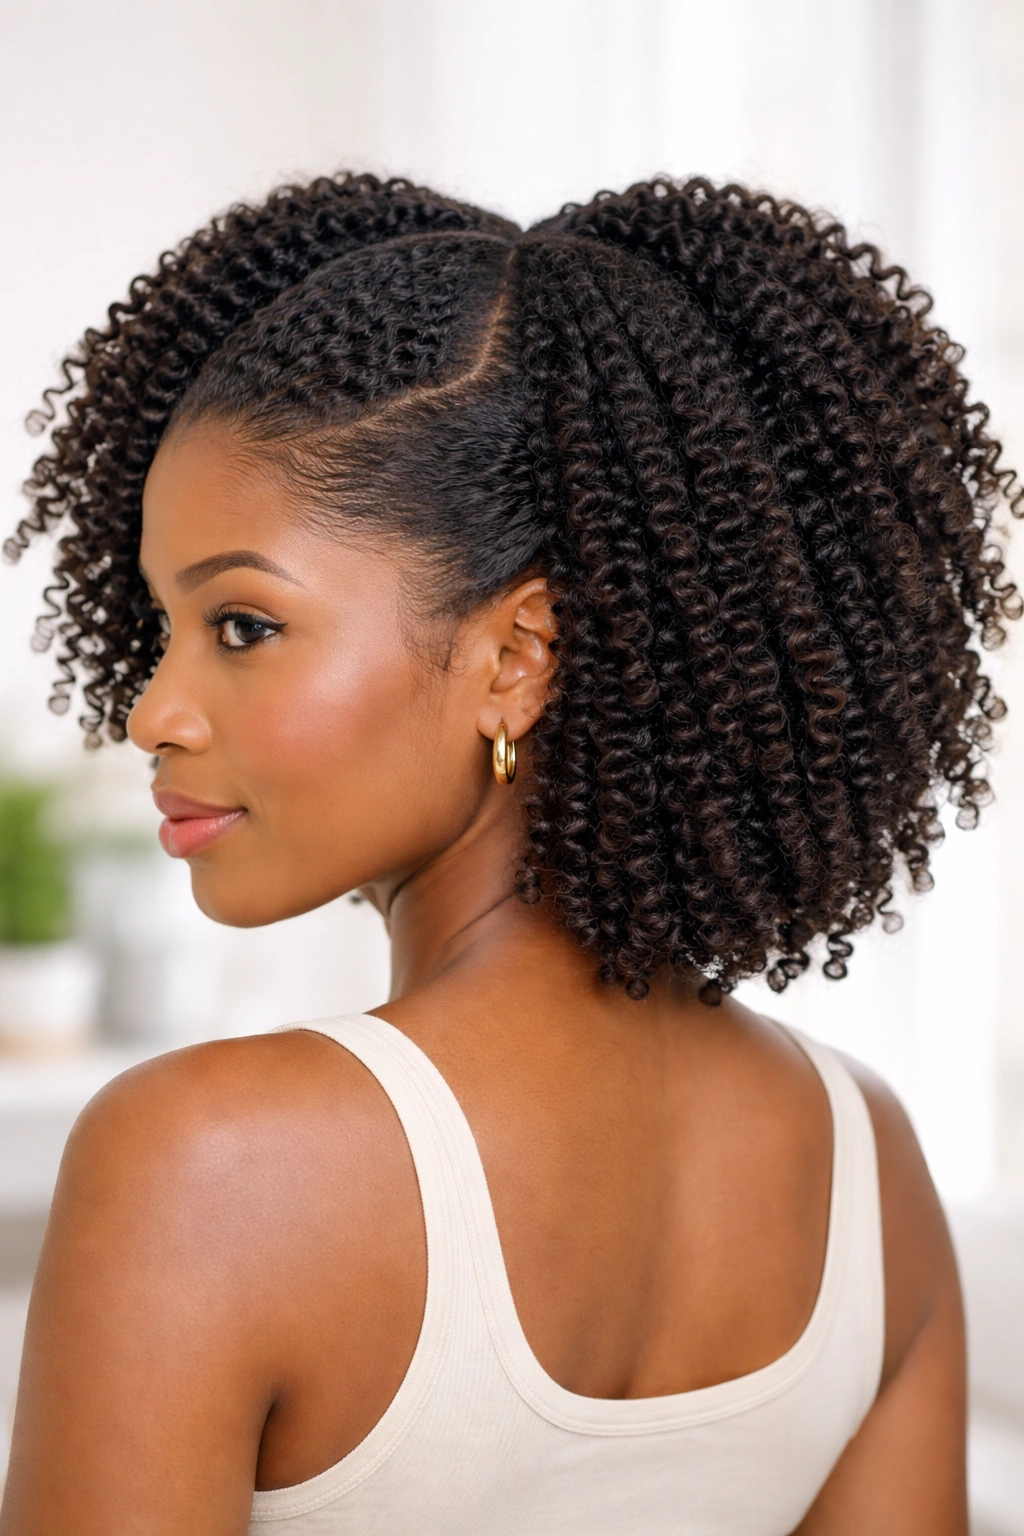
1. The Gathered Puff with Twisted Crown
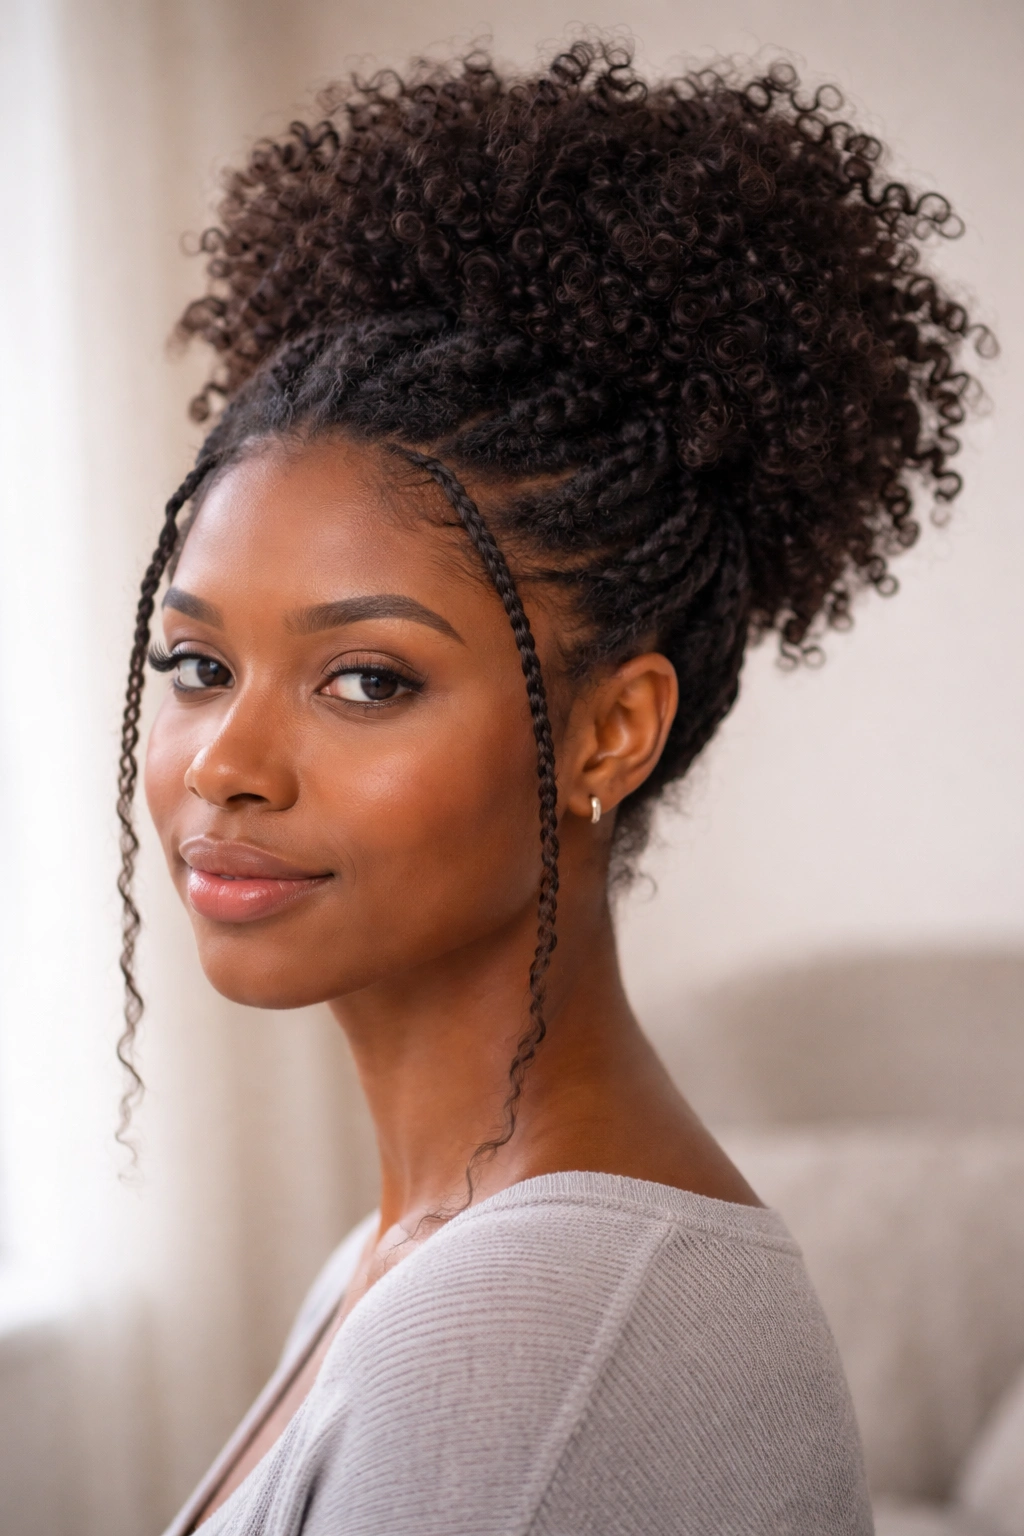
This is the move when you want your coils front and center but slightly more polished than a simple puff. The genius is that it takes your natural volume and reorganizes it into something that reads as deliberate. Start by doing a loose gather at the crown using your fingers or a wide-tooth comb, pulling hair toward the back-center of your head but not making it tight — you want that textured, full look, not a sleek ballerina puff.
Why This Works So Fast
Once you’ve got the basic gather secured with a clip or elastic, the actual styling is where speed happens. The entire crown section stays loose and unmanipulated, letting your natural coil pattern do the work. The beauty here is that imperfection is the point. Flyaways, varied coil heights, and that slightly tousled vibe make it look intentional rather than sloppy.
How to Style It in Minutes
Section off a small piece from each side (temple area) and lightly twist each strand as you bring it toward the back, pinning the twisted sections around the base of your puff to create a frame. You don’t need precision twists — loose, textured twists actually look better and take half the time. Secure everything with a matching clip or gold bobby pins for a more finished look. The whole process takes three to four minutes once your puff is gathered. For extra polish, release one or two coils from the main puff to frame your face.
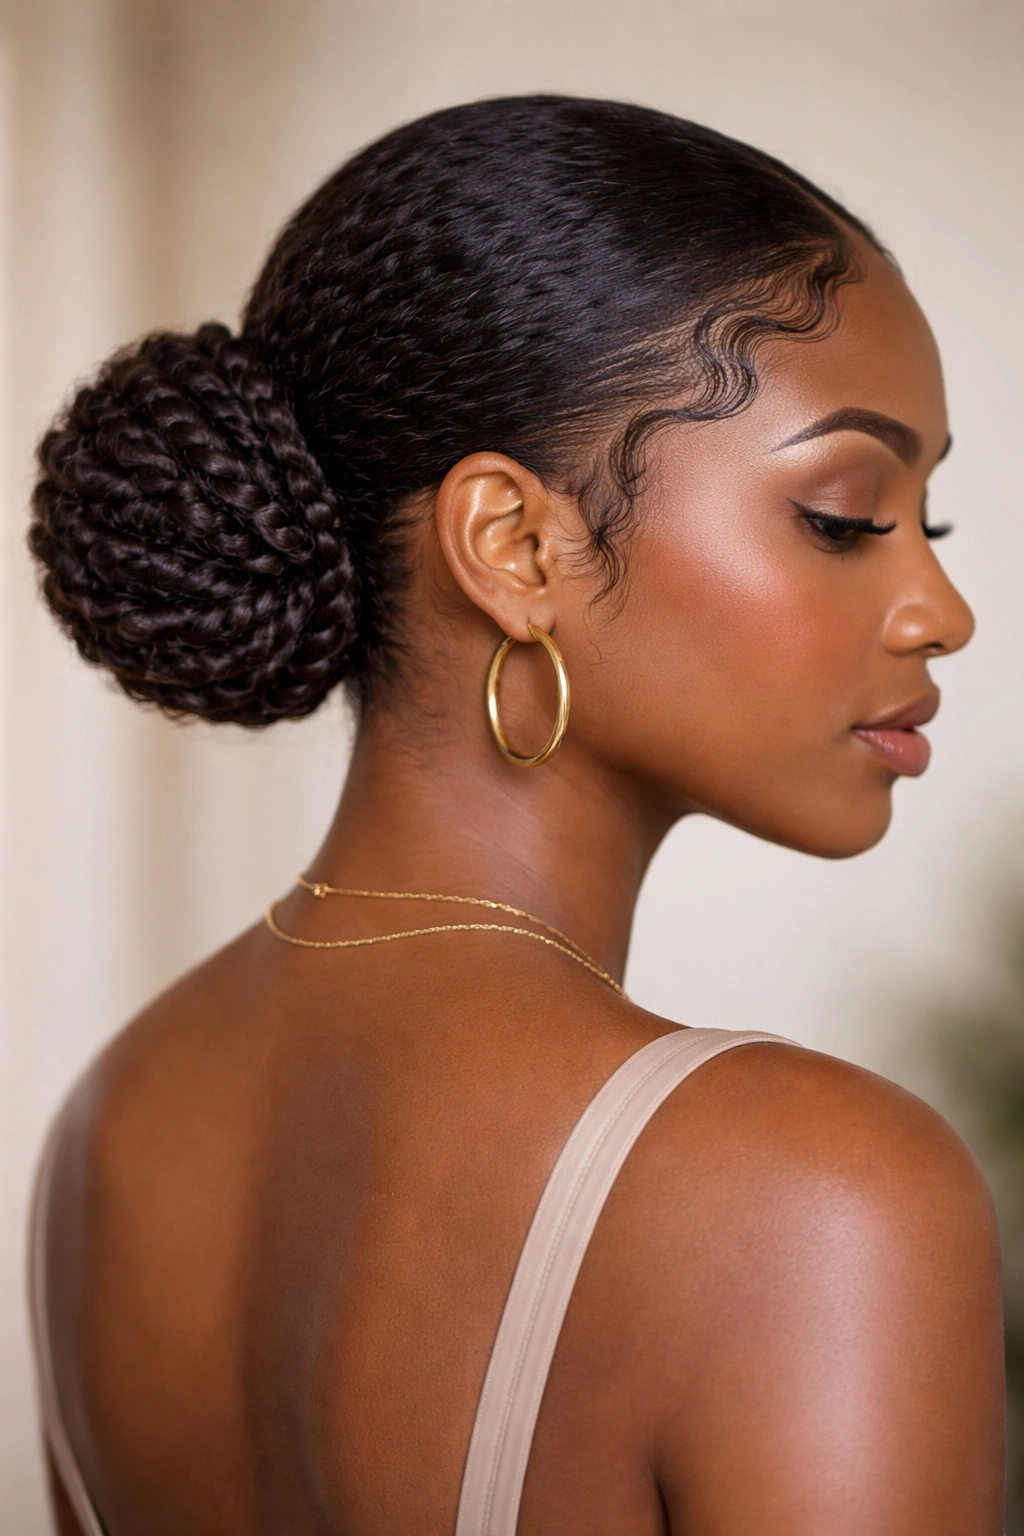
2. The Stacked Coils Sideways Bun
Sideways buns on coily hair have a completely different energy than on straight hair — the dimension from your natural curl diameter means the bun sits out from your head in a way that looks sculptural rather than flat. This style is pure texture and barely needs manipulation. Create a deep side part on whichever side feels more natural to you, then brush your coils gently to one side using your fingers or a paddle brush, gathering them into a ponytail at the nape of your neck on the opposite side from the part.
The Geometry of Coily Texture
The magic happens because your coils naturally stack and hold their shape. When you twist or wrap a ponytail of coily hair into a bun, the coils themselves create dimension without you having to tease or add texture. The bun forms organically and sits away from your head in a way that reads as intentionally voluminous. Your hair’s own bounce and curl becomes the style rather than something you have to create manually.
Securing It Without Damage
Wrap your ponytail loosely into a bun shape and secure with two or three bobby pins rather than a tight elastic that can weigh everything down and flatten your coils. If your coils are on the softer side and won’t hold the shape alone, use a setting gel or light cream to gently define them as you wrap. The entire style takes about four minutes, and it stays intact all day because coily hair naturally grips itself into place.
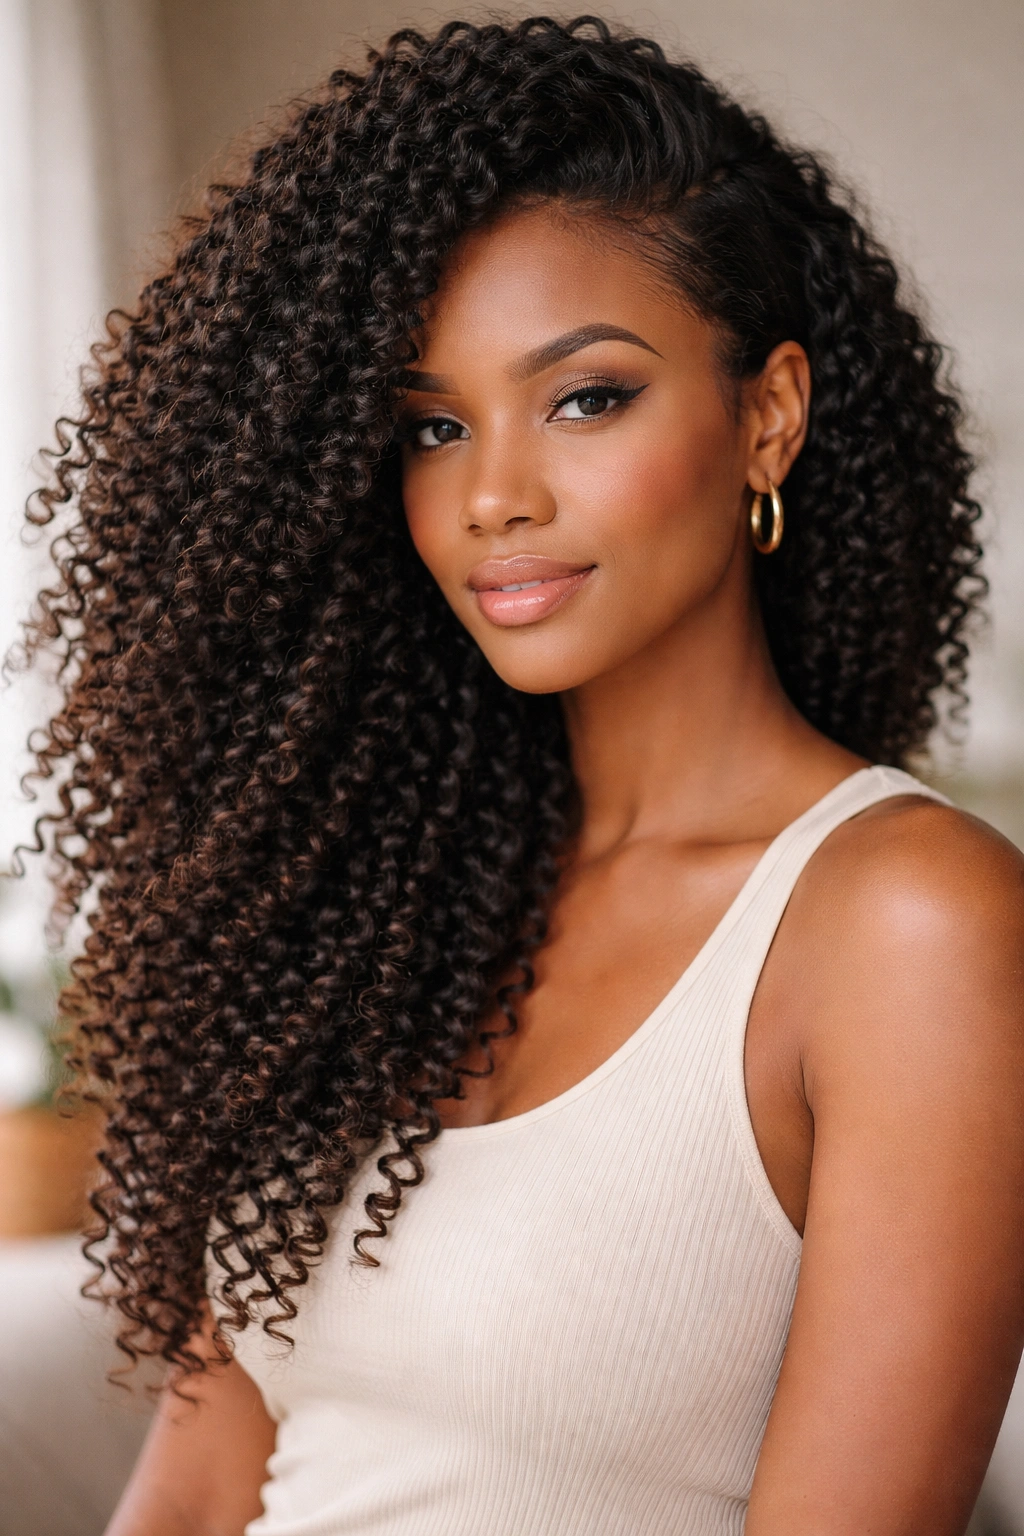
3. The Elongated Coily Ponytail with Face-Framing Pieces
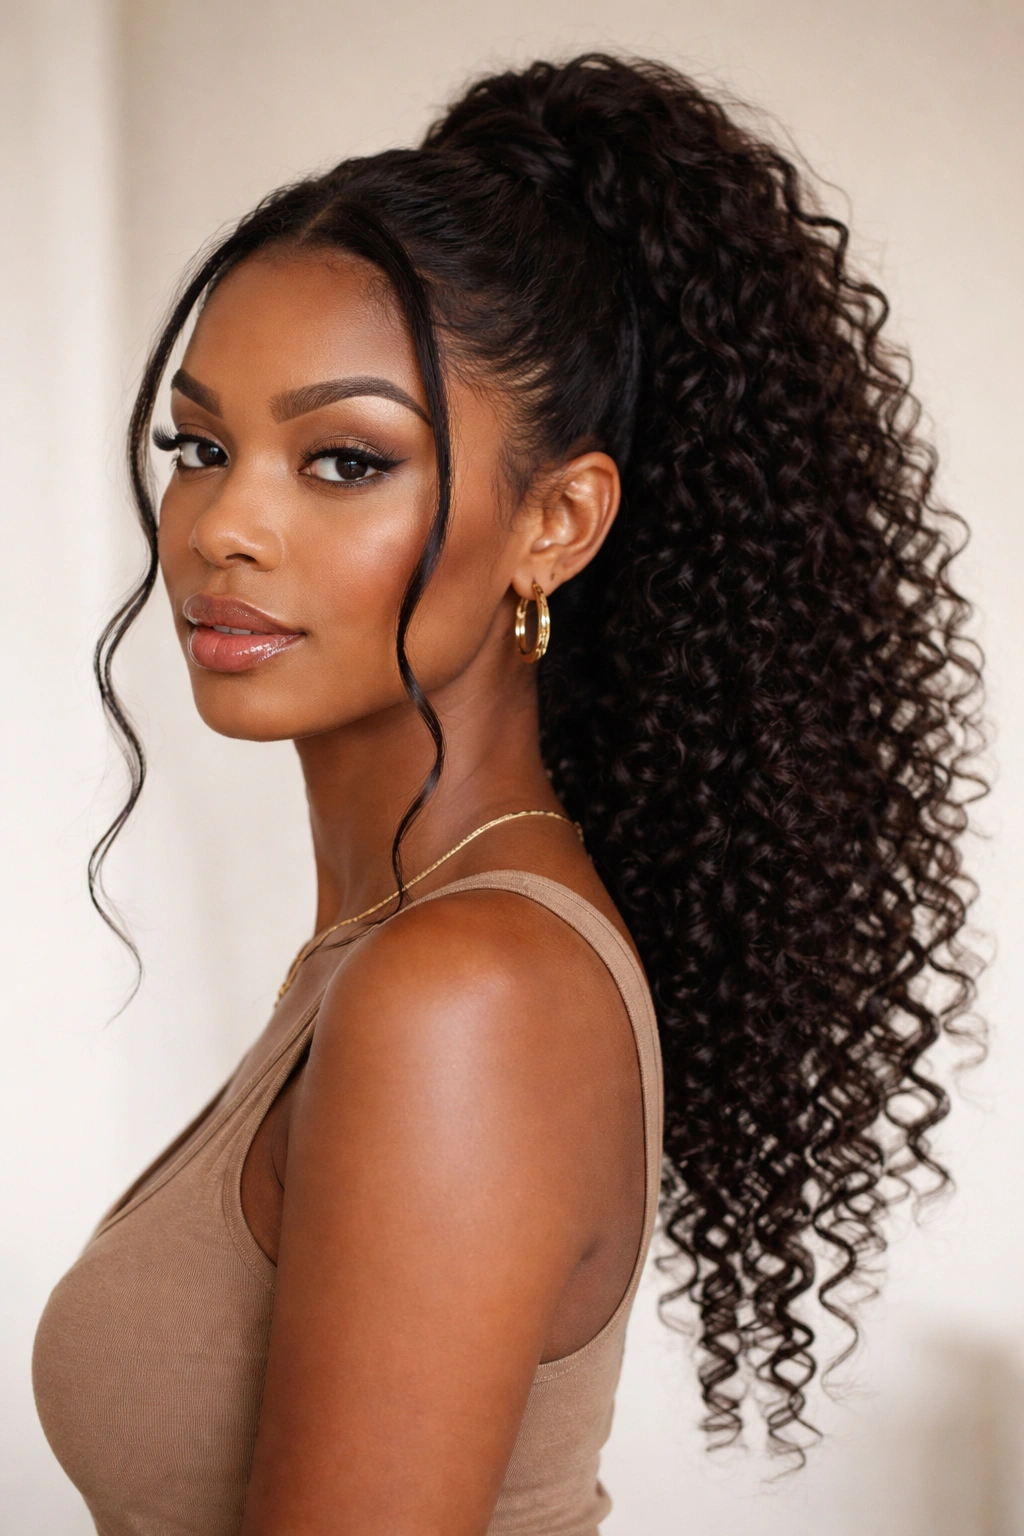
This look takes the simplicity of a ponytail and makes it feel intentional by letting your coil pattern show rather than disappearing into a compressed tail. The difference between a boring ponytail and this version is that you’re leaving it loosely gathered and letting individual coils remain distinct. It’s the coily equivalent of a textured messy bun — it looks undone in the best way.
Creating Intentional Volume
Rather than pulling your hair back tightly, use your fingers to gather your coils loosely at the nape or mid-back of your head, wherever feels balanced to you. The ponytail should feel loose enough that you can see individual coils, not compressed into a single rope. This approach takes literally 30 seconds — no brush required, just your hands and an elastic. The coils naturally cluster and separate, creating visual interest without extra effort.
The Face-Framing Technique
Pull out two or three thin sections from around your face and let them fall forward, unconfined. These pieces should frame your face rather than get tied back with the rest. You can gently twist or leave them loose depending on what feels right for your hair type. The framing pieces add softness and make the look feel intentionally styled rather than hastily pulled back. Secure everything with a single elastic (you want that slightly loose, coily vibe), and you’re done in under three minutes.
4. The Twisted Half-Up Coil Stack
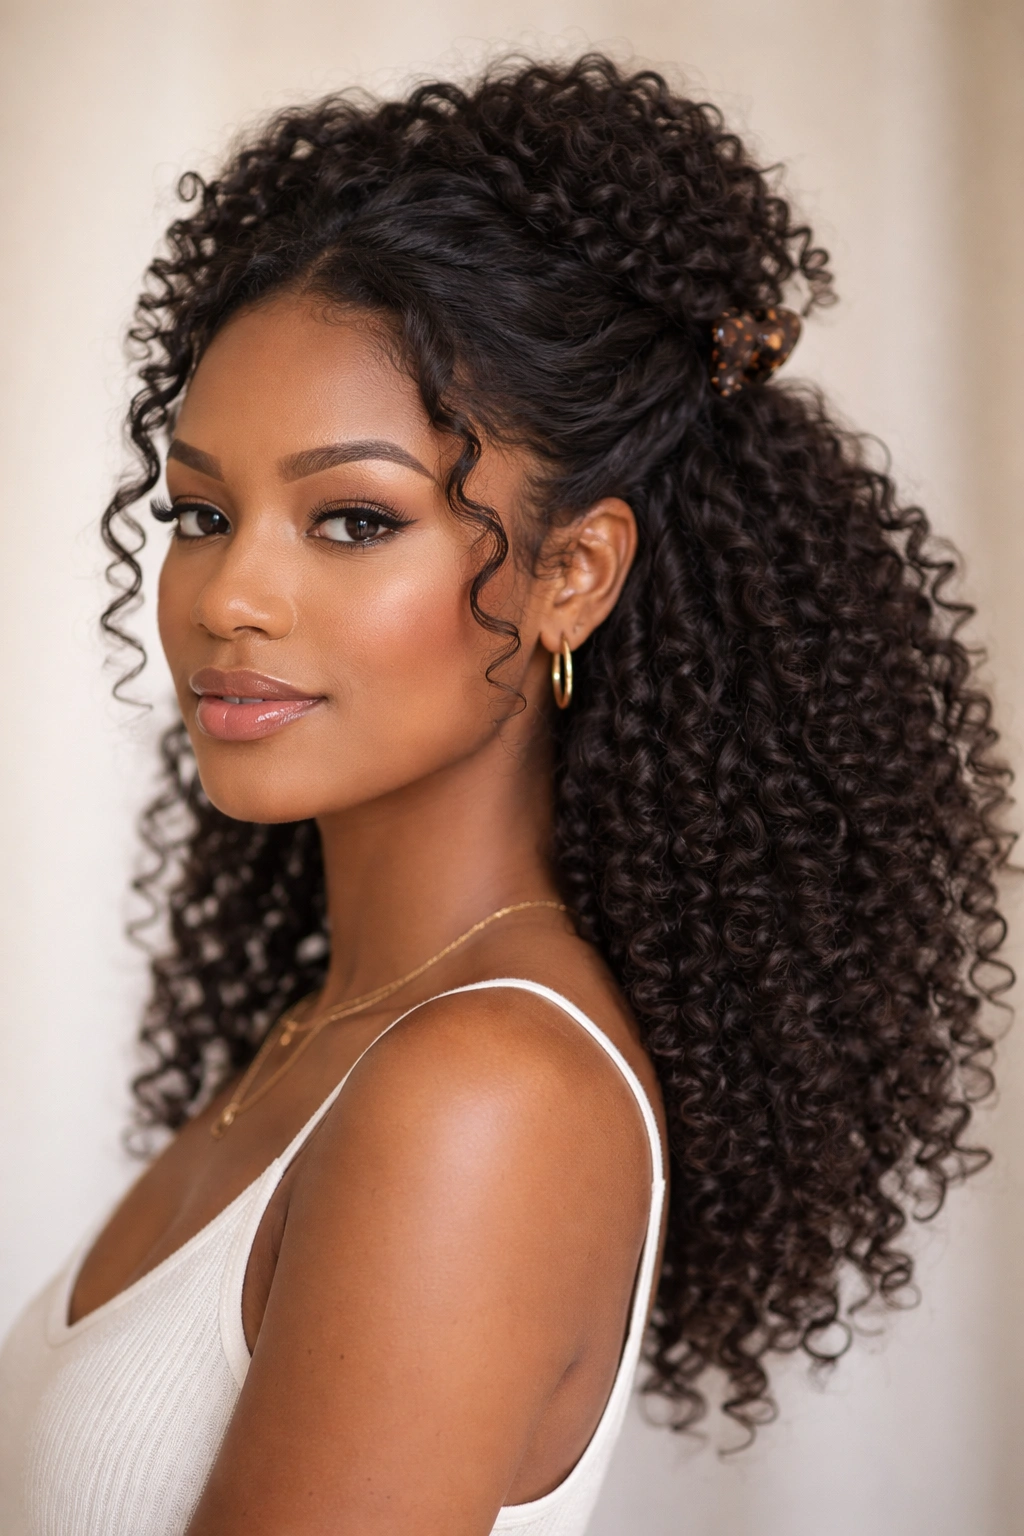
A half-up style works beautifully on coily hair because the top section naturally sits away from your head, creating the illusion of way more volume than you’re actually working with. The key is using twists instead of braids, since twists go faster and look just as polished on textured hair. Create a part that feels balanced to you, then section off the top half of your hair at about ear level, creating a clear line across the crown.
The Two-Twist Frame
Take a thin section from one side near the temple and twist it loosely back toward the crown area. Repeat on the other side, twisting a section from the opposite temple. These two twists frame your face and add movement without bulk. The loose twist texture actually looks better on coily hair because it echoes your hair’s natural pattern rather than fighting against it. Each twist takes about 45 seconds if you’re keeping them deliberately loose and textured.
Securing the Stack
Bring both twists toward the back-center area and secure them together with a clip or elastic. You can leave the ends of the twists loose and stacked on top of each other for extra dimension, or wrap them into a small bun if you prefer a tighter look. The coils below the half-up section stay completely free and full, creating visual contrast. This entire look is achievable in five to six minutes, and it genuinely looks like you spent way longer styling.
5. The Three-Section Twist-Out Refresh
If your coils are already defined from a previous wash or twist-out, this approach refreshes them into a distinct look without re-wetting or adding product. The technique is about strategically releasing twists you’ve done before or creating new ones in sections, letting your coil pattern already do most of the work. Divide your hair into three sections: right side, center/back, and left side.
Working Section by Section
Take one section at a time and gently untwist any previous twists you’ve put in, allowing the coils to unfold and separate. If you haven’t pre-twisted, create loose twists within each section using your fingers, then immediately untwist them to encourage definition and separation. This technique is surprisingly fast because you’re not trying to hold twists in place — you’re releasing them to create texture. Each section takes one to two minutes depending on your hair density.
The Definition Payoff
The result is coils that look deliberately defined and separated rather than bunched into a monolithic mass. Your natural curl diameter becomes the star of the look. Use a light cream or refresher spray as you work to activate any moisture already in your hair and encourage the coils to hold their shape. The whole style comes together in about six to seven minutes and lasts for multiple days with minimal restyling.
6. The Elongated Puff with Coil Definition

This style is technically simple but visually striking because it lets your coils be the primary visual element rather than compressing them into a tight gathered shape. Instead of gathering all your hair tightly, use a comb or your fingers to gently encourage your natural coils to cluster without forcing them into a specific shape. The goal is a puff that’s elongated vertically and shows off your curl definition rather than sitting as a dome on your crown.
The Gentle Gathering Method
Start at the crown and very lightly bring coils together using a wide-tooth comb or just your fingers. You want to support the natural grouping of your coils, not override their texture. Use a flexible elastic or a wrap that won’t create creasing, and keep the tension loose enough that you can fit two fingers inside the elastic. The point is to create visual organization without flattening what makes coily hair beautiful in the first place.
Adding Intentional Detail
Once the puff is loosely gathered, pull out a few individual coils from the front sections to frame your face and add softness. These intentional flyaways make the look feel styled rather than haphazard. If you want to add shine or definition, use a light gel or cream on individual coils, focusing on the face-framing pieces. This style takes about three to four minutes and looks effortlessly textured and intentional.
7. The Sleek Coil Clip Sides with Central Volume

This look plays with contrast — sleek sections on the sides that showcase smoothness, paired with full central volume that celebrates your coils in their natural state. Using a smooth styling cream or gel, brush small sections from your temples back toward your ears using a fine-tooth comb, creating two sleek side sections. The rest of your hair stays loose and full, creating a dramatic difference between the smoothed sides and the textured center.
The Smoothing Technique
Work gel or cream through small sections at a time, using the comb to gently smooth the coils into place without flattening them completely. You’re creating a surface smoothness while maintaining your curl pattern underneath. The sleek sections don’t need to be huge — even narrow sections along your part line and temples create the visual effect you’re after. This technique takes about two minutes for the smoothing.
The Finishing Clip
Once your sides are smoothed, use a clip or barrette at the back-center of your head to hold everything in place if needed, or leave it loose for a completely free-flowing look. The contrast between the smooth sides and the full, coily center creates visual interest and sophistication. Your coils remain completely unmanipulated in the center, so they maintain all their natural definition and bounce. The entire look takes four to five minutes and photographs beautifully.
8. The Layered Coil Mohawk
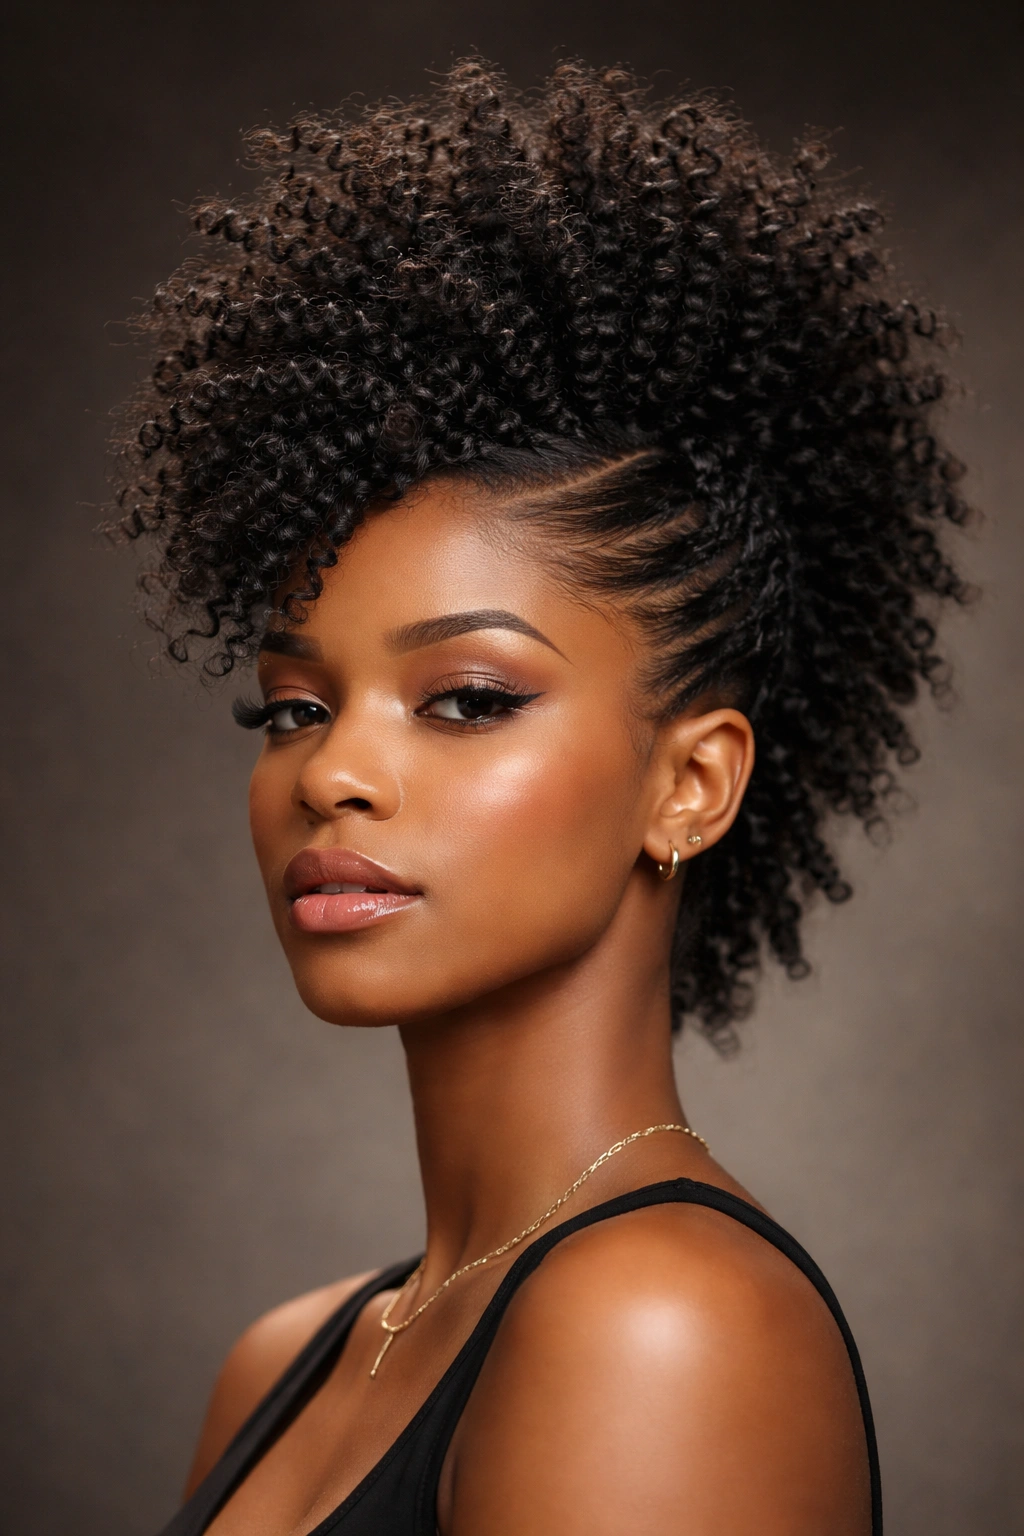
This is the bold play for days when you want your coils to be the statement. Rather than gathering all your hair into one shape, you’re creating intentional height and layering by directing coils upward and outward from a center section. Part your hair down the center from forehead to nape, creating two equal halves. Take thin sections from the sides near your ears and gently push them upward toward the crown, using your hands to direct the coils into a stand-up pattern.
Building the Height Strategically
The key is not using tightness to create height — instead, you’re using the natural spring of your coils and directing them with your fingers or a fine-tooth comb. Gently comb or rake your fingers through the center sections upward, encouraging your coils to stand away from your scalp. This works best if your coils have some moisture and definition already, but even relatively looser coils will respond to this directional manipulation. The visual effect is dramatic without any compression.
Securing the Look
Use a lightweight gel or cream on the sections you’re pushing upward to help them maintain the direction, or simply let your coils naturally hold the position. If you want extra hold, use a light hairspray. You can leave the coils completely loose and wild for a playful vibe, or gently twine thin twists through the center sections for a more structured look. The entire style takes four to five minutes and looks distinctly intentional and edgy.
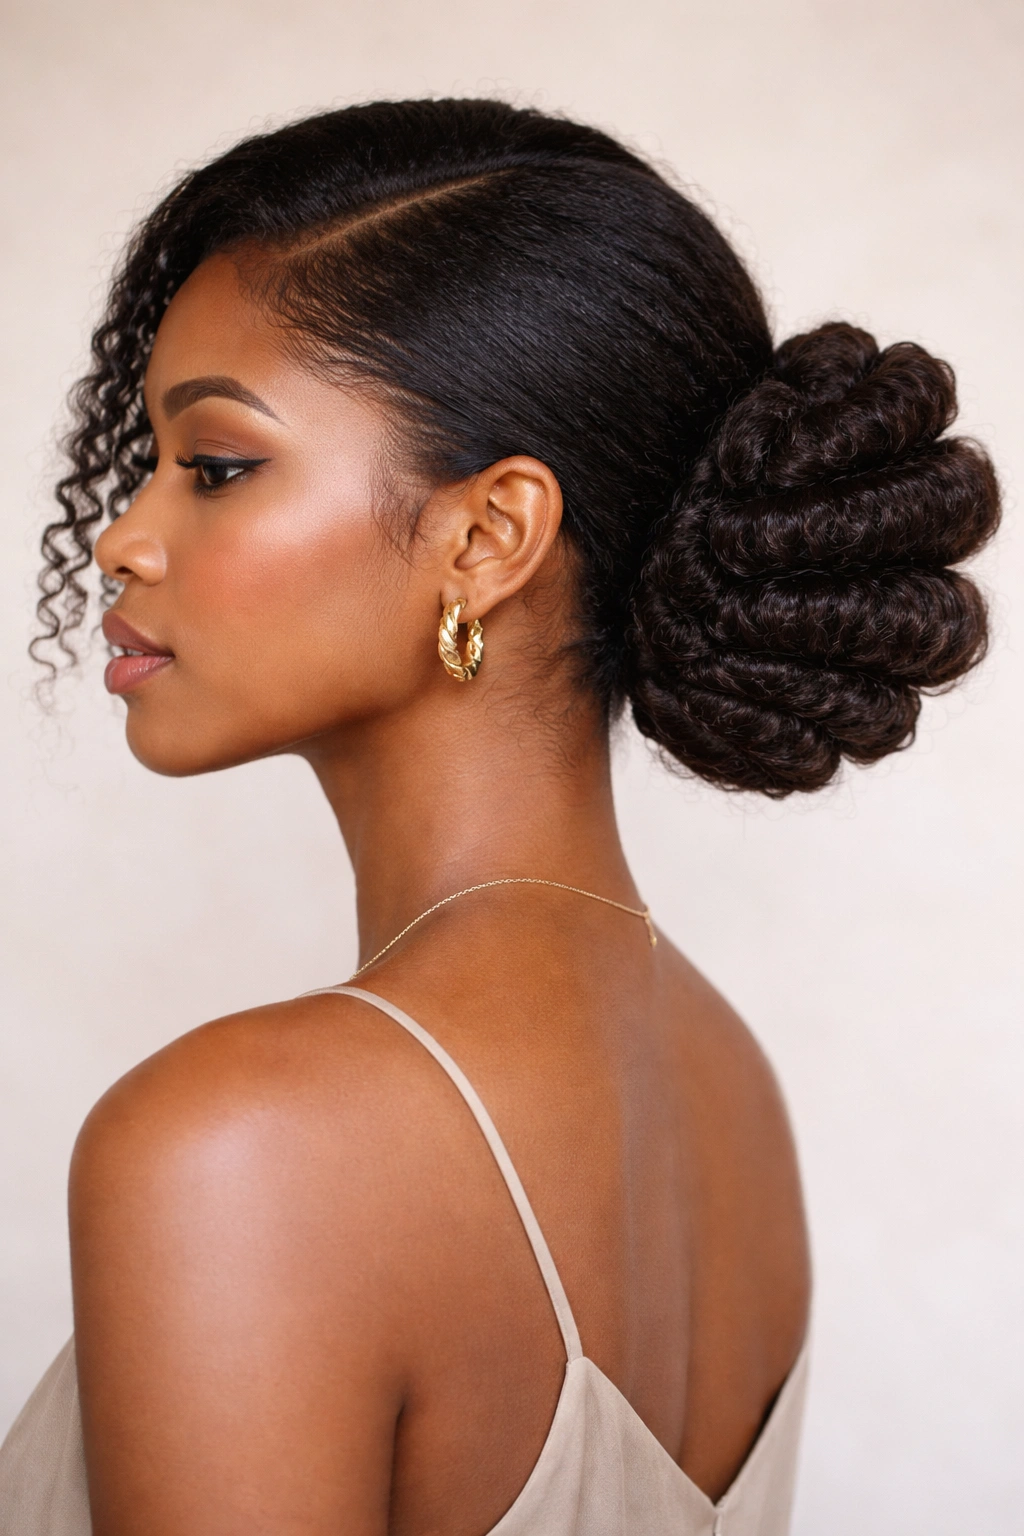
9. The Coil Wrapped Low Bun with Defined Edges
This approach is pure elegance — it works especially well if you have finer coily hair or looser curl patterns that benefit from gentle compression. Create a low ponytail at the nape of your neck using your fingers or a comb, keeping it loose enough that individual coils remain visible. Rather than twisting the ponytail into a bun, wrap sections of the coily hair around the base of the ponytail, creating layers of wrapped texture around the actual gathered coils.
The Wrapping Technique
Take a thin section of the ponytail and gently wrap it around the base in a circle, pinning it with a bobby pin. Repeat with another thin section, layering the wrapped portions around the previous one. This creates a bun that’s clearly made of coils rather than a smooth, compressed shape. Each wrap takes about 30 seconds, and you only need four or five wraps to create a complete, polished bun. The visual texture is striking because you’re seeing the actual coil structure rather than a smooth surface.
Polishing the Edges
If you want defined edges, use a fine-tooth comb and a light gel to gently smooth the hairline and edges around the bun while maintaining the textured coil detail everywhere else. This creates a sophisticated balance between structure and texture. The bun itself remains full and three-dimensional because you’re working with coily hair’s natural properties rather than against them. The complete look takes about six minutes and feels polished enough for professional or formal settings.
10. The Side-Swept Coil Cascade
This is the softest, most romantic option on the list — it celebrates the length and movement of your coils while keeping them completely loose and unrestricted. Part your hair deeply on one side, creating an off-center part that sits well past your temple area. Gently sweep the larger section from one side toward the opposite shoulder, letting your coils fall naturally and separate as they cascade down.
Creating Natural Movement
You’re not braiding, twisting, or gathering anything — the entire point is to let your coils move freely while simply directing them to one side with your hand and possibly a single decorative clip or hair stick if you need to anchor them slightly. The coils create movement and dimension simply through their natural texture, length, and weight. This style works best when your coils have some moisture and definition, but even textured hair will cooperate because you’re not asking it to do anything unnatural.
Adding Optional Detail
If you want to add something extra without compromising the relaxed vibe, use a decorative claw clip to hold the swept section loosely, or weave a thin decorative string or scarf through the coils on one side. These additions should feel light and optional, not structural. The goal is romance and movement, not tightness. This entire look takes literally two minutes — part, sweep, maybe clip — and it looks intentional, beautiful, and like you barely tried, which is exactly the energy to go for.
Final Thoughts
The fastest coily hair looks aren’t the ones with the most steps — they’re the ones that work with what your hair naturally does. Every style on this list succeeds because it uses your coil’s inherent texture, spring, and ability to hold shape without compression or heat. You don’t need two hours, specialized tools, or complicated techniques to have a finished, intentional look.
The real trick is understanding that your coils are doing heavy lifting for you. Twists appear instantly textured because they echo your natural pattern. Gathers look full because your hair is already voluminous. Clips and simple styling feel polished because the coil definition does the visual work. Once you know which styles let your hair shine rather than fight against its nature, getting ready becomes genuinely faster.
Pick one or two of these styles to rotate through for the next week or two, and you’ll develop real muscle memory for the technique. That first time might take the full ten minutes, but by your third or fourth try, most of these styles fall together in four to five minutes. That’s the gift of working with your hair’s natural texture instead of against it — speed and authenticity come together.