Half up half down cornrows offer the perfect balance of style and practicality for kids. You get all the personality of a full cornrow look without the commitment of a complete braided style, and the loose hair flowing down adds movement and a softer appearance that many kids and parents prefer. Whether your child is heading to school, a birthday party, or just wants a fresh look that keeps hair off their face, this hybrid style checks so many boxes.
What makes half up half down cornrows especially appealing is their versatility. You can dress them up or down, they work for various hair textures, and they’re manageable enough that even kids with sensitive scalps usually tolerate them well. Plus, they hit that sweet spot between looking intentional and polished while still feeling playful and age-appropriate. The beauty of this approach is that you’re not locked into one aesthetic—you can adapt the braiding pattern, the thickness of the cornrows, how high you pull the section up, and even what you do with the gathered hair at the crown to create countless looks.
Getting comfortable with these styles does take some practice if you’re new to braiding, but don’t let that intimidate you. The core skills are the same whether you’re doing half up styles or full braids, and once you nail the technique, you’ll find yourself spinning out variations for different occasions. Let’s explore 15 distinct half up half down cornrow styles that range from simple and elegant to intricate and eye-catching—there’s genuinely something here for every kid and every hair type.
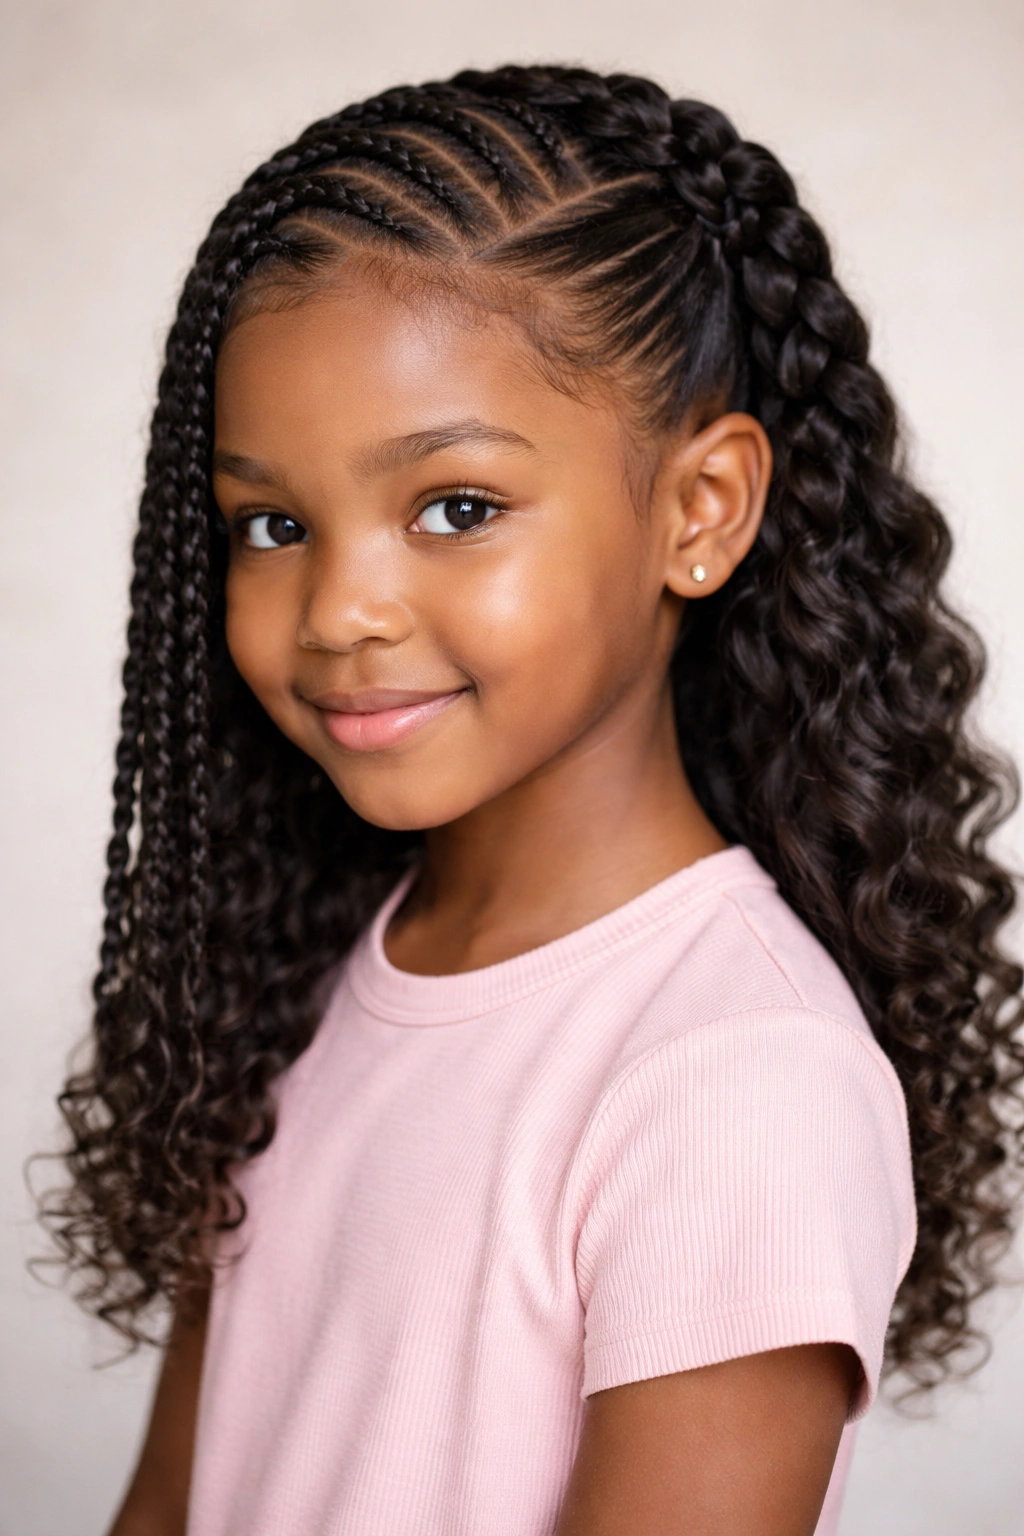
1. Center Part with Two Thick Cornrows
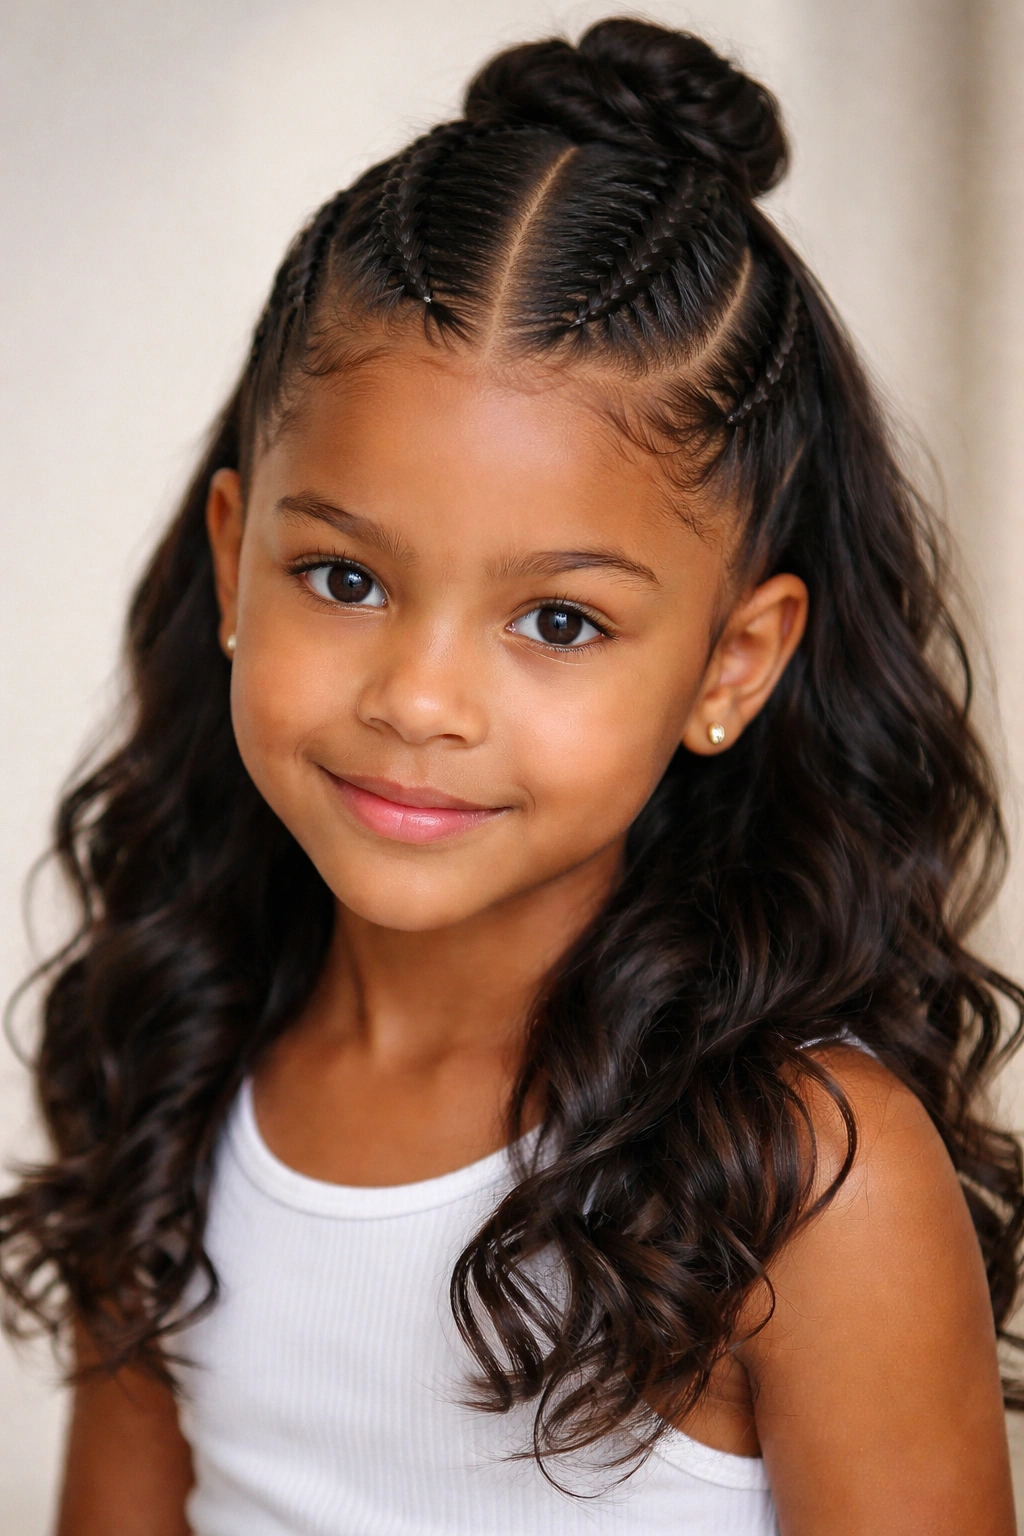
This is the purest expression of the half up half down cornrow style and honestly the best place to start if you’re new to doing these braids on your child. You’re working with two substantial cornrows that run from the front hairline straight back toward the crown, meeting right at the center part line. The visual impact is immediately polished—there’s something so satisfying about the symmetry, and it frames the face beautifully without being fussy.
What Makes This Style Work
The key to nailing this look is starting at the roots with clarity. Part the hair down the absolute center from forehead to the nape, then take a clean vertical section from the part line about an inch wide at the front. Keep your tension even throughout—not so tight that you’re creating stress on the scalp, but firm enough that the braid stays in place for days without getting fuzzy. The two braids should be chunky enough to feel substantial but not so thick that they overwhelm a smaller face.
Pro Tips for Success
- Use a rattail comb to create a perfectly straight center part before you start braiding
- Braid only to the crown area (usually about 4-5 inches back depending on the child’s head size), then gather all the remaining hair into a secure elastic where the braids meet
- This works beautifully with clips, ribbons woven through the braid, or even small gold cuffs slipped onto the braids for extra polish
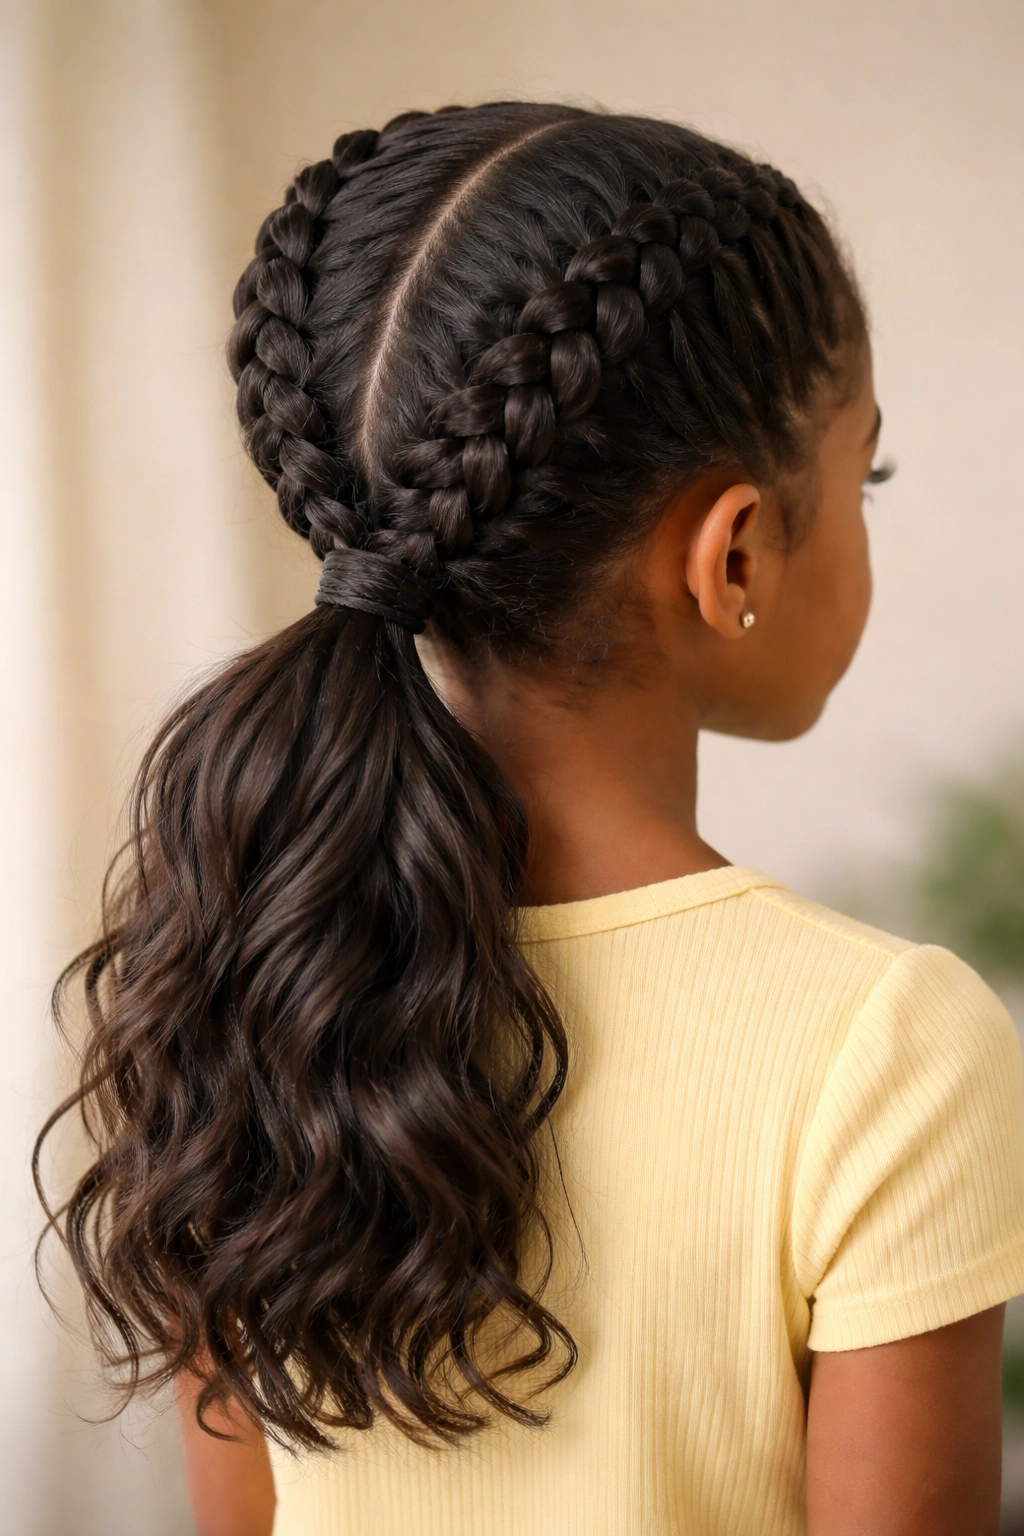
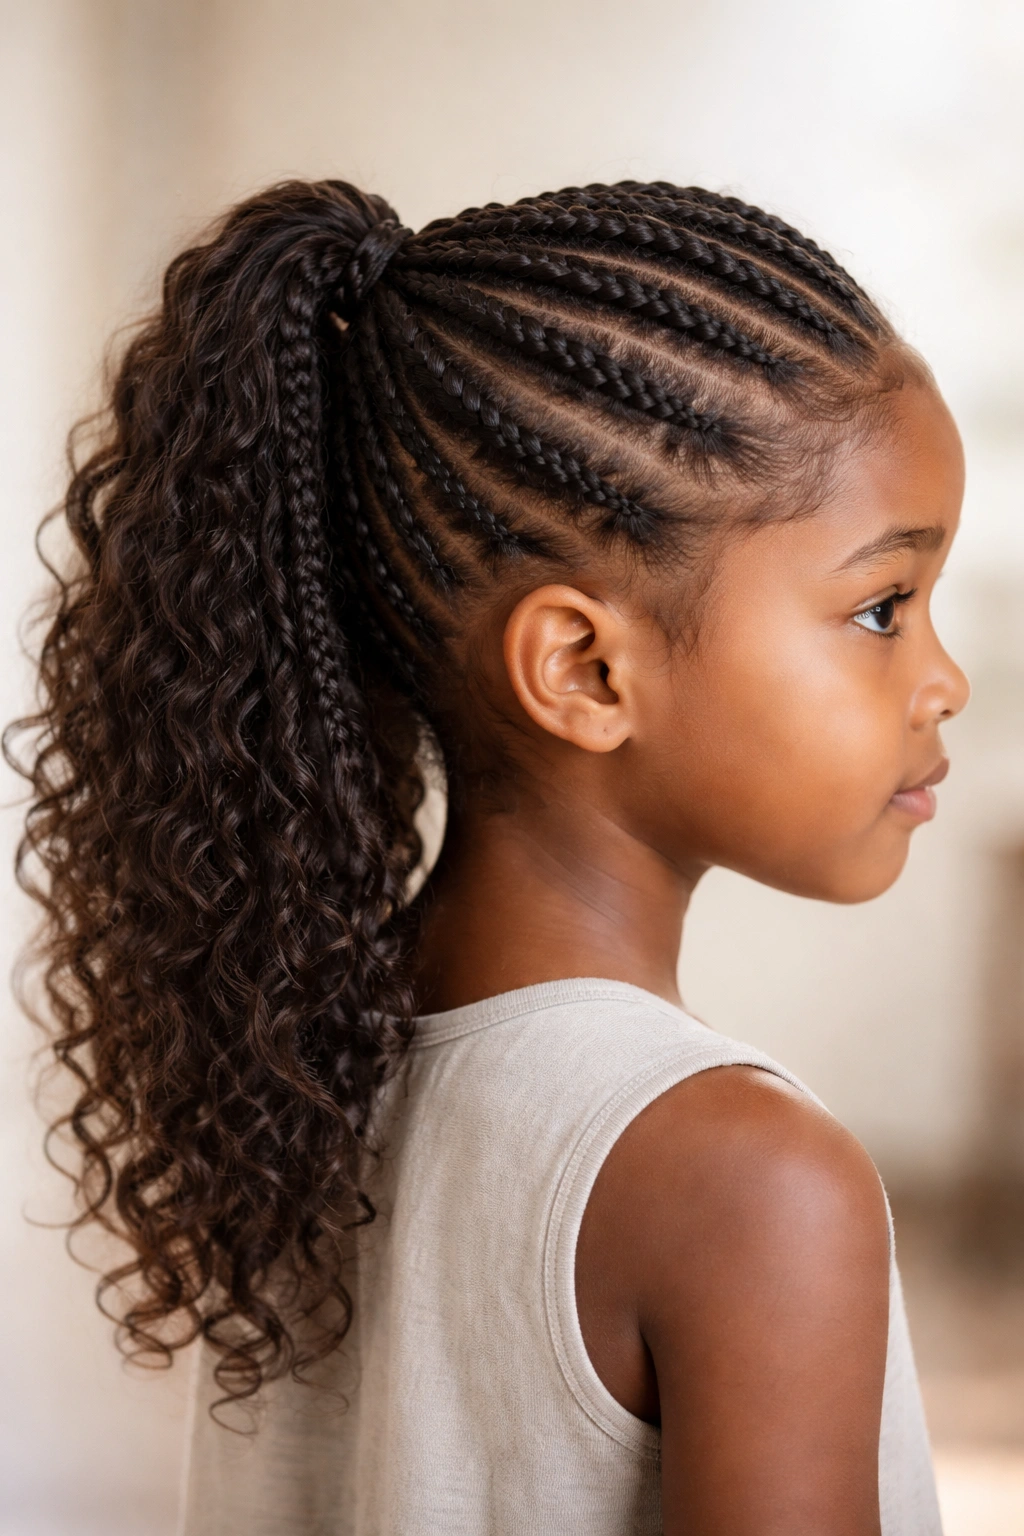
2. Side Cornrows with High Crown Gathering
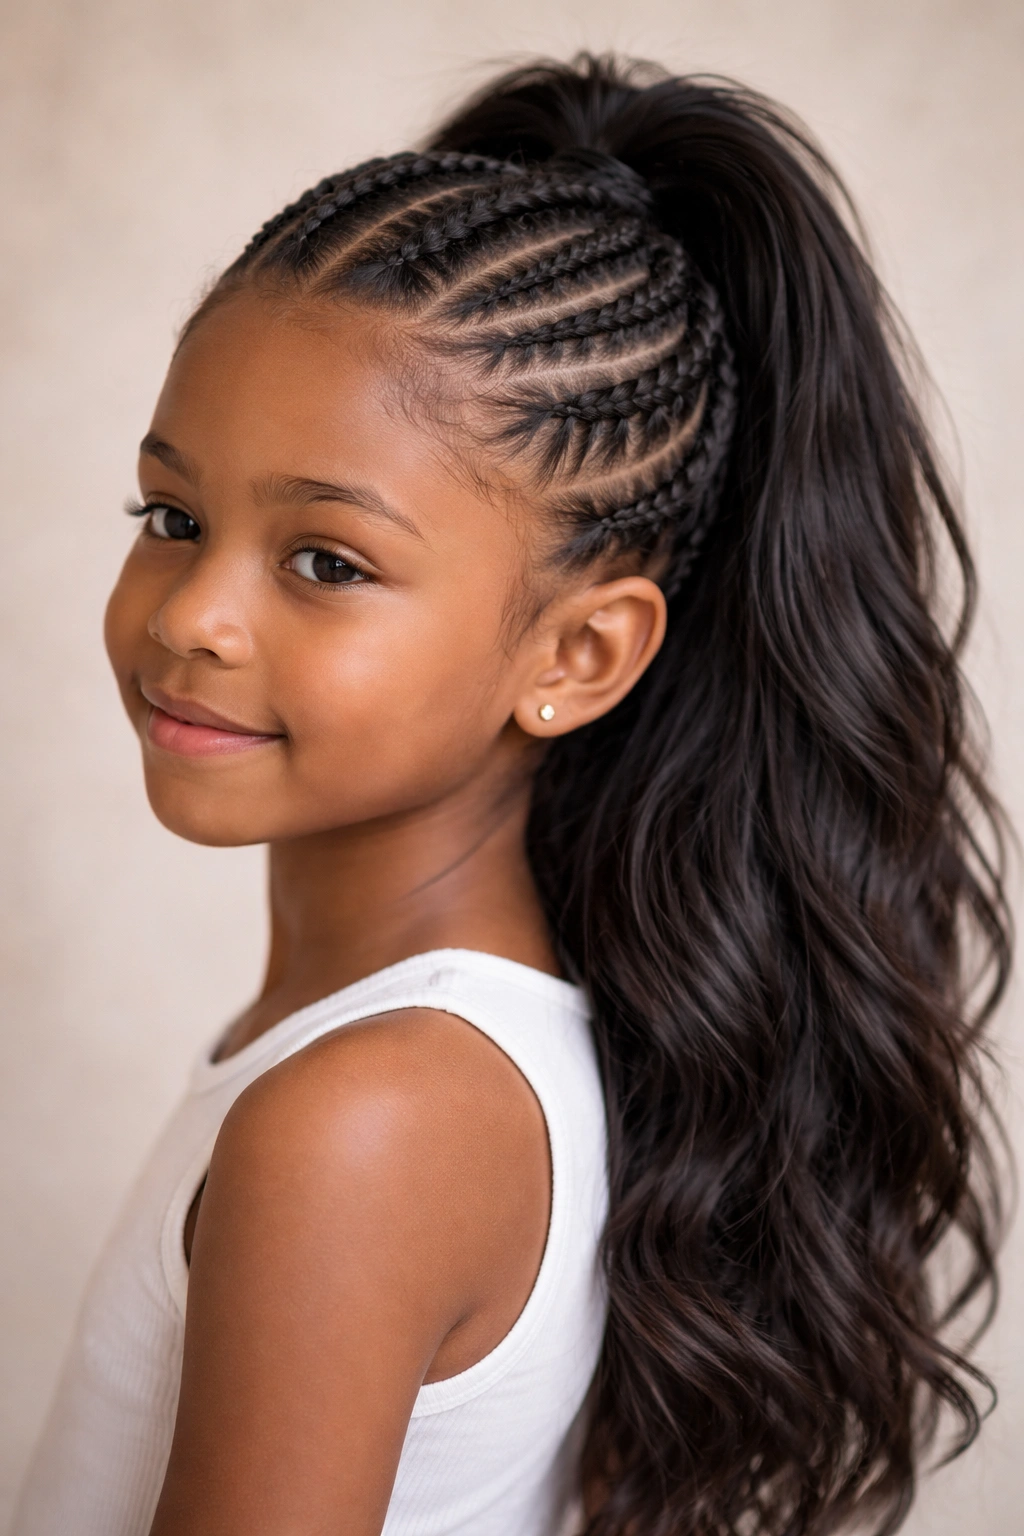
Instead of centering the braids, this version pulls them diagonally from both front corners back toward one side of the crown. Imagine creating two cornrows that both angle slightly inward as they travel backward, then converge at a high pony at the back. It’s more dynamic than center-parted cornrows and gives off an effortlessly cool, slightly edgy vibe that kids absolutely love.
How the Angled Approach Changes Everything
Start the first cornrow about an inch from the hairline on the left side of the face, positioning it to angle slightly inward as you braid. Do the same on the right side, so both braids are traveling toward the center-back as they move backward. This creates natural tension and a flattering shape that draws the eye upward. The cornrows don’t need to be perfectly symmetrical—slight variation actually adds character and authenticity.
Styling the Crown Section
Once your cornrows reach the back of the head, you’ve got options. You can secure them into a high pony with the remaining loose hair, wrap the ponytail with a section of hair pulled from the underside for a sleek finish, or add a decorative clip or cuff right where they meet. The gathered section at the back should feel smooth and intentional, not like an afterthought—spend time smoothing any flyaways with edge control or a soft brush.
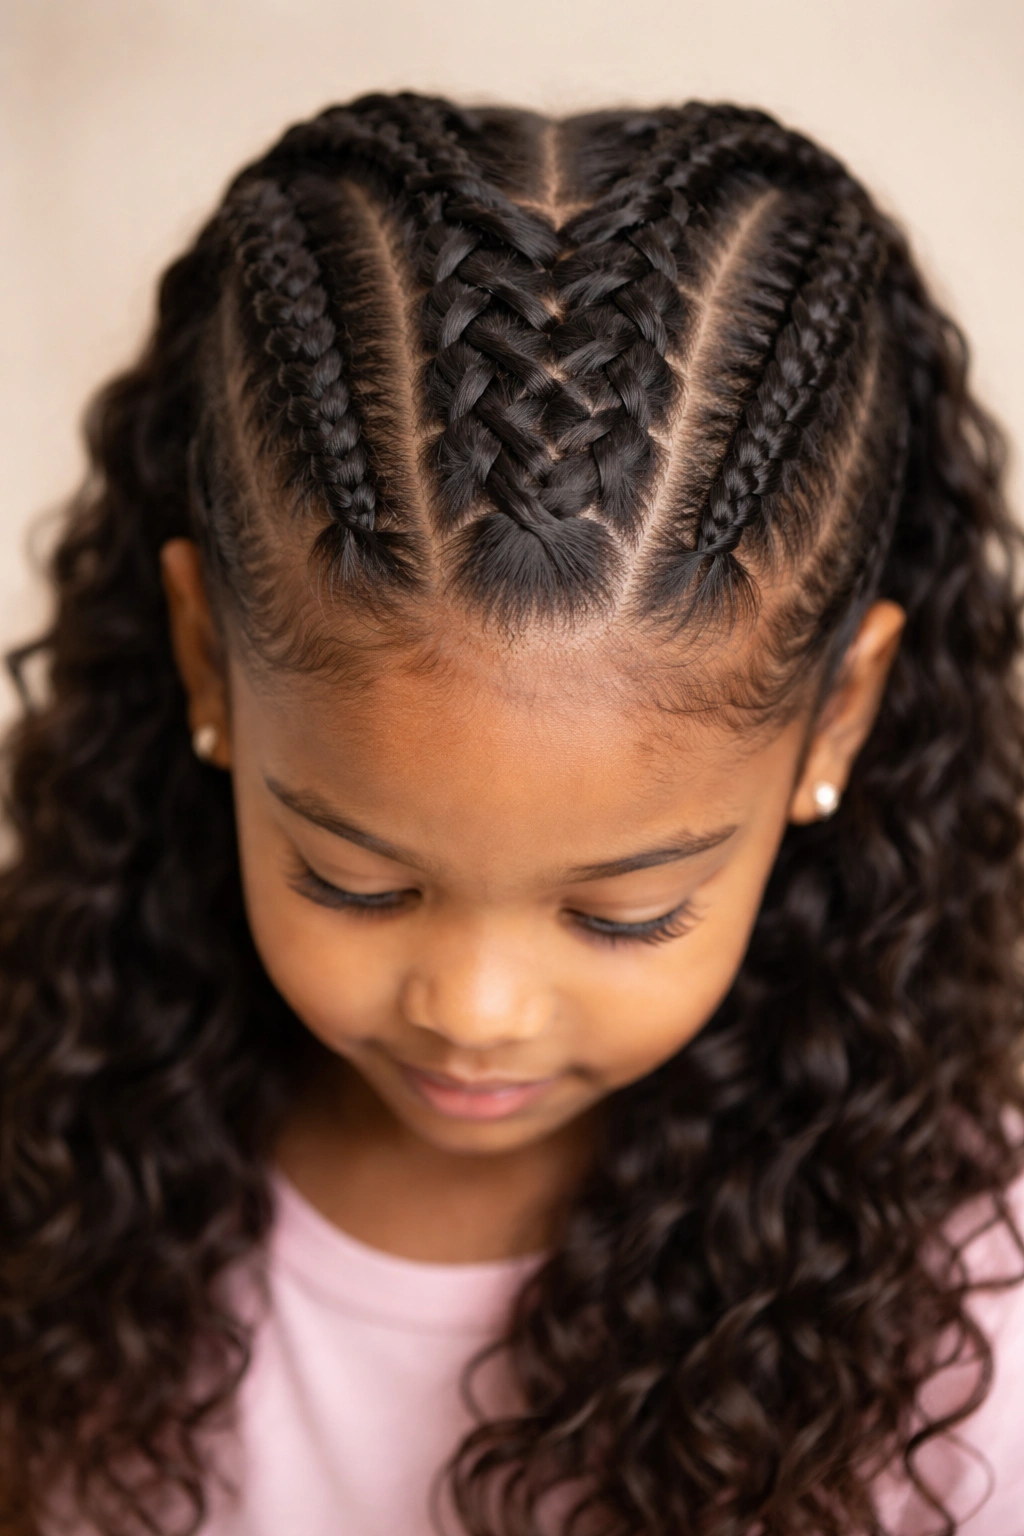
3. Four-Cornrow Design with Split Gathering
Here’s where things get more intricate, but in a way that looks way more complex than it actually is. Instead of two thick braids, you’re creating four thinner cornrows that all start from the front and angle backward. At the crown, two of them combine into one section and the other two combine into another section, creating a gathered look that’s visually striking without being overwhelming.
Planning Your Sections
Divide the top section of hair that you’re going to braid into four equal vertical sections starting from the part line. Each should be roughly the same width—about half an inch for medium thickness. The trick here is keeping your braids all the same tension and width so they look intentional rather than like you lost count halfway through. It helps to mentally number them one through four before you start, then stick to that order as you braid.
Creating Visual Interest with the Gathering
When you reach the crown, take cornrows one and three (or two and four) and gather them together with one elastic, then do the same with the remaining pair. This creates a more dimensional gathered section than two thick braids would. You can also offset the elastic positions very slightly to create a cascading effect, or position them at the exact same height for symmetrical polish. Either way, this style reads as more sophisticated and detailed without actually being harder to execute.
4. Zigzag Pattern from Temple to Back
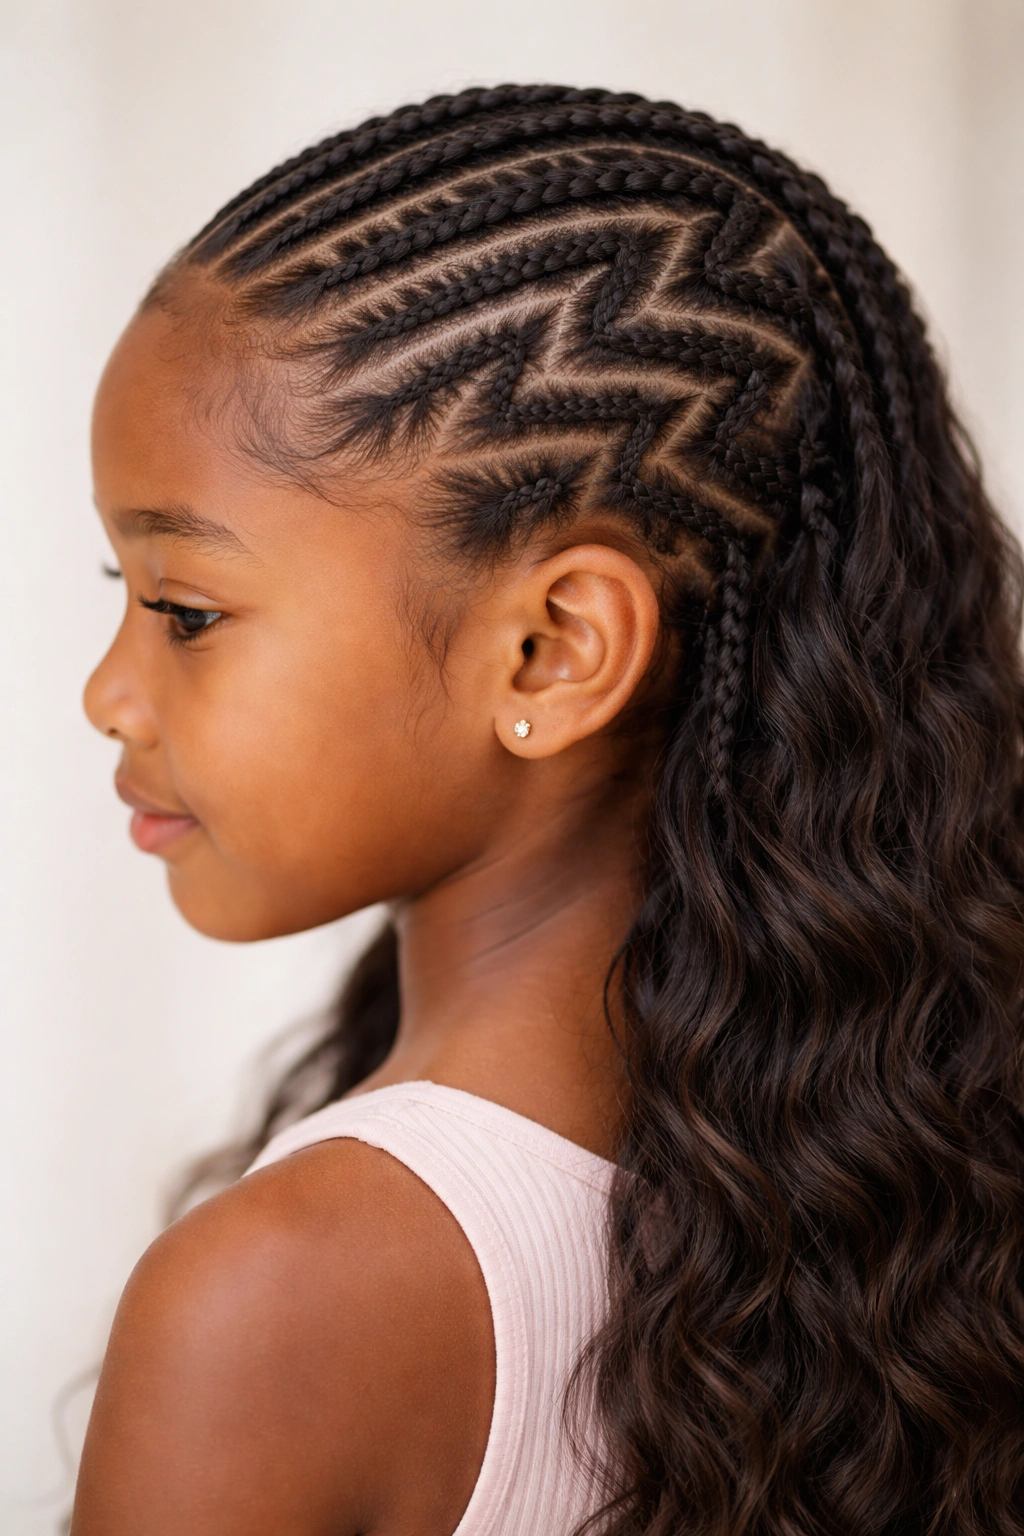
This is the style that makes people stop and ask “how did you do that?” even though it’s not particularly difficult—it just looks intentional and artistic. Instead of braiding straight back, you’re creating cornrows that angle side to side in a subtle zigzag pattern as they travel from temple to crown. It transforms a relatively simple technique into something that feels custom and creative.
Mapping the Zigzag
Before you pick up a comb, mentally map where you want your zigzag to go. One common approach: start on the left temple with a cornrow that angles slightly toward the center as it goes back about 2 inches, then angle it back toward the left, then toward center again—creating that S-curve pattern. You don’t want exaggerated sharp angles; think gentle, flowing waves rather than geometric zig-zags. The subtlety is what makes it look sophisticated.
The Confidence Factor
Honestly, once you’ve done one zigzag cornrow successfully, you’ll feel so much more confident doing braids in general. There’s something about the pattern that just clicks. Keep your tension steady even as you’re angling, and trust that your hands will follow the path you’ve mentally mapped. Kids are usually fascinated watching this style come together, which can help them stay still during the braiding process.
5. Double-Sided Dutch Braids Meeting at a Low Pony
Think of this as a slightly different take on the side-parted approach. You’re creating two thick braids that both angle inward from the sides of the head, meeting at a lower point—more at the nape than the crown. The gathered section falls lower, giving it a more relaxed, undone vibe that works beautifully for weekend wear or active play.
The Lower Pony Appeal
The main difference with this style is where you’re directing the braids to meet. Instead of aiming for the very top back of the head, you’re aiming for somewhere around ear level or slightly lower. This changes the proportions and makes the whole look more casual. The loose hair that stays down creates more visual volume and movement, which is especially nice if your child has thinner hair or prefers fuller-looking styles.
Pairing with Accessories
A low pony from cornrows is the perfect canvas for hair rings, decorative clips, or even a silk scrunchie that matches the child’s outfit. You can leave the ponytail sleek or tousle it slightly for texture. Weaving a thin ribbon through the gathered section or adding a small decorative element right at the elastic point elevates the whole look without needing to do anything complicated.
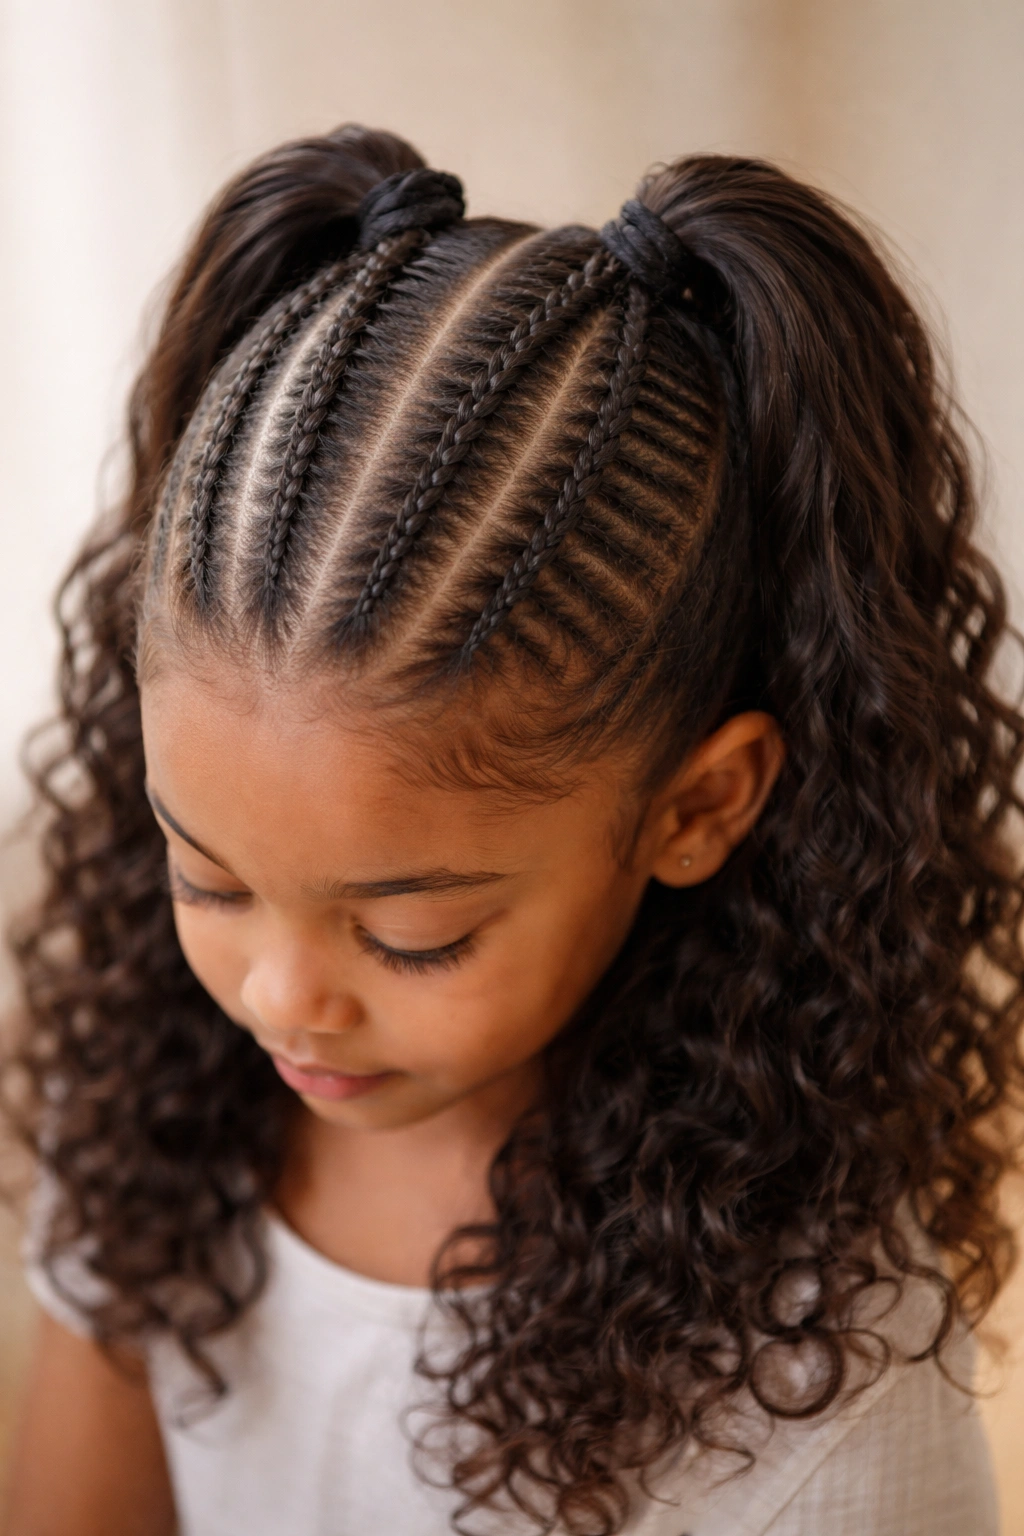
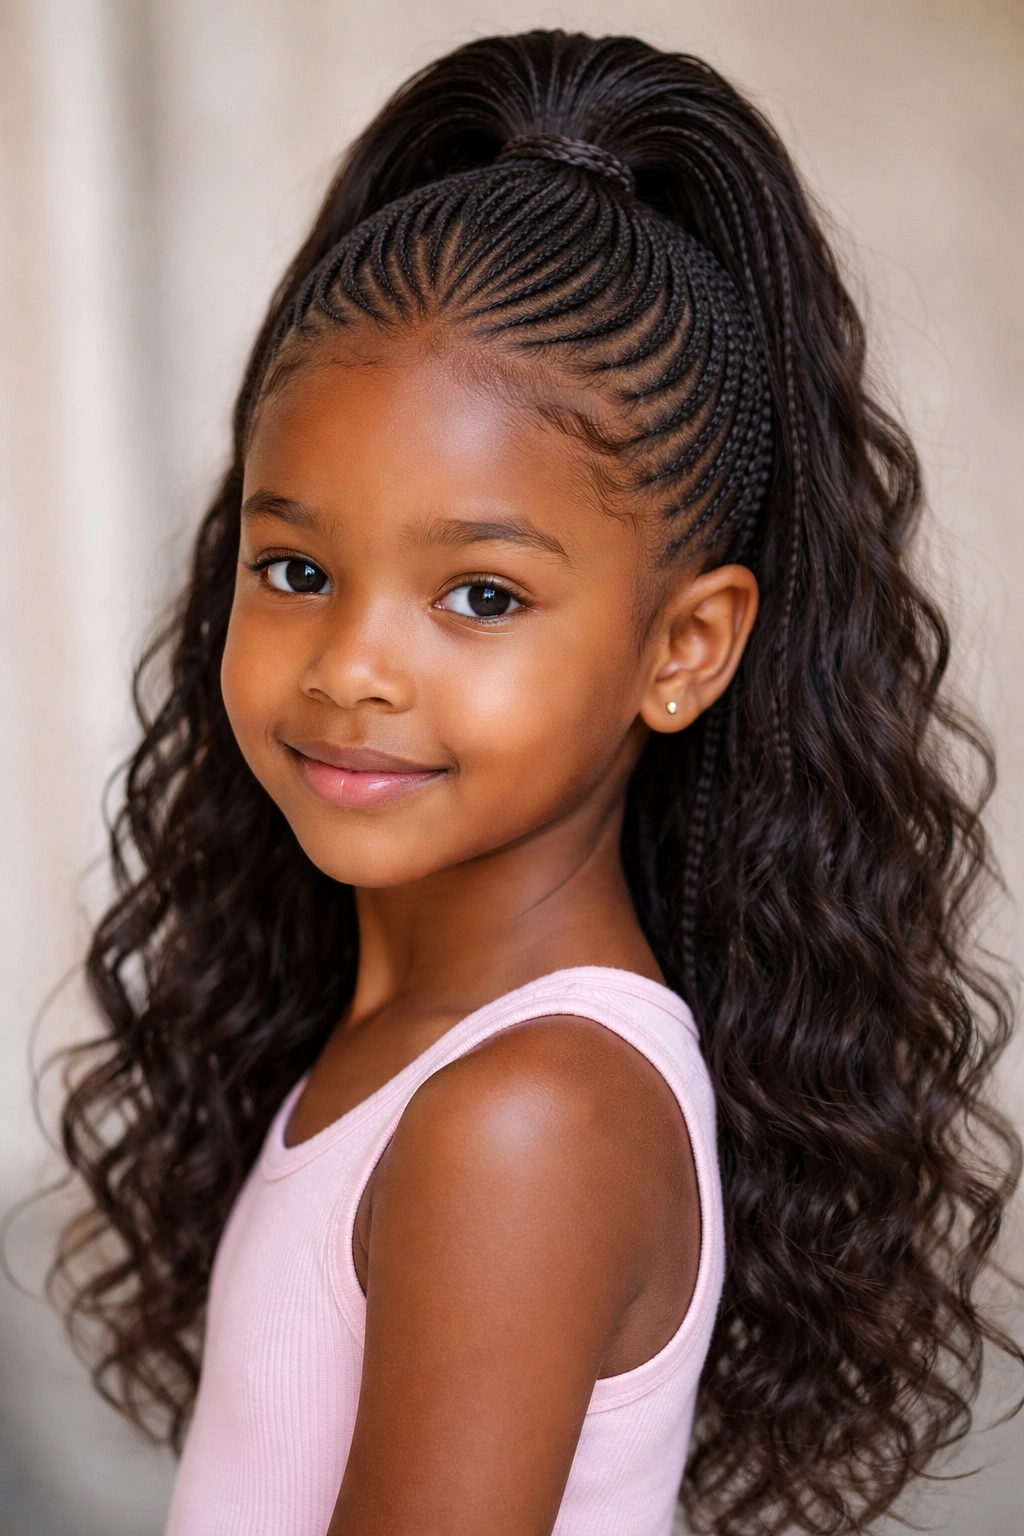
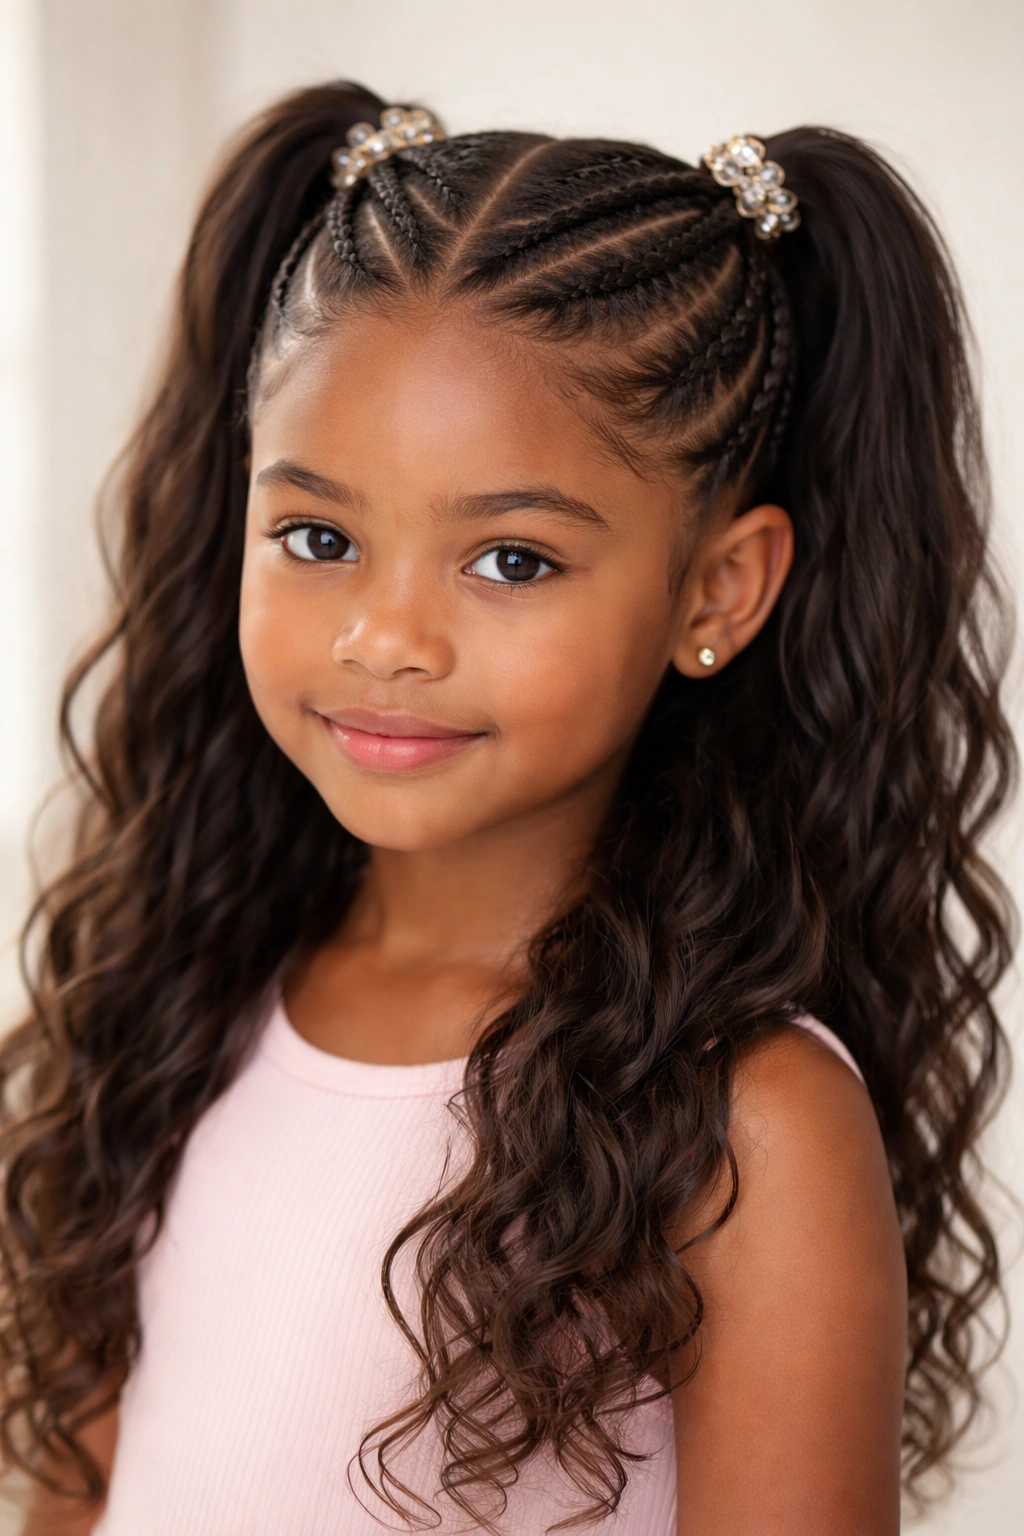
6. Braids Framing the Face with a High Center Gathering
This style uses thinner cornrows that start directly at the hairline on either side of the face—essentially framing the face like a reverse mullet situation, with the sides braided and the center gathered up. It’s playful, it’s flattering, and it keeps all the hair off the face while still showing off length and texture in the gathered section.
Creating Face-Framing Braids
Position one cornrow about an inch in from the hairline on each side, running them straight back parallel to each other. These side braids should angle very slightly inward as they travel back, so they’ll meet naturally at a high center point at the crown. The remaining hair in the center stays loose—don’t braid it, just leave it flowing. The contrast between the braided sides and the loose center creates visual interest and a more playful aesthetic than braids covering more of the head.
The Personality in This Look
Kids often gravitate toward this style because it feels like it belongs to them—it’s just present enough to look intentional but leaves plenty of room for their personality to shine through. You can style the center-gathered section curly or straight, leave it as one ponytail or split it into two pigtails, add clips or keep it bare. It’s endlessly adaptable depending on the kid’s preferences and the occasion.
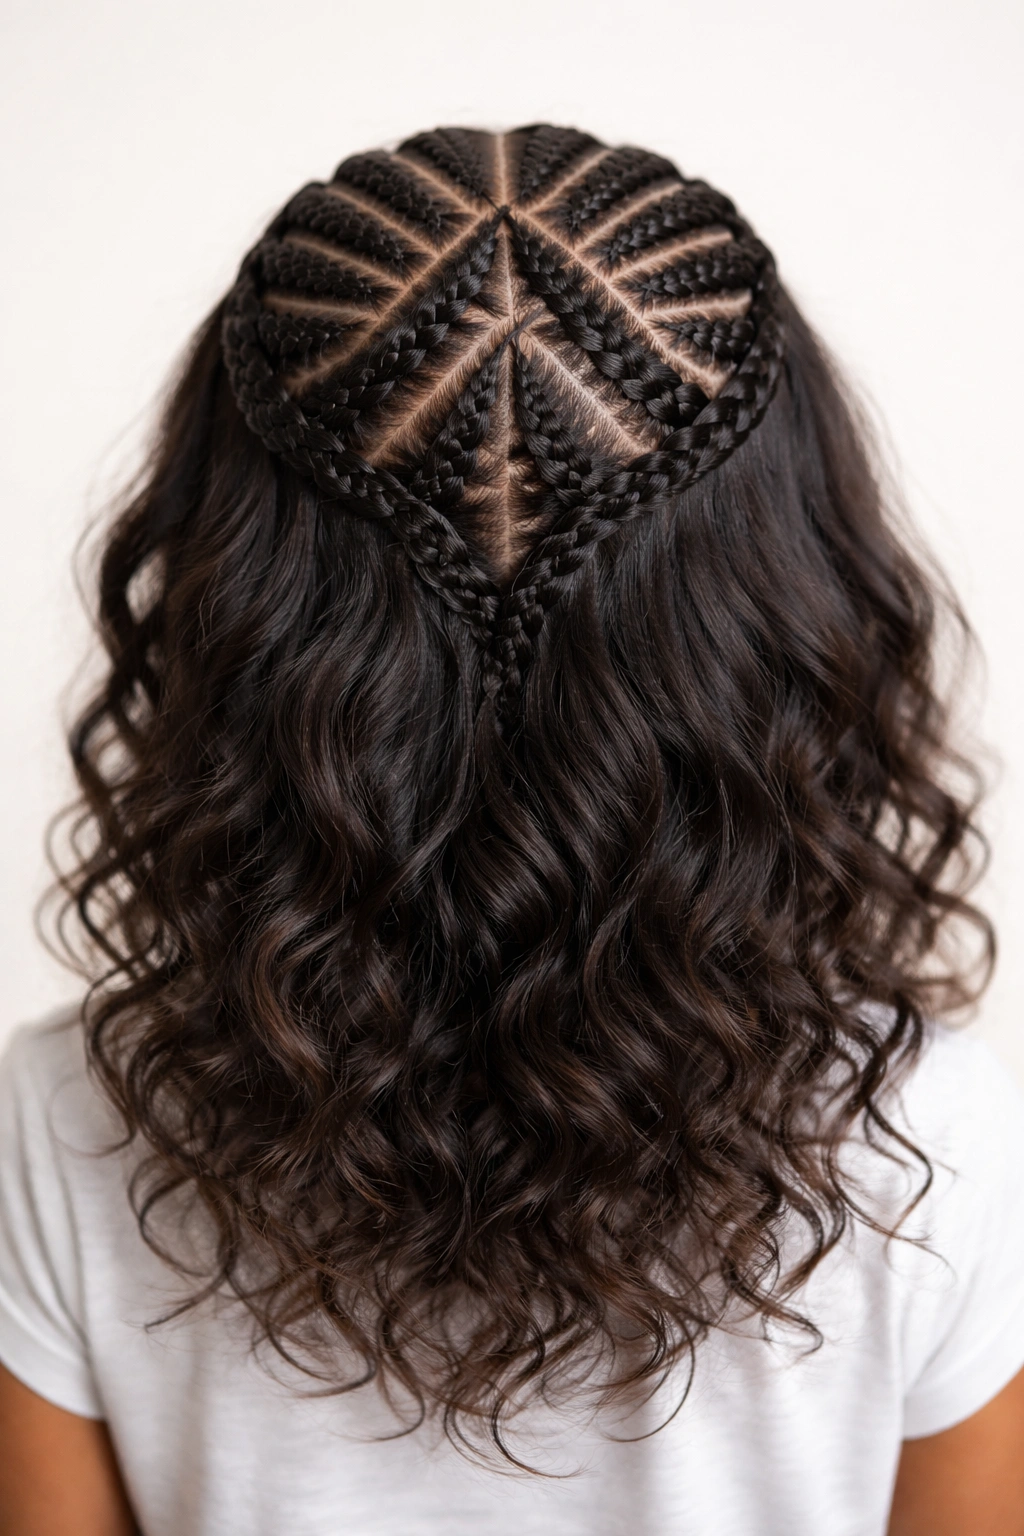
7. Crown-Only Cornrows in a Diamond Pattern
This version starts the cornrows further back, essentially creating a situation where the cornrows only cover the crown area while all the front and side hair remains loose. The braids themselves create a diamond or geometric shape just at the top, which is visually striking and also much quicker to execute than braids that start at the hairline.
Why Starting Back Changes the Game
By positioning your braids to start a few inches back from the hairline, you’re creating a style that’s more about detail and accent than about overall hair management. It’s perfect for kids who want the look of cornrows but don’t want them starting at their face, or for children with sensitive hairlines. The loose hair in front and around the sides creates softness that can balance out any concerns about braids being too tight or industrial-looking.
The Diamond Formation
Create your cornrows so they angle inward from two starting points on either side of the crown, meet in the center back, then angle outward again. This creates a diamond or lozenge shape that’s visually satisfying. You might have just two braids, or you could do four (two pairs) to create a more complex diamond pattern. Either way, gather the loose hair at the crown where the braids meet, or leave it all loose if you prefer a softer, less styled appearance.
8. Boomerang Braids with Side Pony
This one’s fun and feels like a trick even though it’s straightforward. You’re creating cornrows that start at the temple, angle back toward the back of the head, then angle down and forward again—creating a shape that looks like a boomerang or an exclamation point. The hair is then gathered into a side ponytail, so the braids essentially frame one side of the head in this curved formation.
Mapping the Curve
Start your cornrow about an inch back from the hairline on one side (let’s say the right side for this example). Braid straight back for about 2-3 inches, then angle the braid slightly forward and down, creating that curved path. The braid ends up traveling in a gentle arc that’s visually interesting and surprisingly easy to execute once you’ve mentally mapped the path. You can create just one boomerang braid, or mirror it on the other side for balance.
The Gathered Finish
Because the braids are angled to naturally funnel toward one area, gathering them into a side ponytail feels organic and intentional. The side pony position means the gathered hair falls over one shoulder, creating asymmetrical balance that feels modern and intentional. This style works especially well for kids with medium to longer hair, where the gathered ponytail section has enough length to create visual interest.
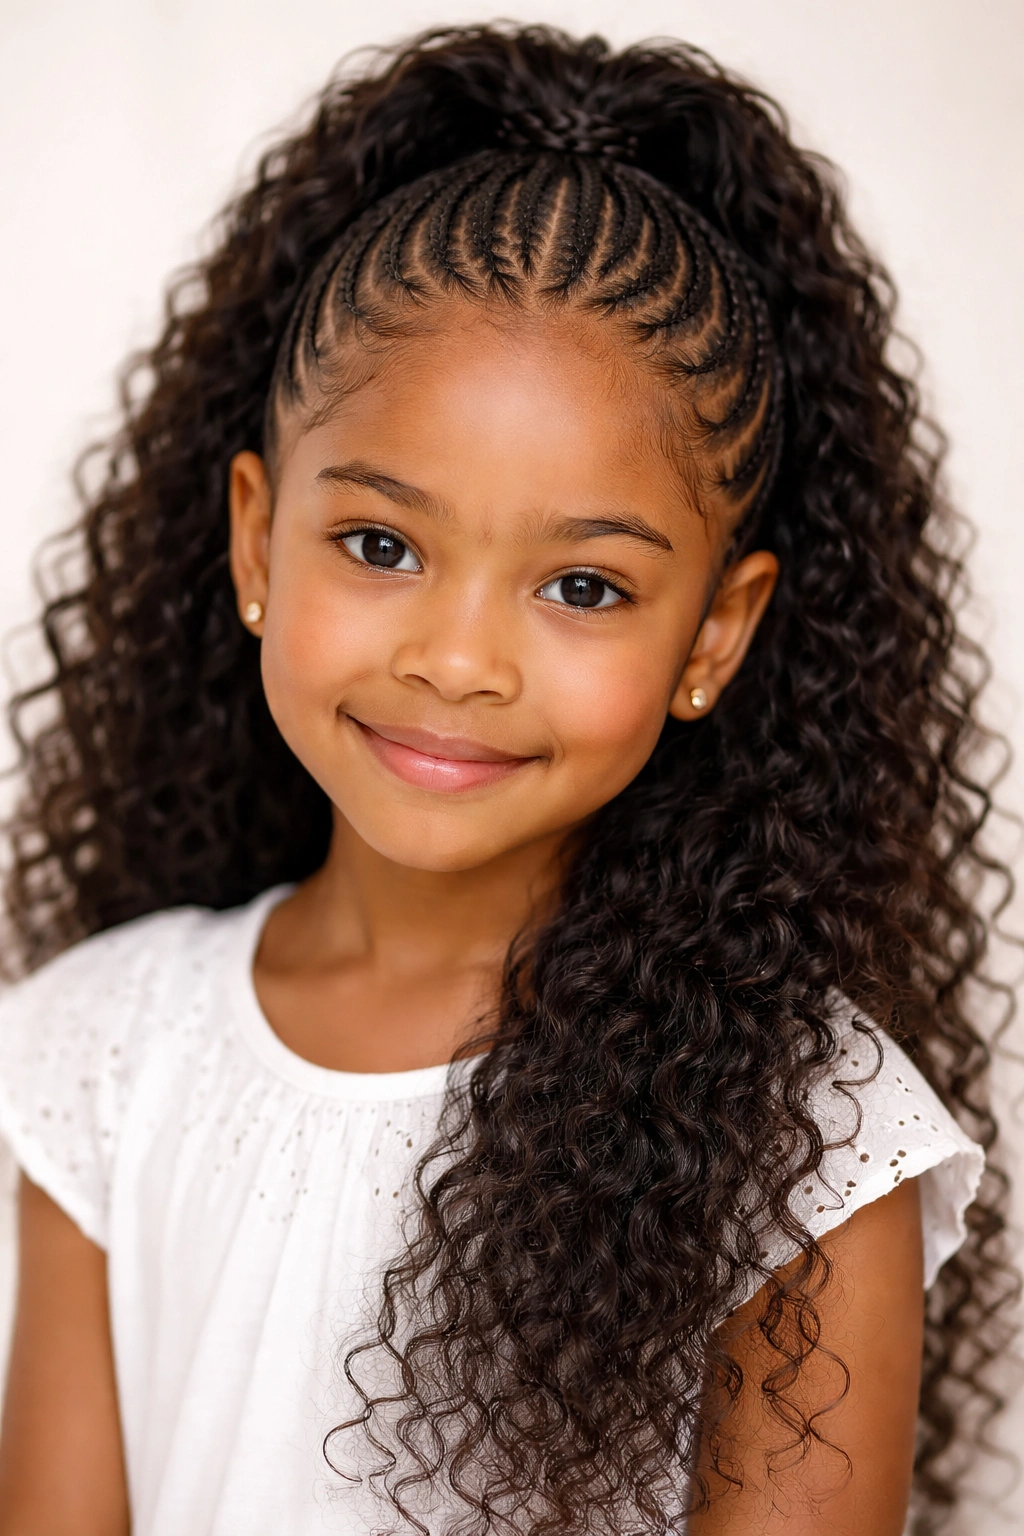
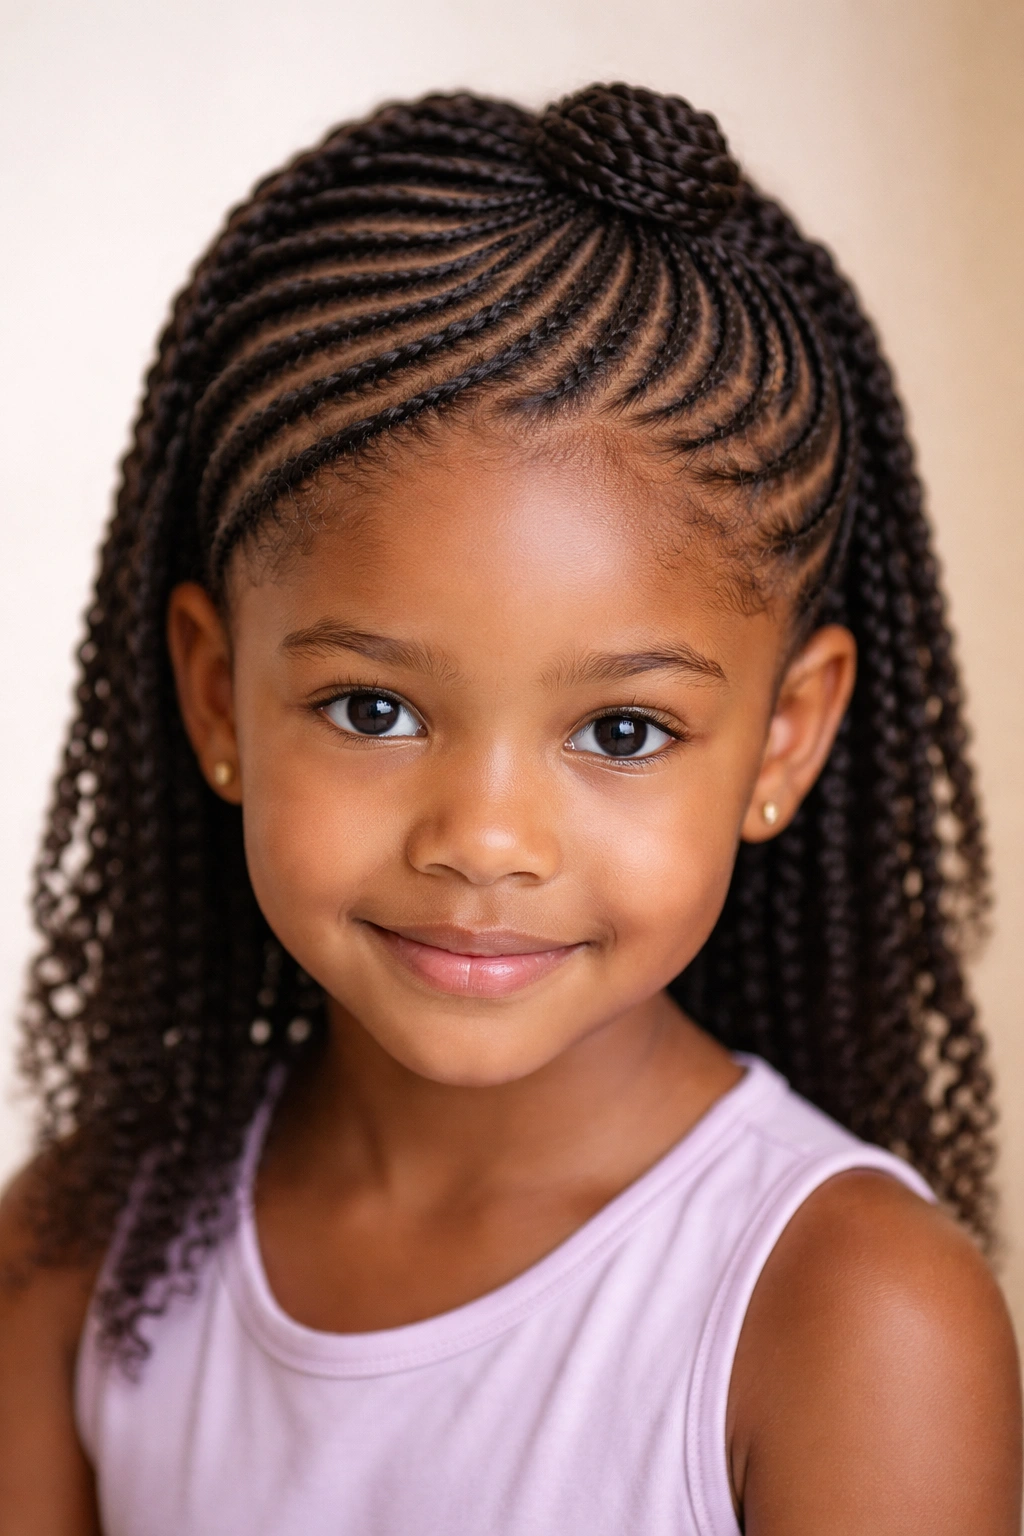
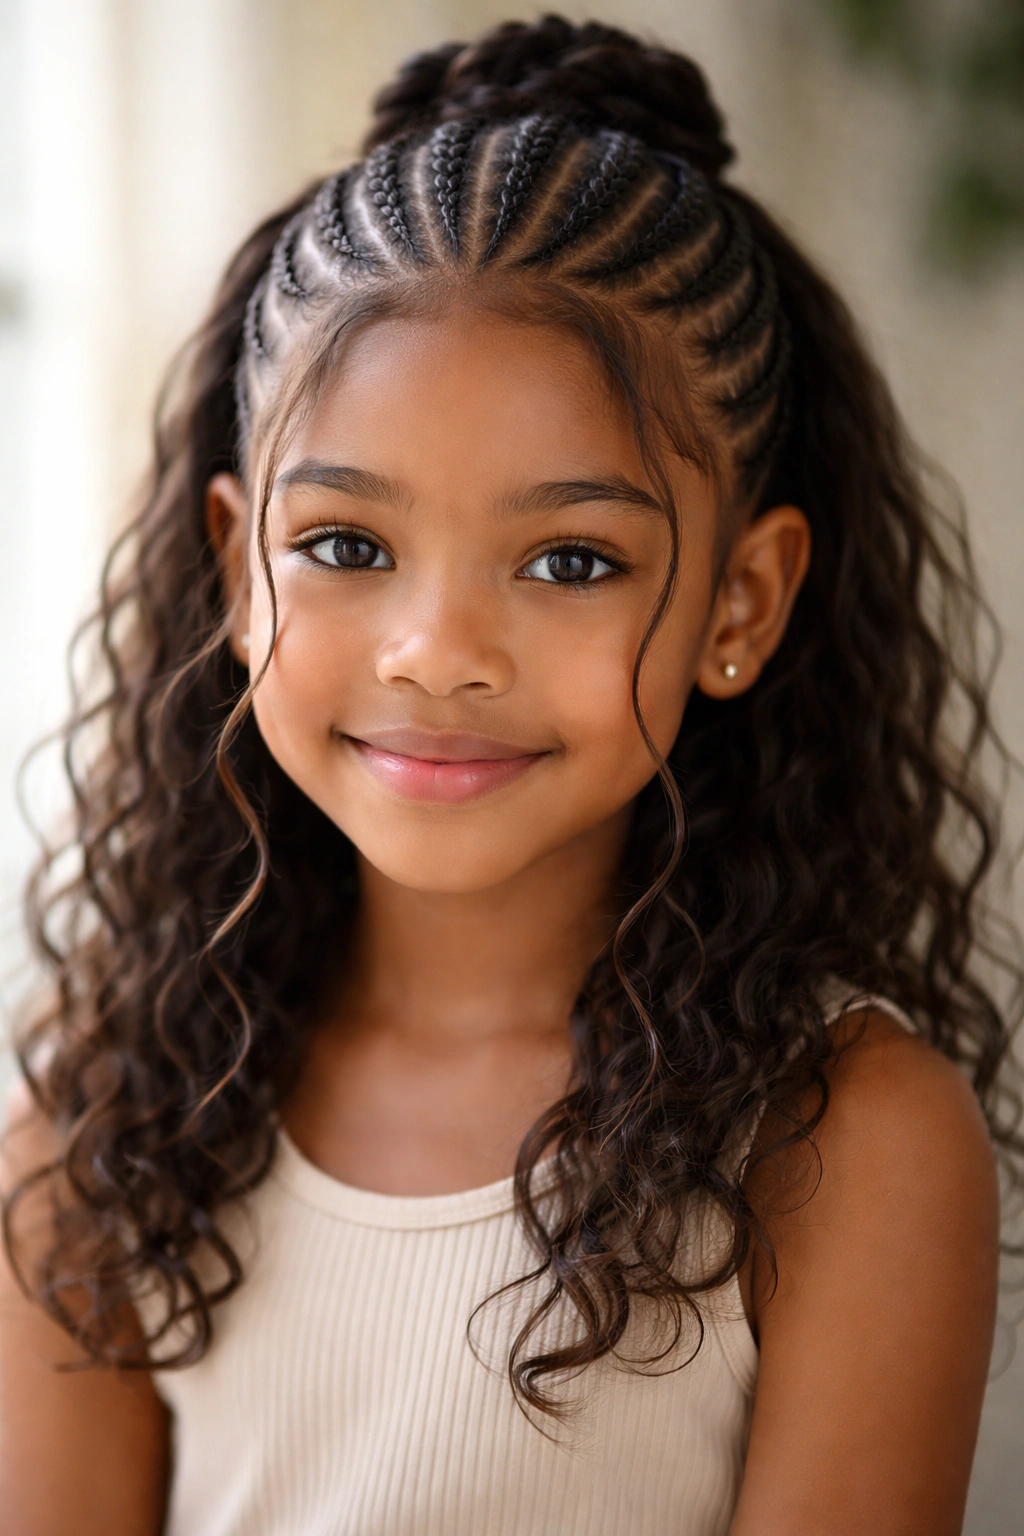
9. Thin Micro Cornrows with Unified Crown Gathering
If your child loves intricate braids and has the patience (and you have the time), thin micro cornrows are absolutely worth attempting. You’re creating six to eight very thin cornrows that all start from the front and angle gently backward, gathering at the crown. From a distance, it reads as one cohesive braided section; up close, it’s a masterclass in detail work.
The Patience Payoff
Yes, this takes longer than thicker braids. Yes, it requires more precision. But here’s what makes it worth it: the visual impact is genuinely stunning, the style lasts significantly longer because each individual braid is less prone to loosening, and once you’ve done it, you feel like you’ve genuinely leveled up your braiding skills. Kids often love how intricate it looks and feel special wearing something that took time and care to create.
Keeping Them Even
The key challenge here is making sure all your micro braids are approximately the same thickness and tension. Use a rattail comb to section out very precise, equal parts, and take your time with the first inch of each braid to establish your tension. Once you’ve got the first couple of inches done consistently, your hands will remember the feel and the rest comes more naturally. Don’t rush this style—rushed micro braids look rushed.
10. Reverse Braids Starting at the Back Gathered Forward
This takes your typical half up approach and inverts it. Instead of braiding from the front back, you’re braiding from the back forward, which creates an entirely different aesthetic. You’re essentially creating braids that run from the nape toward the crown and front, gathering hair as they go and creating a gathered section at the very front or at an angle across the top of the head.
How Reverse Changes the Visual
Reverse braids have a softer, more romantic quality than front-to-back braids. They also have a different weight distribution—since you’re incorporating more hair as you braid forward, the braids naturally get thicker, which means fewer braids can cover more area. You might do just two reverse braids that start at the lower back and travel toward the front, gathering at a center point near the crown or even at the front of the head.
Execution Tips
Start your sectioning at the nape—pick up your first section there and begin braiding. Add hair as you go, incorporating sections from around the back and sides as you move the braid forward. This is definitely one where practice makes perfect, but once you understand the motion, it becomes meditative and intuitive. The gathered section can be styled forward for a face-framing effect or tucked to one side for balance.
11. One Side Cornrow with Twisted Opposite Side
Here’s a style that gives you variety without requiring double the braiding work. You create one substantial cornrow on one side of the head (running from that side’s temple back toward the crown), while the other side features a twisted section instead of a braided one. Both sides gather at the crown, but the contrast between the braided and twisted textures adds visual interest.
The Twisted Alternative
A twist is essentially a two-strand braid—you’re taking two sections of hair and wrapping them around each other as you move backward. It’s faster than cornrow braiding and creates a different texture that reads as intentional rather than like you just couldn’t be bothered to braid one side. The twist can be as thin or thick as you want, and it can follow the same path as the cornrow (straight back) or angle differently, which adds even more visual variety.
Creating Asymmetrical Balance
The magic of this combination is that asymmetry actually looks more modern and intentional than perfect symmetry. One side braided, one side twisted, both gathering at the crown—it says “I made a deliberate choice” rather than “I ran out of energy.” Kids often prefer asymmetrical styles anyway because they feel less matchy-matchy and more expressive.
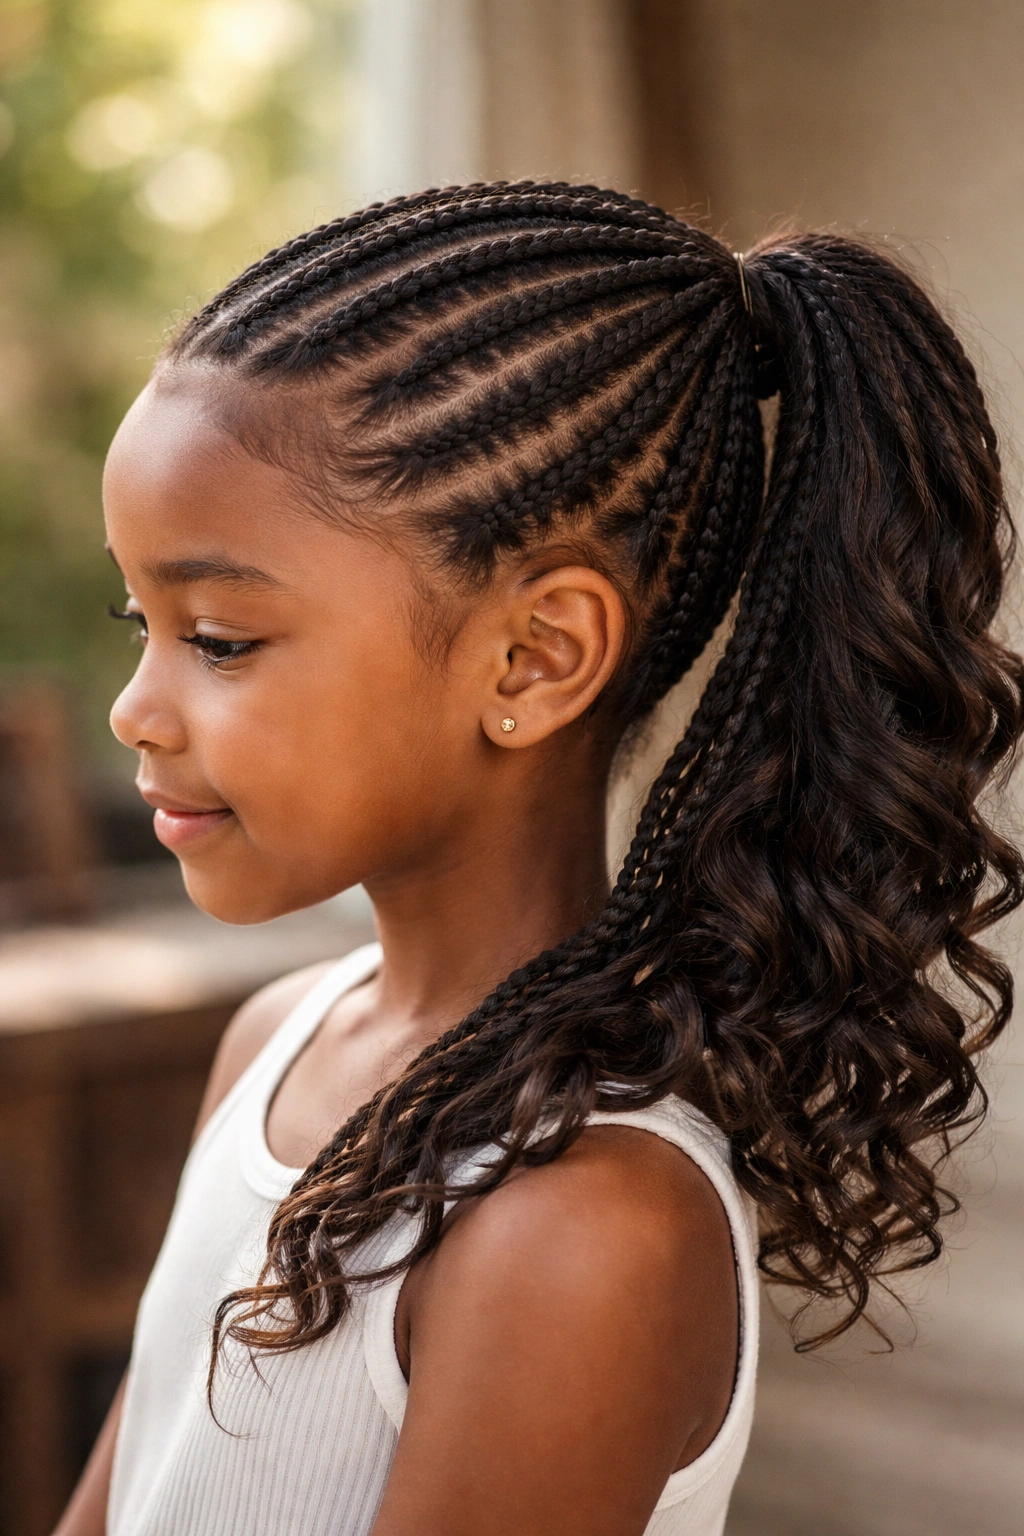
12. Stacked Cornrows in Descending Rows
This is a more sculptural approach where you’re creating three to four horizontal rows of cornrows, each starting at one side of the head and running across toward the other side. The first row starts near the hairline, the second row sits a couple of inches lower, and so on, creating a stacked effect. They all gather at one or both sides into ponytails or clips.
The Architectural Appeal
Stacked horizontal cornrows have an architectural quality that’s incredibly appealing. They create clean, defined lines across the head and look exceptionally neat and intentional. This style works beautifully for kids who like order and defined structure, or for situations where you need hair to look polished and put-together. The horizontal orientation also tends to be more comfortable for kids with sensitive hairlines since the pulling sensation is distributed differently.
Gathering Options
You can gather all of the stacked rows together into one back pony, gather each row separately into individual pigtails, or gather them on both sides into two side ponytails. Each approach creates a different overall aesthetic—one pony is sleek and polished, individual pigtails are playful, and side ponytails are balanced and versatile.
13. Spiral Cornrows Meeting at an Offset Crown Point
This style takes your typical cornrow and adds a spiral or circular element. You’re creating braids that start at the hairline but angle in a subtle circular pattern before meeting at a point on the crown that’s off to one side rather than centered. It’s geometric and modern without being overly complicated.
Creating the Spiral Effect
One approach: create two cornrows that both start near the center part line at the forehead, but angle outward as they travel back (rather than inward or straight back). At the crown, they meet at a point that’s slightly off-center, creating an asymmetrical gathering point. Another approach is to create braids that literally spiral—starting from one point and wrapping around in a circular motion before ending. Either technique creates visual interest and a more playful aesthetic than straight-back braids.
Why Kids Love This
There’s something about spiral or curved patterns that feels special and intentional. Kids often respond positively to styles that have a “wow” element without being uncomfortably tight or time-consuming. This hits that sweet spot. The offset gathering point also means the ponytail falls in an interesting position, which can look flattering depending on face shape and the child’s preferences.
14. Cornrows with Loose Section Woven Through the Middle
This is a technique-forward style that looks absolutely stunning when executed well. You’re creating two thicker cornrows that run parallel from the forehead toward the crown, with a section of loose, unbraid hair running down the center between them. The loose hair can be left as-is, twisted, or even woven in and out of the braids, creating a complex-looking style that’s actually quite doable once you understand the mechanics.
The Weaving Technique
Create your two outer cornrows first, running parallel from front to back. Then, take the center section of loose hair and weave it through the space between the braids—over one, under the next section of braid, over the next, and so on. This creates a lattice effect that reads as intricate and professional-looking. You can tighten the weave to make it more structured or keep it looser for a softer aesthetic.
Styling the Gathered Section
At the crown, you’ve essentially got three sections to work with: the two braids and the woven center section. You can gather all three together into one unified ponytail, or keep them slightly separate and gather them with individual clips for added visual interest. This style is perfect for more special occasions where you want something that looks especially polished and intentional.
15. Feathered Crown Cornrows with Wispy Face-Framing
This final style is all about softness and flattering lines. You’re creating cornrows that run from the hairline toward the crown, but leaving wispy, loose pieces around the face and sides. The braids essentially create the structure and gather the hair back, while the face-framing pieces soften the overall look and add movement. It’s the perfect balance of polished and playful.
Creating the Wispy Effect
Before you start braiding, deliberately leave out thin sections of hair around the hairline and temples. These pieces won’t be braided—they’ll stay loose and frame the face. The cornrows start just past these pieces and run straight back, gathering at the crown along with the loose, face-framing sections. The loose pieces can be left straight or curled for additional texture and movement.
The Softness Factor
Kids who might otherwise feel uncomfortable with their hair being fully braided often love this version because it maintains softness and movement while still keeping hair organized and off the face. The loose pieces can be clipped back if they get in the way during sports or activities, or left loose for a softer everyday aesthetic. This style genuinely works for kids of all ages and hair textures because you’re adapting the level of coverage to what feels comfortable for the individual.
Final Thoughts
Half up half down cornrows give you the best of both worlds—the polished, intentional look of braids with the softness and movement of loose hair. Whether you go simple with two center-parted braids or more complex with micro cornrows and weaving techniques, you’re creating a style that’s genuinely practical while also being beautiful enough for photos and special occasions.
The styles above represent different difficulty levels and aesthetic vibes, so start with whatever feels most achievable for your skill level, then gradually build up to the more intricate options. Your hands will develop the muscle memory, your child will get better at sitting still as they see how cool the results look, and before you know it, you’ll have a whole toolkit of cornrow styles to pull from. Each time you practice, the technique becomes more intuitive and the braids come together more quickly. That’s when braiding stops feeling like a chore and starts feeling like a genuinely enjoyable creative practice that you and your child can share.